CHAPTER 1
Front Gate
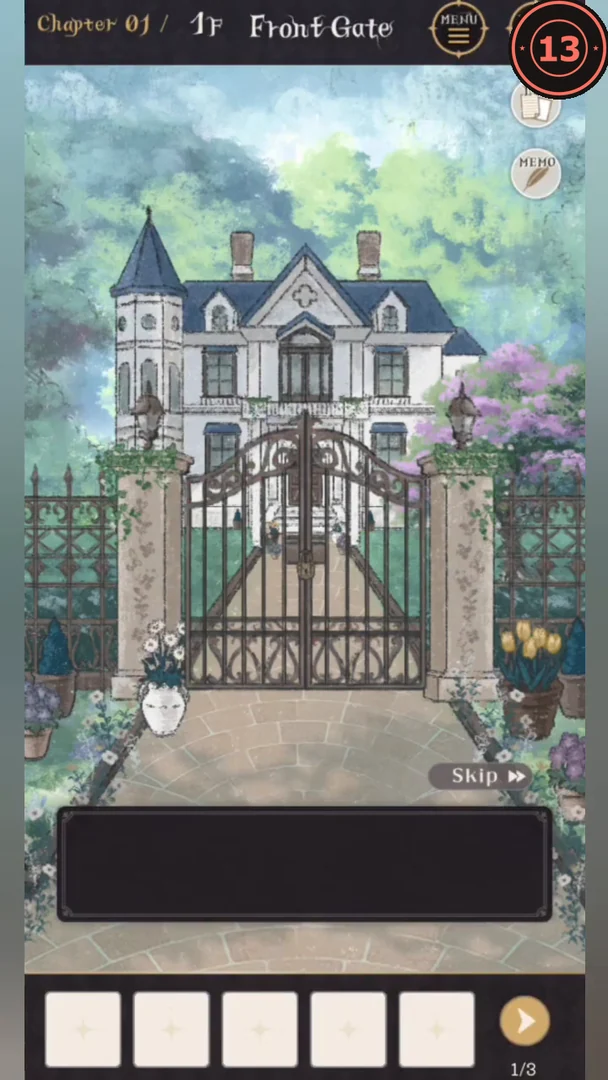
Find the gate key and step inside the mansion.
- Tap the flowerpots to the right of the gate. Moving the tulip pot uncovers the Gate Key.
- Use the Gate Key on the padlock in the middle of the gate to swing it open.
- Optional: pick up the little name tag lying on the porch for the Little Name Tag archive.
- Tap the front doors. They are unlocked, and stepping into the hall clears Chapter 1. On the Chapter Select map, choose Chapter 2; the prompt asks for one heart.
CHAPTER 2
Entrance Hall: cabinet and coat rack
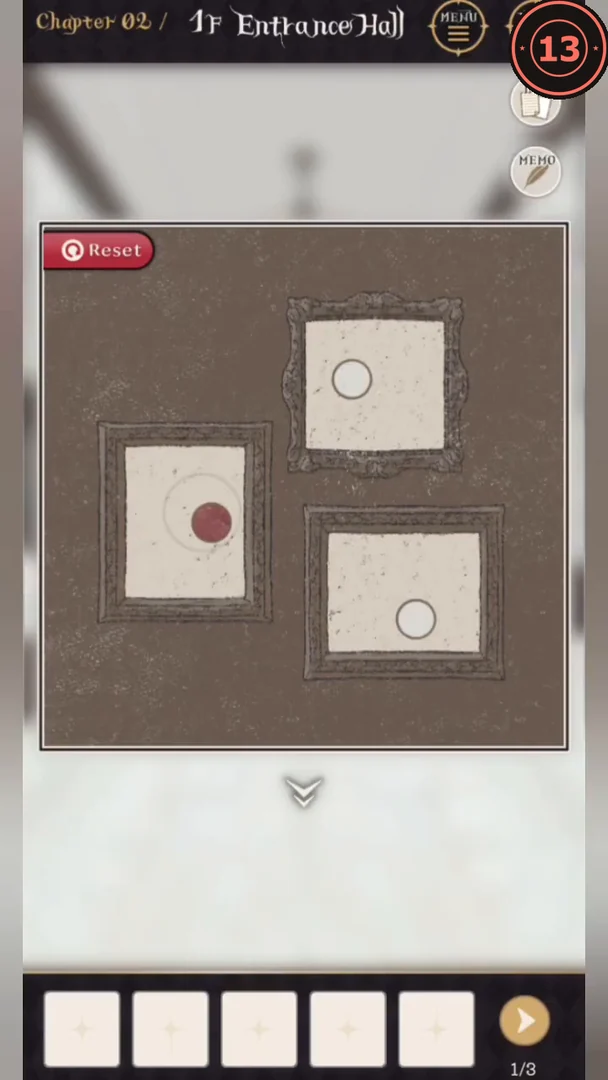
The hall has three linked puzzles. Start with the shoe cabinet and the coat rack.
- Optional: tap the newel post at the foot of the stairs for the Height Marks on the Pillar archive.
- Study the three paintings on the right wall: blue roses on the left, a red apple at top right and red poppies with white flowers at bottom right.
- On the cabinet beside the front door, tap the three frame buttons to cycle their colours. Set the left one to blue, the top right to red and the bottom right to white. The left door opens; the Pink Rain Boots archive inside is optional.
- Take the Large Relief from the side table under the oval mirror.
- The crayon drawing under the stairs shows Grandpa in green, a girl in red and Grandma in purple. Rearrange the coats on the rack by the door to green, red, purple from left to right. The drawer above opens: take the Flathead Screwdriver.
- Use the screwdriver on the floor vent to the right of the door to get the Bent Wire.
- Something is stuck inside the red mailbox. Hook it out with the Bent Wire to get the Sepia Photo, which marks the far-right corner of the blue rug, the one nearest the stairs (upper right in the hall view).
- In the hall view, tap the rug corner nearest the stairs, then lift that corner in the close-up for the Medium Relief. Open the floor panel underneath for the Small Silver Key.
CHAPTER 2
Entrance Hall: mirror, clock and relief box
Use the remaining clues to restart the clock and open the relief box.
- Unlock the drawer of the side table under the mirror with the Small Silver Key. Take the Small Gear and the White Cloth.
- Wipe the cloudy mirror with the White Cloth to reveal a rose, an apple and a poppy. Count each in the paintings: 2 roses, 1 apple and 5 poppies.
- Enter 215 on the wooden box on the side table to get the Clock Winding Key.CODE215
- At the grandfather clock, put the Small Gear in the empty gear slot, then use the Clock Winding Key. The hands move and the Small Relief drops into the clock base; take it. Note where the three flower marks point: 9, 2 and 6.
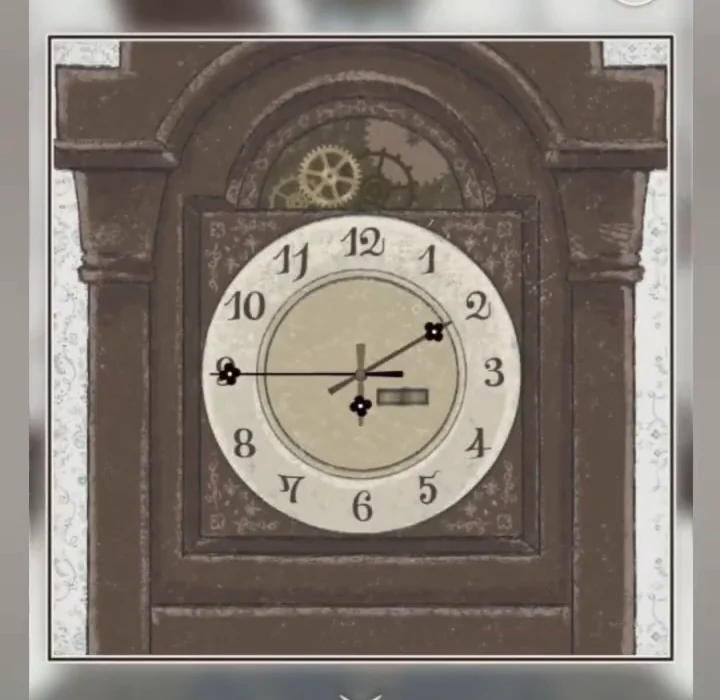
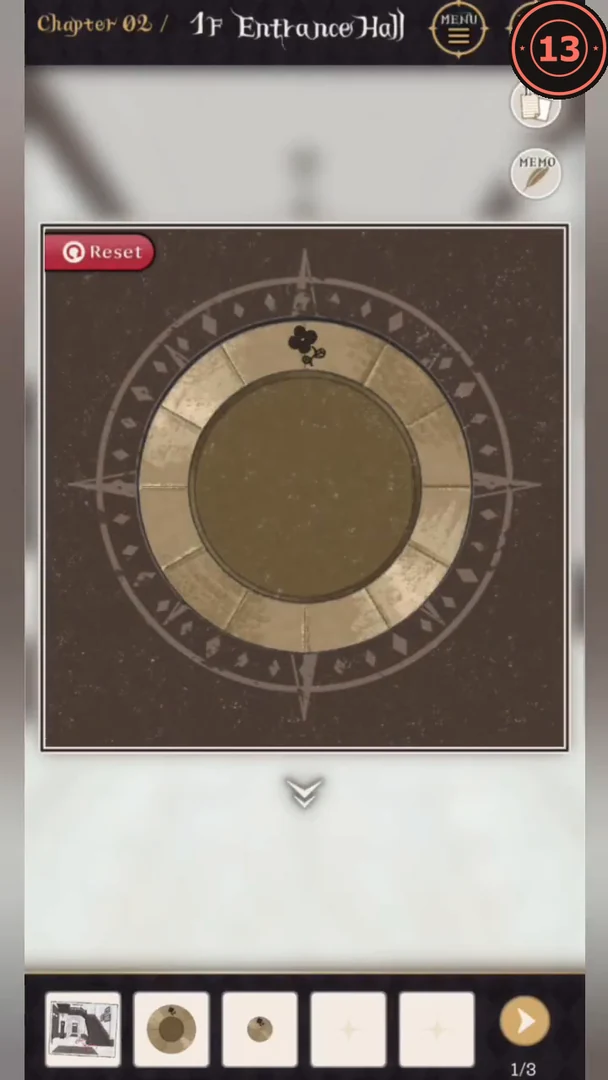
After winding, the clock's flower marks point to 9, 2 and 6. - Place the Large, Medium and Small Reliefs in the round recess of the ornate box on the cabinet by the door. Turn the outer flower to 9 o'clock, the middle one to 2 o'clock and the inner one to 6 o'clock. Take the Reception Room Key to clear Chapter 2.
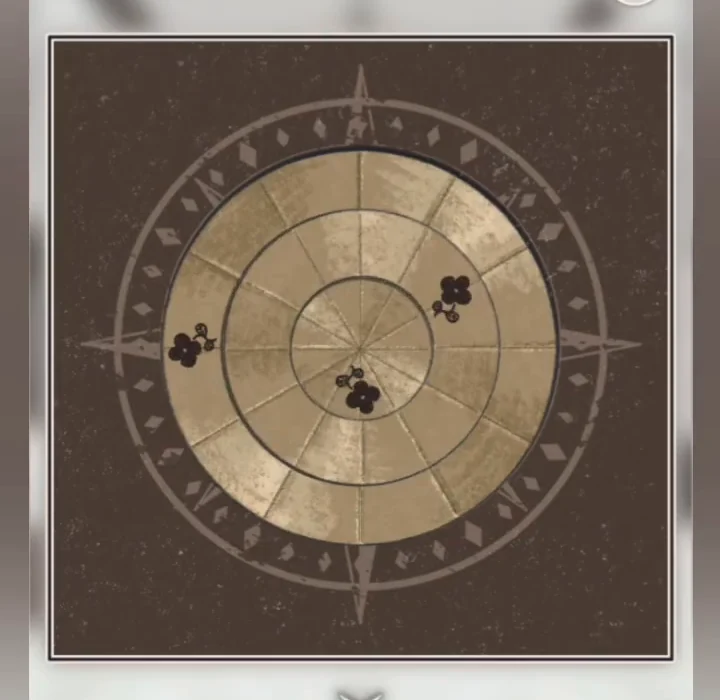
Solved: outer flower at 9, middle at 2 and inner at 6 o'clock.
CHAPTER 3
Reception Room: threads, cabinet and fire
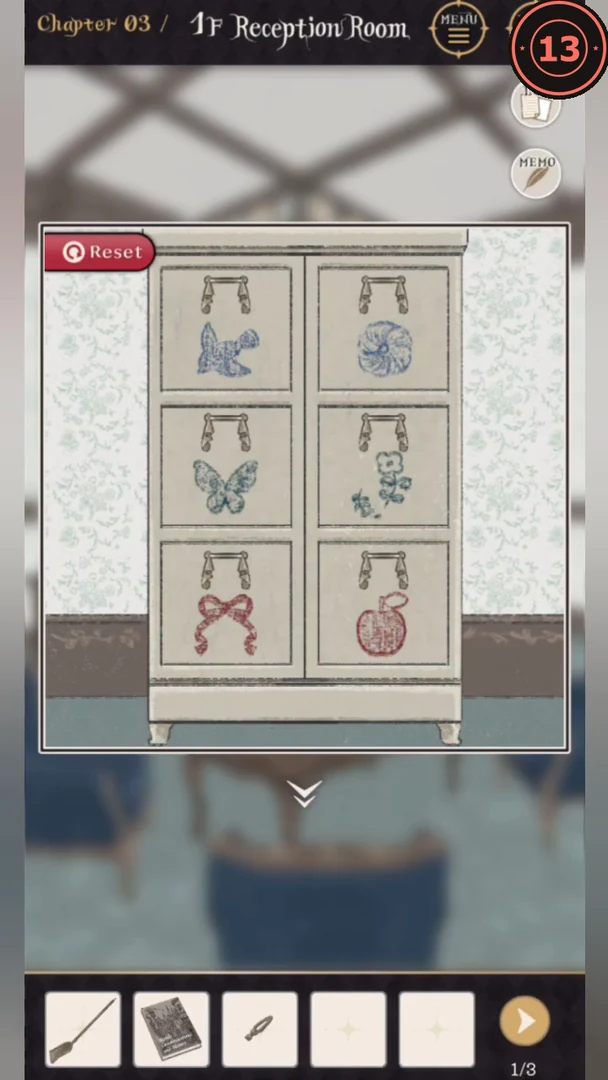
Collect the scattered parts first, then repair the cross-stitch.
- Collect the Extension Cord (table lamp on the dining table), Poker Tip (left of the fireplace), Frayed Red Thread (sofa cushion tassel), Frayed Blue Thread (cloth on top of the bookcase) and the World Communication and History book (left bookcase, middle shelf).
- Optional: open the Photo Album on the same shelf for the Photo with Mom archive.
- Take the Poker Handle from the shelf of the TV stand and the Frayed Green Thread from the window curtain.
- Optional: plug the Extension Cord into the wall outlet by the TV. The VCR ejects the Recital Videotape archive.
- Use the red, blue and green threads on the cross-stitch above the fireplace. The finished picture shows a blue bird, green sprigs and a red ribbon.
- On the white six-drawer cabinet by the window, pull out the bird, green sprig and red ribbon drawers. A hidden bottom drawer opens with the Matches.
- Light the firewood with the Matches. Combine the Poker Tip and Poker Handle into the Fireplace Poker and use it to clear the ash. The bricks behind read black, yellow on the top row and blue, white, orange on the bottom row.
CHAPTER 3
Reception Room: Morse code and music box
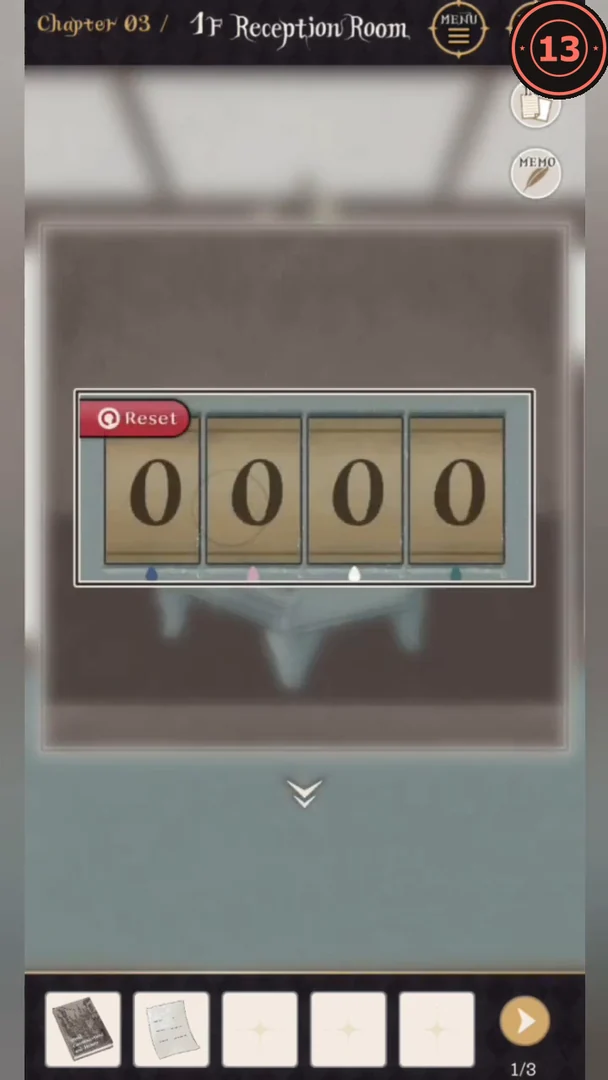
The brick colours lead to a cipher, a Morse message and the final key.
- Set the brick box on the dining table to black, yellow on top and blue, white, orange below to get the Cipher Memo.
- Lay the Cipher Memo over the notepad beside the gramophone to reveal 30295. Enter it on the gramophone counter; it plays a Morse message and gives you the Morse Code Memo.CODE30295
- Decode the memo with the chart in the World Communication and History book: MEMORY. Enter it on the doll's display case by the window and take the Vintage Key from the doll.CODEMEMORY
- Open the padlocked lower doors of the left bookcase with the Vintage Key. Take the Four Candles; the Floral Teacup archive here is optional.
- Place the candles on the mantel candelabra in the order of the stained-glass colours, teal, pink, white, blue, and light them with the Matches. The burnt wicks read 8, 2, 6, 1.
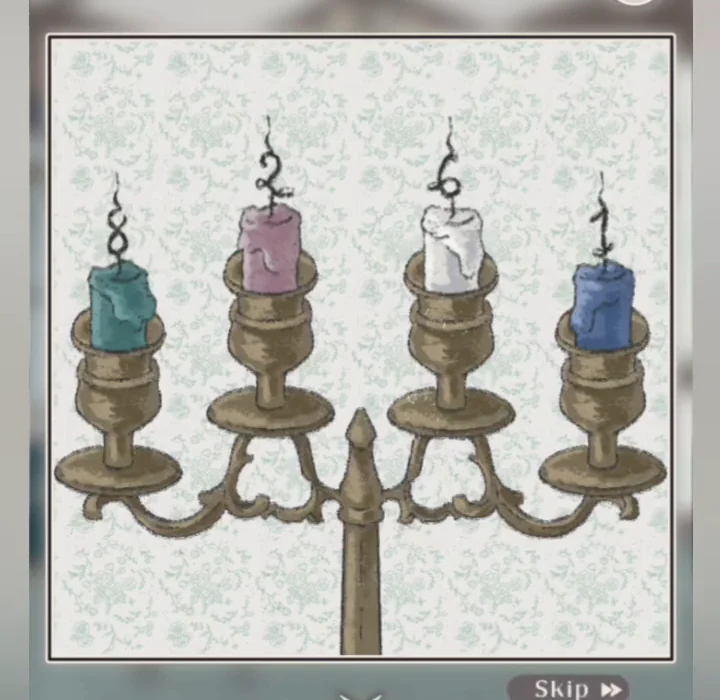
The burnt wicks form numbers: teal 8, pink 2, white 6, blue 1. - The miniature piano music box has blue, pink, white and teal marks. Match each wick number to its colour: blue 1, pink 2, white 6, teal 8. Enter 1268 to get the Dining Room Key and clear the chapter.CODE1268
CHAPTER 4
Dining Room: tableware, cart and floral box
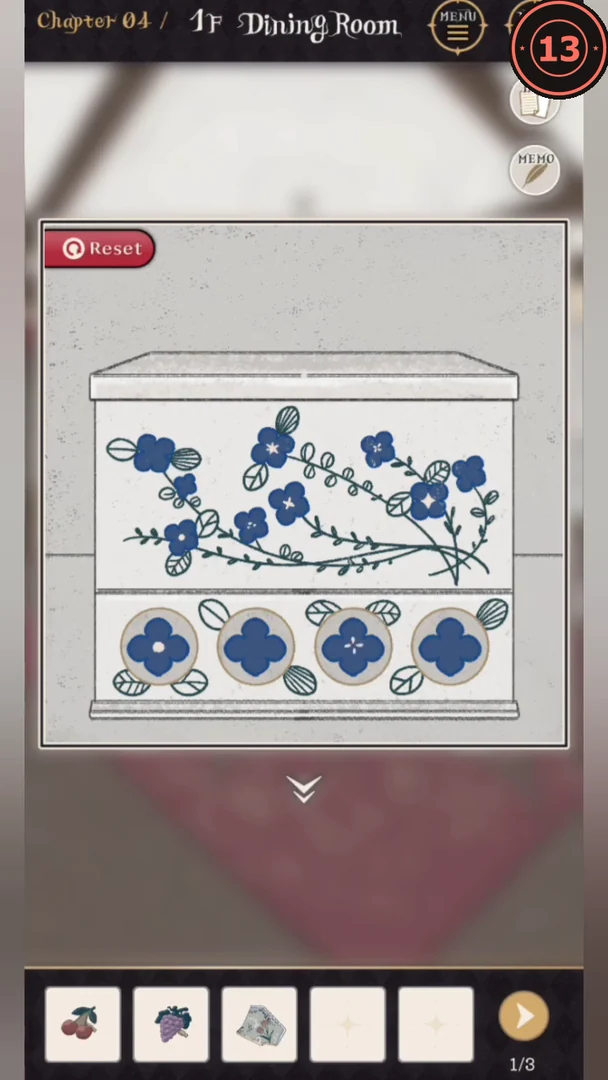
Gather the carved fruit and repair the tea cart.
- Take the Carved Cherry from the end of the table, then lift the front edge of the tablecloth and open the drawer for a Wheel.
- Open the upper glass doors of the white sideboard. Take the Carved Grapes and note the hexagonal ceramic box and the place-setting sketch.
- Take the Tableware Set from the round table in the bay window. Under the doily is a panel held by four screws; you will open it later.
- Take the Crumpled Paper from the metal bin by the kitchen island and open it in your inventory for Ceramic Shard 2. Optional: tap the teapot on the tea cart for the Chipped Teapot archive.
- Place the Tableware Set on the sideboard counter as in the sketch: plate in the centre, fork on the left, knife on the right. The drawer opens with a second Wheel; combine the two wheels.
- Fit the wheels to the tea cart, move it and take the Brass Handle. Attach it to the sideboard's lower doors and open them.
- The floral box inside has four flower dials. Follow each painted stem to its flower and set the matching mark. Solved, the dials read dot, blank, diamond, asterisk. Optional: the Children's Cutlery archive is inside.
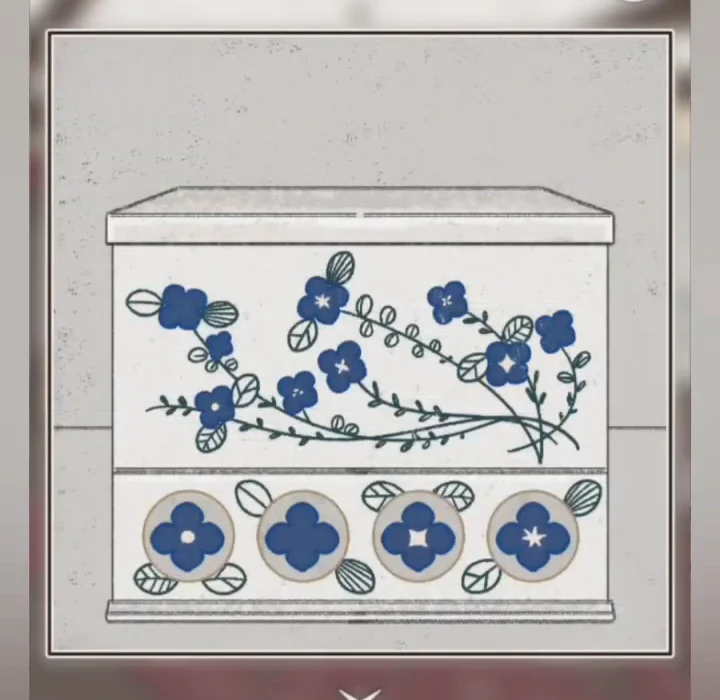
Solved floral box dials, left to right: dot, blank, diamond, asterisk.
CHAPTER 4
Dining Room: spices, fruit and ceramic box
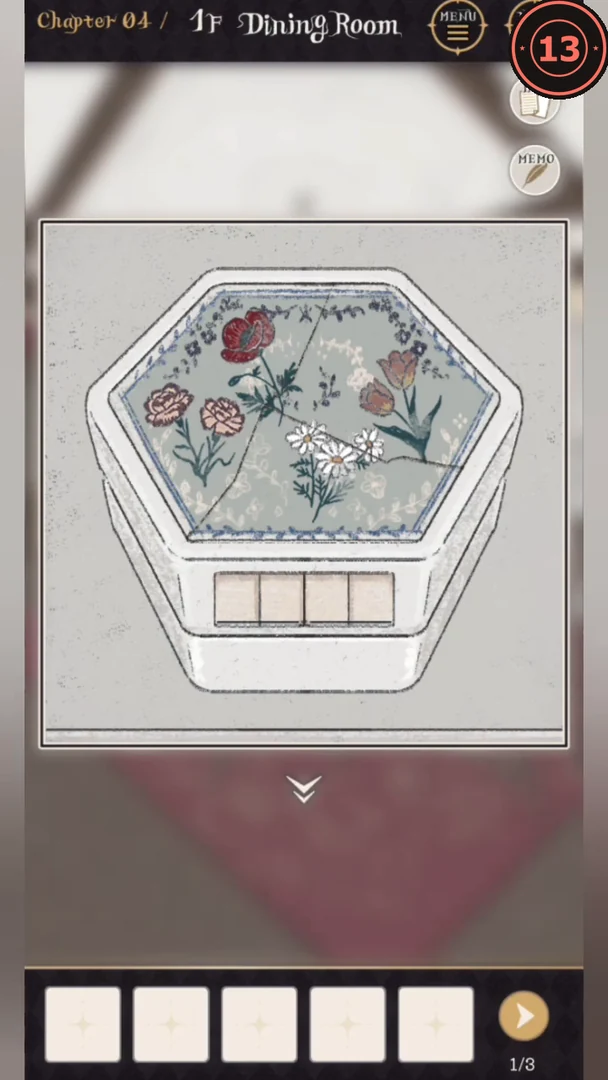
Finish the carved fruit, collect the last shards and open the ceramic box.
- The plates in the sideboard are black, red, brown and white. Arrange the spice jars to match: Black pepper, Chili powder, Cinnamon, Salt. Take the Coffee Beans and Carved Pear.
- Put the Coffee Beans in the coffee grinder and turn the crank to get the Carved Apple.
- Put the four fruits on the peg-board cupboard and set their heights from the framed fruit pictures between the windows (top to bottom: apple, grapes, cherry, pear): apple on the top row, grapes on the second, cherry on the third, pear on the bottom. Take the Hex Wrench.
- Unscrew the round-table panel with the Hex Wrench for Ceramic Shard 1, then the square plate screwed to the wall for Ceramic Shard 3.
- Optional: add sugar cubes from the Sugar Pot to the kitchen scale until it reads 16 g for the Handwritten Cookie Recipe archive.
- Fit the three shards onto the ceramic box. The mosaic shows a carnation, poppy, margaret and tulip; the labelled flower prints on the bay-window pillars give their names. Enter CPMT to get the Nursery Key and clear the chapter.CODECPMT