The Worm Room: Four Petals
The petals you plucked have drifted down into the Worm Room. Four of them open the altar here. You also get your knife back.
- A petal drifts across the window wall toward the right. Follow it to the chest of drawers wall, where it settles on the floor in front of the chest of drawers, and pick it up. If the petal keeps drifting instead, tap it as it passes, then follow it to the floor by the chest of drawers.
- Zoom in on the open base of the grandfather clock. Take your knife from among the wooden splinters, then slide the splinters apart to uncover a petal and take it.
- By the window, tap the closed book on the floor. A petal is trapped inside, but the cover keeps falling shut. Use the matches to prop the book open, take the petal, then take the matches back.
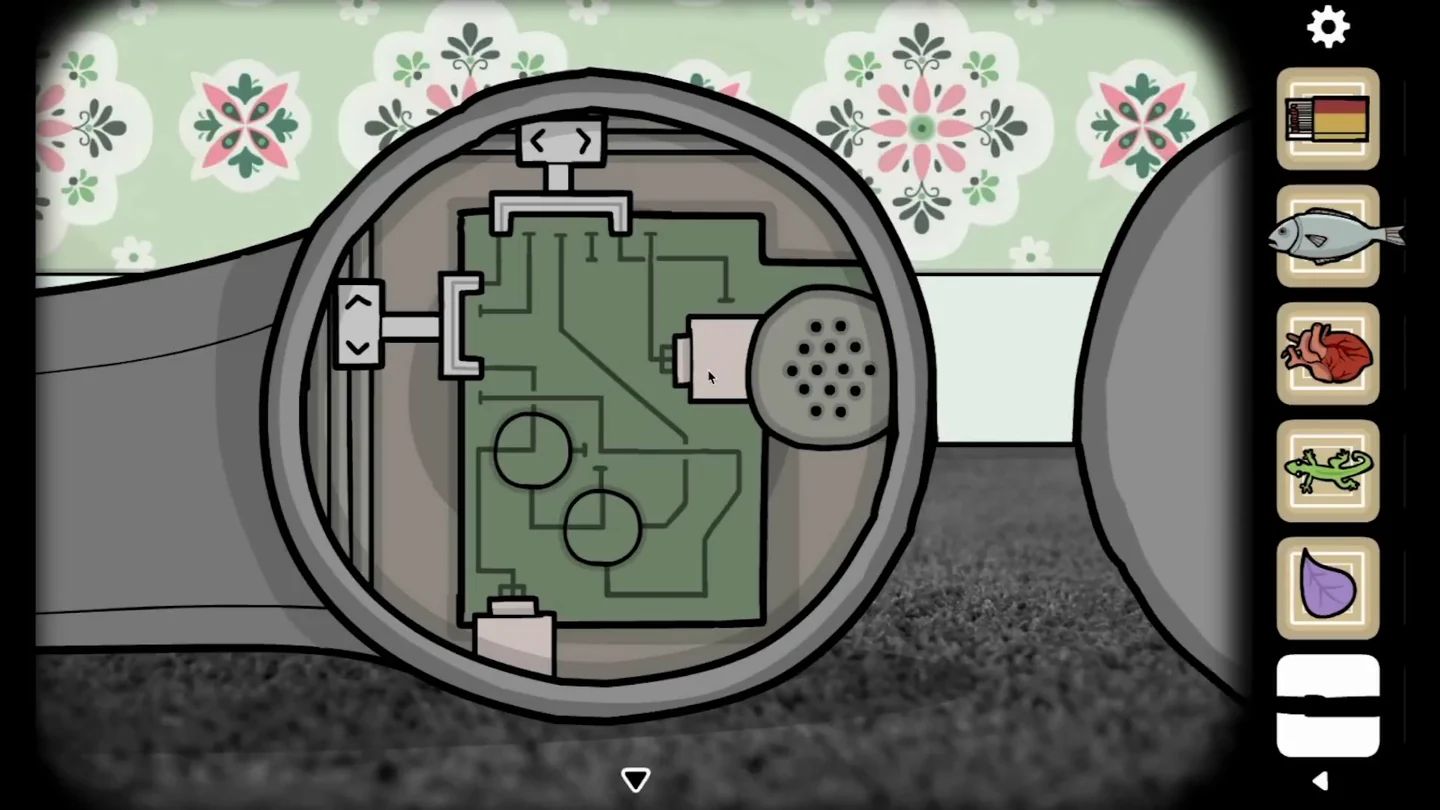
- On the phone wall, tap the telephone until its receiver drops to the floor, then zoom in on the receiver. Use the knife to loosen the two screws on its round cover and remove them. Inside, turn the two round switches and move the two sliders until the green circuit connects through to the speaker; there is no fixed sequence, so keep adjusting until the speaker sparks. Then tap the powered speaker several times until the fourth petal pops out, and take it.
The Corrupted Soul's Mirror Symbols
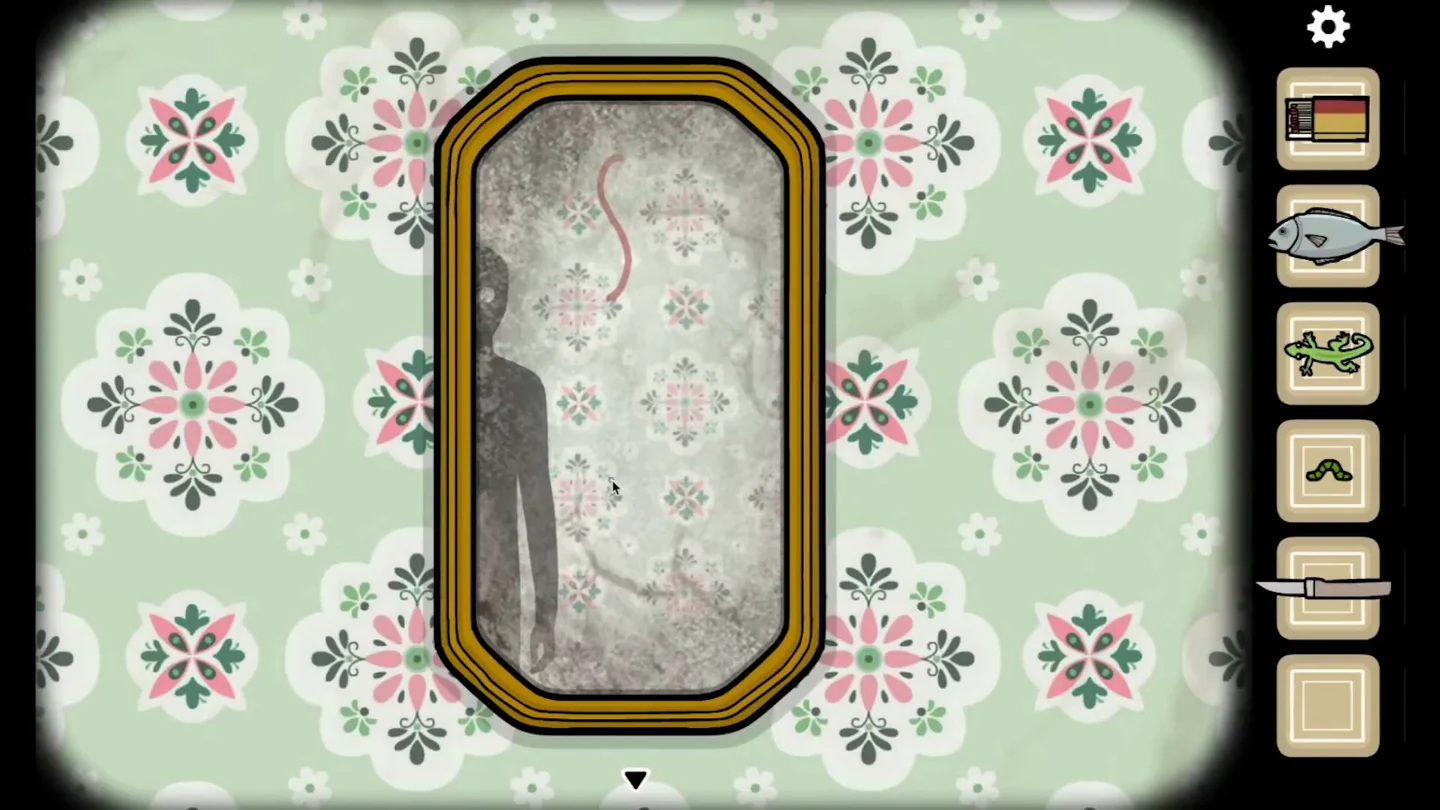
Open the Worm Room altar and return with the heart as the corrupted soul. Each form's mirror now hides a red symbol behind your reflection, and you need all four for the shrine in the forest.
- At the Worm Room altar, place one petal in each corner niche to open the portal. Take the worm back from the dish, place the heart and travel through. You return to the Human Room as a dark figure with glowing eyes.
- Zoom in on the Human Room mirror and drag your dark reflection aside. It reveals a red wavy vertical line.
- Swap the heart for the fish and go to the Fish Room. Zoom in on its mirror and drag the reflection aside if it is in the way: it reveals a red box divided by a horizontal line.
- Swap the fish for the gecko and go to the Gecko Room. Zoom in on its mirror and drag the reflection aside if needed: it reveals a red triangle with a vertical line through it.
- Swap the gecko for the worm and go to the Worm Room. Zoom in on its mirror and drag the reflection aside if needed: it reveals a red envelope.
The Forest Shrine: The Egg
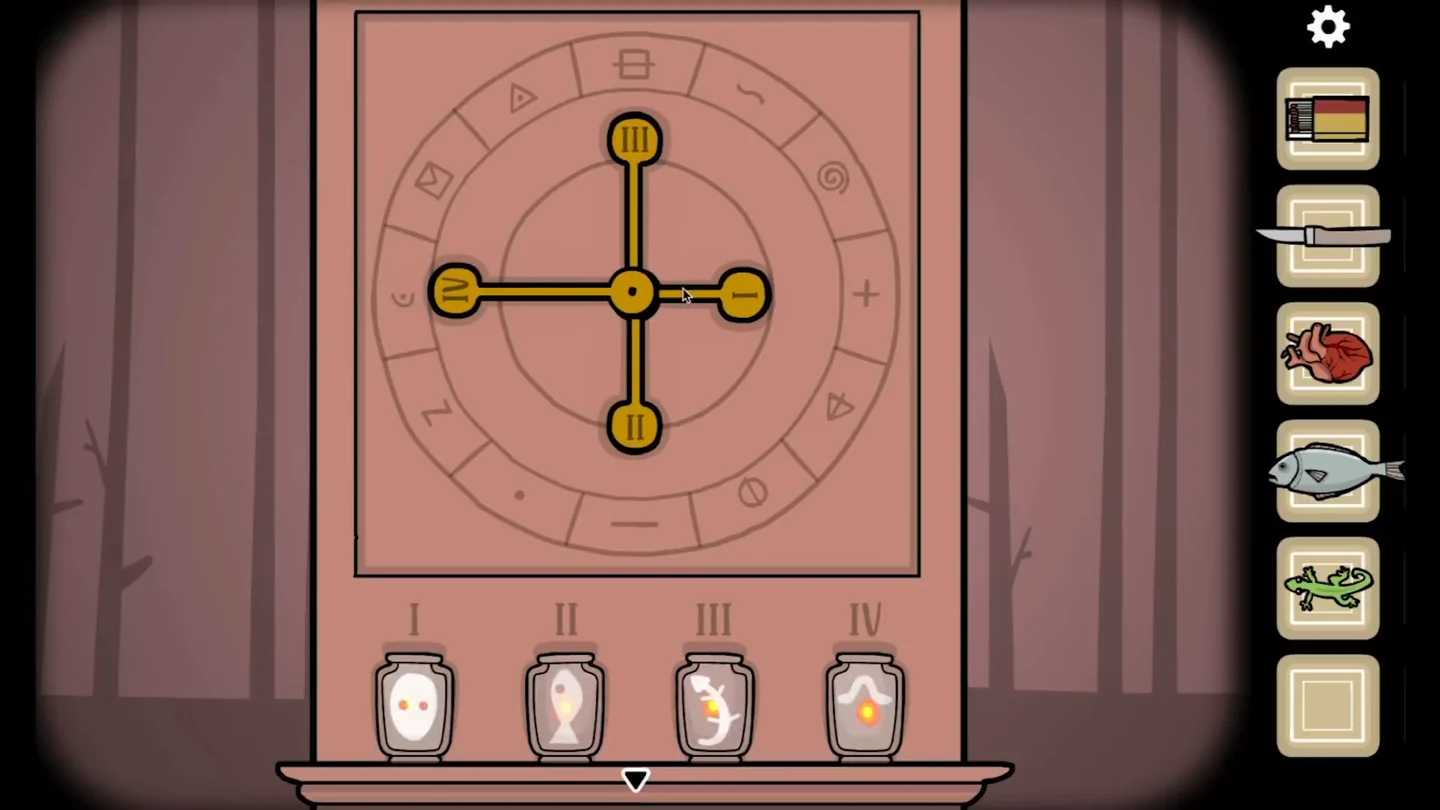
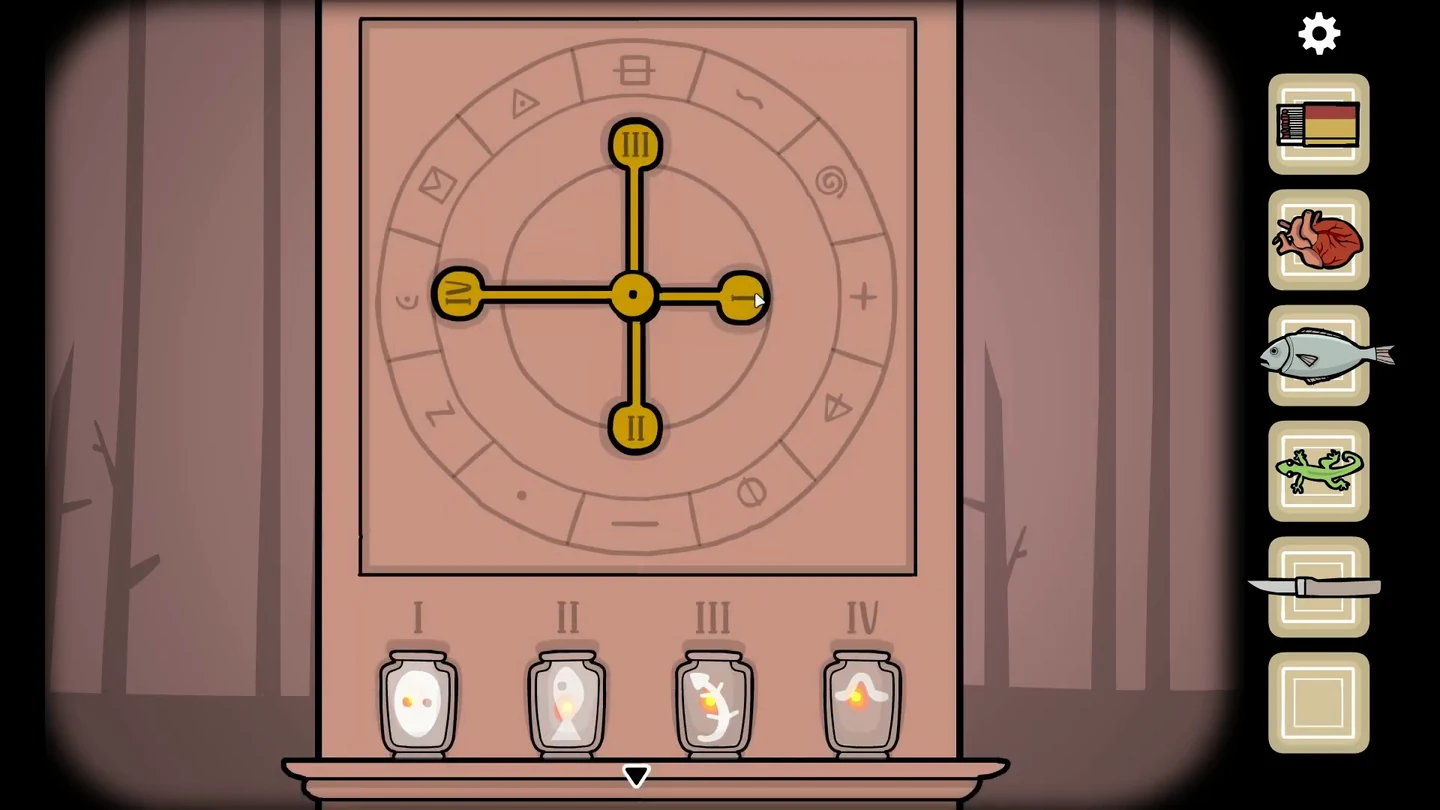
As a worm, you can crawl into the old man's mouth and reach a forest with a shrine. Its dial has four numbered hands, and the jars below show which form each hand belongs to: I human, II fish, III gecko and IV worm.
- Zoom in on the body's face and tap the mouth to open it, then go inside. In the dark forest, press and hold on a tree to reveal a small glowing light, move to the light and release over it to set it free, then move forward. Repeat this in each forest scene; after four lights the shrine stands in the clearing with four glowing jars. Zoom in on it.
- Point each hand at its form's mirror symbol on the outer ring: hand I at the wavy line (1 o'clock), hand II at the divided box (12 o'clock), hand III at the triangle with a line (4 o'clock) and hand IV at the envelope (10 o'clock). The left door opens; take the egg from its cup.CODEI wave, II box, III triangle, IV envelope
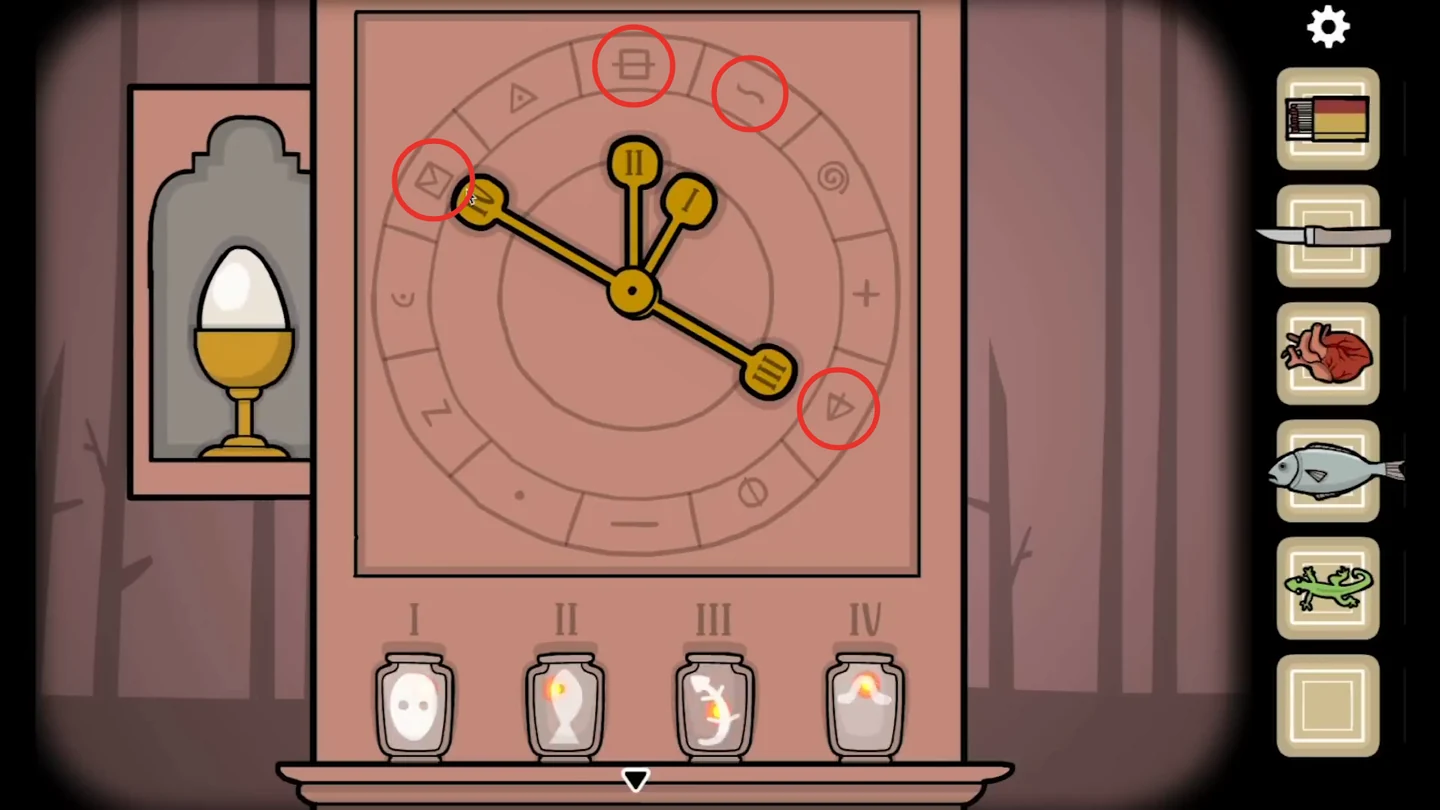
Hands I to IV on the wavy line, divided box, triangle with a line and envelope; the left niche opens with the egg.
Optional: The Shrimp in the Forest Shrine
The forest dial has a second, secret setting that opens a door on the right and gives you a shrimp. This route takes the shrimp and completes the Shrimp Room before you offer the egg and move on to the Bird Room. Taking the shrimp does not affect the egg. Keep the egg in your inventory for later, and carry the matches into the Shrimp Room.
- At the forest shrine, set hand I at the triangle with a line (4 o'clock), hand II at the divided box (12 o'clock), hand III at the spiral (2 o'clock) and hand IV at the wavy line (1 o'clock). The right door opens; take the shrimp.CODEI triangle, II box, III spiral, IV wave
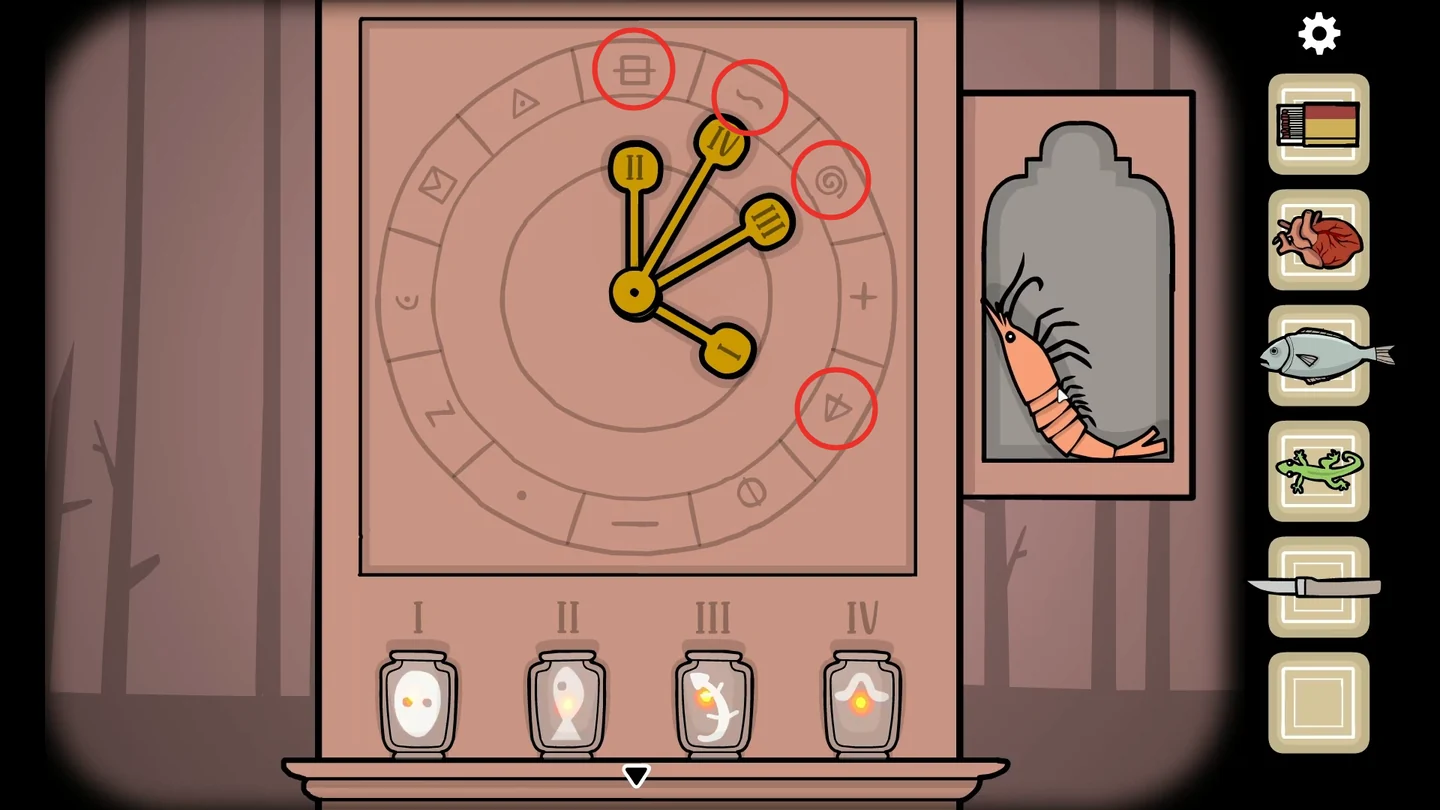
Hands I to IV on the triangle with a line, divided box, spiral and wavy line; the right niche opens with the shrimp. - Leave the forest through the mouth. At the Worm Room altar, take the worm back off the dish, place the gecko and travel to the upside-down Gecko Room. At the ceiling altar there, take the gecko back, place the fish and travel on to the Fish Room. Keep the worm and the gecko; the stork needs them later.
- At the Fish Room altar, take the fish off the dish, place the shrimp on it and travel through the portal. You arrive in a distorted, swaying version of the room. This unlocks the "A shrimp" achievement.
The Shrimp Room and the Window Ending
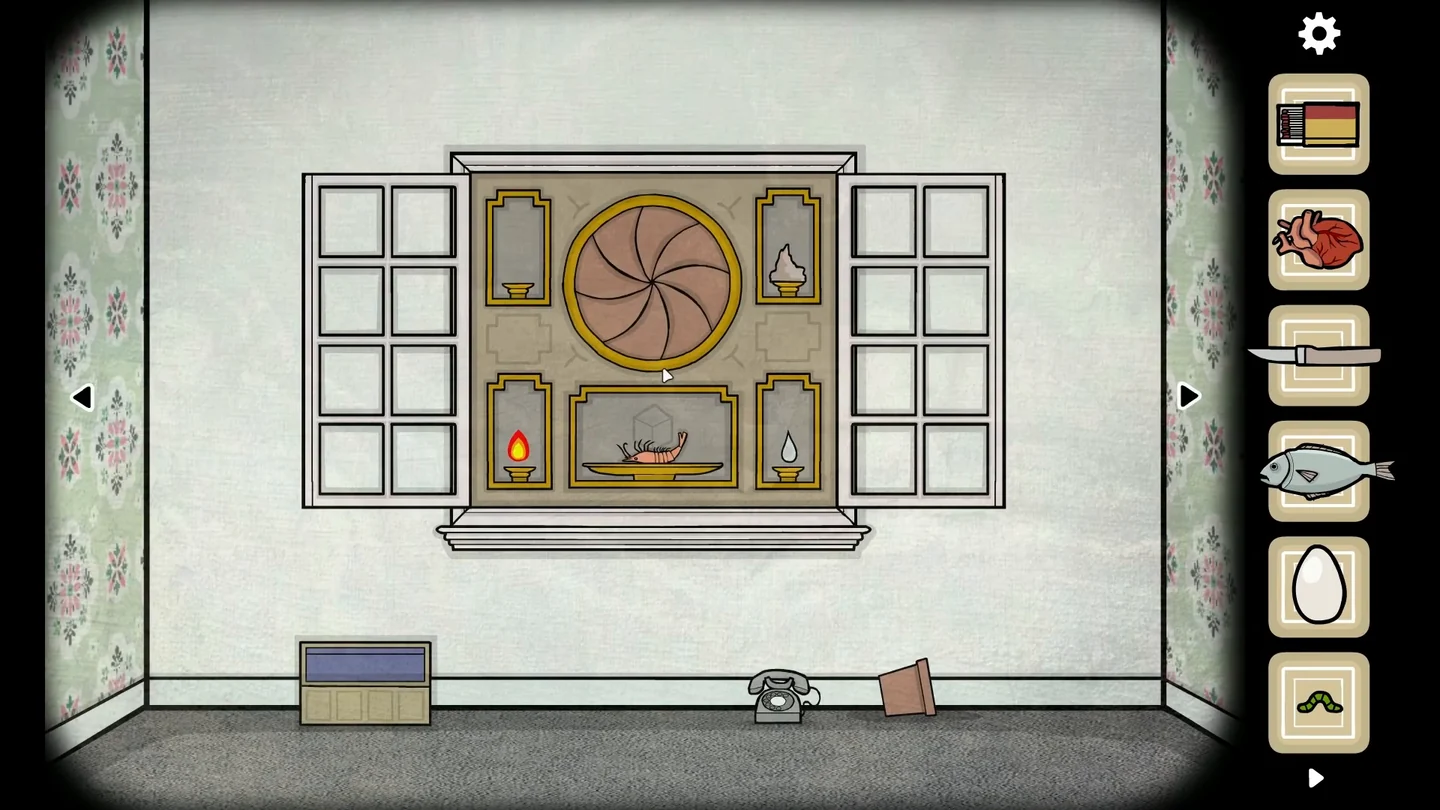
The Shrimp Room altar needs the four elements: air, earth, fire and water. Offering the elixir then leads to the secret ending.
- Zoom in on the mirror and tap the water droplet as it slides down the glass until you collect it.
- On the next wall, a giant shrimp lies under a word painted on the wall. Slide its head off to reveal the old man's head inside. Zoom in on his face and tap his mouth: it opens and green liquid starts to flow.
- On the broken-furniture wall, zoom in on the fallen chest of drawers. A pencil sticks out to the right from behind the open drawer, near the floor; take it.
- By the window, zoom in on the tipped-over flower pot on the floor and tap it. Earth spills out into a pile beside it; take the pile.
- Lift the receiver of the phone under the window. The numbers 1 to 12 scatter across the wall. Drag them into clock-face order with 12 at the top. Two hands appear; note exactly where each one points, because you copy them onto the fallen clock later. For example, the long hand may point at 9 while the short hand points just before 3, slightly above it, like a clock showing a quarter to three.CODEExample: long hand 9, short hand just before 3
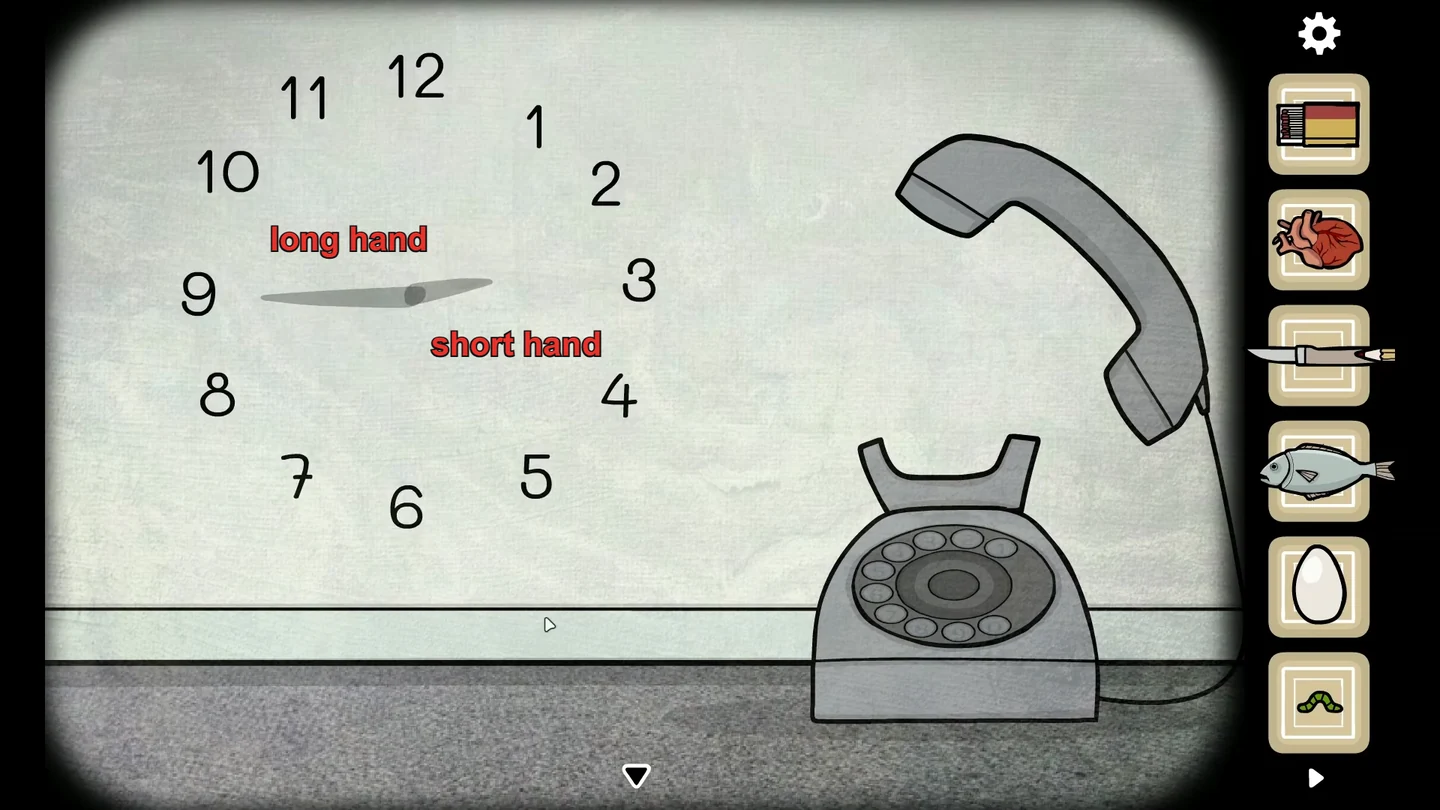
Example: with the numbers in clock order, the long hand points to 9 and the short hand points just before 3. Copy whatever your phone shows. - Open the window and put the water in the lower-right niche of the altar.
- On the window wall, zoom in on the box on the floor to the left of the window and light the kindling inside it with the matches. Take the fire and put it in the lower-left niche of the altar.
- Put the earth in the upper-right niche of the altar.
- The fallen clock lies on its side, so its numerals are rotated. Set its hands to match the phone, reading the Roman numerals. Put the long hand on the numeral the phone's long hand pointed at. For the short hand, use the numeral it was closest to on the phone: in the example above it sat just before 3, so set the long hand on IX and the short hand exactly on III, which opens the compartment. If the compartment stays shut with the short hand on III, try it one hour earlier on II with the long hand still on IX. The compartment cover falls away onto the floor (the white piece) and a small bottle stands inside the compartment; take the bottle.CODEExample: long hand IX, short hand III
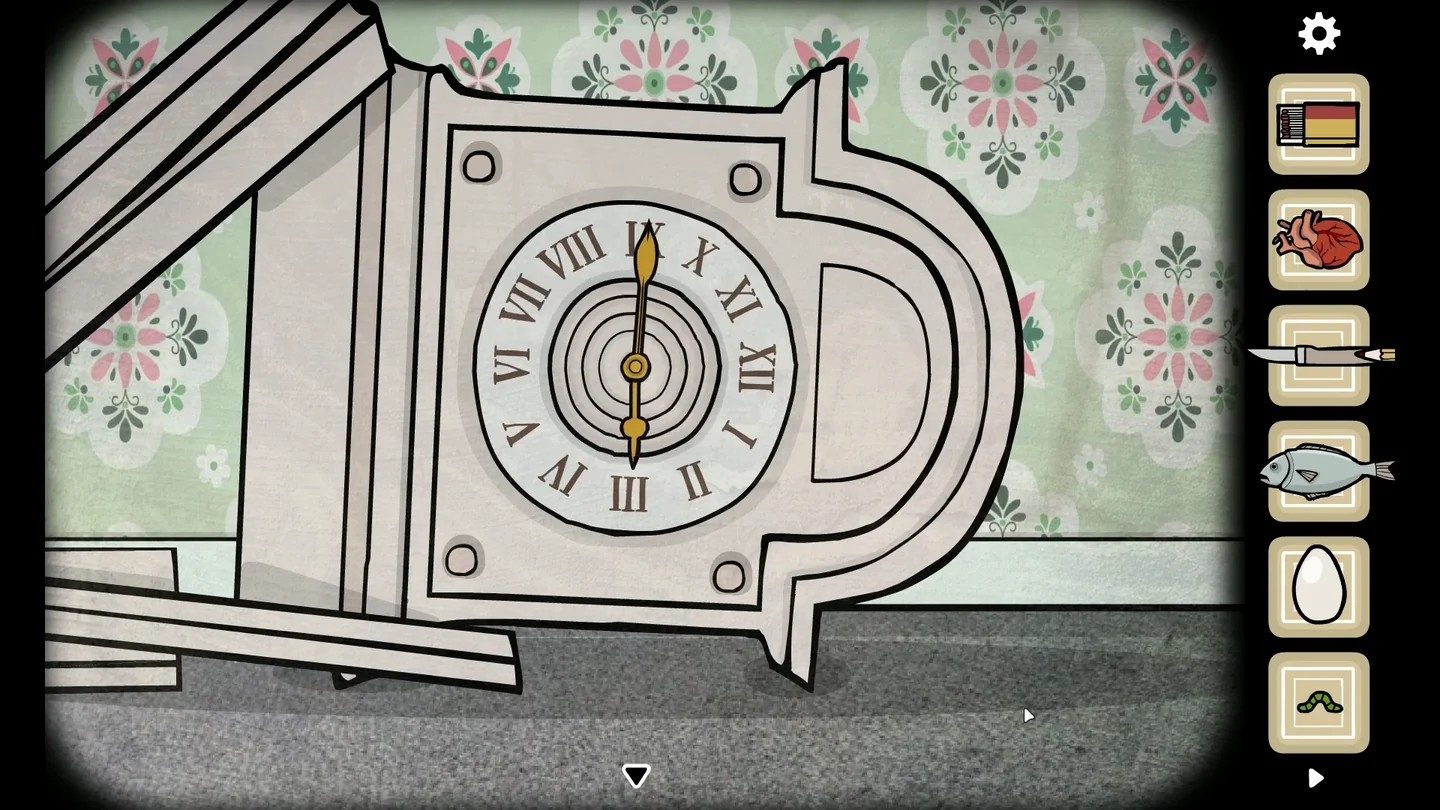
Example: the fallen clock with the long hand on IX and the short hand on III, the numeral nearest the phone's short hand. The numerals are rotated because the clock lies on its side. - Zoom in on the old man's head inside the giant shrimp. If his mouth is closed, tap it to start the green flow, then use the small bottle on it to collect the green elixir.
- Zoom in on the blank paper on the tilted side table and rub the pencil over it. Tap the paper to crumple it, then tap again to smooth it out: a key appears. Take it.
- Use the key on the glass door of the cabinet holding the jar. Open the jar's lid; a bubble of air floats out. Take it and put it in the upper-left niche of the altar. With all four elements in place, the portal opens.
- Take the shrimp off the dish, place the elixir on it and step through the portal. A small white cube appears in the dark; tap it until the window scene opens. In the window scene, a woman appears in one pane; tap the figures in the panes as they appear until a message confirms you found the secret ending. This unlocks the "A window" achievement. Choose Continue to return to the Human Room with your inventory, including the egg.