The Human Room: Candles and Matches
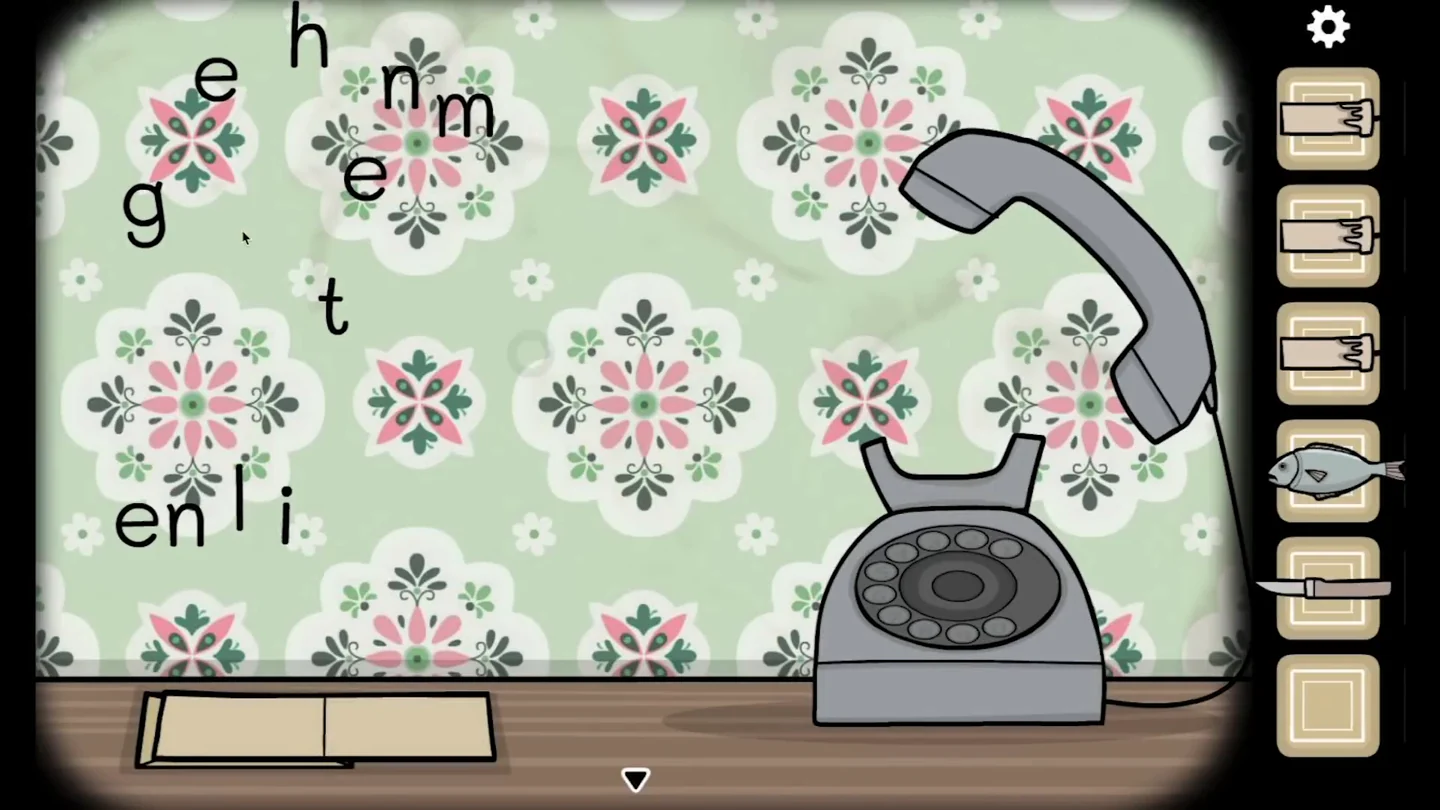
You start as a human in a small room with a phone table, a mirror, a chest of drawers, a grandfather clock and a window. Collect three candles, the fish and the knife, then earn the matches from the telephone.
- Facing the mirror wall, zoom in on the flower pot on top of the wall cabinet and take the candle standing in it.
- Turn left to the chest of drawers and zoom in on the wooden box on top. Two grey bolts lock the middle disc. Turn both outer discs half a turn so their notches face the middle disc, then slide each bolt outward into the notch beside it. The middle disc is now free: turn it to lift the shackle out of the brass tab. Then pull the brass tab down so the two catches on the front release, open the lid and take the second candle.
- Open the drawers: the bottom drawer holds the third candle, the next one up holds a fish and the one above that holds a pocket knife. The top drawer stays shut for now.
- On the phone table, use the knife on the sealed envelope and pull out the letter. It reads "enlighten me" and shows the cycle of forms around a cube.
- Lift the telephone receiver. Letters float out of it; tap them in order to spell the phrase from the letter. A box of matches appears on the table; take it.CODEenlighten me
The Window Altar: Becoming a Fish
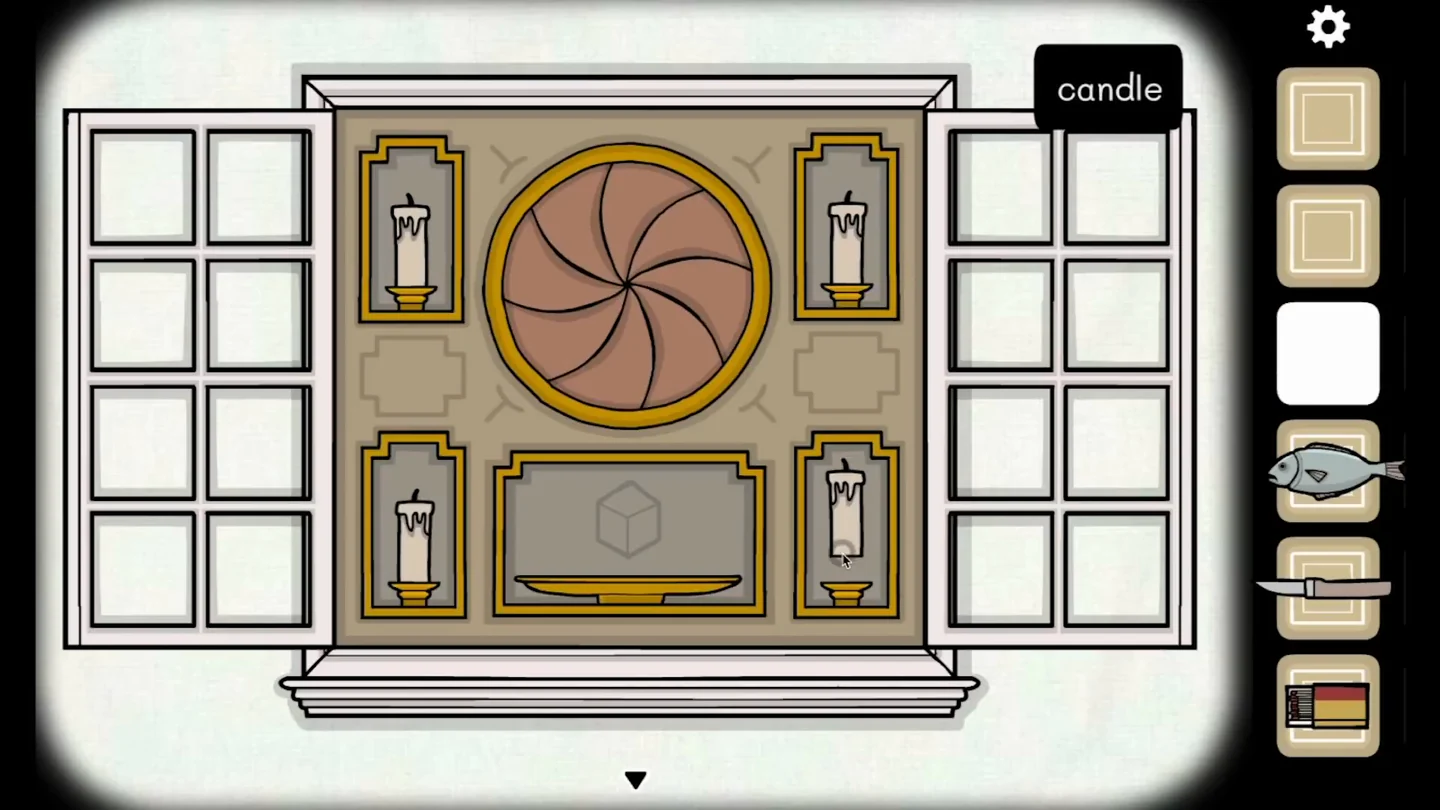
The window hides an altar with four candle niches, a circular shutter and an offering dish. Whatever you place on the dish decides which form you take when you step through the portal.
- Turn to the window, open both shutters and use the knife on the upper-left corner of the landscape picture. Pull away the peeled sections one by one to reveal the altar. One niche already holds an unlit candle.
- Put your three candles in the three empty niches and light all four with the matches. The circular shutter in the middle spirals open into a dark portal.
- Place the fish on the offering dish and tap the portal. A small white cube floats in the dark: keep tapping it as it comes closer until the Fish Room appears. You wake up again in the room, now flooded, and the mirror shows a fish head. This unlocks the "A fish" achievement.
The Fish Room: Four Shells
Everything floats in the Fish Room. The altar here needs four spiral shells instead of candles.
- Zoom in on the mirror and take the shell resting on top of its frame.
- Turn to the clock wall. Zoom in on the floating bottle. A small X marks a weak spot on the glass: tap it, then keep tapping each new X and crack point that appears as the cracks spread, until the bottle breaks. Take the shell inside.
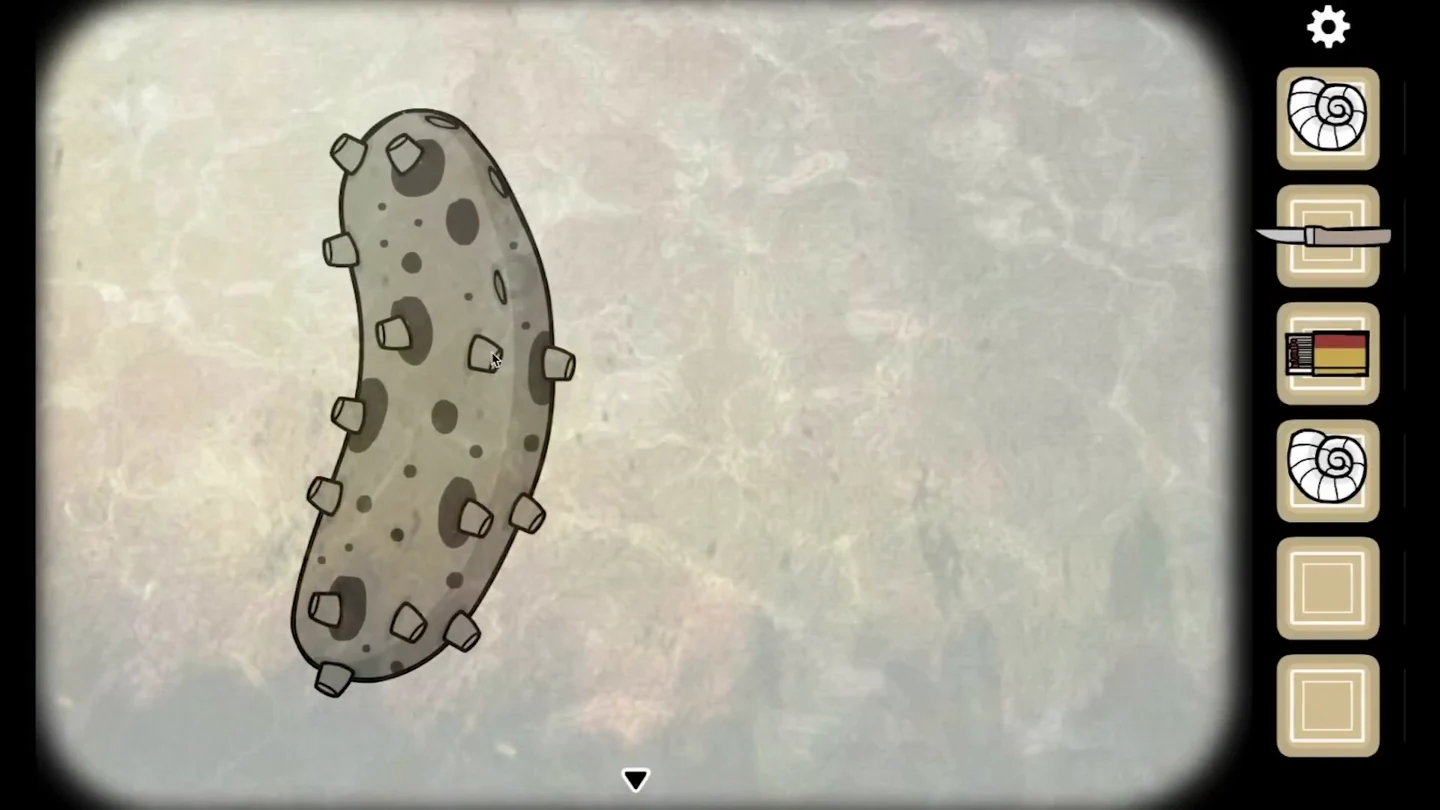
- On the drawer wall, zoom in on the spotted sea cucumber. Some of its spikes sit on large dark spots and some do not. Tap every spike that is not on a dark spot to push it in, and leave the spikes on dark spots sticking out. When only those remain, the sea cucumber releases a shell that floats above it; tap the shell to collect it.
- Zoom in on the floating wooden box from the chest of drawers and take the fourth shell from inside.
The Fish Room: Key, Jar and Heart
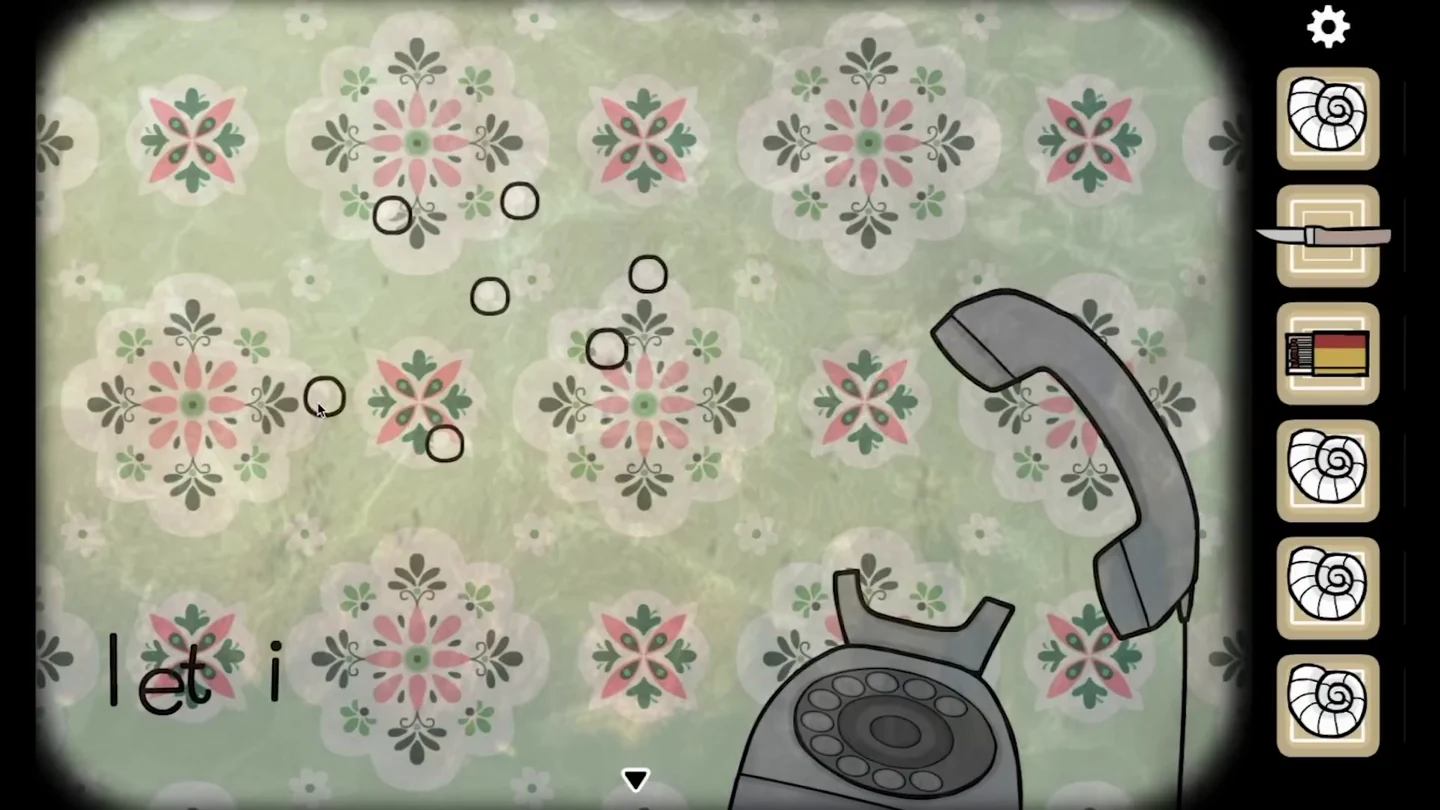
Use the underwater telephone to find a key, then trade with the hand hidden in the clock before opening the Fish Room altar.
- Lift the receiver on the floating phone table. Bubbles rise from it. Pop them one at a time from left to right; each popped bubble drops a letter, spelling the phrase. A paper boat drifts down.CODElet it sink in
- Tap the paper boat until it unfolds flat and take the key lying on it.
- Use the key on the wall cabinet above the phone table and take the empty jar inside.
- Turn to the grandfather clock and zoom in on the wall at its right side. Pull out the nail and the splinters until a pale hand reaches out. Give the hand the knife, tap it, and it comes back holding a human heart; take it.
- At the window altar, place the four shells in the four niches to open the portal. Take the fish back from the dish, put the heart on it instead and travel through the portal and cube. You return to the dry Human Room as a corrupted soul, a dark figure with glowing eyes in the mirror, and unlock the "A corrupted soul" achievement. Every later heart offering brings you back to this form.
The Gecko Room: Marbles and the First Triangle Key
Catch the gecko by the window, then sacrifice it to see the room upside down from the ceiling. Four marbles open this altar.
- In the Human Room, zoom in on the green gecko on the wall to the right of the window and use the empty jar on it to catch it.
- At the altar, take the heart off the dish, place the gecko on it and travel through the portal. You now crawl on the ceiling and the whole room is upside down. This unlocks the "A gecko" achievement.
- Zoom in on the upside-down flower pot on the wall cabinet and take the marble inside.
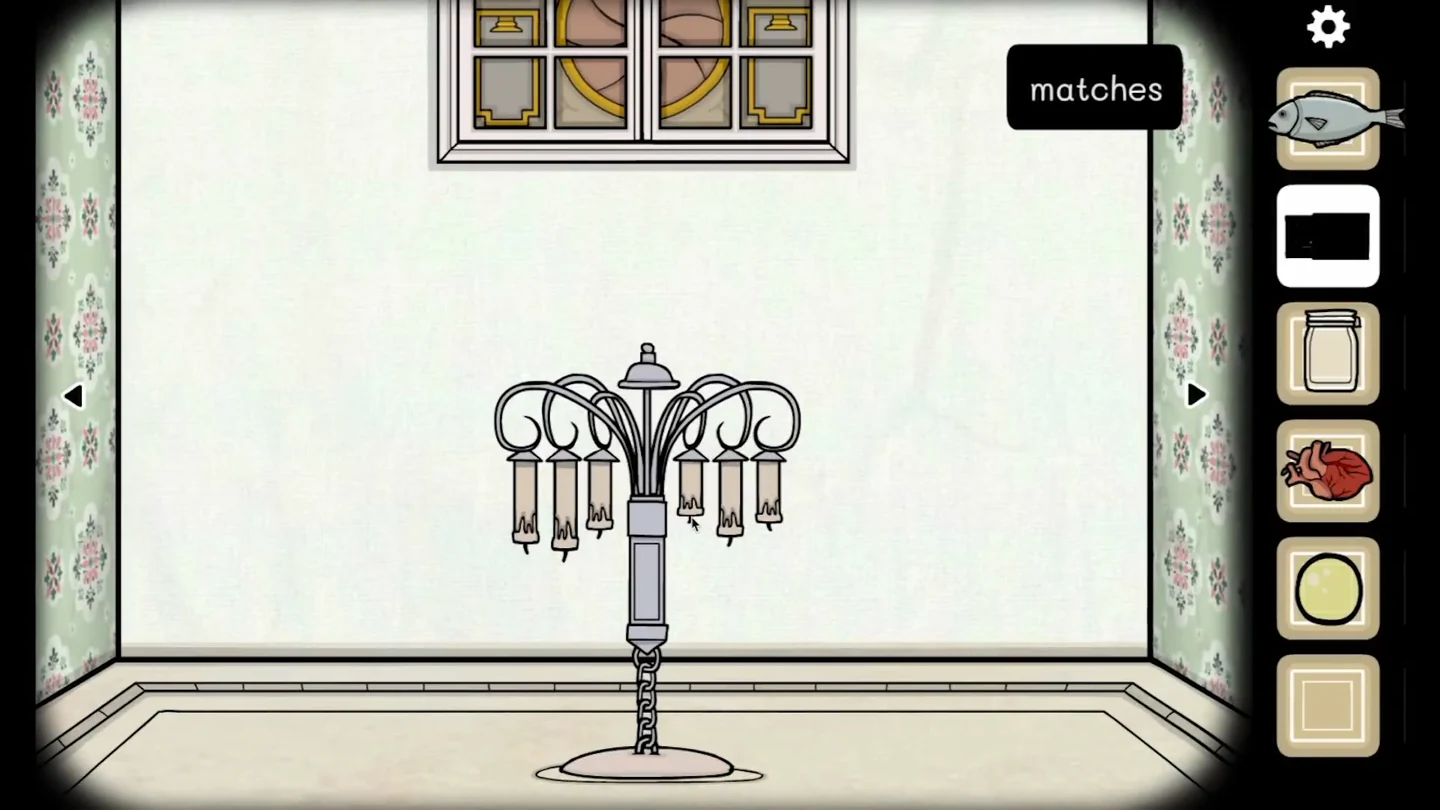
- Turn to the hanging candelabra and light its six candles with the matches from the shortest candle to the longest. Counting the candles from left to right as 1 to 6, the order is 4, 6, 3, 5, 1, 2. The stem opens; take the marble.CODE4, 6, 3, 5, 1, 2
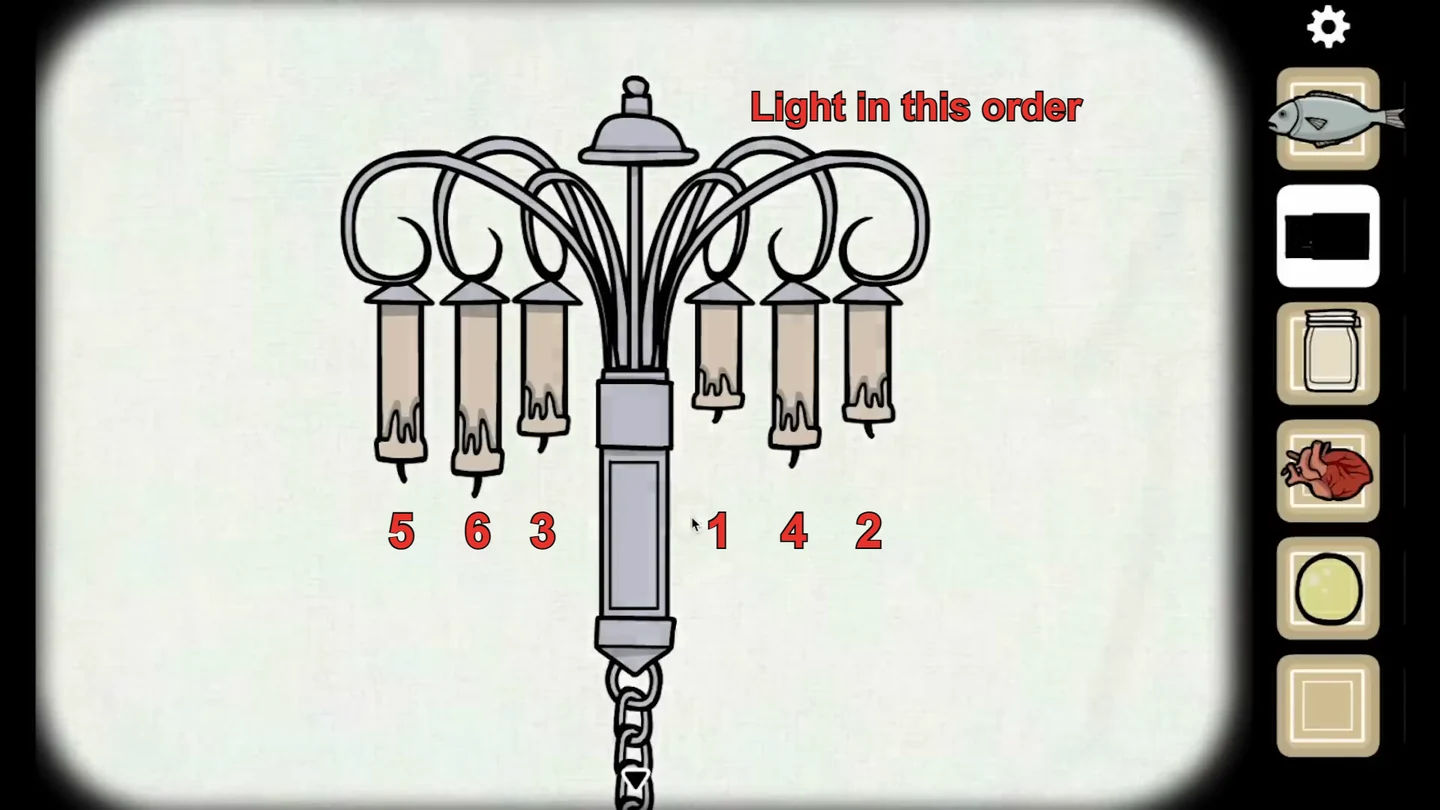
The number under each candle is its lighting turn: light 1 first and 6 last, from the shortest candle to the longest. - On the clock wall, three paintings hang below the clock. Zoom in on the left painting and drag it sideways to tilt it until its upper corner comes loose, then pull the picture down to peel it off and take the marble hidden behind it.
- Zoom in on the middle painting. The small plaque on top of its frame shows a time; read it upside down as 03:55.CODE03:55
- Zoom in on the upside-down clock and set it to 3:55: hour hand just short of IV, minute hand on XI. Read the Roman numerals, because XII is at the bottom of this dial. A triangular compartment opens; take the triangle key.CODE3:55
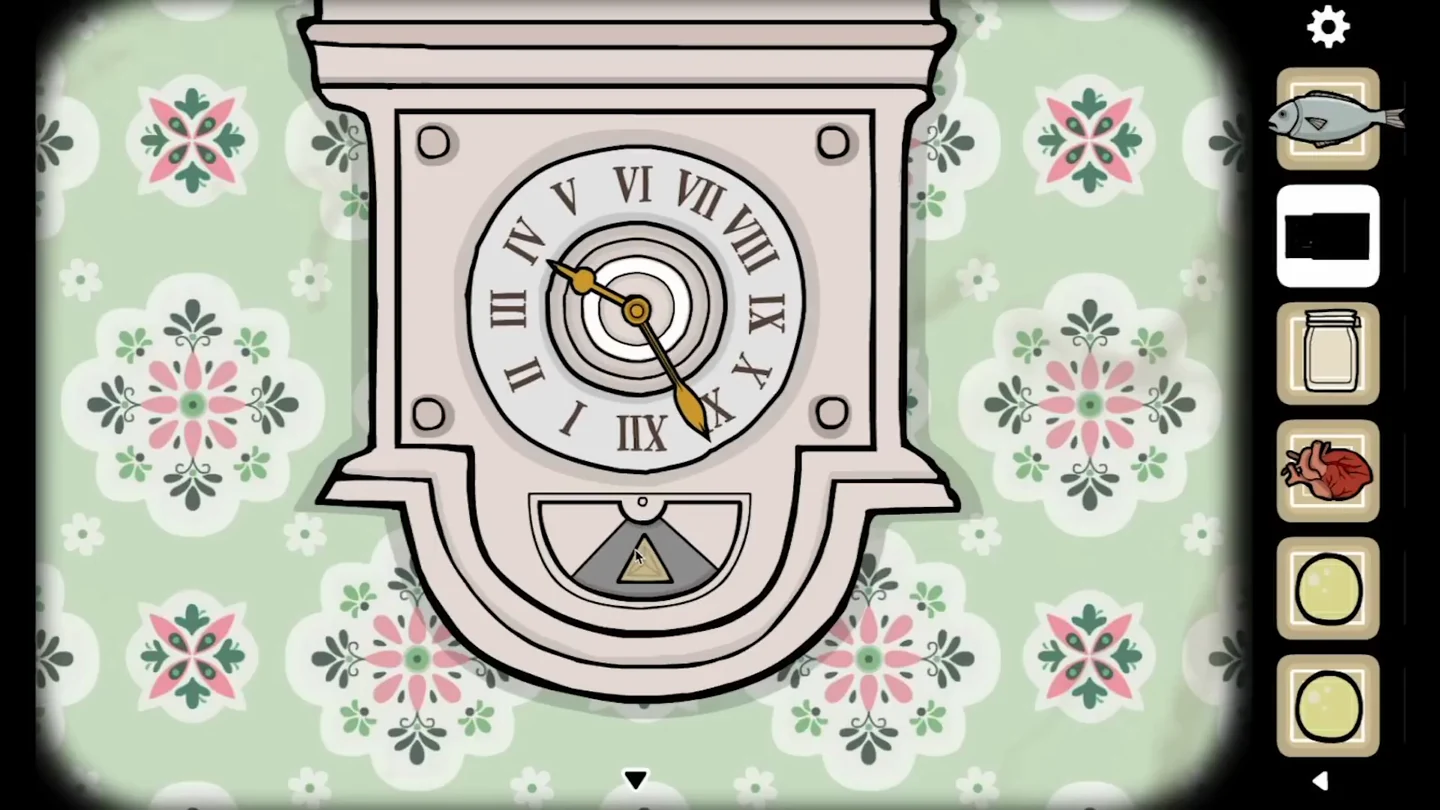
The upside-down clock set to 3:55; the compartment opens to reveal the triangle key. - Turn to the chest of drawers wall. Below the upside-down chest of drawers hangs a small bookcase; zoom in on it and take the marble at its lower-left edge.
- The bookcase is a sliding-block puzzle. A thin red line runs across its lower part, with a red outline marked with a worm below it at the bottom centre. Slide the books so that, as seen on your screen, all the ordinary books sit above the thin red line and the red book with the worm symbol stands in the centre column with its worm-marked lower end inside the worm outline below the line; its upper part still reaches up into the central gap above the line. There is no single required move order. When the red book is in place, tap it and it rises upward out of view and leaves the bookcase.
- At the ceiling altar, place the four marbles in the niches. When the portal opens, take the gecko off the dish, place the heart and travel back to the Human Room.
The Human Room: The Book and the Second Triangle Key
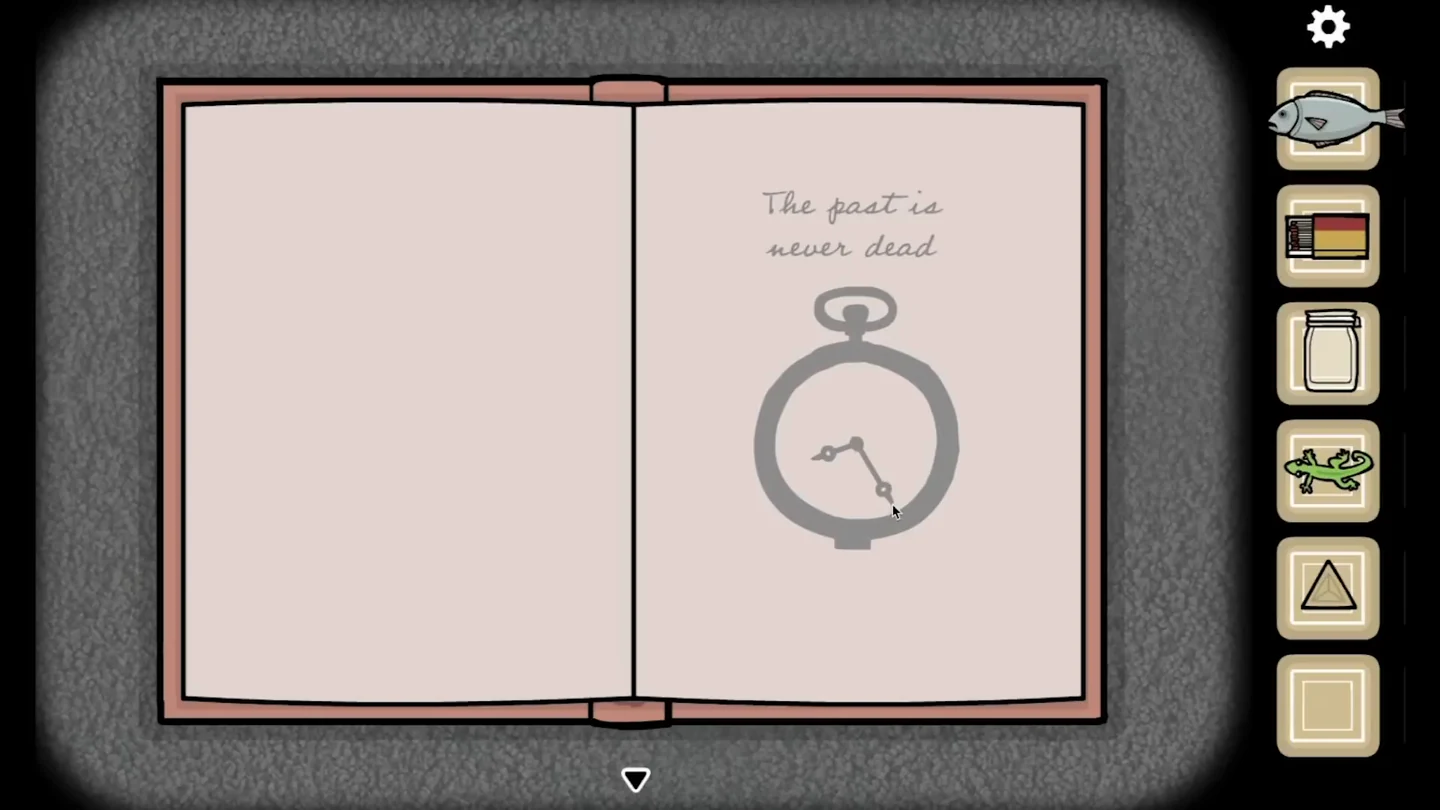
The red book you freed from the bookcase upstairs has fallen into the Human Room.
- Turn to the window wall and open the book lying on the floor. Its pages read "The seed of sacrifice" over a flower pot, "Remember the time" beside three forms and triangles, and "The past is never dead" over a pocket watch showing 8:25.CODE8:25
- Set the grandfather clock to 8:25: minute hand on V, hour hand between VIII and IX. A triangular compartment at the top of the clock opens; take the second triangle key.CODE8:25
The Third Triangle Key and the Body in the Clock
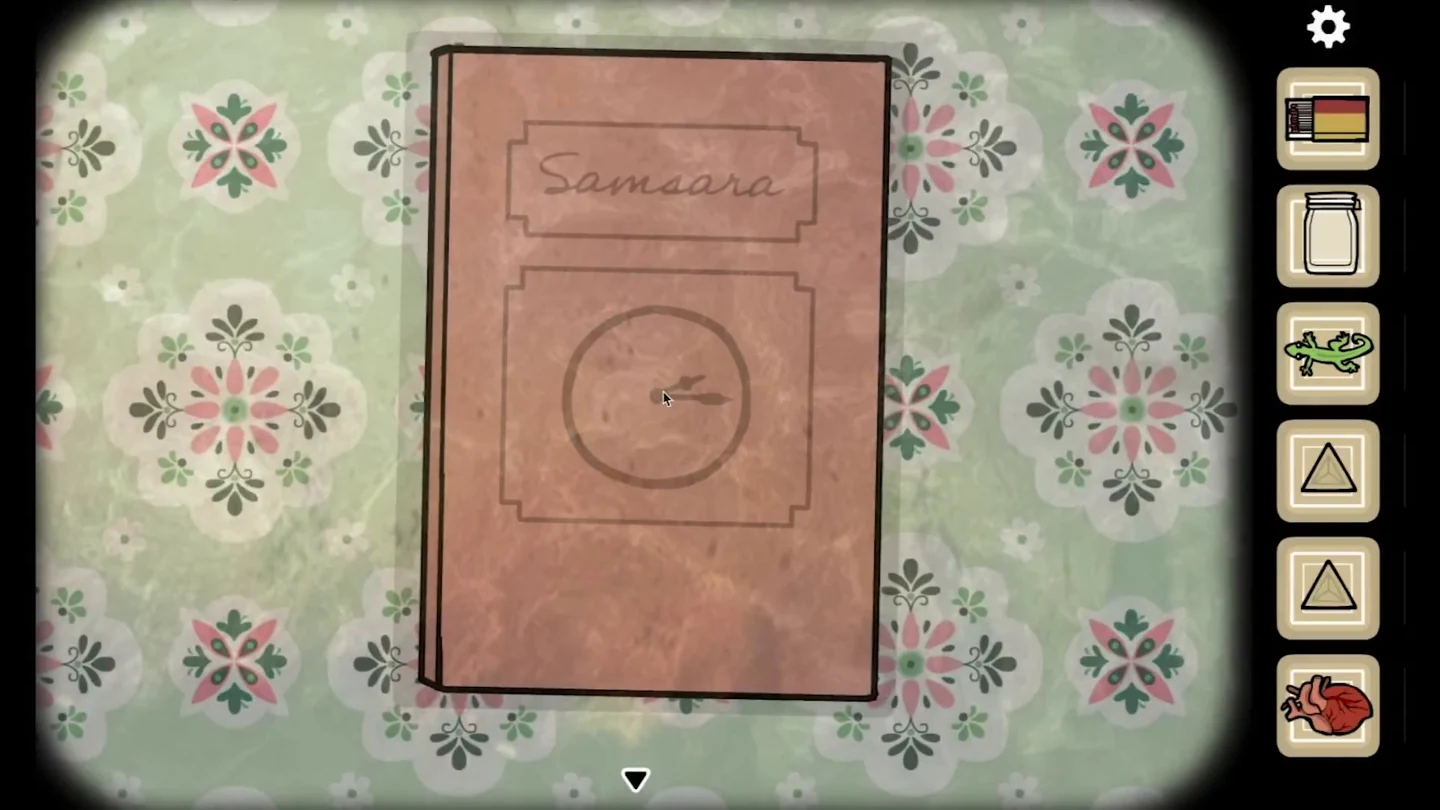
The last triangle key is in the Fish Room clock.
- At the altar, take the heart off the dish, place the fish and travel to the Fish Room.
- A book titled "Samsara" now floats near the ceiling by the mirror. Its cover shows a clock set to 2:15.CODE2:15
- Set the Fish Room clock to 2:15: minute hand on III, hour hand just past II. The top compartment opens; take the third triangle key.CODE2:15
- Return to the Human Room by swapping the fish for the heart on the altar dish and travelling through the portal.
- Zoom in on the round lock on the lower door of the grandfather clock and insert the three triangle keys, then press the yellow button in the centre and open the door. An old man stands inside; tap him and he falls out onto the carpet.
- Zoom in on the body and tap its closed hand. It drops a seed; take it.
Growing the Flower: The Worm
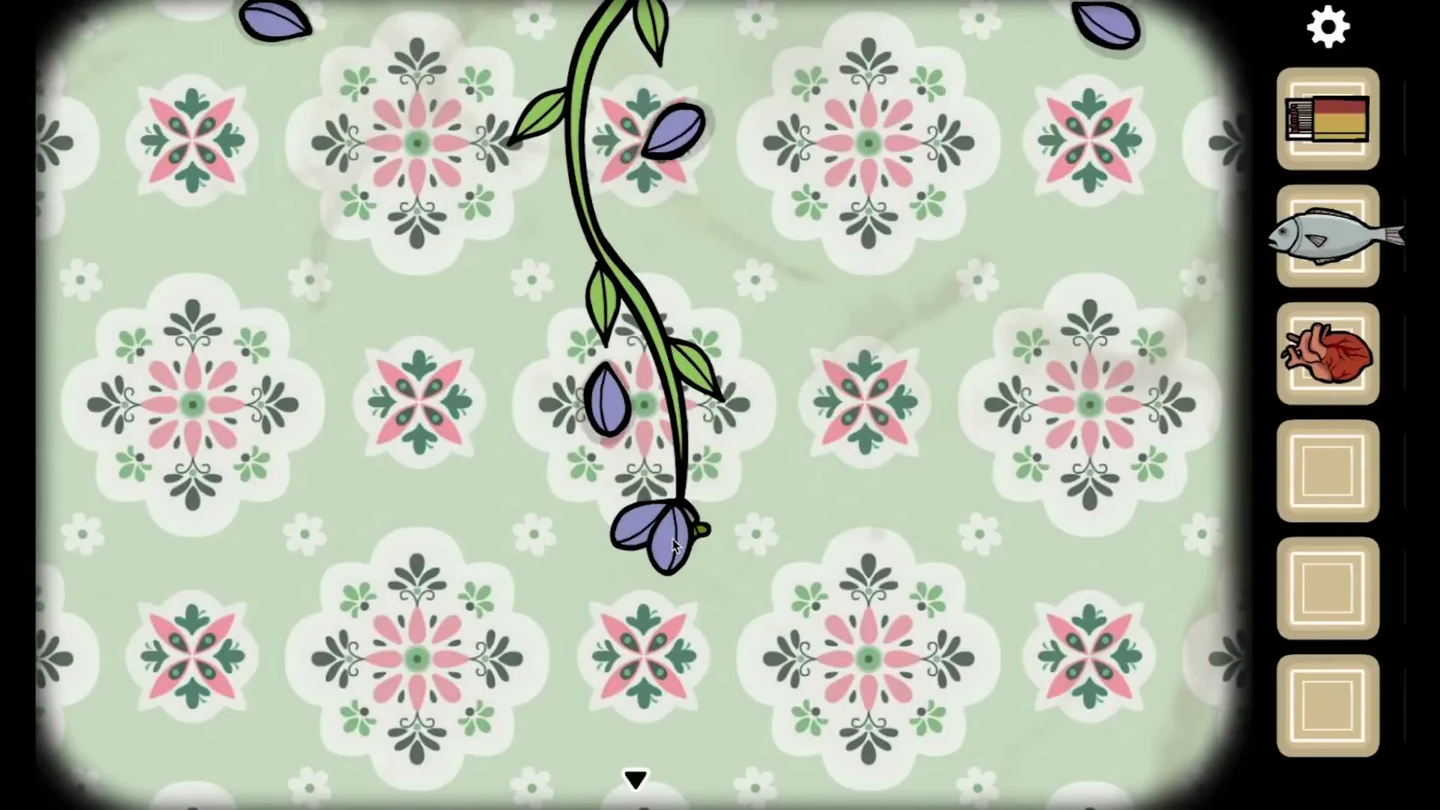
Follow the "seed of sacrifice" page: plant the seed and water it with water from the Fish Room.
- Plant the seed in the flower pot on top of the wall cabinet. A small shoot appears.
- Swap the heart for the fish on the altar and go to the Fish Room. Use the empty jar there to fill it with water, then swap back to the heart and return to the Human Room.
- Pour the water on the shoot. It grows rapidly up through the ceiling.
- Swap the heart for the gecko on the altar and go to the Gecko Room. The vine now hangs down with a purple flower. Pluck all of its petals; a worm drops out. Take it.
- At the ceiling altar, take the gecko back, place the worm on the dish and travel through the portal. You become a worm and see the room from floor level. This unlocks the "A worm" achievement.