CHAPTER 13
The ring vault door
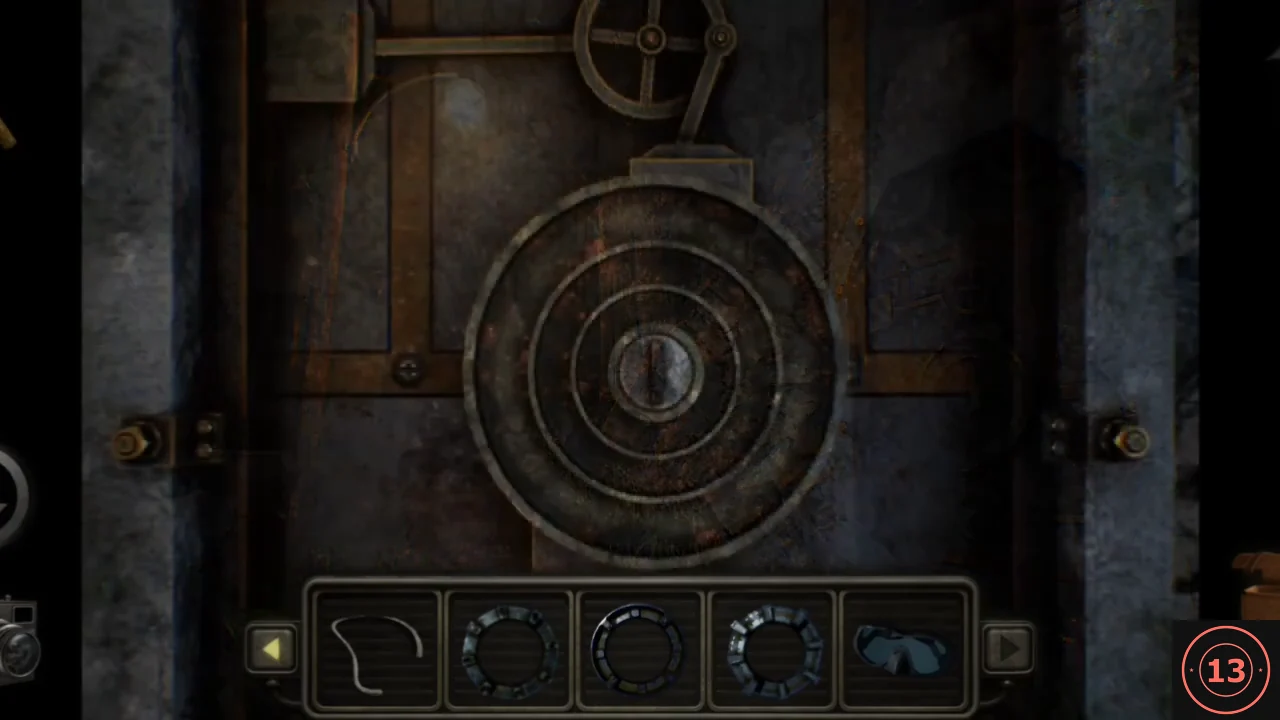
The round vault door on the shore path takes three rings. Fit them from largest to smallest to get inside, then assemble your diving gear.
- Walk back through the tunnel and camp to the vault door on the path from the shore and tap its lock.
- Use the rings from the outside in: first the Large ring, then the Medium sized ring, then the Small ring. All three rings leave your inventory. Tap the centre of the lock and the door swings open.CODELarge, Medium, Small
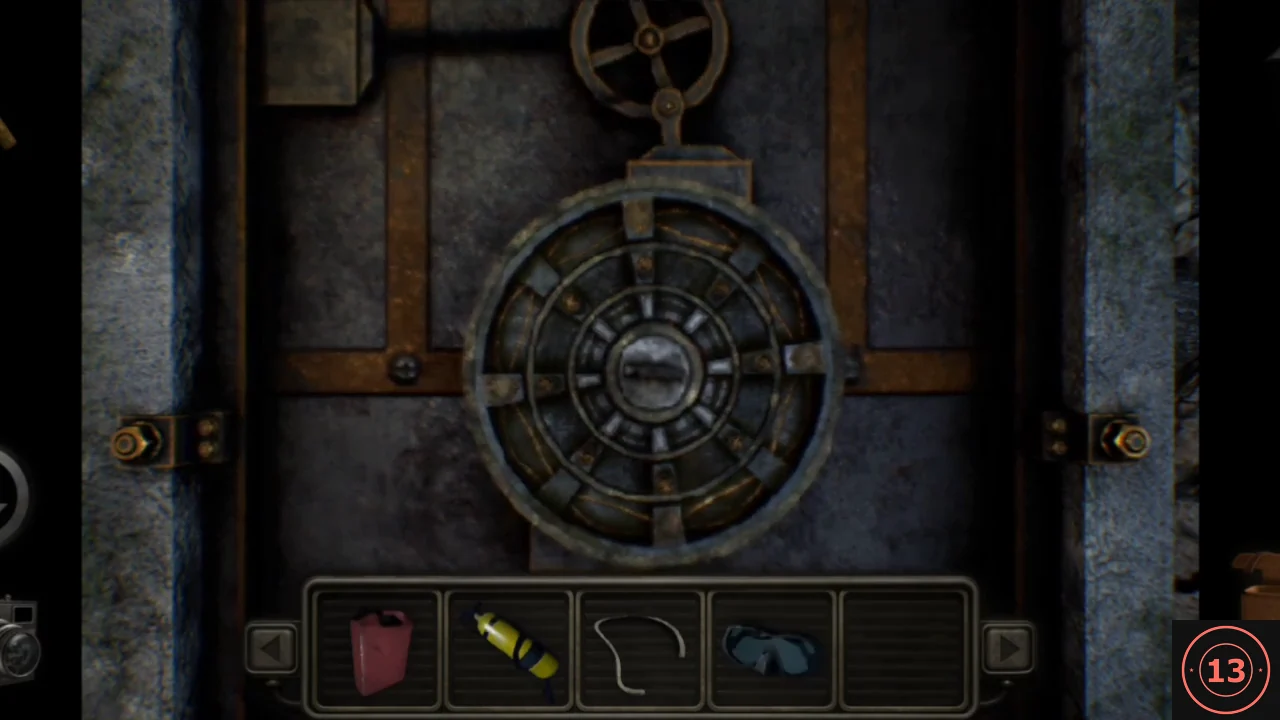
All three rings fitted, largest on the outside. Tap the centre to open the door. - Walk down the lit corridor to the storage shelves and lockers. Pick up the Flashlight; a locker opens, showing a wetsuit beside a "Scuba Equipment" poster.
- Drag the Scuba tank onto the wetsuit in the locker, then the Scuba mask. Tap the completed suit to take the Wet suit. If you try it with only one part, David says he is missing a part.
EVIDENCECollected: Flashlight · Wet suit
CHAPTER 14
Diving for the drill and draining the oil
The end of the vault corridor is flooded. Dive to fetch a drill, use it to draw oil from a drum in the tunnel, then dive again to the rusted hatch.
- Go to the flooded end of the corridor and tap the water to dive (you need the Wet suit in your inventory). Swim forward into the flooded room and on to the room with shelves, and pick up the Large hand drill. Swim back out the way you came.
- Leave the vault and return to the camp. Go through the tunnel gate: in the first chamber, before the long passage with the Electric Room door, a blue oil drum stands on the right opposite some crates. Use the Large hand drill on the drum.
- Use the Jerrycan on the drum to set it down beside it; it is now listed as Empty Jerrycan, because the voyage used up its fuel. Then use the Old hose on the drum to run oil into the can, and pick up the Jerrycan filled with oil.
- Return to the vault corridor and dive again. Swim forward into the flooded room and take the right-hand exit to surface in a caged storage room.
- Tap the hatch panel on the left-hand wall as you enter; David says it is rusted shut. Use the Jerrycan filled with oil on it and the grate opens, revealing a sliding-block board.
EVIDENCECollected and used: Large hand drill · Jerrycan filled with oil
CHAPTER 15
The sliding-block hatch
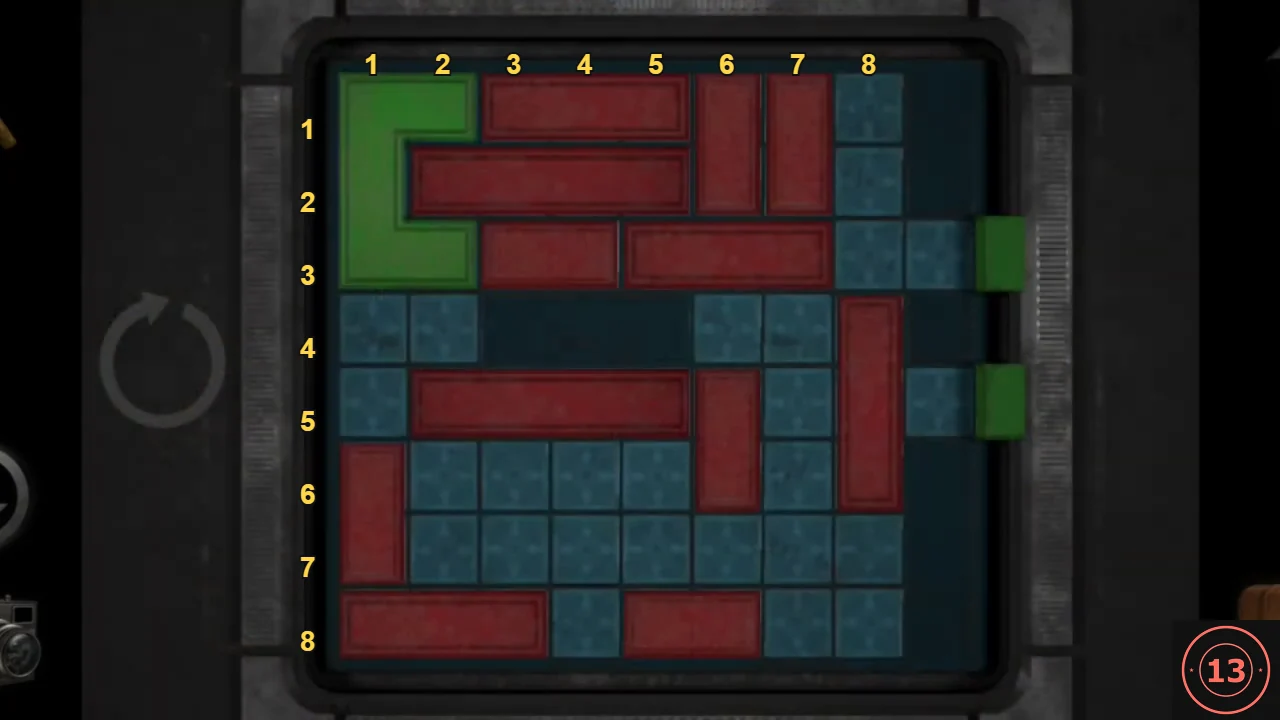
Slide the red blocks out of the way so the green C-shaped block can travel from the top-left corner to the right-hand edge, where its two arms fit the two green exit notches.
- How the board works: number rows 1 to 8 from the top and columns 1 to 8 from the left. Red bars only slide along their length; the green C-shaped block (opening to the right) slides in any direction. Two notches beyond column 8, in rows 3 and 5, are marked green; red bars may also slide into these notches. The three dark squares in the middle of row 4 are never needed. The round arrow button to the left of the board resets it. The layout is the same as in the recording; if yours differs, solve it by the same goal instead. Approach: the C cannot go straight across, because the bars in rows 1-3 and the tall bar in column 8 block its way. Route it down the left column, along the lower rows and back up into column 8, moving each red bar only as far as needed to open the next gap; the tall column 8 bar must finally slide down out of rows 3-5. Steps 2-5 give one worked example sequence of 32 slides, derived from the recorded starting layout and checked against the movement rules seen in the recording. The recording itself reached the same finish by a longer route.
- Example stage 1 - free the C. Pieces are named by where they start: the long row 3 bar (columns 5-7), the upright bar in column 6 (rows 1-2), the long row 2 bar inside the C, the short row 3 bar (columns 3-4), the upright bar in column 6 (rows 5-6) and the long row 5 bar. Slide: long row 3 bar right 2; column 6 top bar down 2; row 2 bar right 1; short row 3 bar right 1; column 6 lower bar down 1; row 5 bar right 2; C down 2; C right 1.
- Example stage 2 - clear the left column. Slide: row 2 bar left 1; column 6 top bar up 2; left-column bar (column 1, starting rows 6-7) up 5; C left 1; C down 2 (the C now sits in rows 5-7 of column 1); short row 3 bar left 3; long row 3 bar left 4; tall right bar (column 8, starting rows 4-6) up 3; row 5 bar right 2.
- Example stage 3 - cross the bottom. Slide: C right 3; bottom row 8 bar (starting columns 5-6) right 2; C down 1; row 5 bar left 5; column 6 lower bar up 3; C right 1; C up 1; C right 2; C up 1.
- Example stage 4 - into the exit. Slide: the row 8 bar that started in columns 5-6 (now in columns 7-8) left 3; column 6 lower bar down 4; C left 1; C up 1; tall column 8 bar down 5; C right 2. The C now fills column 8 in rows 3-5 with its arms in both green notches. David says "I think something happened".
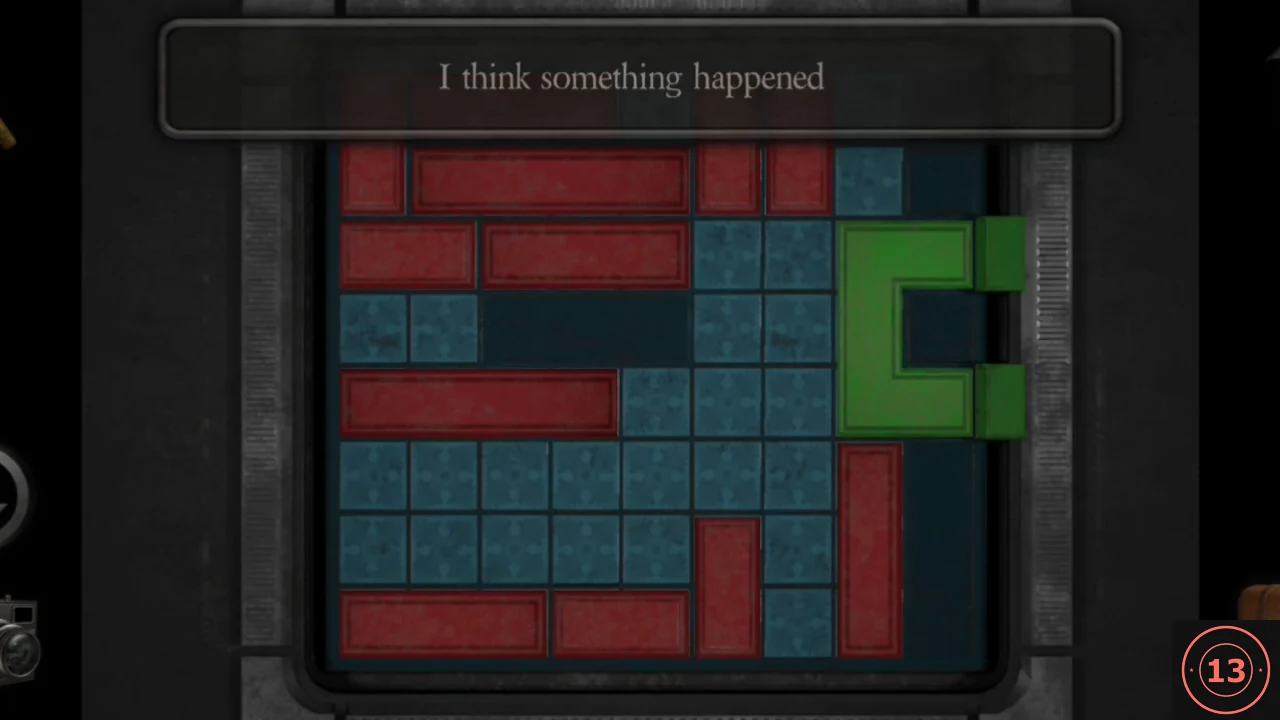
The finished board from the recording. The green C must end like this. Red bars may sit elsewhere because the recording used a different move order.
ENDING
The elevator
Solving the hatch opens the way to an elevator, which ends the Prologue.
- Back out of the hatch view and walk toward the far end of the caged room. The barred gate there is now open, revealing an elevator. Step inside and tap the control panel on the left wall.
- The elevator descends, its lights fail and the Prologue ends on "To Be Continued...". The story continues in the separate game Meridian 157: Chapter 1.