Landfall
The long trip used up most of the boat's fuel. Rest, then head ashore and explore the path to the abandoned camp.
- In the boat cabin, David says he used most of his fuel and should rest before heading out. Tap the bed. After an unsettling dream sequence ("Must've been a bad dream..."), leave the boat onto the jetty.
- On the shore, tap the old rowboat and take the Old rope from it.
- Follow the path inland. You pass a round vault door set into the rock; it is locked for now. Continue along the path through the forest to the camp clearing.
- Search the crates to the right of the tunnel entrance and pick up the Crowbar.
- Tap the small box on the post to the right of the tunnel entrance. David notices something is missing from it; a crank fits here later.
The cabin cellar and the notepad
The cabin at the camp hides a scuba tank in its cellar and a code on a scribbled notepad upstairs.
- Go to the cabin. Its cellar doors outside are barred with a plank: use the Crowbar on the plank to prise it off and open the doors.
- Go down into the cellar and pick up the Scuba tank.
- Enter the cabin upstairs and open the desk drawer to find a notepad covered in faint scribbles. Use the Eraser on it: rubbing the page reveals a stylised four-digit number, 5416. Note how each digit is drawn.
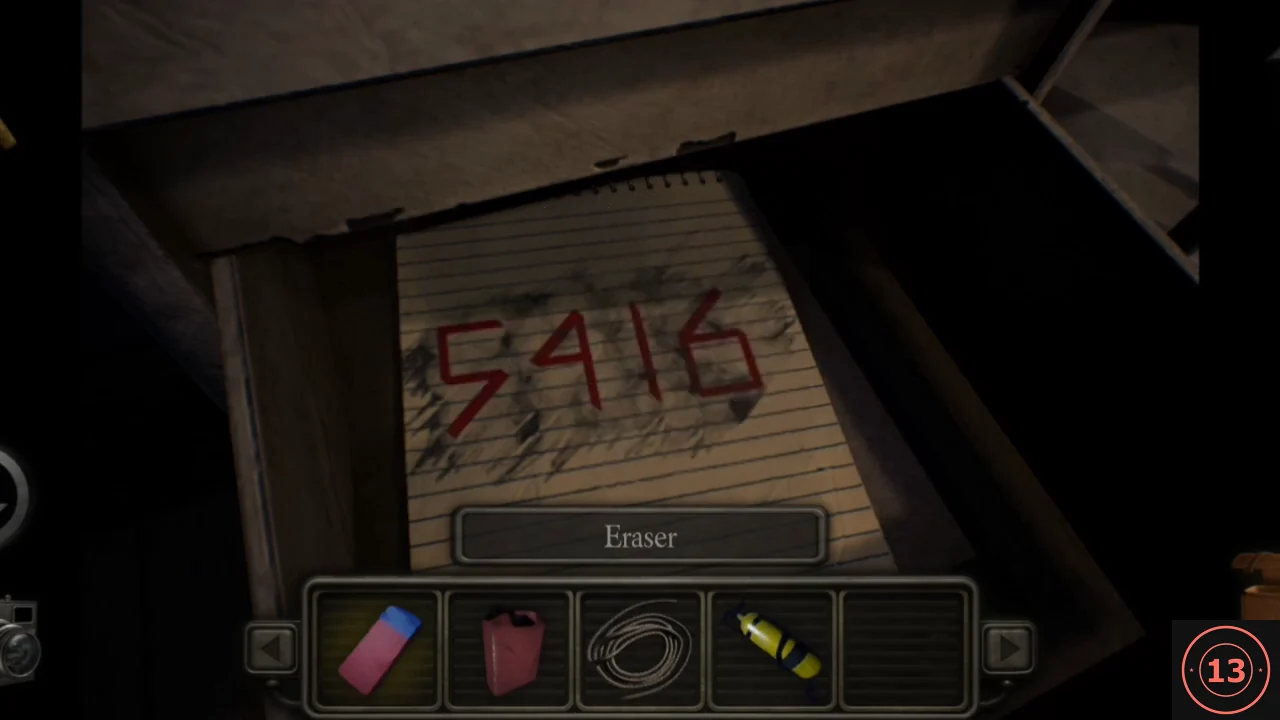
The rubbed notepad shows 5416. Copy the exact shape of each stroke for the chest.
The metal chest
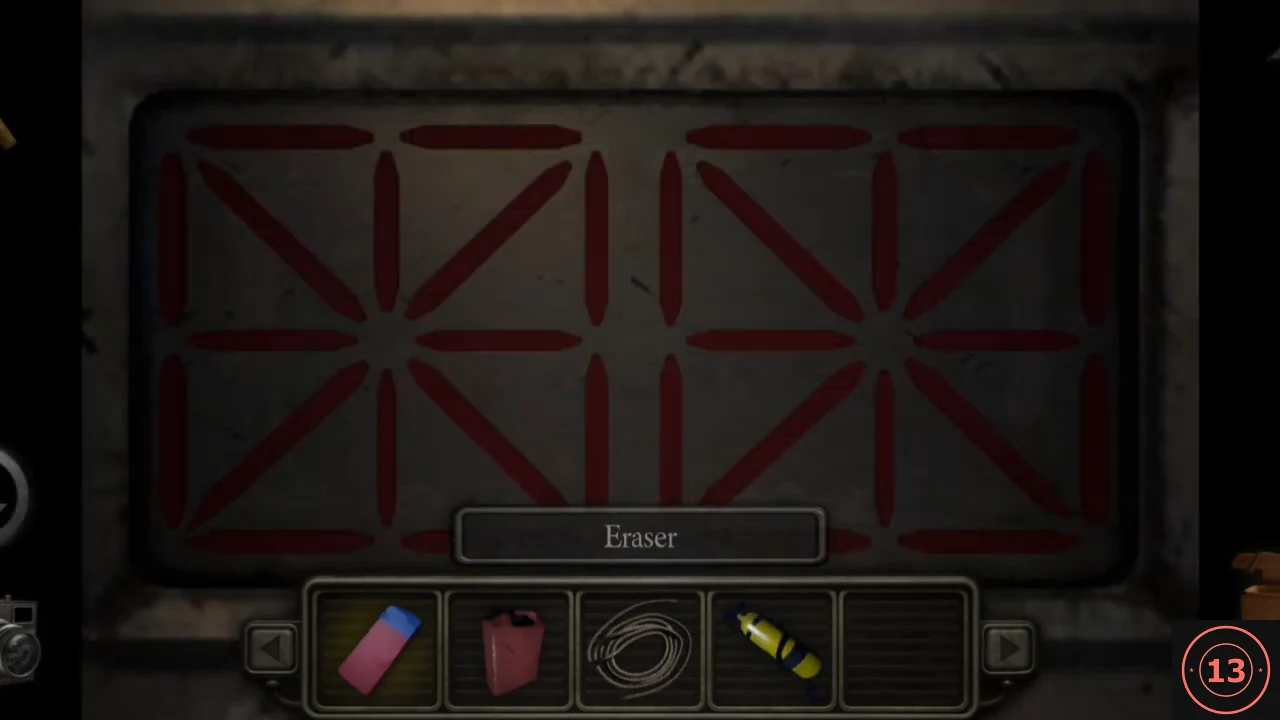
A metal chest by the stair rail in the cabin has a four-character segmented display. Light the segments to copy the number from the notepad.
- Tap the metal chest beside the stair rail to view its lock. Each of the four characters is made of segments that light up when tapped.
- Recreate 5416 exactly as it is drawn on the notepad, segment for segment, including the slanted strokes in the 5, 4 and 6. A plain digital-style number is not the same shape. When every character matches the notepad, the chest opens.CODE5416
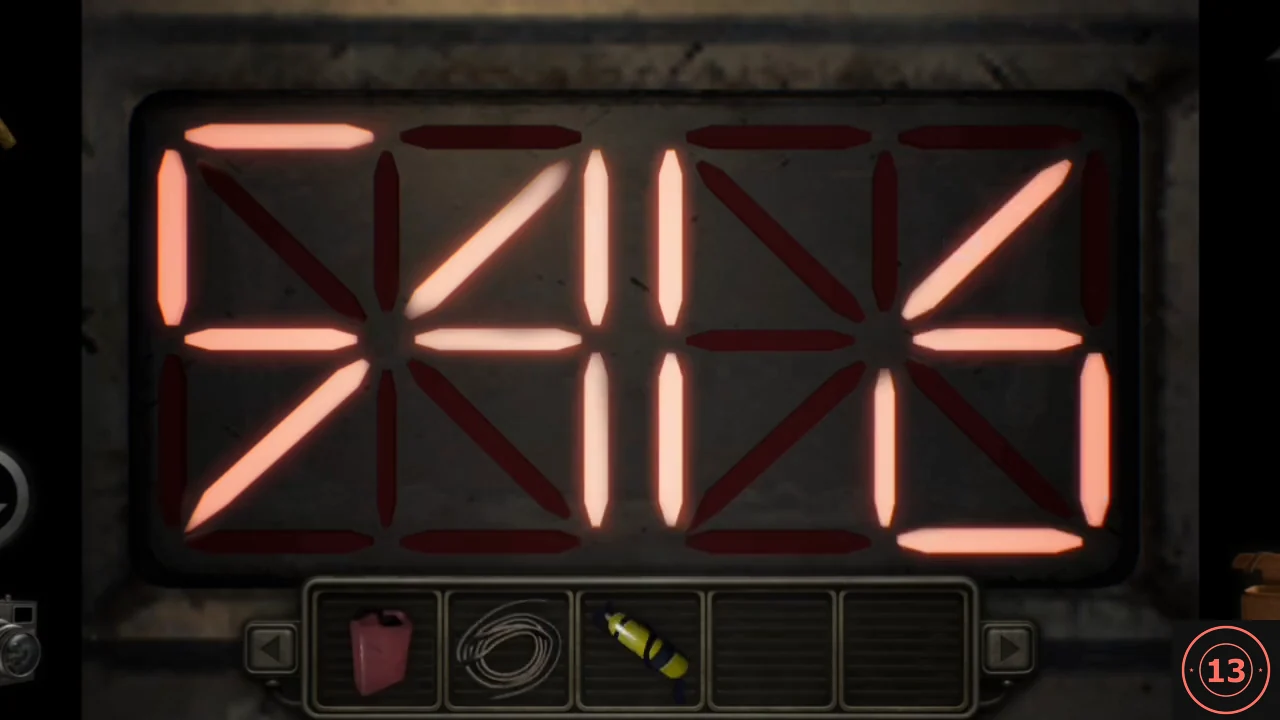
The chest display copying 5416 stroke for stroke from the notepad. - Take the Bolt cutters from the open chest.
The tunnel and the flag
Cut into the tunnel at the camp, find the crank and use it to lower a flag that hides the drawbridge code and a key.
- Return to the camp and use the Bolt cutters on the chain-link gate marked "Authorized Personnel Only" just inside the tunnel.
- Walk through the tunnel, past the Electric Room door on the right, to the crates at the far end and pick up the Crank.
- Go back out to the camp and use the Crank on the box on the post beside the tunnel. Turning it pulls the cable and brings the tarp flag down to the ground.
- Look at the flag. It shows five arrows from left to right: long up, short up, long down, short down, short up. This is the drawbridge lever code.
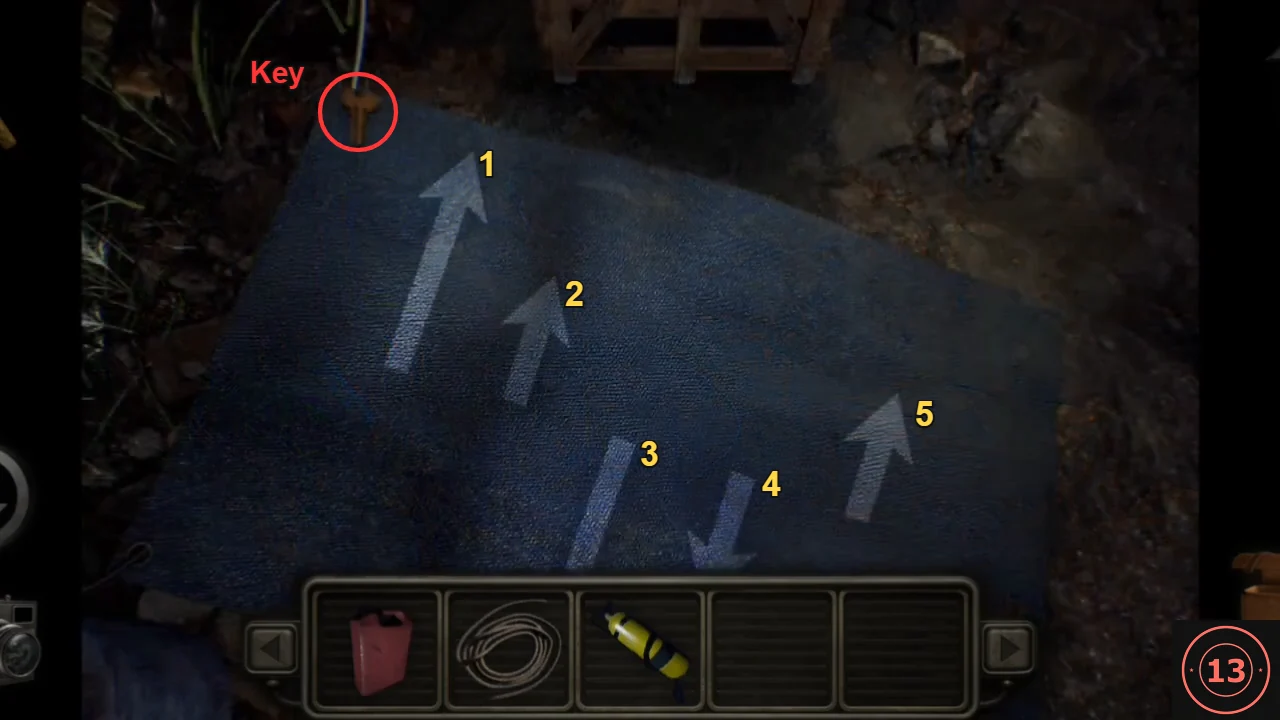
The flag arrows, numbered from left to right, give the lever code. The key (circled) hangs at the top edge. The inventory bar hides the head of arrow 3, which points down. - Tap the flag again and take the Key hanging from the cable along its top edge, above the first long up-arrow.
Drawbridge control panel
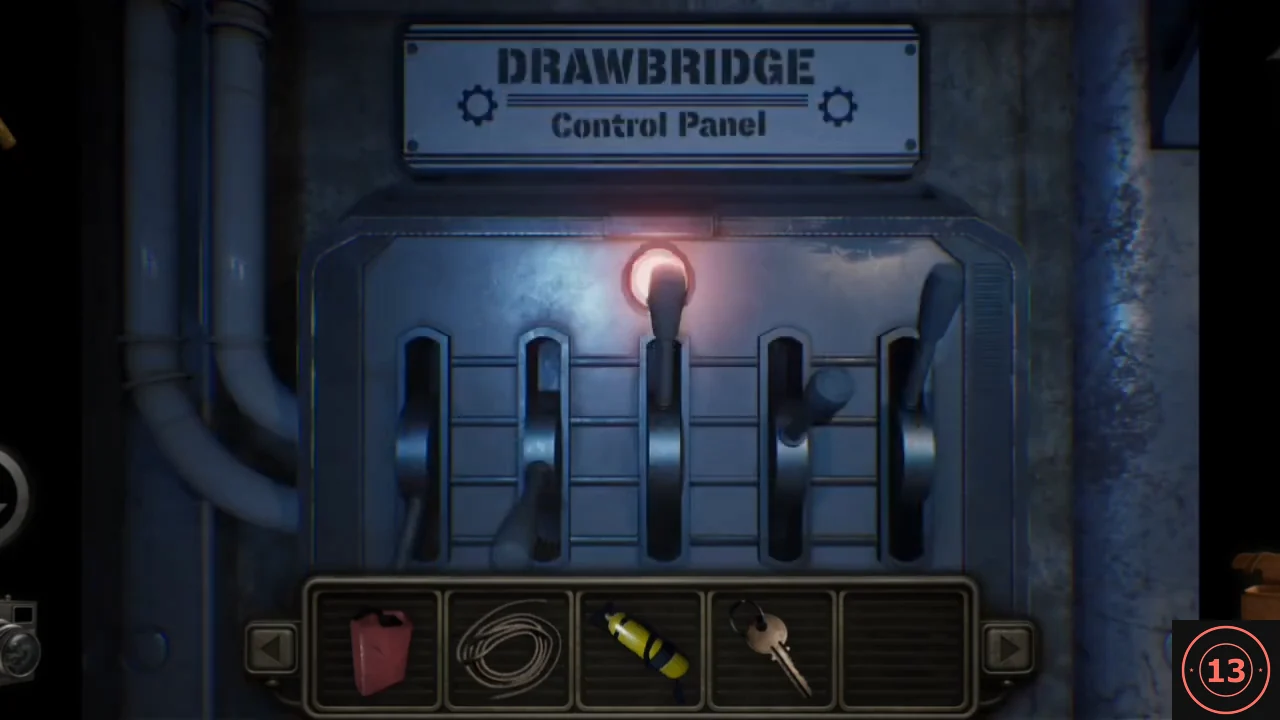
The Electric Room in the tunnel controls the island's drawbridge. Set its five levers using the flag's arrows.
- Go into the tunnel and enter the Electric Room through the door on the right. Tap the DRAWBRIDGE control panel. It has five levers, and each can sit in four positions: fully up, half up, half down or fully down. Tap a lever to move it, and keep tapping until it reaches the position you need.
- Match the flag: a long arrow means fully up or down, a short arrow means halfway. Set lever 1 fully up, lever 2 half up, lever 3 fully down, lever 4 half down and lever 5 half up. The panel light turns green and David says "Looks good"; the drawbridge is now lowered.CODEFull up, half up, full down, half down, half up
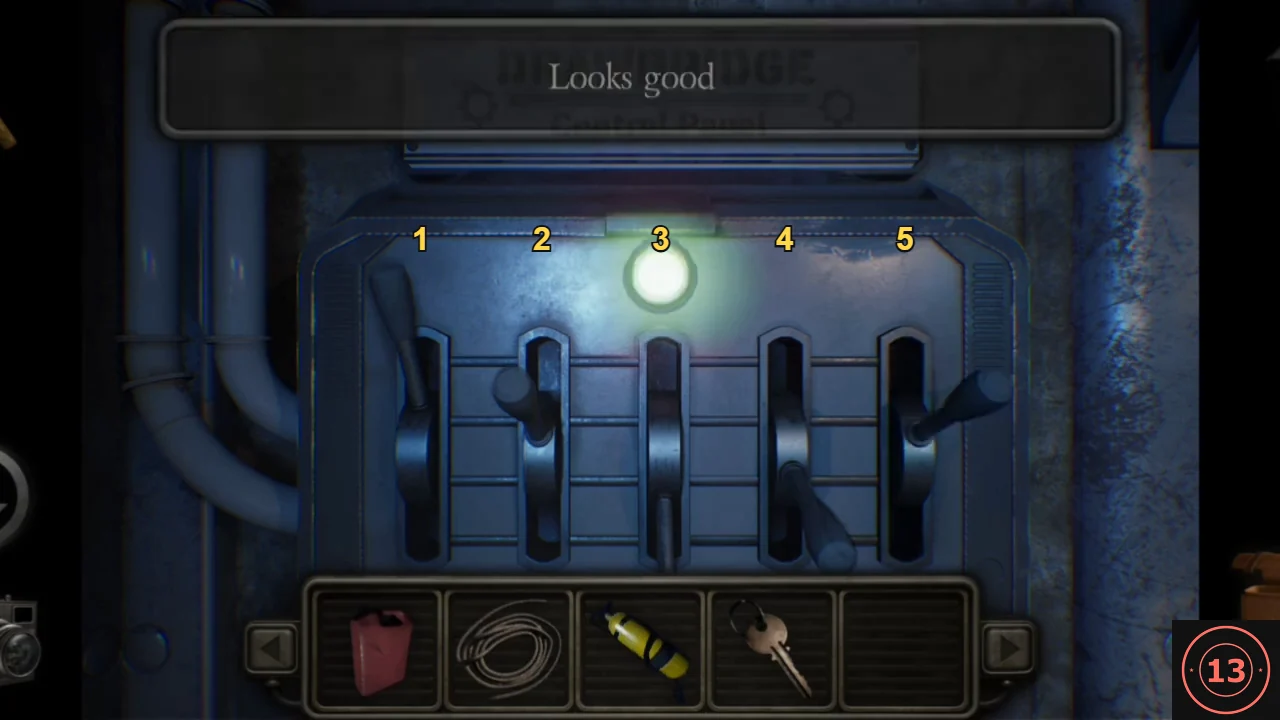
The correct lever positions: full up, half up, full down, half down, half up.
Across the gorge to the treehouse
With the drawbridge down you can reach the treehouse across the gorge, where you make a grappling hook and find a broken telescope.
- Leave the tunnel and take the right-hand path from the camp to the gorge. The bridge is now down; cross it.
- Follow the fenced path past the lamp and pick up the Old hose.
- Climb the ladder up into the treehouse. Take the Medium sized ring hanging on the right-hand wall above the desk.
- Tap the hook on the desk; David needs another part to make it work. Use the Old rope on it to make a Grappling hook.
- The journal on the desk is background story only. Tap the telescope by the window: the view is blurry and David thinks something is missing. It needs a lens, which you will find in the lighthouse.
The lighthouse
The lighthouse is beyond the far end of the tunnel. Climb in through its broken window, unlock the lantern room for a ring, then fetch the lens the telescope needs from the ground floor.
- Go back across the bridge to the camp and through the tunnel, past the Electric Room, and out through the arch at the far end to the lighthouse.
- David notes the window looks shattered. Use the Grappling hook on the window; climb the rope inside and go up the spiral stairs to the upper room.
- Climb the ladder and use the Key on the ceiling hatch, then go up into the lantern room.
- Step out through the broken window onto the balcony and take the Large ring from the railing.
- Climb back down the ladder and keep going down the spiral stairs, past the room with the empty boxes, to the ground floor. This is the room with the red door, a barrel and a table under the stairs. Tap the table: a round glass lens lies beside the tray of old papers. Take the Old lens.
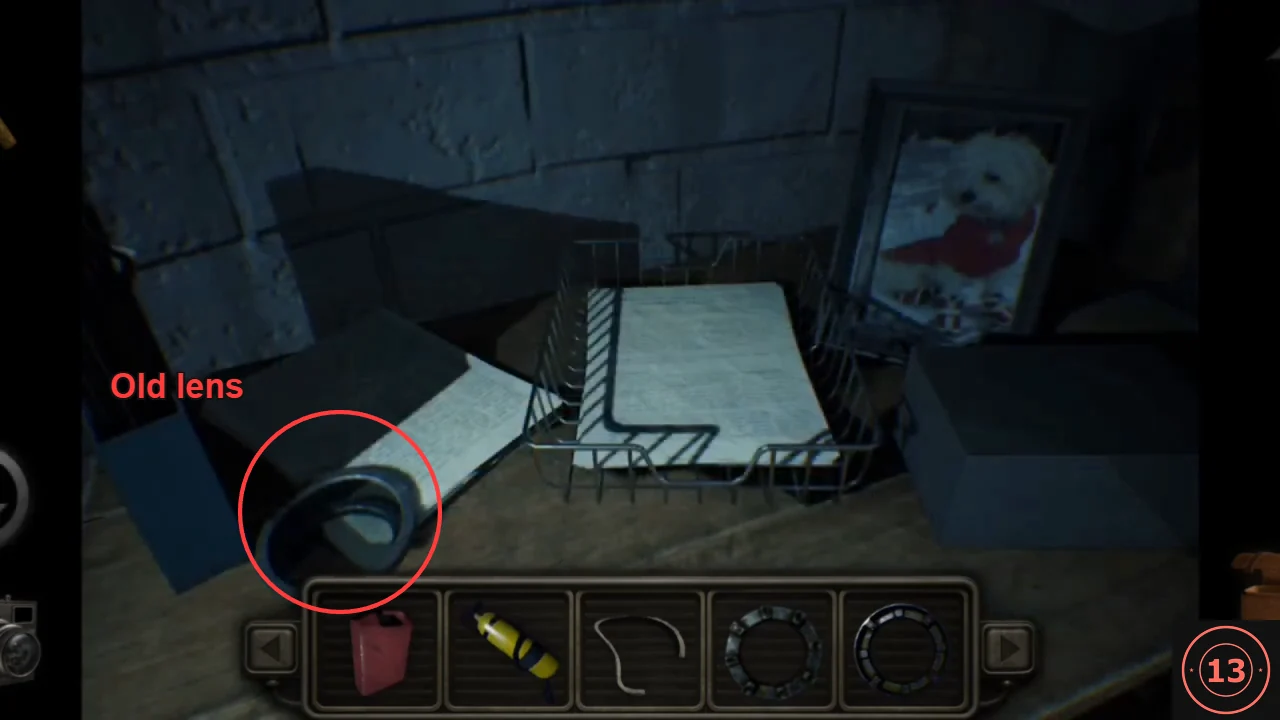
The Old lens (circled) on the ground-floor table, beside the tray of old papers. - To leave this way, tap the wooden bar across the red door to lift it off, then go out through the door to the lighthouse path.
Telescope numbers and the lockbox
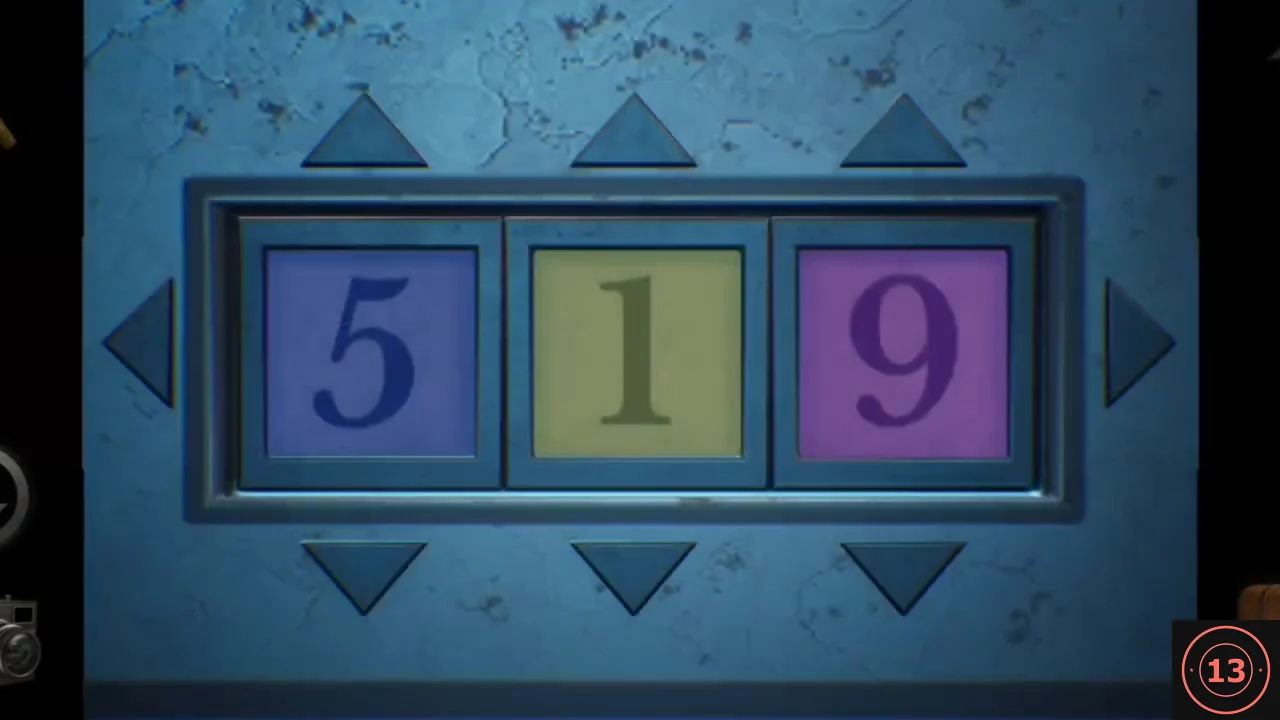
Repair the treehouse telescope with the lens to spot three coloured numbers around the island, then use them on the lockbox in the Electric Room.
- Return through the tunnel, camp and gorge to the treehouse. Use the Old lens on the open front end of the telescope; it fits in place and leaves your inventory. The telescope now gives a view of the island. Keep all three rings for later.
- Drag the view around and find three painted numbers: a red 9, a yellow 2 and a blue 3. The view is foggy, so pan slowly across the buildings and rocks.
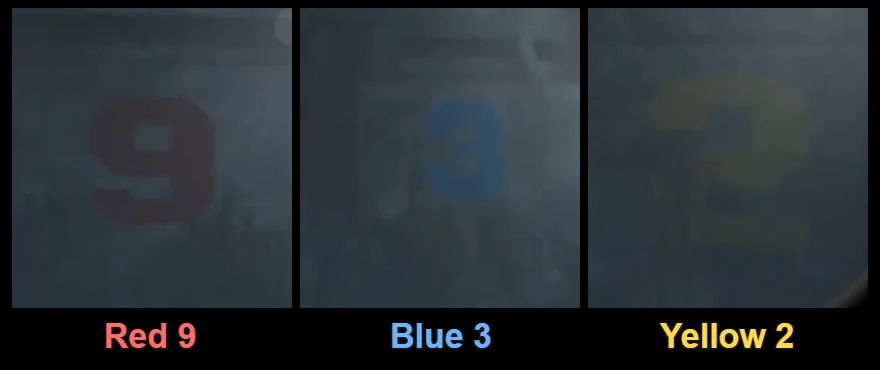
The three telescope numbers, shown in lockbox order: red 9, blue 3, yellow 2. - Go back to the Electric Room in the tunnel and tap the lockbox on the workbench on the left. It has three number tiles: the arrows above and below each tile change its digit, and the arrows at the left and right sides slide the tile colours along together.
- Set the digits to 9, 3, 2 from left to right, then use the side arrows until the colours read red, blue, yellow, so each number has its telescope colour: red 9, blue 3, yellow 2. In the recording, one tap on the right arrow was enough. The box opens.CODE932 (red 9, blue 3, yellow 2)
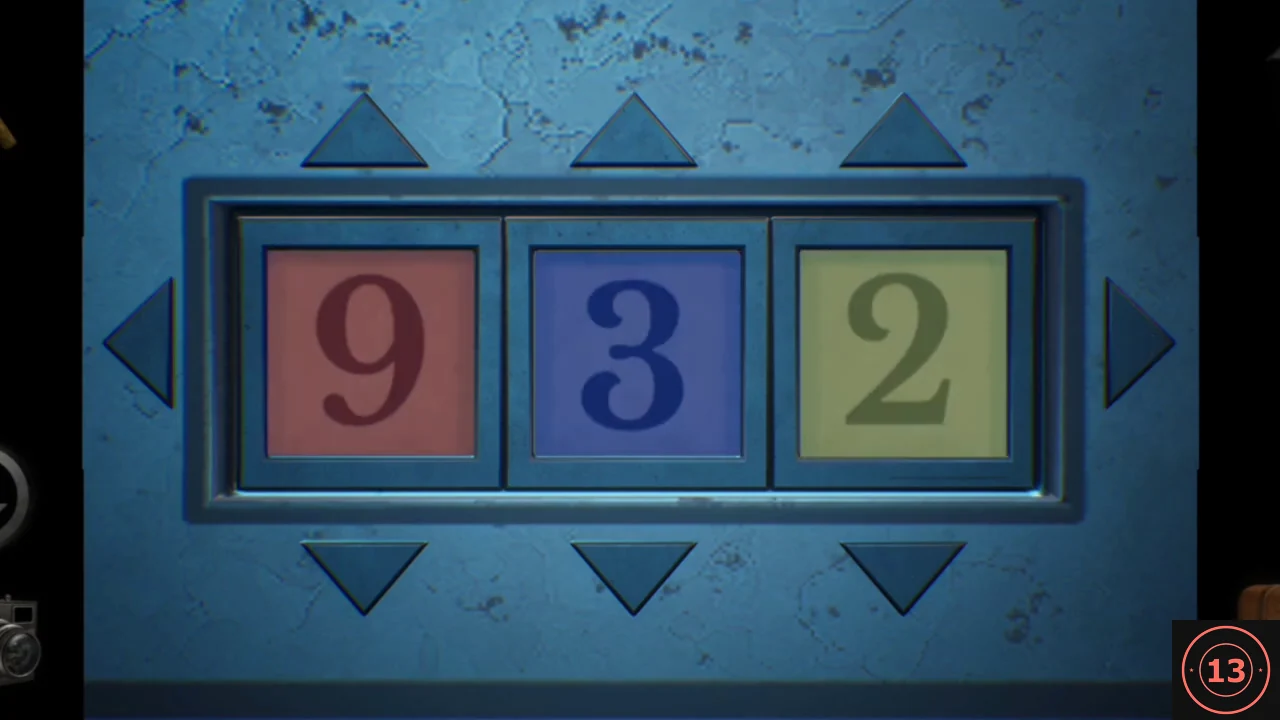
The solved lockbox: red 9, blue 3, yellow 2. - Take the Small ring and the Scuba mask from the lockbox.