First room, bar lock and the lower level
The memory starts at a cave in the woods. In the entrance hall a face with three eyes is drawn on the left wall; remember it. Climb the steps into the first room. Its four walls are: the shelf wall (a shelf, a locked chest and two torches with a blank space between them), the cabinet wall (a low cabinet with a broken red door and a panel of coloured switches), the maze wall (a sliding-button maze, a small red box on the floor and a dark passage) and the boulder wall (a huge rock blocking a dry stream). The dark passage leads to a two-level area; the steps on its left go down to the lower level, which has a tall blue cabinet, a chasm with a broken rope bridge, a red door beside a stone face and a turtle behind bars.
- Take the black book from the shelf. Several pages matter later: four coloured line styles (example: blue wavy, red dotted, yellow zigzag, green dashed), a mirror hanging between two torches, an idol and a key, and a key outline.
- On the cabinet wall, search the low cabinet and take the nail and the head of lettuce.
- Go through the dark passage on the maze wall to the two-level area and pick up the small rock lying in the middle.
- Take the steps on the left down to the lower level. The lower doors of the tall blue cabinet hide eight locking bars, each with a red button: four above and four below. An arrow marks the first button. A correct press leaves its bar open; a wrong press closes all of them again, so find the order by trying the remaining buttons one at a time. Example order, numbering buttons from the left: bottom 4, top 3, bottom 2, top 1, bottom 3, top 4, bottom 1, top 2. Take the fluorescent tube and the drill.
- Open the cabinet's upper doors and take the toy boat and the green key.
Colour lights and the white box
The colour panel turns line patterns into symbols. The black book tells you which colour belongs to which line style, and the white box on the lower level takes one symbol per colour.
- Go back up to the cabinet wall in the first room. Unlock the colour panel with the green key and put the fluorescent tube inside. Four white squares appear, each crossed by a different line: wavy, dotted, dashed and zigzag.
- Use the four coloured switches on top of the panel. For each colour, check in the book which line style belongs to it, switch that colour on and note the symbol that appears on the square with that line; ignore the other squares. The book's colour for each line style and the symbols that light up can differ in your game, so use your own book and panel. Example: blue (wavy line) showed a framed rectangle, red (dotted) a dotted arch, yellow (zigzag) a circle crossed by a vertical line and green (dashed) an hourglass.
- Go down to the lower level and turn to the red door. The white box below the stone face has four frames: green, yellow, red and blue. Set each frame to the symbol you noted for that colour. Take the large candle, the small black box and the torn paper inside.
Maze panel, turtle and the stream
The torn paper and a small sketch on the cabinet wall solve the maze, which supplies the tools for the turtle and the stream.
- Back in the first room, view the maze panel on the maze wall. The torn paper is a piece of the maze map showing where three buttons must stop: the one with three dots, the one with three petals and the one with a sprout. The small sketch hanging on the cabinet wall shows where the button with three lines belongs. These target positions can differ in your game, so follow your own paper and sketch. Slide each button along its track to its place; the compartment below opens. Take the metal file and the black marker pen.
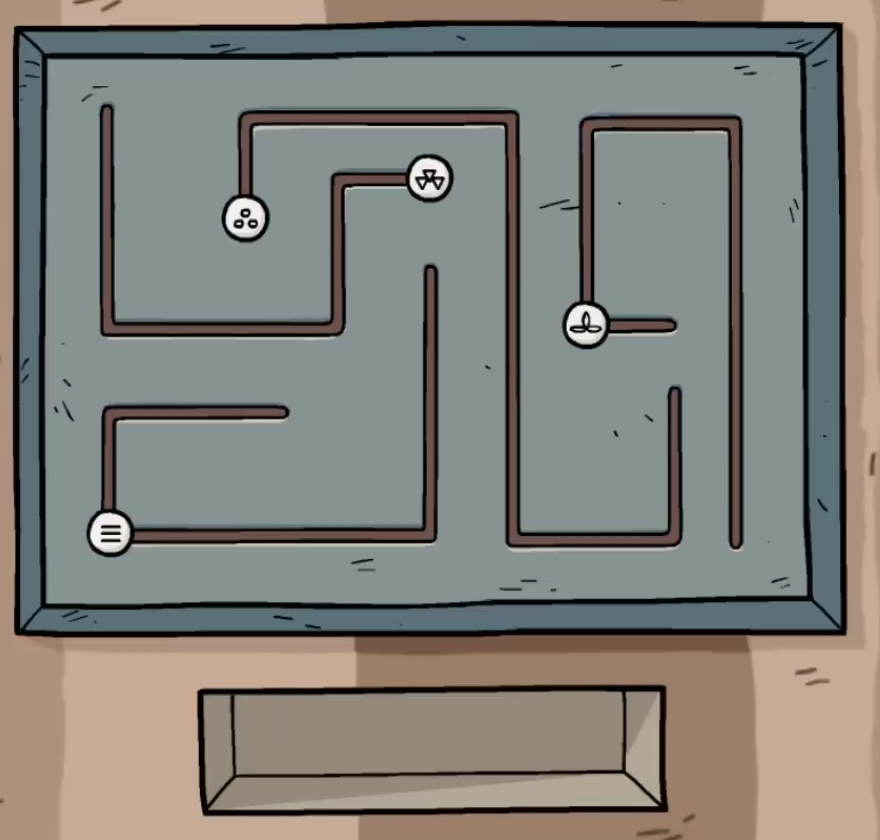
Example of the solved maze from one game, after the reward was taken: the compartment below is open and already empty. The torn paper placed the three-dot, three-petal and sprout buttons; the wall sketch placed the three-line button. - On the lower level, turn to the turtle behind bars. Cut through the middle bar with the metal file and take the iron bar.
- Put the head of lettuce on the right-hand floor tile. The turtle walks out and stays on it. Then tap the left-hand floor tile: the tall shutter between the tiles rises and reveals a machine with a lever slot and three dials.
- Take the hammer from the turtle's empty hole.
- Go up to the boulder wall in the first room. Put the small rock on the ground at the left of the boulder, place the iron bar on it and tap the bar to lever the boulder aside. Water runs down the stream and under an arch where a key hangs. Put the toy boat in the water on the left; it floats under the arch and catches the key. Take the yellow key.
- On the shelf wall, open the locked chest with the yellow key and take the spoon and the mirror.
Mirror, third eye, wax key and the bridge
The black book's drawings show where the mirror goes and how to copy a key. The stone face then gives the setting for the bridge machine.
- Between the two torches on the shelf wall, put the nail in the wall, knock it in with the hammer and hang the mirror on it.
- Use the small black box on the mirror. In the reflection the box opens; take the glass eye.
- Go down to the stone face beside the red door. Like the drawing in the entrance, it needs a third eye: drill a hole in the top of the face and put the glass eye in it. The mouth opens; take the scissors and the pink key. The three eyes now look in different directions; note which way each one points.
- Open the black book at the key outline and cut it out with the scissors to get a key-shaped piece of paper.
- On top of the low cabinet in the first room is a vise. Turn its handle first, otherwise the candle will not fit, then put the large candle in it. Lay the paper key on the candle, trace round it with the black marker pen and carve it out with the spoon to make a wax key.
- Open the small red box on the floor by the maze wall with the wax key and take the lever.
- Return to the machine on the turtle wall and insert the lever. Its three dials sit in a triangle like the stone face's eyes: the top dial is the forehead eye and the two lower dials are the left and right eyes. Turn each dial to point the same way as its eye. The eye directions can differ in your game (example from one game: top down, left dial left, right dial right). Then pull the lever. The rope bridge over the chasm is repaired.
- Cross the bridge and watch the scene with Laia's father and brother. When it ends, the story jumps back three years.