Radio Station
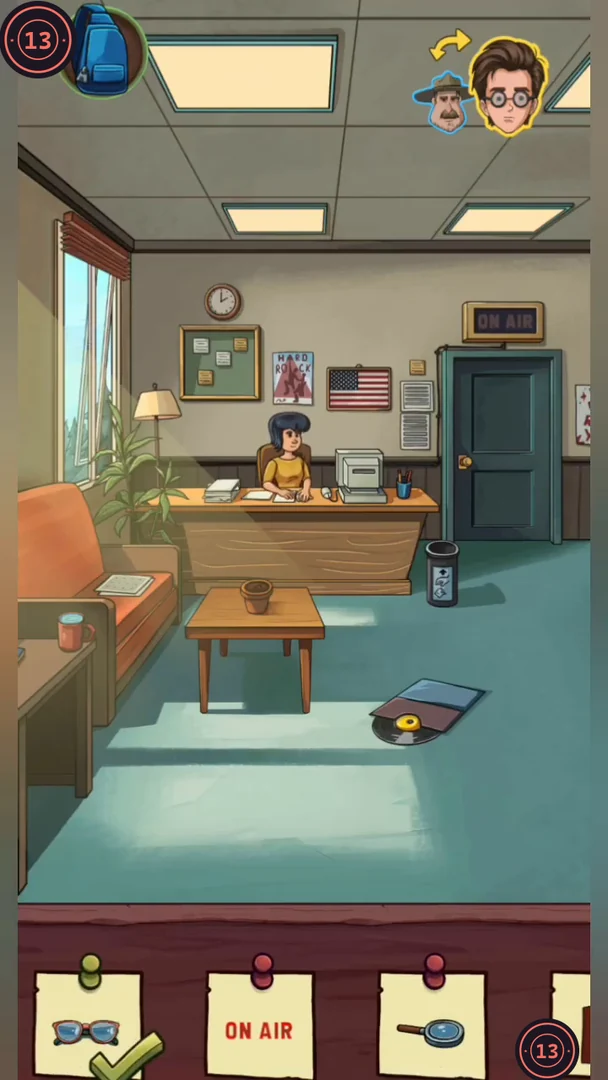
Joe looks for the song at the radio station while Sheriff Jones waits in the station archive.
- As Joe, tap the glasses on the lobby floor and raise the blind on the lobby window at the left. Put the three coloured pieces together on the notice board and tap the finished symbol, and tap the discarded container for the magnifying glass. In the studio, take the perforated plate. Use the loose wire to reach the wrench, and move the jazz poster to uncover the letter behind it, then tap it.
- Switch on the studio TV and put the Joe's Birthday tape from Joe's house into it. Turn the knobs until the recording of a boy at a birthday table appears, then tap the gift.
- Flip the studio switch to ON and tap the ON AIR sign in the lobby. Take the bag of seeds from the studio equipment, plant them in the pot on the lobby table and water the pot from the cup in the lobby. Tap the flower and the bee.
- Lay the perforated plate over the numbered sheet in the lobby: the holes show red 5, purple 2 and green 8. The studio cabinet lock has red, green and purple dials, so enter 582 and take the cassette player inside.CODE582
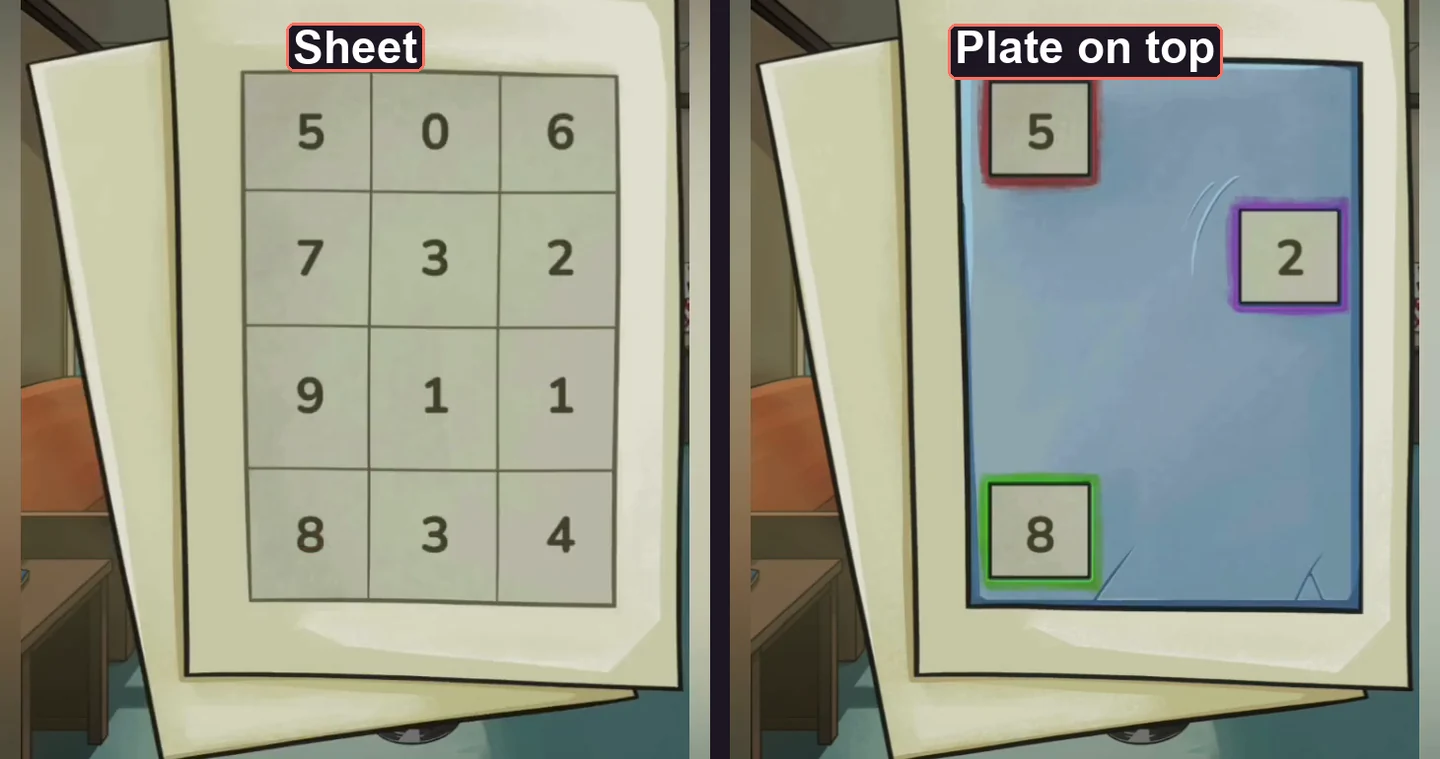
With the plate on the sheet, only red 5, purple 2 and green 8 remain visible. - Switch to the Sheriff in the archive. Take the microphone out of the box on the upper shelf and fit it onto the meter on the floor. Switch the meter on, then tap the microphone repeatedly until all of the meter's lights are lit; the lit-meter card is then ticked. Take the cutter from the desk to open the sealed box and tap the film reel. Tap the spider in the ceiling web, and turn the page of the music book to find the clef.
- Turn each peg on the guitar headstock until the tuner shows green for that string. When the guitar view closes, collect the Done reward that appears in the room.
- As Joe, ask the DJ about the lyric: it is "Fiery Girl" by Stone Skulls. Radio the Sheriff; the archivist says Old Billy borrowed the tape.
Billy's House
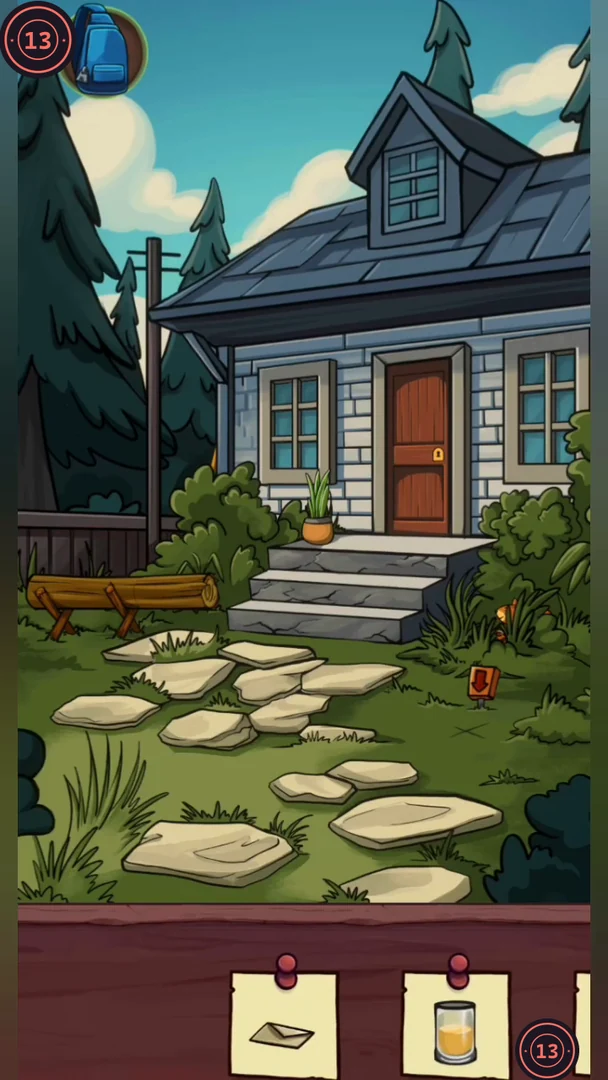
Joe needs the cassette that Old Billy borrowed. Search the yard, the kitchen, the hallway and the attic.
- In the yard, take the shovel and dig at the marked spot in the flower bed. A locked chest appears; tap the squirrel as it comes out. Slide the small path stone in the lower pair of stepping stones to the left to uncover a small blue key; leave it there for now. Use the key by the flower pot on the porch to open the front door, then tap the blue ball on the step.
- In the kitchen, take the crank handle lying at the side of the couch. Put the popcorn from the counter into the microwave and tap it.
- In the hallway, drag the yellow-handled paint scraper from the floor, between the doormat and the cabinet on the right, onto the cracked ceiling patch above the back door, then tap the planet it uncovers. Hang the picture for the feather, and remove the wall tile and move the cupboard to uncover the letter; tap the feather and the letter too. Read the framed poem: the first letters of its lines (Here, Only, Paper, Emptiness) spell HOPE. In the attic bedroom, take the Silver Key from the edge of the rug and keep it for the yard, set the briefcase letters to HOPE to open it and tap the camera inside.CODEHOPE
- Solve the magnet maze with the arrow buttons. The target is the blue ball: first use the magnet to move the red ball out of its way, then pick up the blue ball and guide it through the walls to the exit. When the maze closes, the blue ball appears beside the bed; tap it for its card.
- Take the glass cup. Fit the crank handle and the loose record onto the gramophone and play it, then tap the musical notes that appear beside the horn. Open the window, send the saw down to the yard, and tap the cap on the shelf.
- In the kitchen, put the glass cup from the attic on the counter. Open the fridge and take out the juice bottle, open it with the opener on the wall and pour the juice into the glass, then tap the filled glass for its card. In the yard, saw the log on the bench with the saw you dropped from the attic, then tap the cut log. The dug-up chest by the path has two locks. Use the Silver Key from the attic on it first; the first lid opens. Then take the small blue key you uncovered under the path stone, use it on the remaining lock and tap the red bag inside.
- Old Billy comes home. Talk to him and he hands over the tape.
Hospital at Night
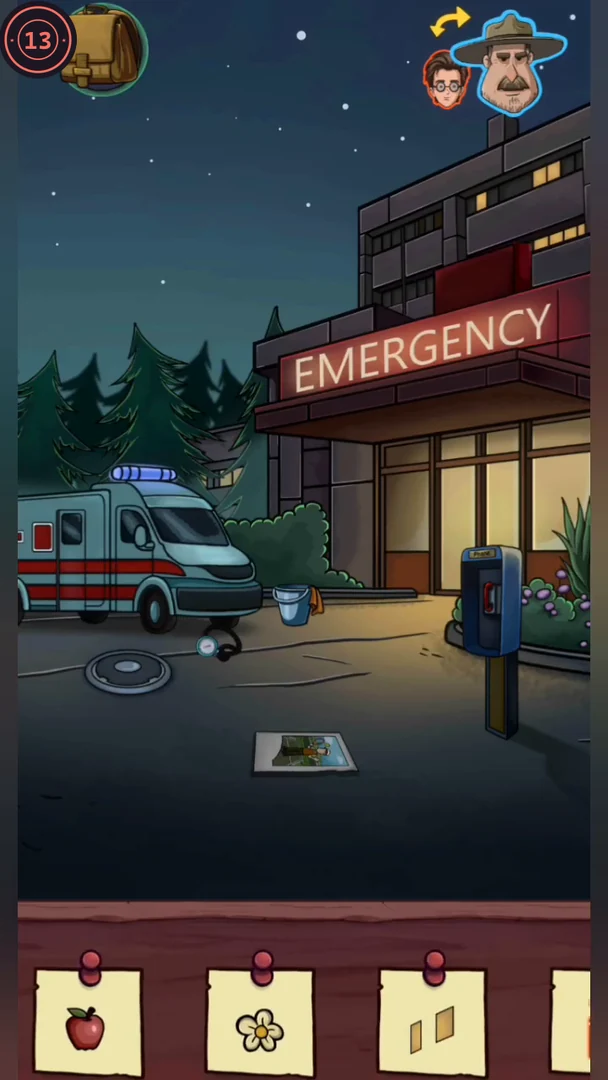
Phil is in intensive care and visitors are not allowed. Joe sneaks in through the lobby while Sheriff Jones works outside by the ambulance.
- As the Sheriff outside, take the pressure gauge from under the ambulance and read the KORV joint-pain flyer on the ground. Clean the phone booth sign with the rag from the bucket, then tap the cleaned Phone sign for its card. Tap the tennis ball from the flyer. In the ambulance, take the headphones and the cuff. Join the gauge and the cuff, put them on the patient, pump and release; he then asks for water.
- As Joe in the lobby, take the X-ray image from under the gurney and the small green bottle on the right side above the red couch. The poster says to ask at reception: the number is 0070. Talk to the receptionist and radio the plan to the Sheriff.
- As the Sheriff, take the coin from the backpack in the ambulance, put it in the payphone and dial 0070 to call the receptionist away. Give the patient the water from the overhead cabinet in the ambulance; he thanks you with an apple.CODE0070
- As Joe, move the papers on the reception desk to find the Elevator Key Card, read the note about Mr. Jones's EPAF at 15:00 for digestion, and assemble the green symbol from its four pieces. Use the key card on the elevator reader. Inside, read the VIROX flu poster, clear the sweet wrappers to uncover the red wrapper and press 2.
- In the ICU, open the curtain, switch on the light box and put the X-ray on it, then tap the screw that shows. Pull out the bedside cabinet for the flower and read Phil's chart (CYMA for memory recovery). Drag the coil of rope out from under the right-hand bed onto the floor beside Phil's bed; it stays there. Switch both lights on, then as the Sheriff tap the two lit windows from outside.
- As the Sheriff, sort the medicines in the ambulance first-aid kit: moon NEXA, thermometer VIROX, brain CYMA, knee KORV, eye ORIN, stomach EPAF. When the kit closes, a pill appears in the ambulance; tap it for its card.
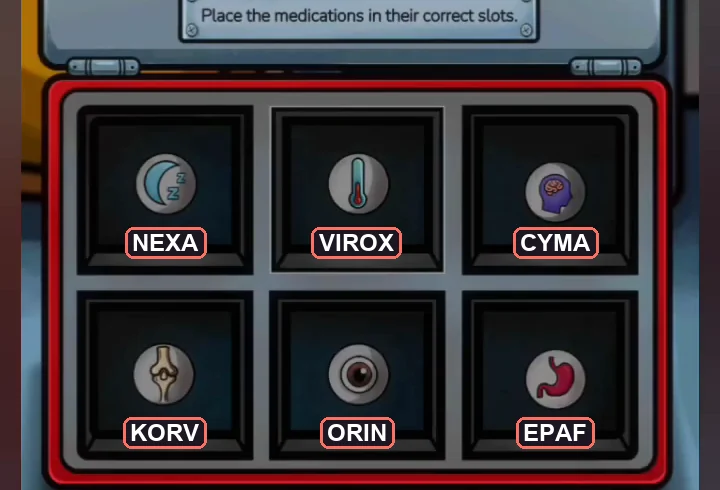
Which medicine goes in each first-aid kit slot. - As Joe, take the elevator back down to floor 1 and tap the down arrow. As the Sheriff, open the bulb panel above the emergency entrance and place bulbs on the top-middle socket, the left and right sockets of the second row, the middle socket of the third row and the left socket of the bottom row. Tap the orange bottle that appears.
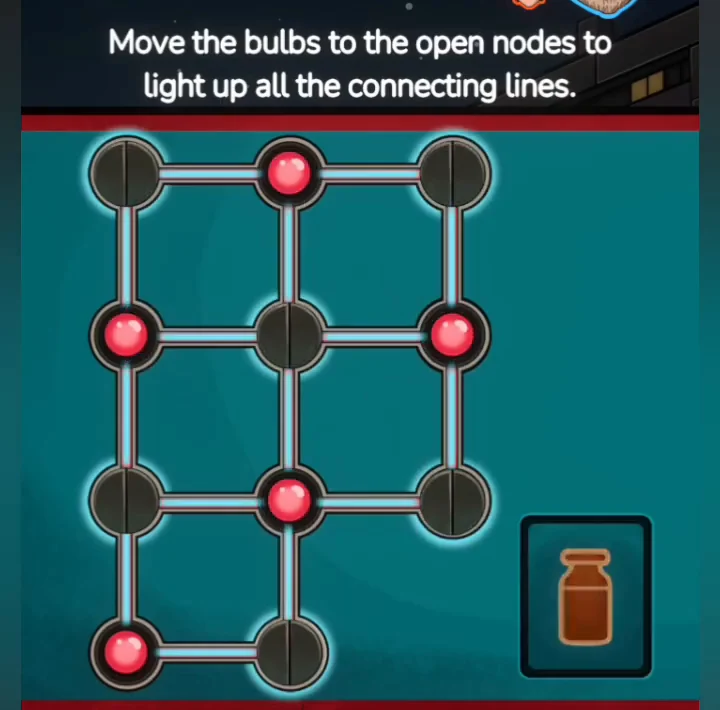
The completed bulb panel with every connecting line lit. - As Joe, go back to the ICU, where the window above Phil's bed is now open. Tie one end of the rope to the overhead curtain rail and drag the rope out through the open window. As the Sheriff, tie the bucket to it and put the headphones in. As Joe, pull the bucket up, then use the cassette player from the radio station, Billy's cassette and the headphones on Phil. The song wakes him. Keep the green bottle; you need it later.
FBI Archive
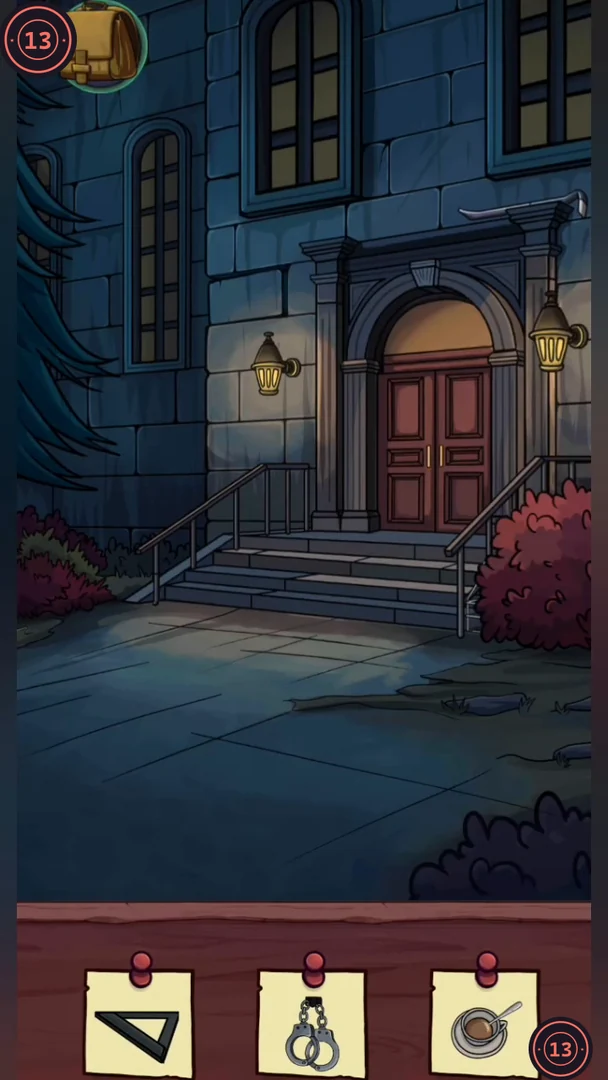
The Sheriff looks for the old case file on Becky Cole. The archivist will not help until you beat him at a game.
- Outside, take the milk bottle beside the red bush by the steps. Take the crowbar from above the entrance and use it on the loose wall block to reveal the envelope, then tap it. Inside the entry hall, tap the black triangle at the near-right edge of the rug. Then go into the office on the left, where the archivist wants to play a game first.
- Pour the milk into the archivist's coffee and stir it, then press the pedal to start the colour peg game. After each guess, the first number counts pegs of the right colour in the right place and the second counts right colours in the wrong place. You only have six attempts, so use both numbers to rule out colours and positions rather than changing one peg at a time. In our game the answer was white, black, purple, orange; if your feedback does not match that example, follow the numbers instead.
- The archivist gives you a pass. The wall clock's hands point to 12, 4 and 8. Open the panel in the front of the archivist's desk to reach the safe. Turn its top dial up, the right dial toward 4 and the bottom dial toward 8, then tap the handcuffs.
- Show the pass to the guard to enter the records room. Move the chair and place the wire coil so it casts the shadow shown on the card, then tap it. Search the boxes and drawers for the handbag, the heavy trophy and the UV flashlight.
- Play the agents game on the records room computer: move your agents to trap both bandits within 8 moves. The bandits react to every move, so close off their escape routes first and then tighten the trap. If you run out of moves, try again. After the Win screen, tap the trophy left on the computer screen for its card.
- In the office, shine the flashlight on the castle painting to reveal the letters ZM, and take the printer cartridge above the frame. Move the trophy onto the floorboard recess to raise the board and take the coin under it. In the records room, unplug the cable from the computer to tick the socket card. Replace the cartridge in the records room printer, then use the computer's photo app to print the file and tap the printed photo. Back at the office bookshelf, drag the globe from the lower shelf onto its empty stand and tap it. Then move the stack of books up to the top shelf and pull the shelf board down to reveal the red book, and tap it.
- Type BECKY COLE, the full name on the sticky note, into the computer search and submit it to find Becky Cole's address, then head to her house.
Hermit's House
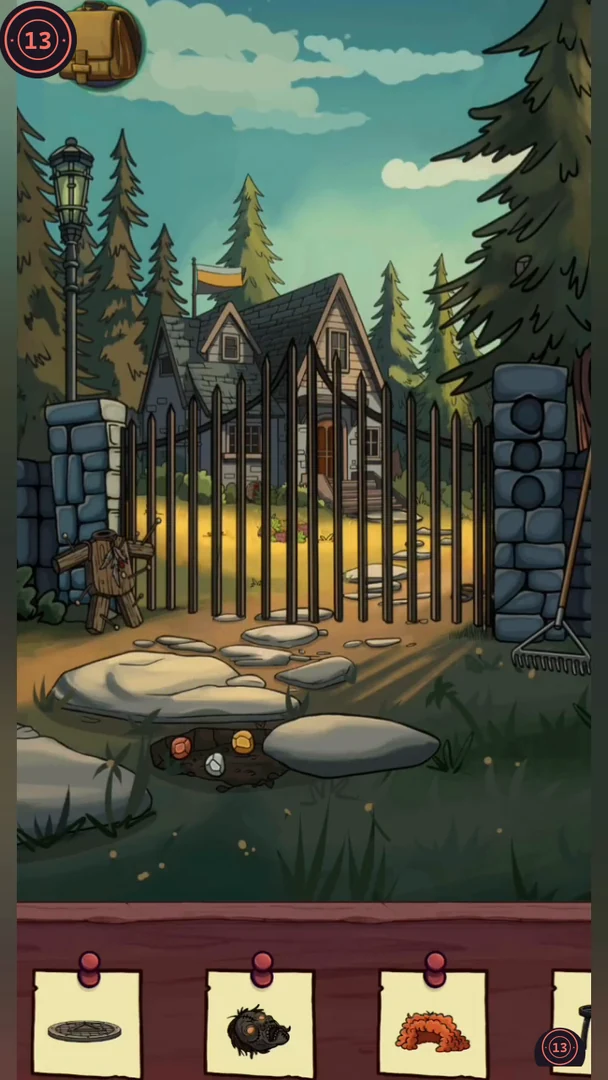
The Sheriff visits Becky Cole's house in the woods. The gate is locked, so start in the yard.
- Take the door handle by the gate. Move the flat path stone to uncover the white and orange stones. The dark grey stone is up in the pine branches just above the right gate pillar; tap it there. The flag on the roof is white, orange and grey: put the three stones in the right gate pillar in that order from top to bottom to open the gate. Take the scissors just beyond the gate. Use the rake leaning against the right pillar to clear the debris in the yard; this uncovers a round sewer cover. Tap it for its card.
- In the hall, move the pot for the blue flower, search the cabinet drawers for the face and wig, use the scissors to cut the cord of the small landscape picture below the dark portrait so it falls and uncovers the spider, and open the white-framed THEY WALK AMONG US clipping beside the blue door and lift the alien face for the star. Peel down the large dark portrait to the right of the clipping to find the keypad safe. Take the Ruler, and use the door handle on the basement door.
- Before going down, read the children's book lying in the hallway. In the basement, press the animal stones in the order cow, pig, goat, horse to get the bone. Take the coconut, and take the short red wooden rod at the left side of the basement, above where the stool stands by the crates near the stairs (not the red yarn). Drag the loose piece of charcoal from the floor onto the crate to draw an X, then tap the marked crate. Pull the stool out beside the stairs on the left, then tap it. Move the red yarn from the crates to the table and measure the yarn balls with the Ruler: red 5, blue 7, orange 4.
- The hall safe shows red, blue and orange dots. Multiply the matching yarn lengths, 5 × 7 × 4, enter 140 and tap the green idol inside.CODE140
- Slide the metal piece on the stair railing up to the top, set the coconut at the bottom end of the railing beneath it, then let go of the metal piece so it slides down and splits the coconut, then tap the two coconut halves that land beside the stairs. Outside, at the left gate pillar, put the red wooden rod into the neck of the headless doll, then attach the doll's head to it. Tap the finished doll.
- Go back inside and down to the basement when you hear a noise. Becky Cole tells the Sheriff she saw the dust near the old tower.
Lookout Tower
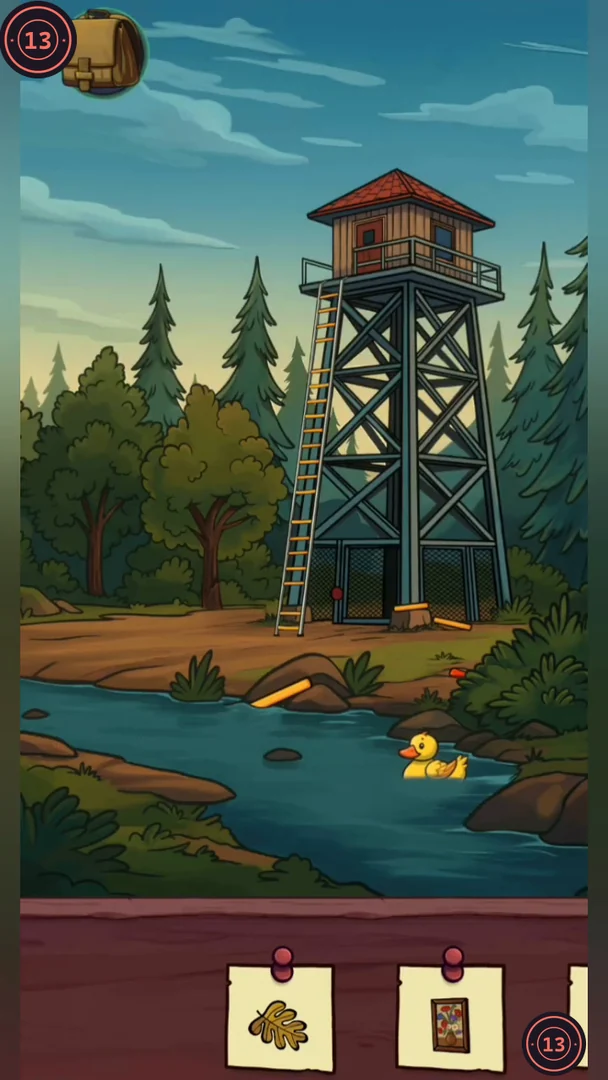
The Sheriff checks the old lookout tower where Becky saw the dust. There is a pond and a cage at the base, a deck at the top and a cabin on the deck.
- Take the brush at the base of the tower, fix the loose ladder rungs and climb up. Tap the yellow leaf on the deck. In the cabin, take the telescope, the axe and the bird feed. Open the curtain to see the mountains, place the painting in the window and tap it from the deck, and flip the light switch so the deck lantern lights up, then tap the lantern.
- Back at the base, scatter the bird feed on the pond so the duck swims over, then tap the duck. Chop the tree with the axe to reveal the red flower, then tap the flower to collect it. Peel the restricted-access sign on the cage to reveal the warning triangle, then tap the triangle to collect it, and pull down the rope from above the cage.
- On the deck, mount the telescope on its tripod and look through it. Tap the blue bird when it lands on the tree branch; it then appears on the cabin roof and its card is ticked.
- Open the cabin safe with its five sliders. The clue is the row of trees in front of the mountain seen through the window: their heights give the slider positions. Counting the stops from the top, set the sliders from left to right to 1, 2, 3, 4 and 2. Take the book and the dye from the opened safe, then take the key from the drawer of the cabin table.
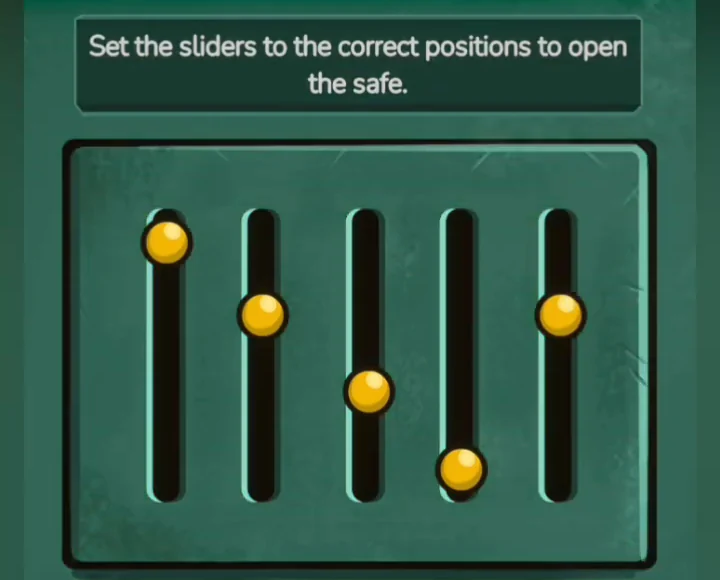
The slider positions that open the cabin safe. - Open the dark star box on the cabin table. Tap one of the blue stars to move the chip there; every star it passes through lights up, and you have 12 moves to light them all. The chip can move along rows, columns and diagonals, and the blue stars show where it can reach (the first move here goes to the upper-left diagonal star), so pick long moves that cover as many dark stars as possible. If you run out of moves, try again with a different route. When the box closes, tap the star that appears in the cabin for its card. Then tap the snowy mountain peak in the cabin window to tick its card.
- Pour the dye into the paint bucket on the deck, dip the brush and paint the antenna pole yellow. At the base, unlock the cage with the key from the table drawer and take the shovel.
- A light appears over the forest. Look at it through the telescope.
Forest Gate
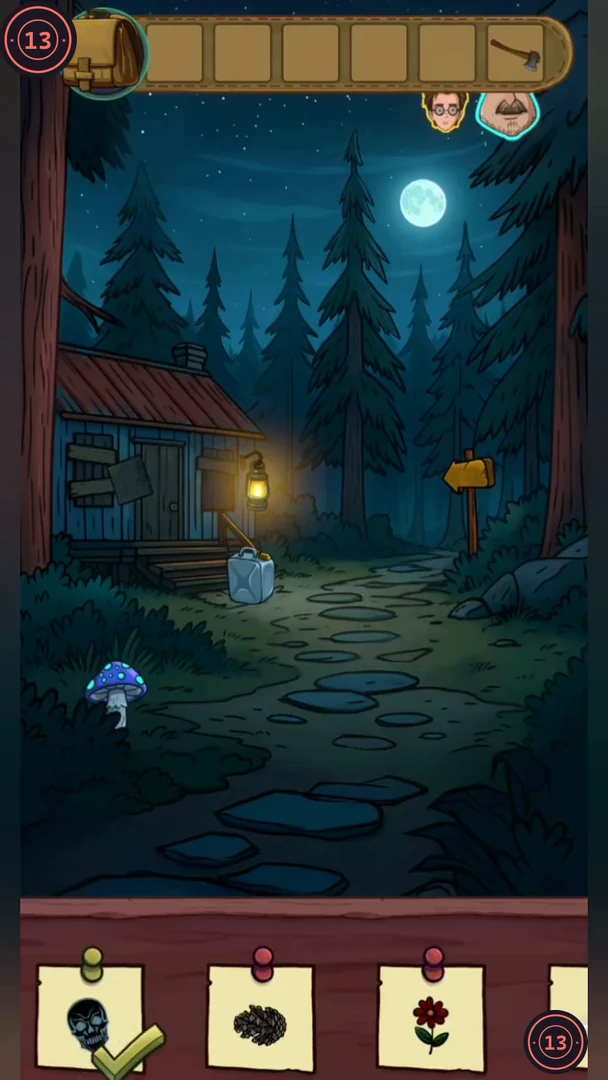
Joe keeps watch from the tower while Sheriff Jones walks into the forest toward a strange standing stone.
- As Joe, climb the tower ladder, remove the cap from the telescope and tap it, then use the telescope arrows to pan up into the sky and then to the left until a large bright star comes into view (the moon is off to the right). Tap the star to collect it.
- As the Sheriff, take the axe and the stick from the path. Turn over the KEEP OUT sign on the cabin front to uncover the skull on its back, and tap it. Hang the lantern by the cabin door, then tap the eye that it reveals in the cabin window. At the archway, tap the metal basin leaning by the wall to lay it flat, then drag it down to the bottom of the screen; it ends up on the path by the cabin. Pour the can standing by the cabin door into it so it reflects the moon, then tap the reflection. Tap the pine cone. Break the archway door with the axe and tap the red flower behind it.
- In the clearing, tap the stone tablet on the ground, shake the pine tree for a nut, and use the stick to guide the insect onto the leaf. Open the chest by lighting these squares of its 3×3 grid: top left, top middle, middle right, bottom left and bottom middle. Take the fireworks from the chest and set them off, then switch to Joe on the deck and tap the red cloud. Switch back to the Sheriff, pull out the round cap to the right of the monument steps and tap it.
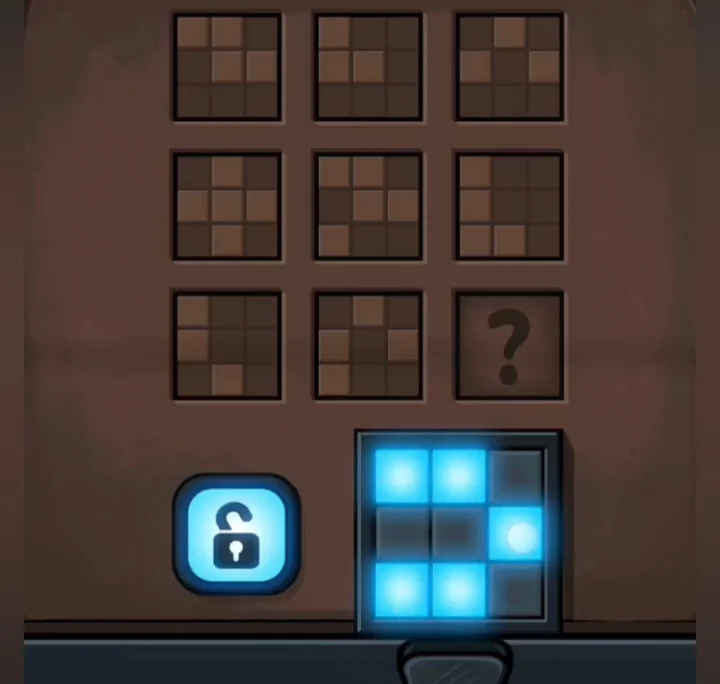
The lit pattern that opens the chest. - As the Sheriff, feed the nut to the raccoon at the base of the courtyard tree and tap the raccoon. Radio Joe about the plate high in the tree. As Joe on the deck, aim the bow at the target and shoot, then as the Sheriff tap the broken plate on the path.
- As the Sheriff, turn the rune wheel on the standing stone and set three symbols one at a time, pressing the check button below the lights after each: first the oval-on-arch symbol at the top pointer, then the S-shaped symbol at the lower-left pointer, then the small outlined rectangle at the lower-right pointer. Each accepted check turns on one more light, and lit lights stay on while you turn the wheel for the next one. The puzzle is solved when the third light comes on.
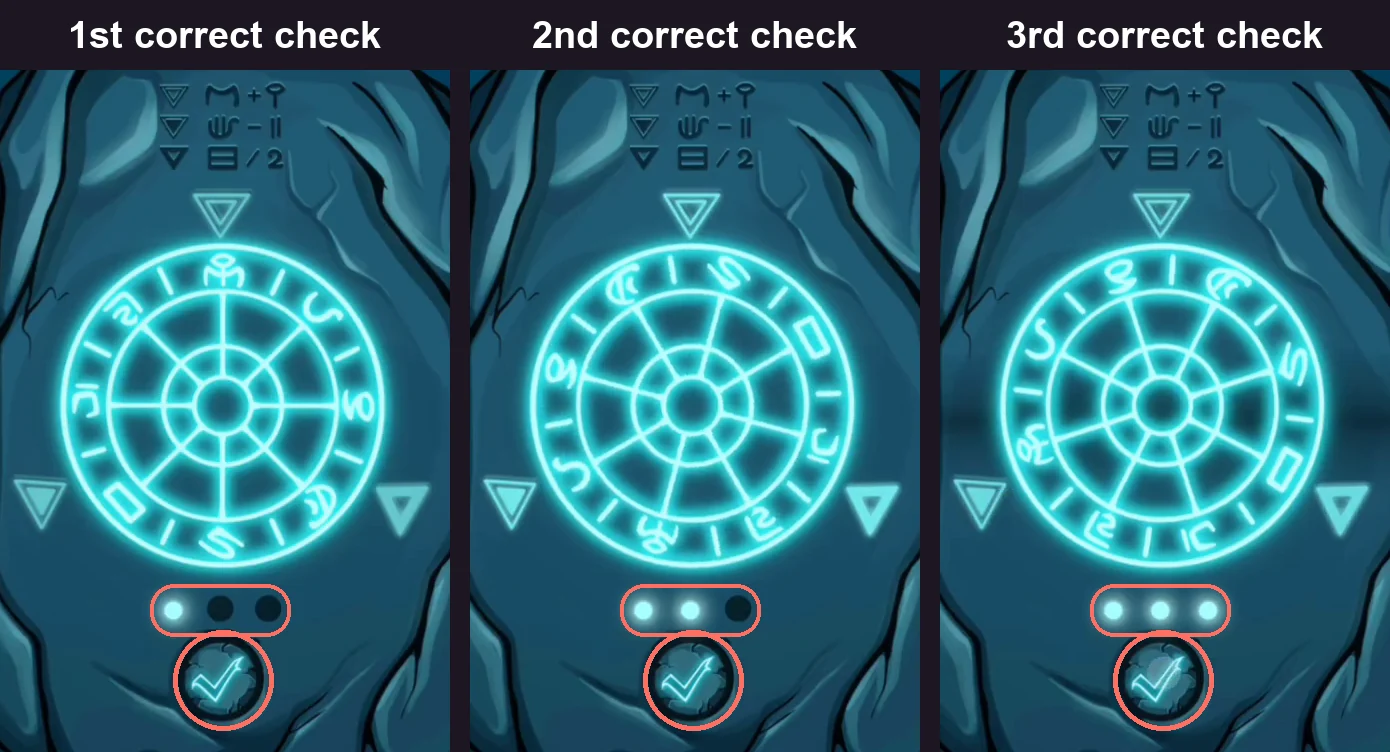
The three accepted positions: oval-on-arch at the top pointer, S shape at the lower left, rectangle at the lower right. Each correct check turns on one more light. - A flash knocks the Sheriff out. As Joe, find him with the telescope, climb down and use the green bottle from the hospital on him to bring him round.
City Hall
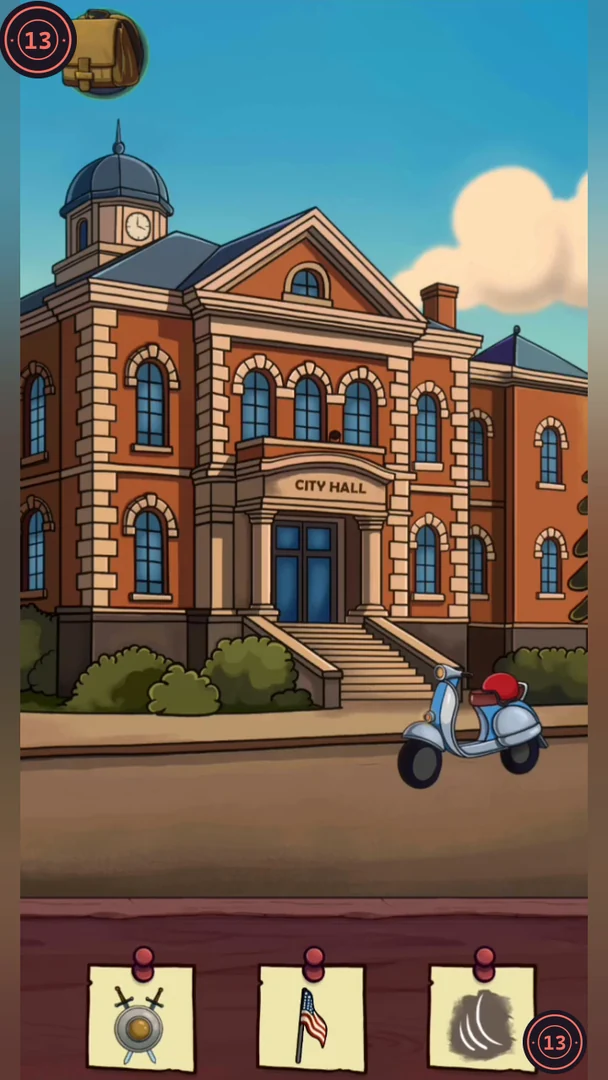
Sheriff Jones hurries to City Hall to warn the Mayor. Search the front, the foyer, the upstairs reception and the office.
- Outside, tap the blue triangle on the roof and the red rose. Tap the clock on the dome and set it to 11:00 to ring the bell. A white ringing-wave symbol then appears on the front of the building; tap it. In the foyer, take the metal pole and the mirror by the statue, and assemble the swords and shield.
- Upstairs at reception, use the hammer lying on the reception desk to break the desk panel and tap the wheel. Take the first half of the scissors from behind the desk. Pull down the coat to uncover the moon picture and open it, then tap the bright moon in the picture to tick its card.
- In the office, take the second half of the scissors from the floor behind the desk and join the two halves. Rotate the globe and tap the continent, and lean the mirror against the front of the desk; a faint heart shows on the desk beside it. Tap the heart to collect it.
- Place all seven plots on the wall map so that no two plots touch side by side. Try the larger pieces first and fit the smaller ones into the remaining gaps. When the map is solved, a map with a compass appears; tap it for its card.
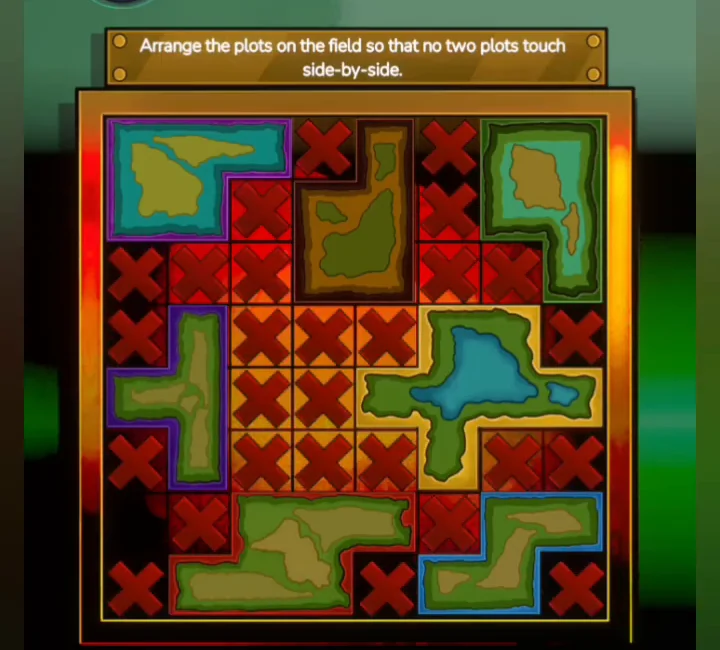
A completed plot map; red crosses mark the empty squares. - In the foyer, cut the ties of the rolled carpet on the stairs with the scissors, unroll it and tap the symbols. Go outside and put the metal pole from the foyer into the mounting hole above the entrance. Then go back to the office, open the window and move the flag onto the installed pole. Go outside again and tap the flag.
- Take the book from the upper drawer below the globe in the office and put it on the reception bookshelf. Swap books until the dolphin picture is whole and the spines read FISH, then tap the completed dolphin to collect its card. Remember FISH.CODEFISH
- On the reception cipher disk, read across from each of F, I, S and H to the letter beside it: FISH becomes TRAP. In the office, place the tokens 1 to 4 on the letter grid on T, R, A and P in that order, then tap the chess knight when the panel opens.CODETRAP
- The Mayor arrives, and the meeting turns into a confrontation that ends with the Sheriff being seized. A message then confirms that Part 1 is over.