Police Station
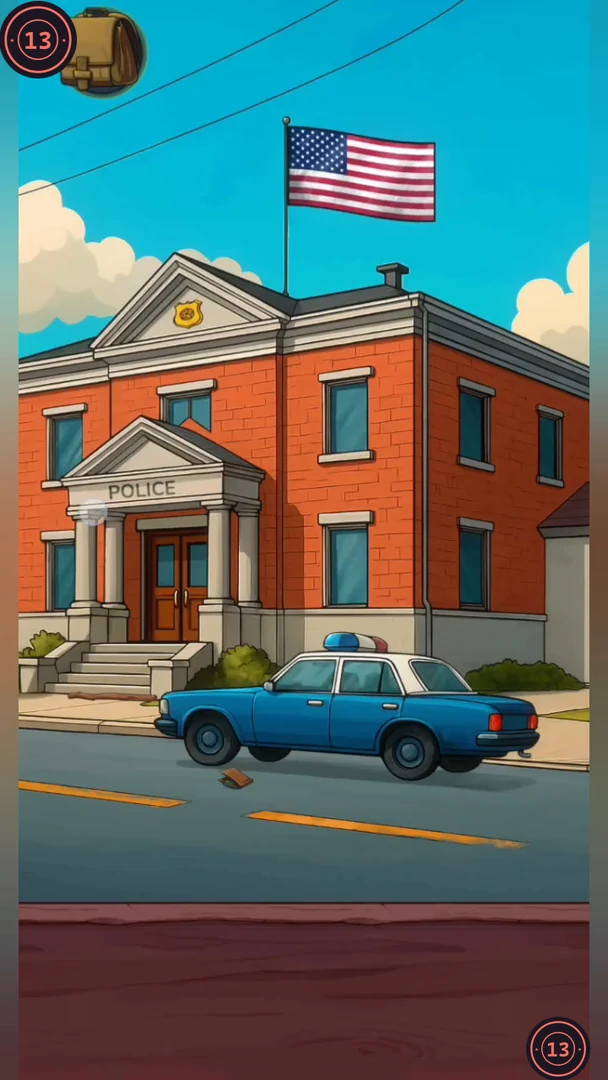
Sheriff Jones starts the day outside the station. This first location teaches the basics: each pinned picture card at the bottom of the screen is an object to find in the scene.
- Outside, tap the wallet lying on the road in front of the police car.
- The soccer ball has rolled under the police car. Take the stick from the pavement, drag it under the car to push the ball out, then tap the ball.
- Go inside. The chair by the flag is broken: first drag the blue chair base out of the doorway on the left, then drag the blue chair back from the bench on the right onto it.
- Tap the framed photo to the right of the office door. It shows a dog; close the photo and tap the police dog now sitting by the flag.
- Tap the flag so it tilts, then tap the baton hidden behind it.
- Mrs. Henderson walks in. Go back outside, open the rear door of the police car, take the flowers and give them to her inside. A pink heart then floats beside her head; tap it to collect its card. News of a robbery then sends you to the map.
Joe's House
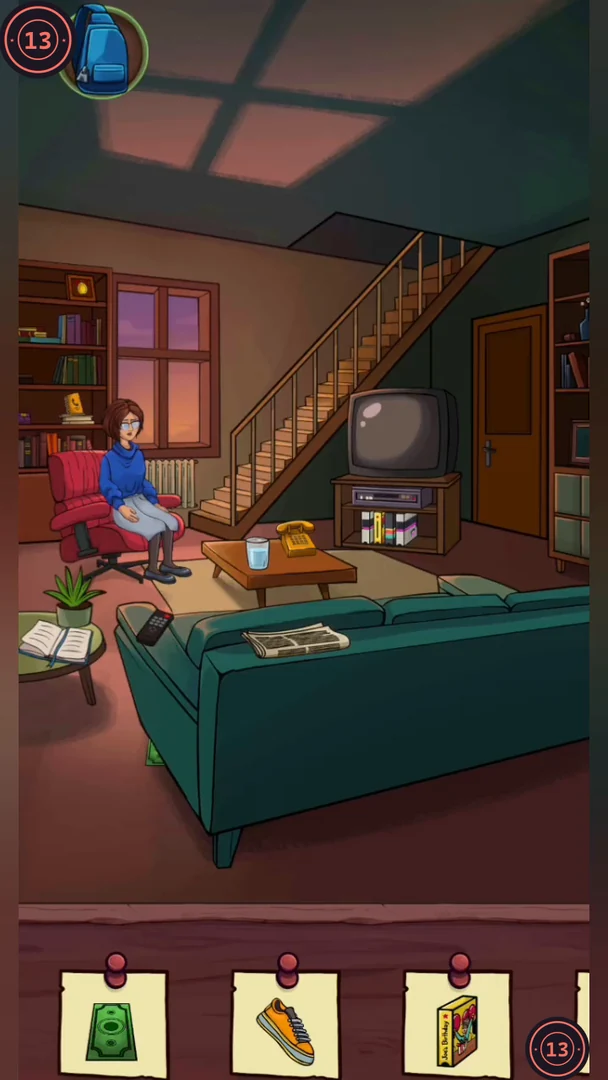
Joe is at home with his mother. Use the living room and the bathroom through the door on the right.
- In the living room, take the banknote from the floor by the sofa. Open the newspaper lying on the sofa and tap the badge on the Sheriff's chest in its photo. Tap the small framed picture on top of the left bookshelf, and take the Phone Book from the same bookshelf.
- Take the "Joe's Birthday" video tape from the TV stand; you need it later at the radio station.
- Go into the bathroom. Open the bin and tap the sneaker. Take the spray bottle from the toilet and spray the dirty stain above the bath; it turns to foam. Wipe the foam away with the yellow towel hanging by the window to reveal a painted sun, then tap the sun.
- Open the battery compartment of the electric toothbrush on the sink and take the Batteries.
- Turn on the sink tap so the water runs, then look at the water meter by the pipes. Its last digit keeps rolling; tap it when it shows 9.
- Back in the living room, open the back of the TV remote on the sofa, insert the Batteries and switch the TV on. Change channels until a cartoon boy with a red bow tie appears, then tap him.
- In the bathroom, open the cupboard under the sink and take the Headache Tablets. In the living room, drop the tablets into the glass of water on the table; Mom takes the glass and drinks.
- When Mom stands up, tap the wallet she was sitting on in the armchair. The phone rings: Phil asks Joe to meet him at the Roadside Cafe.
Roadside Cafe
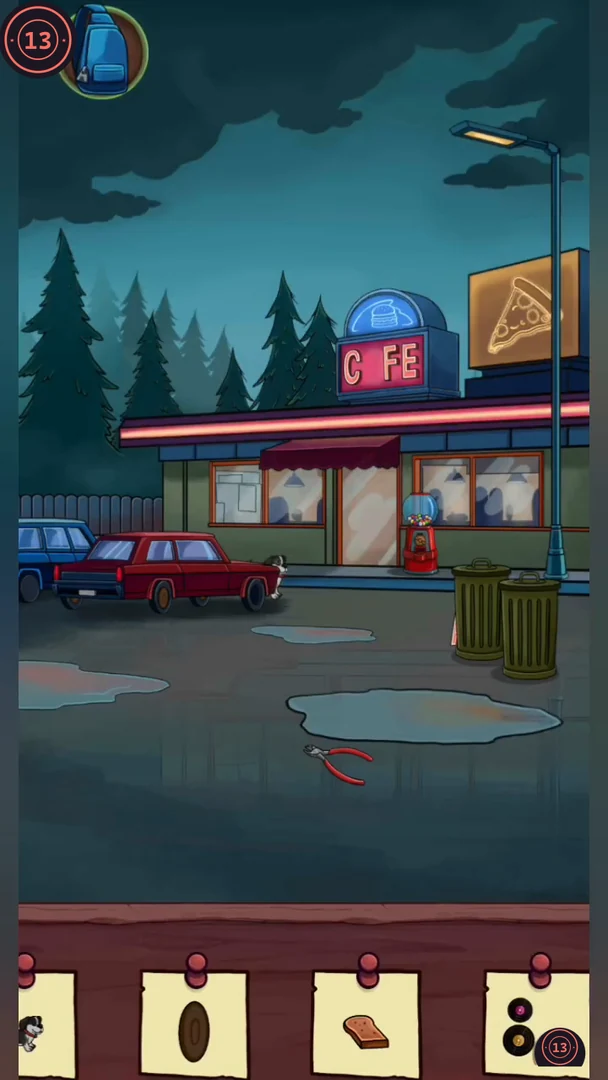
Joe waits for Phil at the cafe at night. The outside area and the dining room are both part of this location.
- Outside, drag the fallen red letter A up into the gap in the sign so it reads CAFE again, and tap the finished sign to tick its card. Then take the Wire Cutters from the pavement beside the puddle. The gumball machine needs a coin, so leave it for now.
- Go inside. Take the Pin from the top of the right bar stool. Move the sheet of paper on the floor to uncover the yellow spill and tap it.
- Open the drawing toy on the left stool and draw a 9 with the arrows: Left, Up, Right, Down, Down, Left.
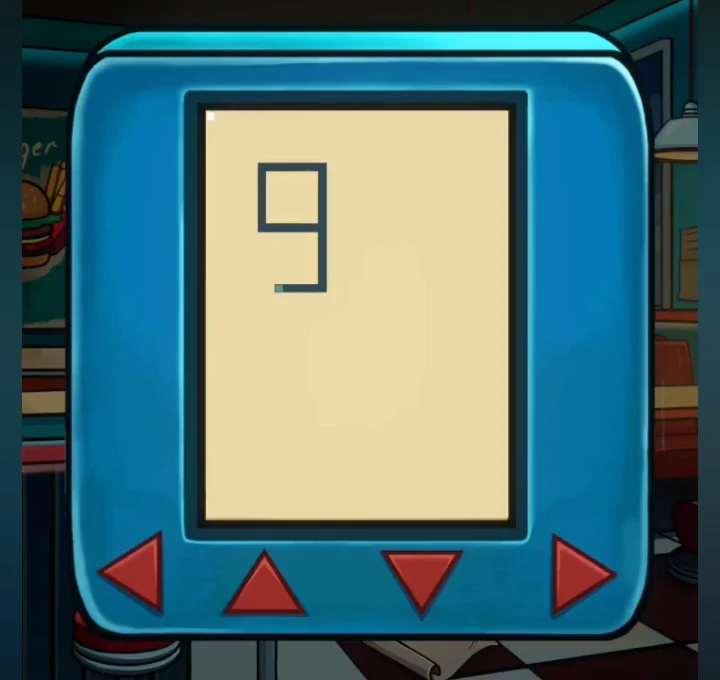
The finished 9 on the drawing toy. - Drag the loose slice of bread into the toaster on the counter and tap the toast when it pops up. Take the Plate of food from the right booth table.
- Put the Banknote into the jukebox and take the 50-cent Coin it returns. Press the Disco button and tap the disco record that appears.
- Move the records on the wall until three of them form the triangle shown on the card (pink at the top, yellow and red below).
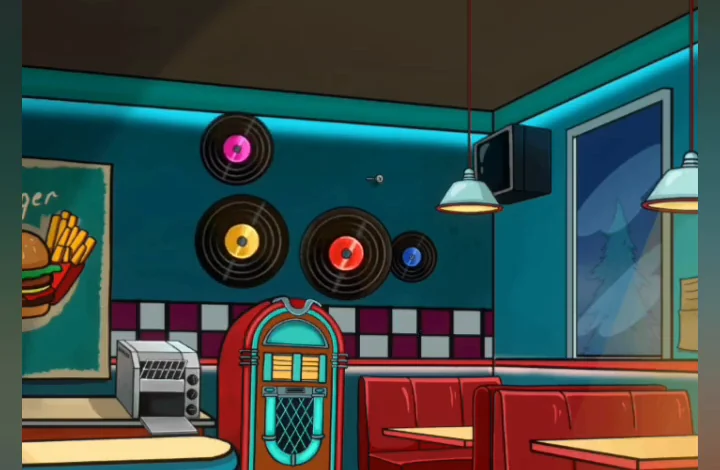
The wall records arranged as a triangle: pink at the top, yellow and red below. - Tap the camera hidden under the booth next to the jukebox.
- Outside, put the Coin into the gumball machine, turn the crank and tap the green gumball. Put the Plate of food on the pavement by the red car. A small animal comes to eat; tap it for its card. Then tap the car's rear tyre.
- With every card ticked, go back inside. Phil finally arrives, cold and acting strangely, and leaves glowing footprints behind him.
Wilkins' Jewelry
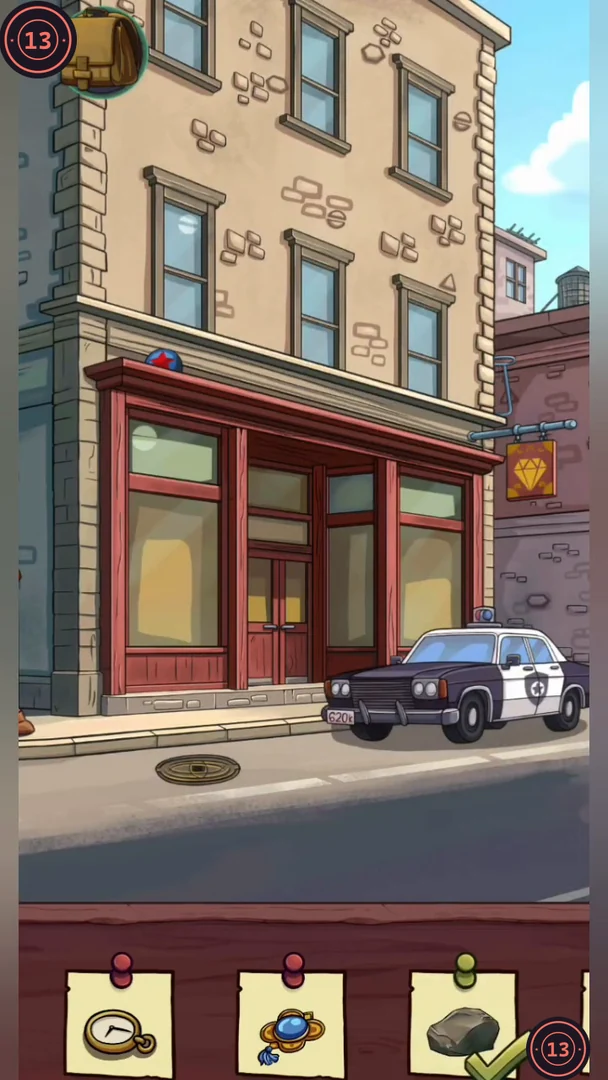
Sheriff Jones investigates the robbery at Mr. Wilkins' shop. Work outside, in the police car and inside the store.
- Outside, take the Stone lying on the pavement by the police car. At the right corner of the shopfront, just above the bracket of the hanging jewelry sign, the end of a metal hook pokes out from behind the wall. Drag the hook out and onto the manhole cover to lift it, then tap the turtle at the bottom of the manhole; it moves around, so keep tapping it until the card ticks.
- Open the police car. Move the loose blue button from the seat into the empty socket on the dashboard and press it, then take the Fingerprint Kit from under the seat. Wind down the passenger window and tap the pocket watch that appears there. Back outside, tap the flashing siren on the car roof.
- Go inside and talk to Mr. Wilkins about the stolen ruby necklace. Tap the green ring on the floor. Then drag the broken glass on the floor aside; the brooch is hidden between the shards. Tap it once it is uncovered.
- Pick up the calculator on the floor. Peel the tape off its solar strip, then press ON, 5, ÷, 0, = to make it show ERROR. Tap the display to collect the ERROR card.CODE5÷0
- Use the Fingerprint Kit on the broken display case: brush the powder over the print on the glass, lift the print with the tape, then press the tape onto the blank card to get the Fingerprint card. Take the Lockpick from the right side of the case.
- On the counter, open the jewelry box and tap the purple gem, then tap the handkerchief next to Mr. Wilkins' hand.
- Outside again, lift the sash of the middle window on the upper floor to uncover the clay jug and tap it. Pull out the TV antenna on the roof of the building to the right and tap it.
- Open the wall safe behind the counter. The keypad shows four symbols: a triangle, a hexagon, a striped circle and a diamond. Each one is a shape hidden on the outside of the shop; count them: 2 triangles, 3 hexagons, 4 striped circles and 1 diamond. Enter the counts in the symbol order, 2341, and tap the gold bar inside. Miss Peterson then walks into the shop and the Sheriff talks to her; tap through the conversation. Phil's House then opens on the map.CODE2341
Phil's House and the Sheriff's Office
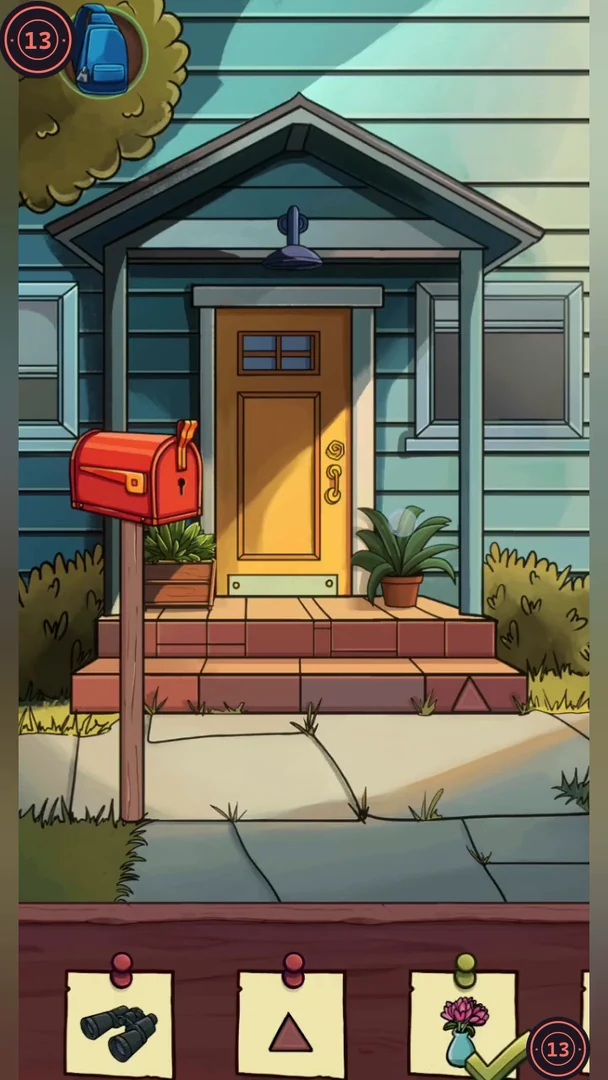
Joe visits Phil, who has been ill since the night before. After the phone call in step 3 you can switch between Joe and Sheriff Jones with the portrait icon at the top right; both characters' finds count toward the same cards.
- On the porch, raise the blind on the right window to reveal the flower vase and tap it, then tap the pink triangle on the step. Knock on the door and talk to Phil's mother; she leaves the door open.
- In the hallway, take the Key hanging on the hook. Tap the screwdriver lying at the bottom of the right door frame, and shift the picture on the right wall to uncover the red X, then tap it.
- Open the Phone Book at the wall phone: Sheriff Jones's number is 9922. Dial 9922 to call him. While it rings, the screen splits to show the Sheriff's office: tap the ringing lines beside the handset of the red phone on his desk to collect their card, then let the call play out.CODE9922
- Switch to the Sheriff in his office. Take the Binoculars from the floor. Use the blade lying on the floor to open the cardboard box and tap the radio inside. Take the evidence container from behind the computer monitor, turn the monitor toward you to show the police badge and tap it, then tap the star on the framed family photo.
- Switch back to Joe and go into Phil's room. Pick up the virtual pet on the rug and keep caring for it with its buttons until the heart is full and it falls asleep. Then tap the Zz above the sleeping Phil.
- Take the Rabbit toy by the bed and tap the superhero figure on the shelf. Place the Rabbit on the hallway floor so its shadow on the wall shows rabbit ears.
- Open the mailbox with the Key and tap the letter inside.
- Return to Phil's room. Phil mutters "Girl... sunset...", and the map opens on the next location.
School Break-In
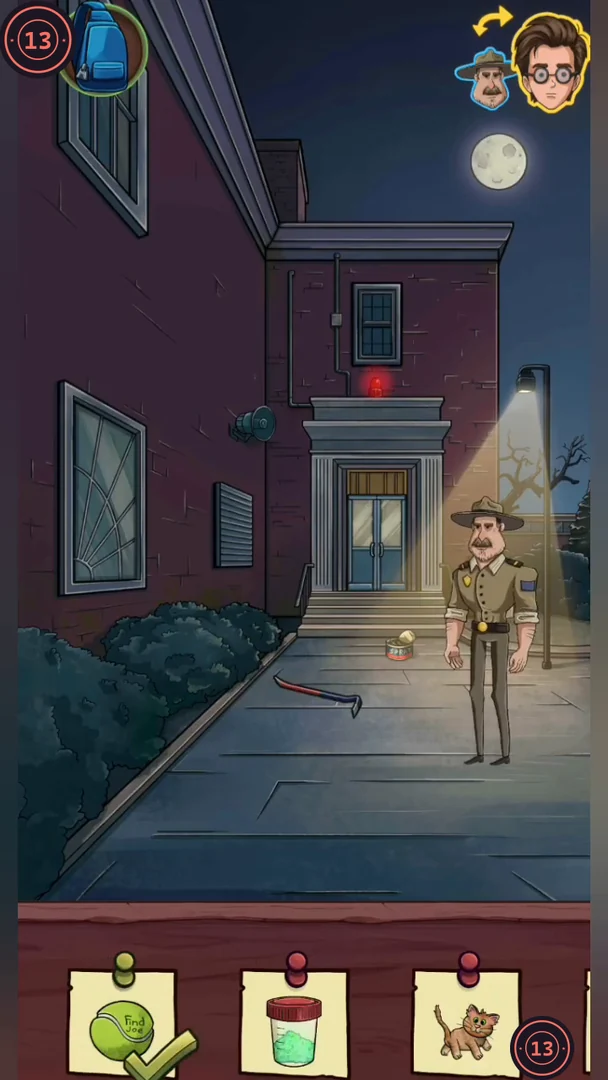
The school alarm has gone off. Joe gets inside while Sheriff Jones helps from the courtyard; switch between them as needed.
- As Joe, tap the tennis ball on the path; this uncovers a red crowbar lying on the paving. Leave it there and switch to the Sheriff, then use the crowbar on the basement grate in the left wall to open it. Move the food can from the steps to the open vent, and tap the cat when it comes out.
- As the Sheriff, use the evidence container on the glowing green powder at the window on the left. The Sheriff cannot fit inside, so Joe says he can squeeze in and the Sheriff hands him the walkie-talkie.
- As the Sheriff, use the Binoculars on the sky to spot the UFO.
- Switch back to Joe and crawl through the opened grate in the left wall; it leads into the school hallway. Switch the hallway light on and then off again; a glowing clock hand appears on the wall clock. Tap it. Slide the DANGER lid of the alarm panel on the right wall aside. Each wire connects two terminals with the same number; cut the green 33 wire and the red 67 wire with the Wire Cutters (33 + 67 = 100). Tap the ALARM OFF sign.
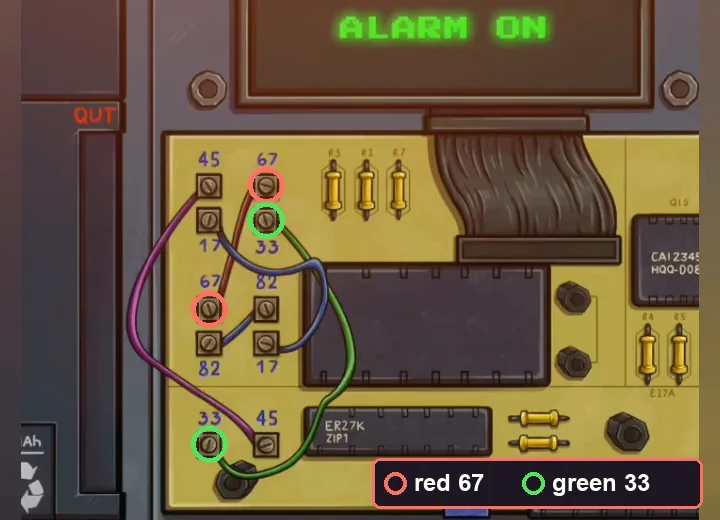
Cut the red wire joining the two 67 terminals and the green wire joining the two 33 terminals. - As Joe, slide the newspaper under the janitor's door. As the Sheriff, throw the Stone at the window to break it, then take the stick propped beside the window and poke it through to knock the keys off their hook onto the paper.
- As Joe, pull the newspaper back, take the Keys and unlock the janitor's room door.
- In the janitor's room, move the broom to free the pink glove and put it with the yellow glove to tick the gloves. Spray the dirty caution sign with the spray from the shelf and wipe it with the cloth on the floor, then tap the cleaned sign to tick its card. Open the window so the toilet paper roll drops, and tap it. Then take the Lockpick that the Sheriff passes through the broken window.
- Use the Lockpick on the office door and lift each pin into its green zone to open the door, then tap the chain on the door.
- In the office, move the object at the front of the desk and open the drawer on the right for the medicine bottle. Tap the star in the small frame on the left wall. Turn the four clips on the back of the desk photo frame, remove the back and take the Photograph.
- Tap the grey device on the right side of the principal's desk to open its display. The display has a fixed blue box in the middle. The buttons on the left and right sides and the buttons above and below the display switch the matching segments of the digit inside the blue box, and the ribbed control at the bottom right shifts the digits one place to the left. Build 5 in the box, shift, build 2, shift again and build 7, which gives 275. Shift twice more: 275 becomes 752 and then 527, the number on the card. A red 527 then appears in the office; tap it for its card.CODE527
- Give the Photograph to the principal. The principal wakes up and talks to Joe and the Sheriff, and the map opens.
Forensic Lab
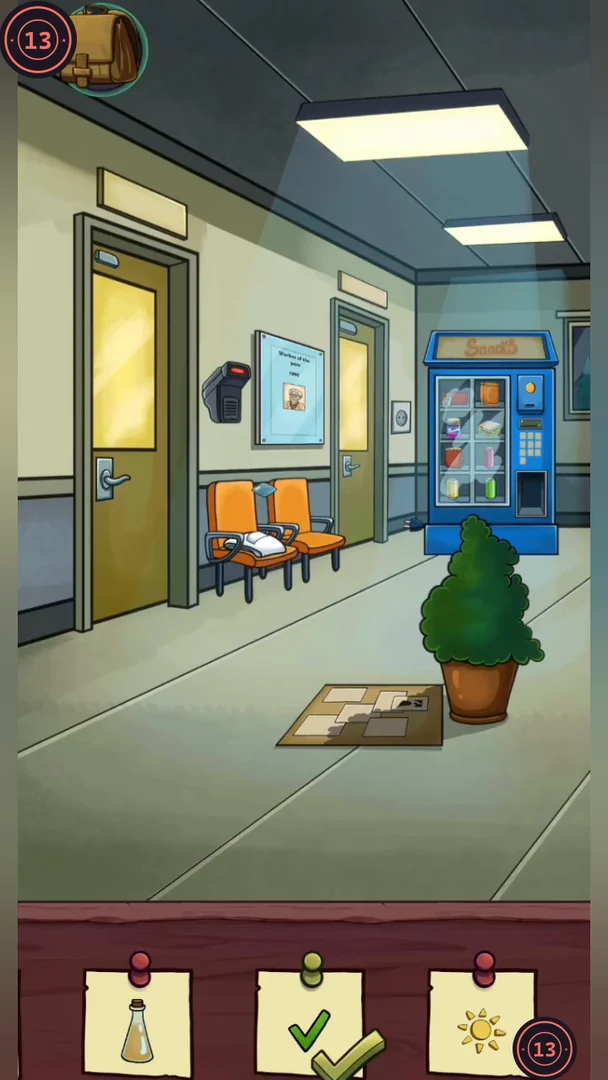
The Sheriff brings the green powder to the forensic lab after hours. The lab has a hallway, a storage room behind the nearer door on the left and the laboratory behind the farther door on the right, beside the vending machine.
- In the hallway, look at the case board on the left wall and tap the cardboard on the floor for the check mark. Take the access card from the white coat on the orange chairs and use it on the card reader beside the nearer door on the left; the reader turns green and the storage room door opens. Plug the vending machine's cable into the wall outlet on the machine's left, between the farther door and the vending machine, so the Snacks sign lights up, then tap the lit sun on the sign. Read the Worker of the Month poster: it gives Professor Adam Doyle's email, adam.doyle@psl.arc.
- Go through the nearer left door into the storage room. There, move the green box and then the red box from the shelves on the left onto the pink spot in the green cabinet, so the red box sits on the green one. Take the Key from the floor and the floppy disk. The desk chair is missing a wheel: take the loose wheel from the shelves on the left, fit it to the chair and roll the chair aside to uncover the alarm clock under the desk, then tap the clock. Tap the blue scarf caught on the pipe above the left windows; it falls onto the boxes on the left, where you tap it again. Knock over the fire extinguisher to reveal a purple JOE mark on the wall, and tap the mark. Open the desk drawer with the Key and take the 50-cent Coin. Keep the Key: you still need it for the laboratory door.
- Back in the hallway, drag the Key onto the farther door on the right, beside the vending machine; the Key turns in the handle and the laboratory door opens. Then put the Coin in the vending machine and type 12 to get the chocolate bar.CODE12
- Go through the right door into the lab. Pour the yellow liquid from the small flask into the empty flask on the desk and close it, then tap the finished flask. Tap the pair of glowing lights in the night sky outside the window. The tree painting hides three digits in its leaves: 8 at the top left, 4 in the centre and 5 on the right. Open the safe in the storage room with 845 and tap the glowing jar inside.CODE845
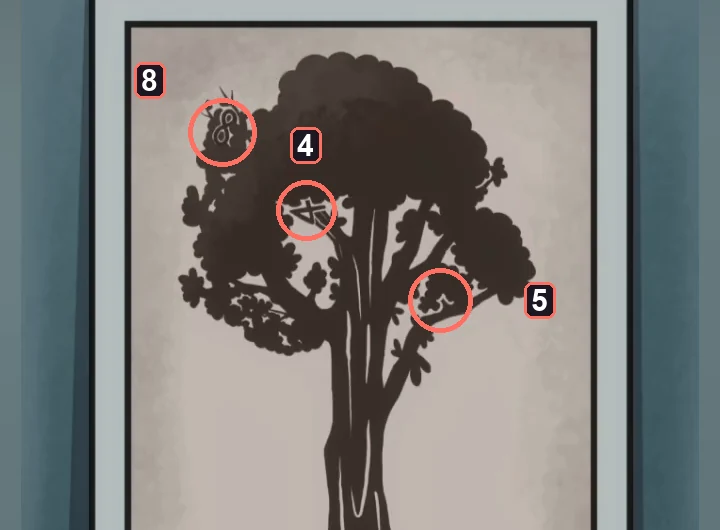
The digits hidden in the tree: 8 at the top left, 4 in the centre and 5 on the right. - The lab computer's password hint is the sum 1 + 2 + ... + 99, so log in with 4950. Open the fingerprint app, put the Fingerprint card into the scanner on the right desk and run the search; there is no match. A yellow warning triangle then appears on the screen. Tap it to tick its card, which you need before the lab's clue can be found.CODE4950
- Open the flap under the computer monitor and insert the floppy disk, then select the new red photo icon on the screen to see a photo of the professor. Zoom in and pan to the grey building sign to the left of the professor, which reads Mashtots 53 (not the red book he is holding), and tap the number 53.
- Place the green powder from the evidence container on the microscope. The analysis needs Reagent A73: type A73 on the dispenser on the storage room wall, take the reagent, add it to the microscope and run the analysis.CODEA73
- The substance is unknown. Share the result by email to adam.doyle@psl.arc, send it and tap the paper plane on the screen. Tap the pink glasses on the hallway floor by the left door. Only a sliver of the last orange bottle shows beside the grey box on top of the green storage cabinet: drag it out to the left of the box, then tap it. When every card is ticked, read the professor's reply on the computer.
Hospital: Phil's Room
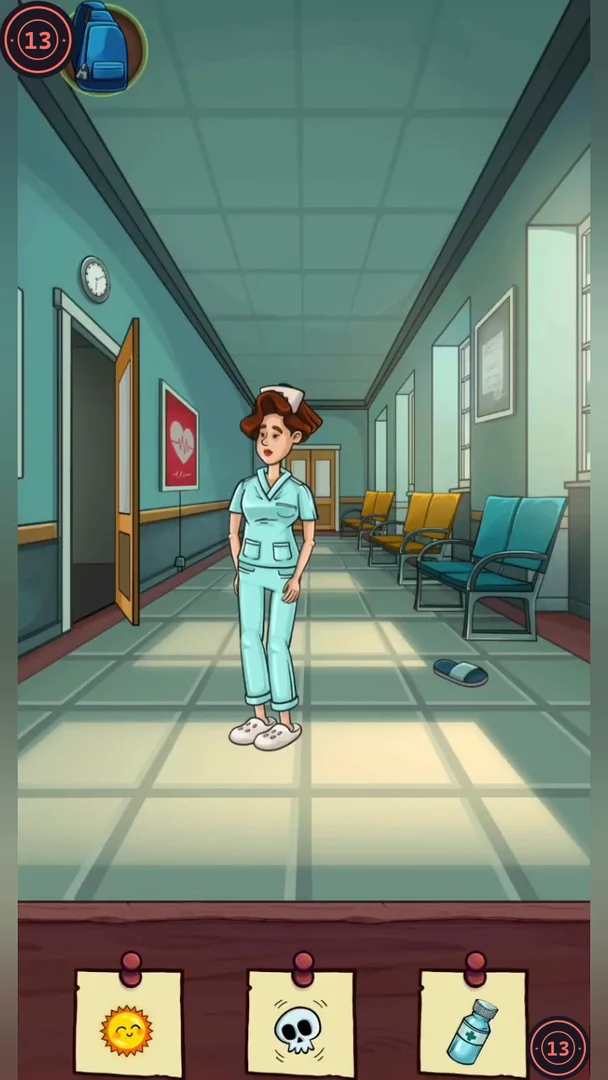
Phil is in hospital and Joe watches over him. You move between the hallway and Phil's room.
- In the hallway, use the Pin from the cafe to pin the curled corner of the notice flat, then tap the white flower-shaped seal it uncovers. Tap the cross on the nurse's cap. Tap the wall clock, drag the long hand away from the 3 to uncover the numeral underneath, and tap it.
- In Phil's room, take the thermometer from the trolley and use it on Phil; it reads 100°F. Tap the 100°F readout on the enlarged thermometer to collect its card. Take the power strip from the floor and the stethoscope by the bed.
- Press the up arrow on the bed control panel; picture pieces come loose. Fit them together in the frame on the wall, then tap the finished picture for its card. Lift the lid off the kettle on the bedside cabinet, then pour the water bottle standing on the trolley into it. Let it heat, then pour the hot water into the red mug to reveal the skull, and tap it.
- Tap the yellow handheld game on the red chair to play the egg game: move the platform to catch the falling eggs until WIN appears. This is a timing game rather than a fixed solution, so watch where each egg is falling and keep the platform under it. When WIN appears back in the room, tap it for its card.
- Give the stethoscope to the nurse in the hallway. A small sun appears beside her; tap it for its card. Note the colours of the waiting chairs: four yellow chairs followed by two blue ones.
- Open the locked box in Phil's room by setting its tiles to yellow, yellow, yellow, yellow, blue, blue, and tap the medicine bottle inside.
- Close the window and draw the curtain to uncover the calendar and tap it. Pick up the extension cord from the floor and connect it and the power strip to the wall socket by the bed. Drag the power strip through the doorway into the hallway and plug in the heart picture frame there. When the frame lights up, tap the heart in it to collect its card.
- When the heart card is ticked in the hallway, go back through the door into Phil's room. Phil murmurs "You stand in the fire of the sunset...", which sounds like a song lyric.