Level 1: The Car Wash Murder
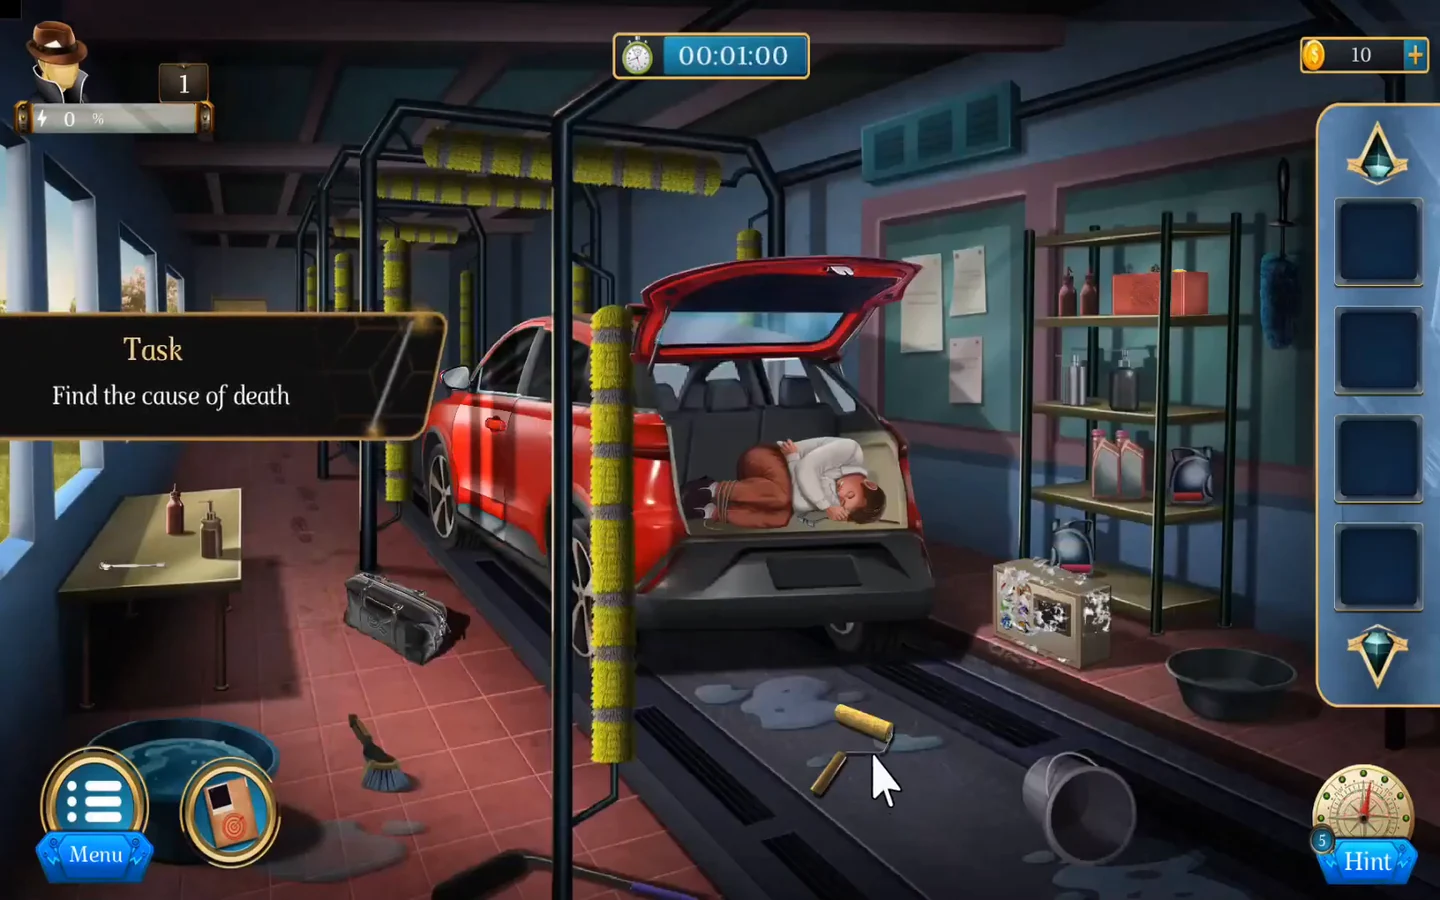
A victim is found tied up in a car's boot at a car wash. Find the cause of death, then follow the killer's trail into the utility room.
- In the car wash, take the Roller Brush from the wet floor between the tracks, the Spoon from the workbench on the left and the Box from the metal shelf on the right. Open the Box in your inventory to take the Spanner.
- Open the black bag on the floor left of the track and take the Solution, X-ray Glass, Colour Scale, Powder and Brush.
- Use the Roller Brush on the foam-covered control box to the right of the track. Press its play button and note the order the buttons light up: red, blue, green, yellow, red. You will need this order later.
- Open the red car's driver door and take the Air Purifier from the cup holder. Use the Powder and then the Brush on the centre console to reveal a fingerprint.
- Examine the Air Purifier in your inventory. Remove its lid with the Spanner, scoop the residue with the Spoon and add it to the Solution, which turns green. Hold the Colour Scale beside it: green matches HCN, hydrogen cyanide. This completes the first task.
- Go to the door at the back of the car wash and use the X-ray Glass on its lock panel. The two gears each carry a plug that must end up in the matching opening on the right. Tapping a gear turns it, and the gears are linked, so turning one can move the other as well. Keep turning them until both plugs sit in their right-hand openings. The door opens.
- In the utility room, pick up the Wrench from the floor right of the spilled oil drum. Use it on the valve of the steaming pipe on the right wall. The steam stops and reveals a warning panel with coloured lights, each beside a group of dots.
- Take the Tool Box from the red barrel under the stairs and open it in your inventory. Match each colour in the flash order to its dot count on the warning panel: red 4, blue 5, green 7, yellow 2, red 4. Arrange the dial tiles to read 4, 5, 7, 2, 4 from left to right. The button under a dial turns it so its tile moves to the other side; when two neighbouring tiles face each other, the swap button above them exchanges them.CODE4-5-7-2-4
- Inside the tool box, fill the five slots in the bar at the bottom by tapping the tools whose silhouettes match them: a fan-like rotor, a round perforated disc, a two-pronged tool, a pair of pliers and a wrench. With all five in place, a Hammer appears; take it.
- Take the Wiping Cloth from under a step of the red staircase. Use it on the black oil puddle under the overturned drum to uncover a Key, and take it.
- Use the Key on the small grey box on the wall beside the stairs and take the Stick inside.
- Select the Stick in your inventory and tap it to extend it. Then examine the locker on the left wall and use the extended Stick to push the sparking wire away, which lets you open the locker. Break the wooden back panel with the Hammer, then tap the sewer opening to take the Evidence (a torn piece of fabric). The level is complete.
Level 2: Trapped in the Burning Warehouse
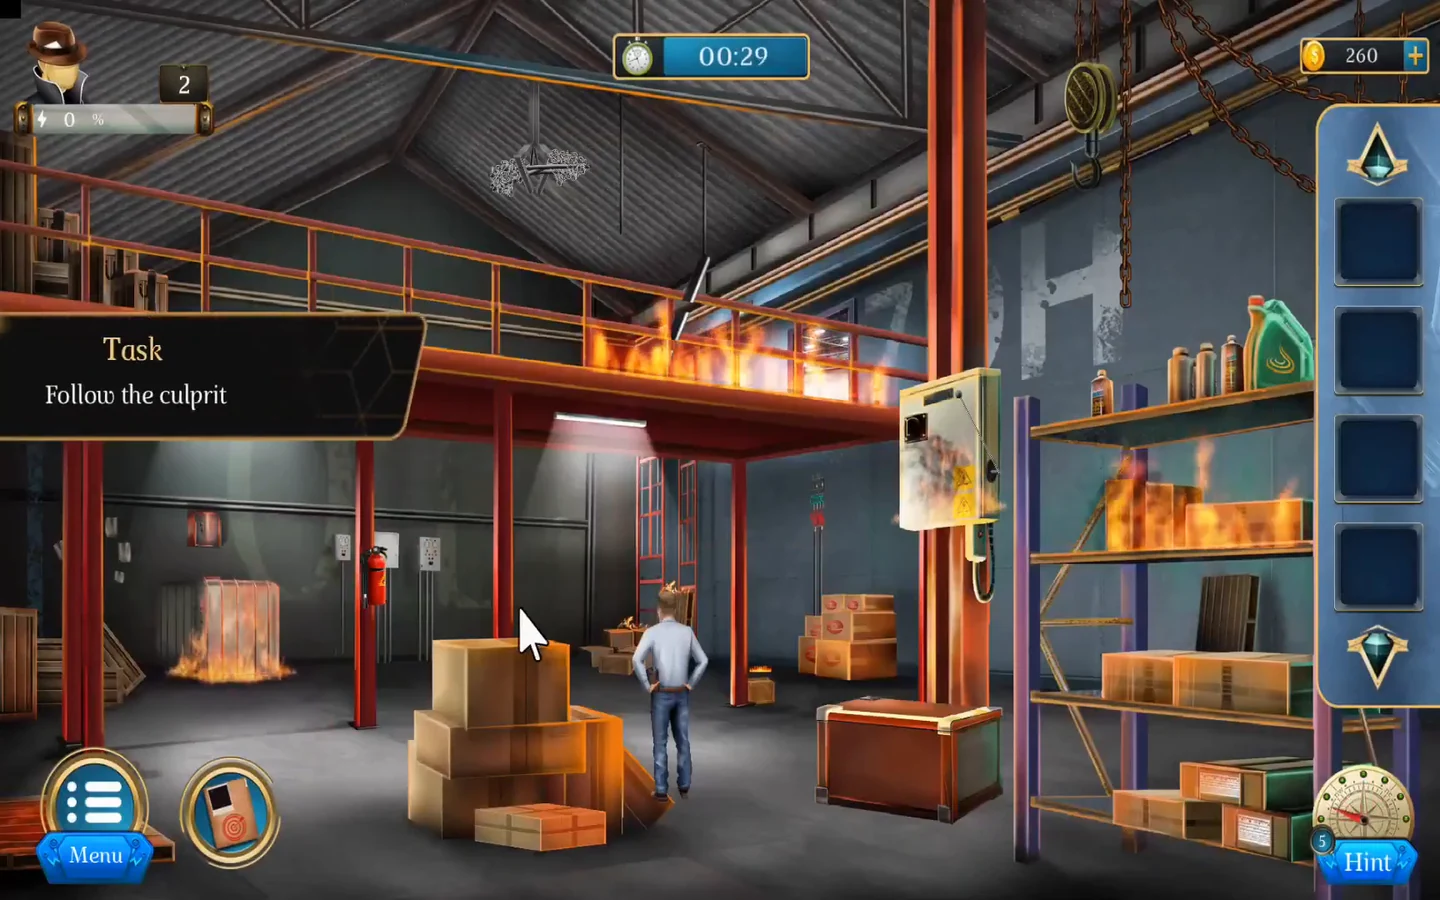
Kyle is ambushed in a lake warehouse and wakes up surrounded by fire. Follow the attacker across the mezzanine, then use the overhead crane to escape.
- Take the Fire Extinguisher straight off the red support pillar beneath the mezzanine. Slide the top cardboard box in the left foreground aside to find the Safety Gloves.
- Use the Safety Gloves on the hot metal wall box surrounded by flames and take the Axe. Open the wooden crate near the central pillar and take the Spanner.
- Examine the Fire Extinguisher in your inventory and use the Spanner on its valve to make it usable, then tap the prepared Fire Extinguisher to take it back. Spray the burning boxes on the right-hand shelves; a label with the number 98532 appears.CODE98532
- Spray the fire around the electrical box on the central pillar, then pull its lever. A ladder drops from the mezzanine and Kyle climbs up.
- Break the small wooden crate behind the left railing with the Axe and take the Box. Open it in your inventory, set the middle row of the number wheels to 98532 and press the lock button. Take the Rope Gun.CODE98532
- Select the Rope Gun in your inventory and use it by the pile of boxes on the lower floor. Drag to aim at the upright metal beam on the burning mezzanine across the fire; when the reticle turns green, press the blue fire button beside the gun. Firing alone does not get you across. Inspect the doorway on the far side of the fire; Kyle says he has to cross the fire, and the first task is completed. Close the dialogue. In the doorway close-up the metal beam now lies across the flames; if it has not fallen yet, inspect the doorway again to bring it down. Then tap the doorway again to cross the beam and reach the crane room.
- In the crane room, take the Rope and the Note Pad from the desk on the right. Flip the Note Pad's first page to see a diagram of five symbols. Take the Steel Rod from the workbench on the far-left walkway and use it on the Rope to make a Ladder, then tap the finished Ladder to take it.
- Examine the crane console on the right railing. Tap the grey front cover below the lever to take it off and expose an empty socket, then tap the lever: it breaks off, so the crane needs repairing before you can use it. Take the Hockey Bat from the top of the metal shelf on the left. Examine the large chest in the left foreground and use the Hockey Bat to knock the burning lump and paintbrush off its lid. This uncovers a smaller Wooden Box on top; take it.
- Open the Wooden Box in your inventory. Select a chip, then use the red arrow button to move it along a line into an empty space. Using the Note Pad diagram, arrange the chips like this: gun top left, police cap top right, radiation symbol in the centre, skull bottom left and the infinity symbol (a horizontal figure eight) bottom right. Take the Capacitor inside.
- Pick up the Crow Bar from the walkway floor near the railing. Use the Ladder at the edge of the walkway to climb down to the lower floor.
- Pull the blue Sheet off the crate on the lower floor, then use the Crow Bar to open the crate. Tap parcels to flip them and reveal their symbols, then pair parcels with matching symbols until the puzzle is done. The skip button (10 coins) also completes it. Take the Lever and the Nail from the open crate.
- At the crane console, insert the Lever in the top slot and fix it with the Nail. If the grey front cover below the lever is still closed, tap it off to expose the socket, then put the Capacitor in that socket. Tap the repaired lever to activate it, then press the red button. The crane moves over the fire, but its bar is burning.
- Use the Sheet on the burning crane bar. Kyle grabs it, rides the crane over the fire and escapes through the exit door. The level is complete.
Level 3: Murder at the Modelling Agency
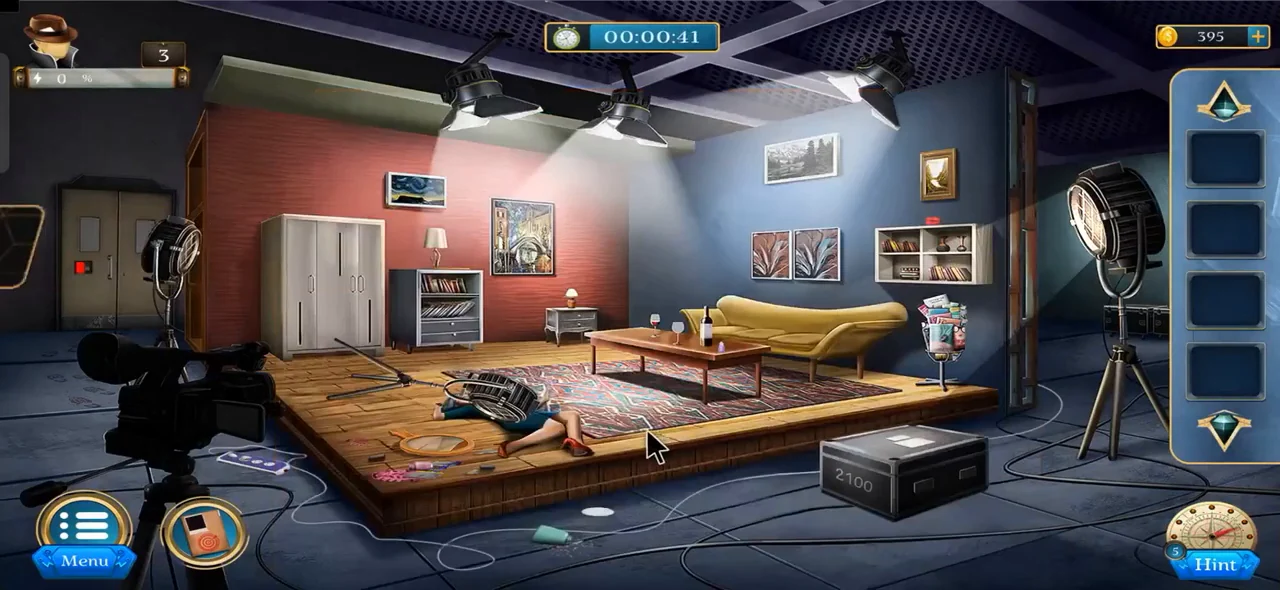
A model has been killed at a modelling agency. Search the studio, then the make-up room, to find a suspicious person and collect evidence.
- In the studio, take the Ring Box from the shelf on the right wall and open it in your inventory to get the Black Spider Card and the Ring. Collect the Access Card from the bottom-left corner of the stage, the Sponge Cloth from the floor, the Nail Polish Remover from the table on the right and the Scene Paper from the lamp on the bookshelf.
- Open the large box in front of the stage. Each of its four slots has a symbol: a dial, two masks, a clapperboard and a play button. The Scene Paper gives a number for each symbol: dial 7, masks 3, clapperboard 2, play 6. Enter 7326 and tap the lock button, then take the Connecting Wire.CODE7326
- Use the Connecting Wire on the cables of the camera at the front left, then tap the image on its screen. Swap pieces two at a time until they form the lion picture. Take the Memory Card.
- Tap the stage light to raise it and examine the victim. Kyle notes that this murder looks like a copycat crime.
- The scanner by the door on the left shows an error. Select the Access Card in your inventory to open it, then place the Nail Polish Remover beside it and apply the Sponge Cloth to the remover. Tap the bottle to wet the cloth, which then wipes the card clean, and tap the cleaned Access Card to take it back. Use the clean card on the scanner and go into the make-up room.
- In the make-up room, take a Key from the row of keys under the chessboard on the right wall and use it on the chest below the mirrors to get the Greeting Box. Take the Analog Clock from the table on the right.
- Turn on the light with the switch on the left wall; the time 10:00 appears on the floor. Set the Analog Clock in your inventory to 10:00 to get the Secret Key, then use it to open the cabinet on the left. It holds a board of photos.CODE10:00
- Insert the Memory Card into the printer on the left table and take the Photo Copy. Place it with the photos in the cabinet and tap them.
- Select the comparable photos in pairs: the city building with the ruined building, the paraglider with the scuba diver, the man in the wave with the surfer, the beach with the pool float, the Taj Mahal couple with the Eiffel Tower couple, and the night lighthouse with the cliffside lighthouse. Kyle realises the victim and her make-up artist share the same tattoo.
- Move the flower box beside the right-hand mirror to find the Clue Paper. Remove the wig from the mannequin head and place the Clue Paper on it to reveal the date 16-10-2003.CODE16-10-2003
- Open the Greeting Box in your inventory. Each number you press enters at the left and pushes the others right, so press 3, 0, 0, 2, 0, 1, 6, 1. The display then reads 16102003. Take the Greeting Card and examine it to complete the level.CODE30020161
Level 4: The Witness's House
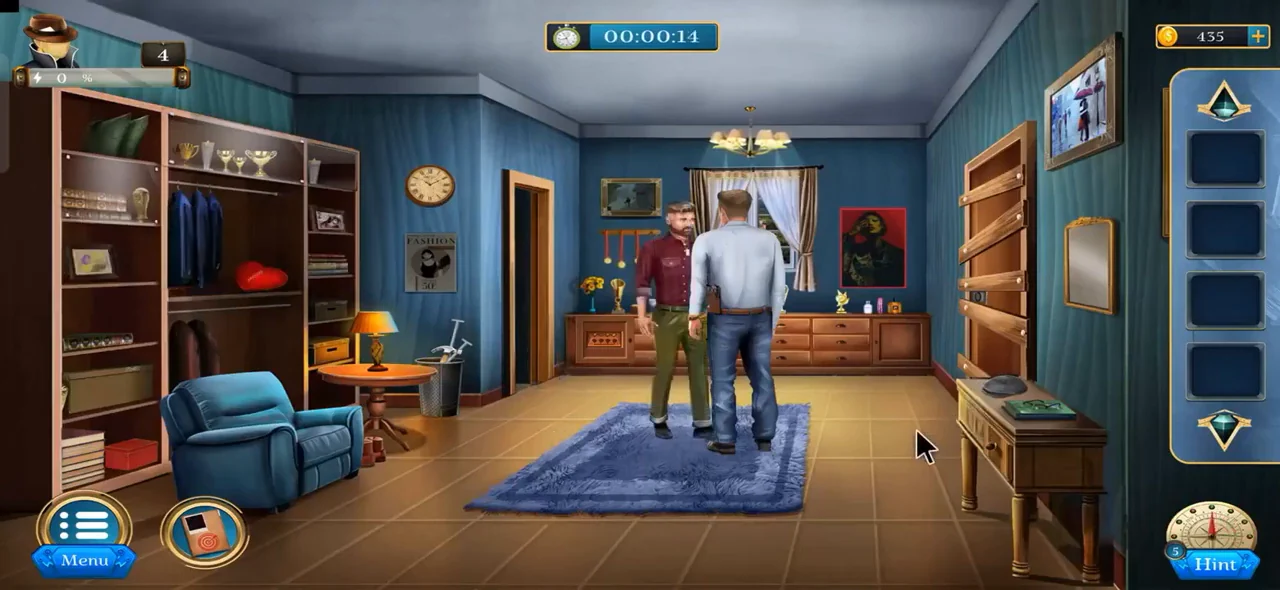
Kyle questions the witness Frederic at his home. While Frederic fetches tea, search the room for evidence, then explore the basement.
- After the conversation, Kyle asks for tea and the witness leaves. Open the drawer of the cabinet on the right and take the Vanity Box. Open it in your inventory to get the Knife.
- Cut open the red heart-shaped pillow on the right-hand shelf with the Knife and take the Button. Take the Hammer from the basket on the left.
- Take the Chemical Perfume from the bottles in the top-right corner and spray it on the mirror on the right wall. Two symbols appear with numbers: triangle 1 and double chevron 2.
- Open the red box on the bottom of the left shelf and take the Shoe. Examine it in your inventory: it has nail polish on it, and its sole shows two more symbols, diamond 3 and cube 4. Kyle restrains the witness.
- Insert the Button into the empty slot of the machine at the bottom left. Use the arrows to choose a slot and the green button to change its symbol. Set triangle, chevrons, diamond and cube from left to right, then take the Door Mantle from the cabinet.CODE1-2-3-4
- Use the Hammer to remove the planks from the door on the right. Place the Door Mantle on the lock, then turn each of the three rings with its button until every gap lines up with the opening at the bottom. Go through to the basement.
- In the basement, take the Shovel, the Fuel Can from the foot of the stairs and the Metal Plate from the shelf right of the stairs. Open the backpack by the chair on the left and take the CNC Book.
- At the generator on the right, remove the white cap and pour in the Fuel Can. Open the switch panel. Its twelve switches must be turned on in a set order. This map shows each switch's place in that order. Top row, left to right: 3, 5, 8, 10, 1, 11. Bottom row, left to right: 12, 2, 4, 9, 6, 7. Turn them on in ascending order from 1 to 12: first the fifth switch on the top row, then the second switch on the bottom row, then the first switch on the top row, and so on. When all twelve are on, press the separate green button beside the switch panel to start the generator; the CNC machine needs it running.
- Insert the Metal Plate into the CNC machine by the stairs. Open the CNC Book to its last page with ticked circles in four rows of two. On the machine, press the matching buttons: both in row 1, the right one in row 2, both in row 3 and the left one in row 4. Take the Handle.
- Put the Handle on the electrical box on the wall above the stairs and open it. Pull the lever inside to show four clocks pointing to 9, 7, 3 and 8. Set the four dials on the left wall to the same positions to raise the bars of the small room.CODE9-7-3-8
- Dig the freshly turned earth in the small room with the Shovel. Open the plastic bag to find the Face Mask and the Rope. The level is complete.
Level 5: The Morgue and Maize's Apartment
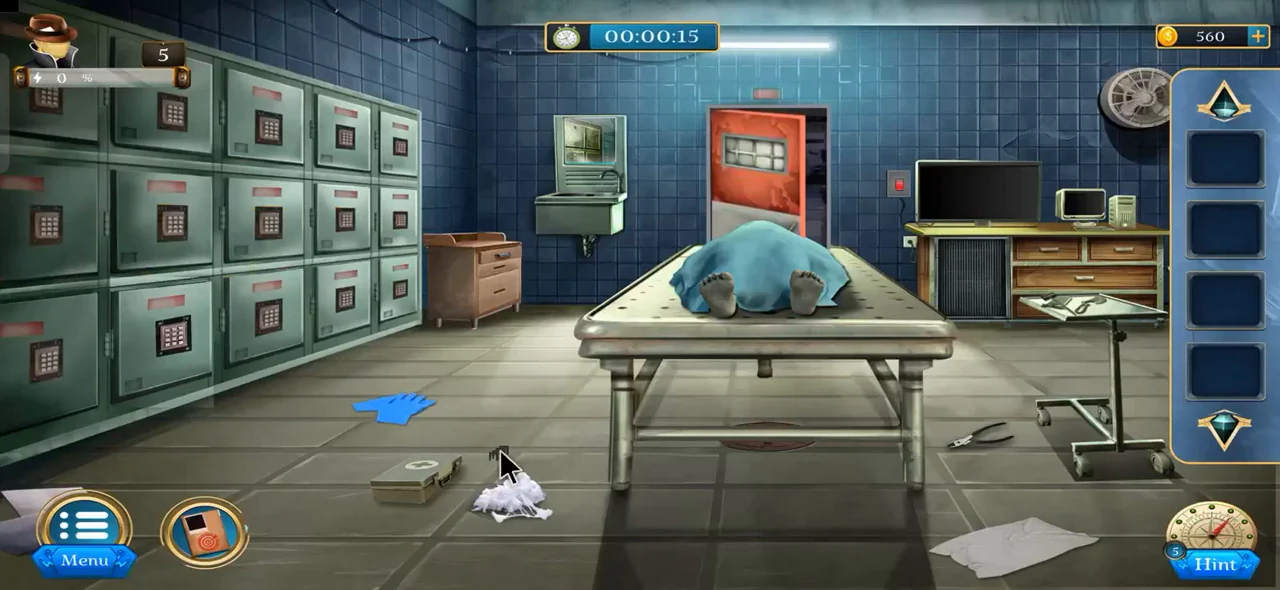
Examine the body of the 34th victim in the morgue, then treat Kyle's wound at his partner Maize's apartment.
- In the morgue, take the Medical Kit and the Clips from the left side of the floor. Pull the chain in the sink to drain it and take the Key from the bottom.
- Examine the Key: its tag shows a wheelchair, a chart screen, a stethoscope and a caduceus. Open the Medical Kit and move the symbols along the connecting lines until the top row reads wheelchair, chart screen, stethoscope, caduceus from left to right. Take the X-ray and the UV Light.
- Attach the X-ray to the large screen on the right, fix it with the Clips and press the red button to light it. A column of Greek letters with numbers appears beside the film.
- Open the drawer of the cabinet at the top left to get the File, then open the File to take the ID Card. It belongs to Daniel.
- Open the cabinet under the screen and remove the jars from the top shelf to reveal a tangle of lines linking letters to numbers. Follow the lines for D-A-N-I-E-L to get 1, 2, 4, 3, 5, 6.CODE124356
- Switch on the computer, type the password 124356 and press the Enter arrow at the right end of the green keyboard's middle row. The screen shows a password written in Greek letters; the lit X-ray converts them to 48725.CODE124356
- Enter 48725 on the locker keypad on the left to slide out the body bag. Take the Cutter from the floor near the instrument stand on the right and use it on the body bag, then tap the zipper to pull the bag open. Use the UV Light on the body: the number 34 and a spider tattoo appear, completing the first task.CODE48725
- In Maize's apartment, take the Key from the trash can, the Oil from the small table at the bottom left, the Alcohol from the fridge and the Makeup Kit from the desk. Remove the sheet from the bathroom mirror to reveal 52638.CODE52638
- Open the Makeup Kit: its colours are numbered. Reading 52638 gives purple, pink, yellow, blue, green. Open the black box on the cabinet at the top right and select two symbol buttons at a time to swap the colours above them. Arrange the colours in that order, then take the Lock Picker.
- The Key breaks in the desk drawer at the top left. Use the Lock Picker and then the Oil on its lock to open it. Find all the listed objects in the drawer, then take the First-aid Kit.
- Open the First-aid Kit to get the Cotton and the Bandage. Tap Kyle, then use the Alcohol, the Cotton and the Bandage on his back. Maize spots the number 37 tattoo on his neck, so Kyle is the Black Spider's next planned victim. The level is complete.
Level 6: The Invisible Ink Trail
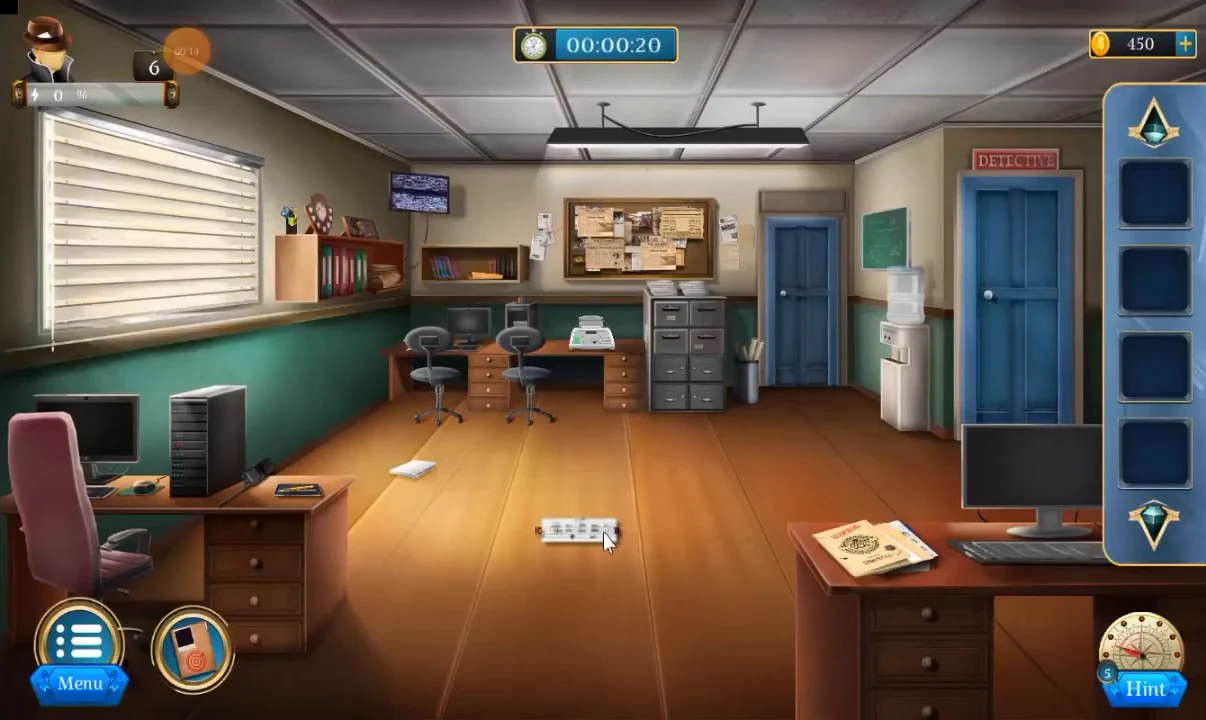
The lab results point to a rare invisible ink. Map the shops that sell it, search a tattoo shop for proof, then question the buyer at the police station.
- In the office, take the Scale and the Paper from the middle of the floor, the Mobile from the left desk (move the pencils first), the Pen Stand from the left bookshelf and the Map from the bookshelf on the back wall. Open the bottom-right drawer of the right cabinet for the Ink Cartridge, and move the top files on the right desk to find the Paper Bundle.
- Move the four notes on the corkboard to see arrow clues numbered 1 to 4. The Paper from the floor is clue 5. Take the Marker from the Pen Stand in your inventory.
- Open the Paper Bundle to get a blank Paper. Put it in the fax machine on the front desk, insert the Ink Cartridge and press OK, then take the Report.
- Open the Mobile and draw the pattern shown on its screen to unlock it. It then searches for shops near the crime scene.
- Open the Map, place the Scale and the Marker on it and tap it. Enter the five arrow clues in order with the arrow buttons: up, left, up, left; left, left, left; down, left, down, down; right, right, right; up, right. Each clue lights one lamp, and the route leads to a tattoo shop.CODE↑←↑← ←←← ↓←↓↓ →→→ ↑→
- At the tattoo shop, take the Laser Machine beside the seller. Peel the tape off the poster behind the seller and take the Poster. Slide the panels behind the seller aside to reveal two groups of green symbols.
- Place the Laser Machine by the small panel on the left wall. Tap it to raise the power to 50, then fire to cut the panel open and reveal a board of symbols on tracks.CODE50
- Turn the Poster over to see a network diagram; together with the green panel symbols it gives the target layout, which also appears in the small panel to the left of the board. The silver symbols cannot be moved one at a time. Each coloured arrow button on the board shifts the whole group of tokens on its linked track, empty sockets included. Tap the coloured arrows to move the groups until the board matches the target layout. This puzzle can take many moves, so check your progress against the target panel as you go. When the board matches, the safe opens; take the Key Part.
- Take the Magnifier from the drawer of the small rolling cart and use it on the picture on the left wall to reveal coloured dots on a grid. Take the Box from the cabinet on the right.
- Open the Box and move the coloured chips to match the picture. In the 6 x 5 grid, put green at row 1 column 1, yellow at row 1 column 4, purple at row 2 column 6, light blue at row 3 column 2, dark blue at row 4 column 5 and red at row 5 column 3. Take the second Key Part and combine the two parts, then tap the completed Key to take it.
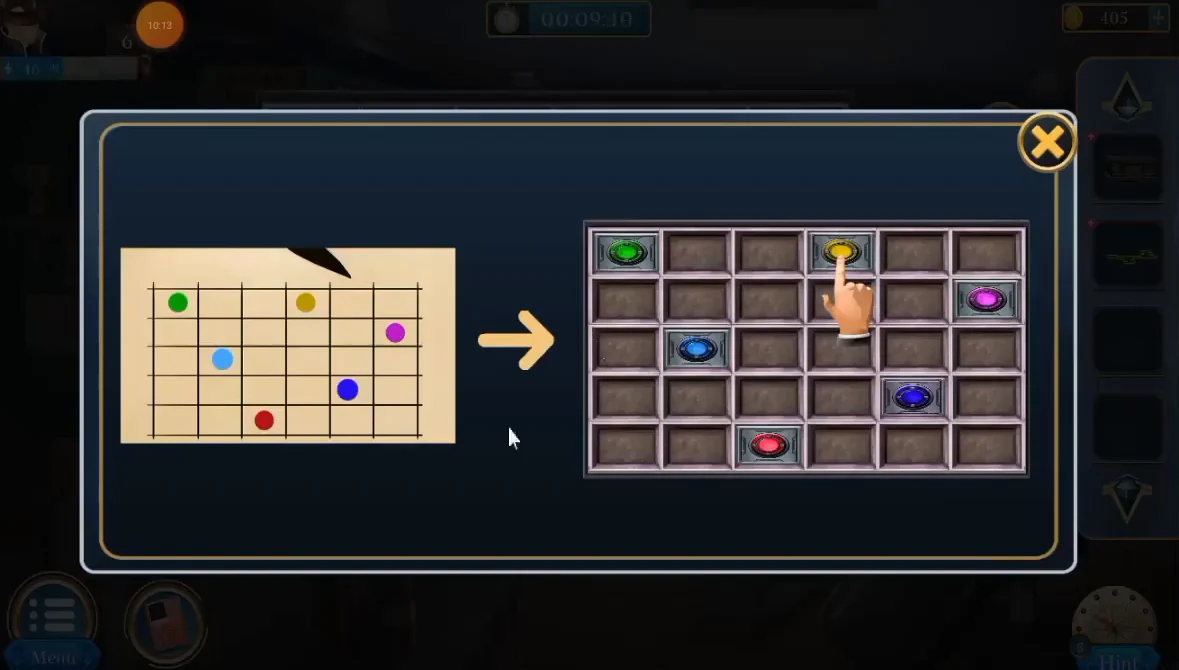
Chip box solution: copy the dot positions from the clue picture. - Open the safe under the left desk with the Key and take the Ink Powder. Show it to the seller, who admits selling the ink and plays the security footage. Frederic Cassatt bought it, completing the task.
- At the station, take the two Photos and the Report from the small table on the right. Lift the bars of the hatch in the door and take the Ball.
- Place the Ball in the maze machine on the left wall. Each number sets the clock hand, which turns the arrows and rolls the ball. Press 3, 2, 4, 2, 7, 10, 3, 2, 3, 2, 5 to guide it to the red circle, then take the Safe Box.CODE3-2-4-2-7-10-3-2-3-2-5
- Examine the clock on the wall: the board beside it lists A 2,4,6,8; D 1,3,5,6,7; H 1,2,3,4,5,7; R 1,2,4,5,6,8. Open the Safe Box and turn its disks until the letters read A, D, H, R, then take the Truth Serum.CODEADHR
- Take the Syringe Box from the cabinets on the left and open it for the Syringe. Turn on the TV in the top-right corner and open the folder to see a green pattern. On the machine in the top-right corner, light these squares (7 columns): row 1 column 4; row 2 columns 3 and 5; rows 3 and 4 columns 2, 3, 4 and 6; row 5 columns 3 and 5; row 6 column 4. Take the Wire and the Lie Detector. Select the Lie Detector case in your inventory to open it, attach the Wire, then tap the wired Lie Detector to take it back.
- Tap the suspect and put the items on the table in this order as he answers: the Lie Detector, one Photo, the Report, then the second Photo. He remembers nothing, so select the Syringe in your inventory, load it with the Truth Serum and tap the loaded Syringe to take it back, then inject him. Frederic reveals the Black Spider hypnotised him. The level is complete.
Level 7: The Mummy in the Art Gallery
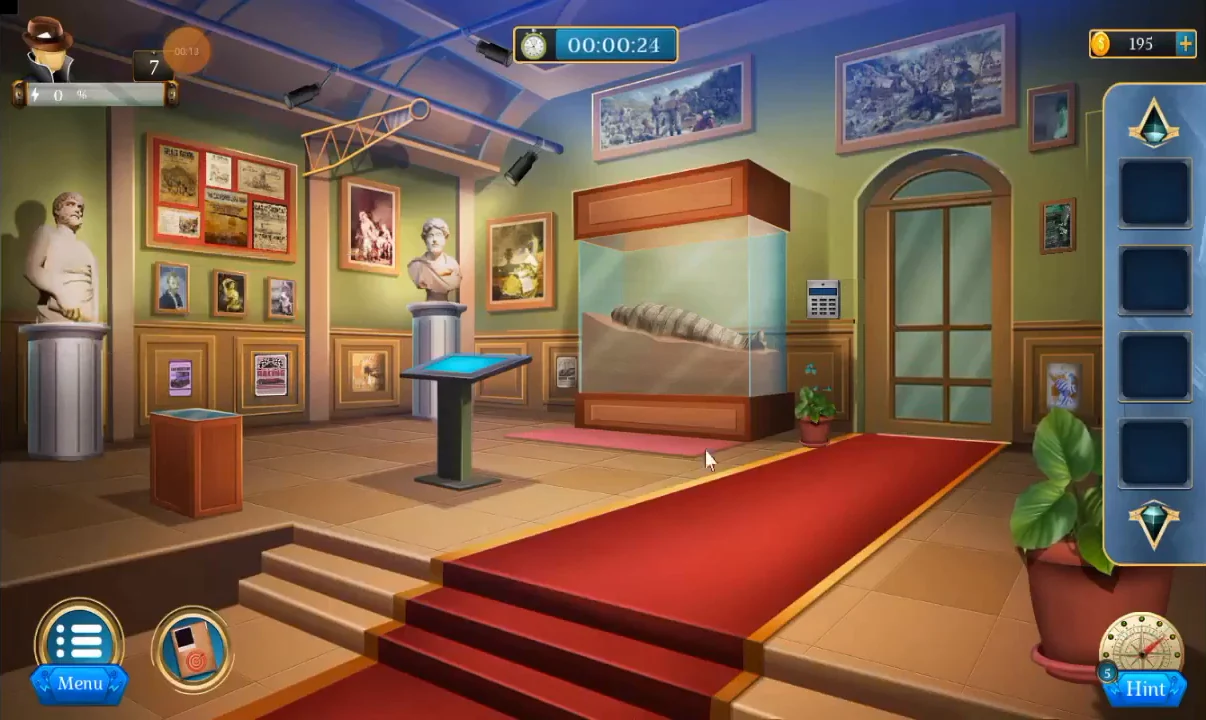
A body wrapped like a mummy has been dumped in an art gallery. Find the hidden camera, recover the body from its display case, then work out the killer's pattern back at the station.
- Remove the picture on the right wall to find a covered slot. Peel the poster off the cabinet on the left, open it and take the Photo Frame. Use the Photo Frame to pry the lid off the wall slot, then take the Book and the Stone.
- The display case on the left shows the opening times 7:30 AM to 8:30 PM. Set the screen in the middle of the room to 7:30 AM to 8:30 PM.CODE7:30 AM – 8:30 PM
- With the arrow buttons, draw a path that passes through every open square of the grid and finishes at the folder. Squares with files are blocked, and there are two rounds. The completed routes are shown in the solution image; the skip button costs 25 coins. Afterwards the screen shows three coloured lines numbered top 3, middle 1, bottom 2.
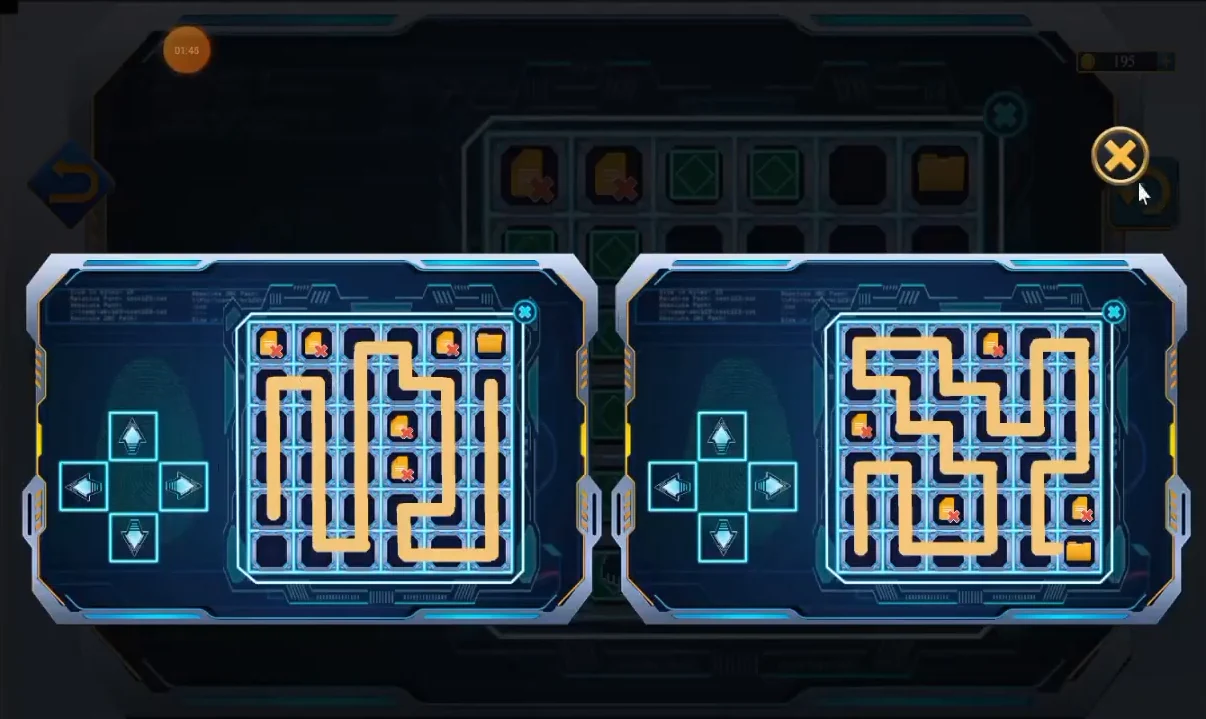
Completed routes for both rounds of the grid puzzle. - Insert the Stone into the statue in the top-left corner. Guide the stone along the maze routes in the numbered order: middle route first, then bottom, then top. The statue opens; take the CCTV Camera to complete the first task.
- The other statue shows a sun, a moon, a star and a cloud. Work out each symbol's value from the sums in the Book; together they give 8286. Enter 8286 on the keypad left of the door, then tap the green checkmark at the bottom right of the keypad to unlock the door, and go through.CODE8286
- Read the notice board's three questions. Count 18 photo frames and 5 statues in the two rooms, and 5 colours on the route map in the first room's display case. Enter 18, 5, 5 on the machine on the right and take the Spanner, Ring, Nut and Magnet.CODE18-5-5
- Turn the middle statue on the right around and take the Thread and the Sensor Remote from it. Tie the Thread to the Magnet in your inventory and tap the Magnet with Thread to take it back. Lower it into the transparent statue on the left to pull out the Coin, tap the Coin to take it, and put the Coin in the slot machine to get the Robotic Hand.
- Lift the top off the small table on the left to take the Ladder. Assemble the frame on the floor with the Ring, Nut and Spanner to make the Wheel Stand and tap it to take it. Select the Wheel Stand in your inventory, fit the Ladder onto it and tap the Ladder with Stand to take it. Optional: in this second gallery, use the Sensor Remote on the shallow white box on the wall to the left of the door to open it, and take the Connecting Wire and the I-Pad. Select the I-Pad in your inventory, turn it on, attach the Connecting Wire and the CCTV Camera, then tap the I-Pad to take it back. The remaining steps of this level do not use the I-Pad.
- Back in the first room, place the Ladder with Stand in front of the large display case and climb up. Use the Robotic Hand to lift out the body, completing the second task.
- At the station, take the Envelope and the Pen from the desk on the right and open the Envelope to get the Pendrive. Take the File from the lockers on the right and plug the Pendrive into the computer.
- Take the Bucket by the left door and move its trash to find a crumpled Paper; take it. Select it in your inventory, unroll it to reveal the torn half of a missing-person photo and tap it to take it back. Add it to the missing-person board above the computers. Load the Paper from the left cabinet into the printer and print from the computer, then tap the printed report in the printer to take it.
- Open the File and add the printout. The postmortem report gives the date of death as 3.12.2022. Use the Pen on the wall map: the killer strikes every seven days, so Frederic Cassatt, the 36th victim, is next. The level is complete.
Level 8: Flood at the Prison
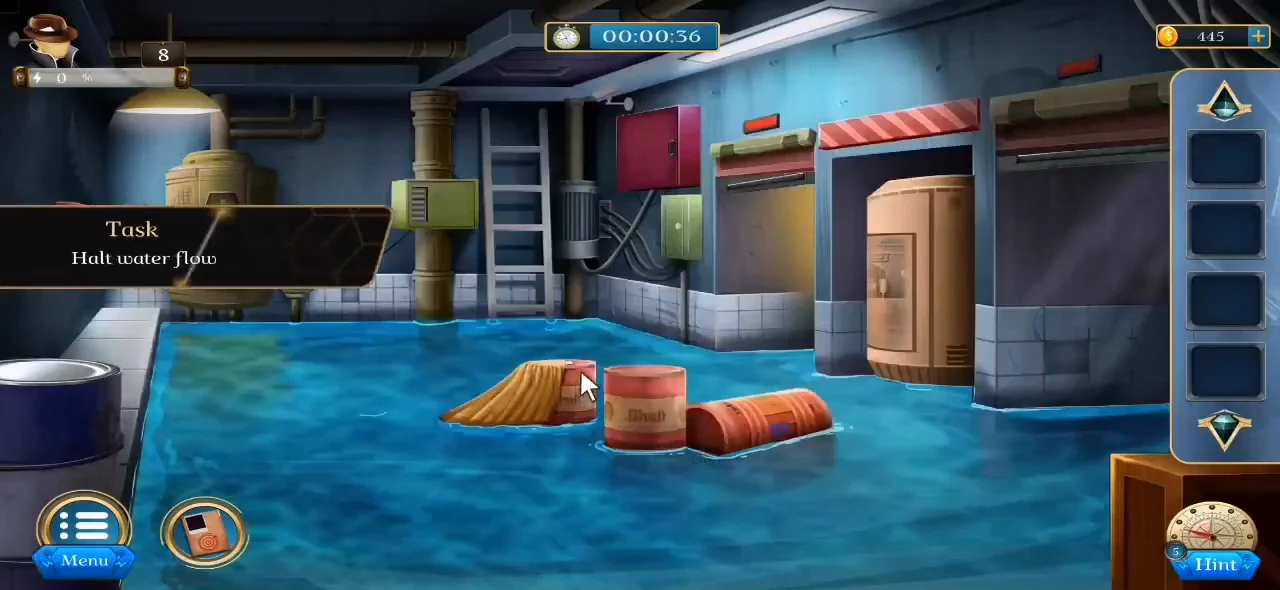
Kyle arrives at the prison to protect Frederic, but the maintenance room is flooding. Stop the water, question the prisoner behind it and find the Black Spider's hidden message.
- In the flooded maintenance room, open the blue barrel at the bottom left and take the Hammer. Break the glass of the red box on the left wall with it and take the Equation Paper. Open the red box on the right wall and pull its lever to close the two doors on the right.
- Place the Equation Paper over the numbers on the right-hand door. Its arrows turn the number square into x = 9, o = 3, z = 1 and y = 7.
- At the machine, the display asks for x → o → z → y. Press the coloured buttons that match the coloured numbers on the door: red 9, blue 3, orange 1, cyan 7. Then press Enter.CODE9-3-1-7
- Turn the handle on the gauge at the right of the machine to raise the power, which opens a wiring panel. Only one red light can be connected to the power source at a time, and only matching wire colours carry power. Rotate the wire tiles to connect the first light: it turns green and stays activated. Then rearrange the wires to power the next light, and finally the last one. The solution image shows the three successive layouts; the skip button costs 25 coins. Once all three lights are green, the water stops, completing the first task.
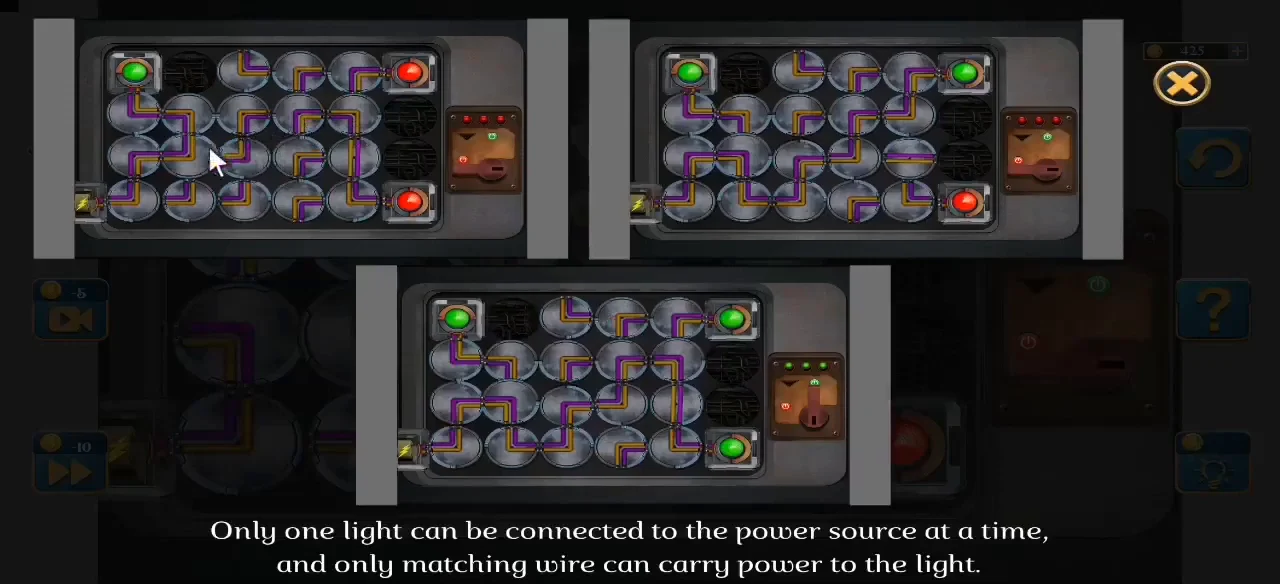
Wire layouts in order: each one activates another light. - Take the Prisoner Card from the barrel and examine it: it shows a grinning face. At the CCTV screen on the left, use the arrows to find the cell with that face on its wall and confirm it. The warden brings in the prisoner, who says he will only talk if you beat him at a shell game.
- The calendar beside the clock shows 590 for September, 472 for October and 361 for November. Enter the last two digits for Nov, Oct, Sep on the keypad: 61, 72, 90. Press Enter to raise the bars on the right.CODE617290
- Take the Button from the desk on the left and use it to open the safe on the left; take the Torchlight. Move the trash can in the barred room on the right and take the Key behind it.
- Unlock the prisoner's handcuffs with the Key and press the red button to start the shell game. Watch the cup that hides the ball as they shuffle, then tap it. Win four rounds to receive the Clue Hint.
- Shine the Torchlight on the blank Clue Hint to reveal the word 'cafeteria'. Go to the cafeteria.
- In the cafeteria, take the Knife from the floor and cut open the purple can on the middle table to get a Paper Piece. Break the bread on the left table for a Coin; it is marked with a line and 105. Take the Baton and the Nightstick from the bench.
- Remove the screws of the wall fan with the Coin, stop the blades with the Baton and take the Paper Piece behind it, marked with a wavy line and 110. Move the trays in the sink to take the Aluminium Box; the trays show a star and 115.
- Open the red box on the left wall. For each symbol in turn, move the needle and press the green button: star 115, line 105, wavy line 110. Take the Chewing Gum and the Metal Piece.CODE115-105-110
- Add the Metal Piece to the Aluminium Box. Swap neighbouring pieces until each piece's shape fits the outline below its slot, then take the third Paper Piece.
- Unwrap the Chewing Gum. At the drain in the top-left corner of the floor, place the Nightstick on the bars and stick the gum to it to fish out the last Paper Piece.
- Place all the Paper Pieces on the green board on the right wall and swap them until the spider-web picture is complete. Turn the pieces over to read 'I'm going to kill him today'. The level is complete.
Level 9: Death and Bombs at the Courthouse
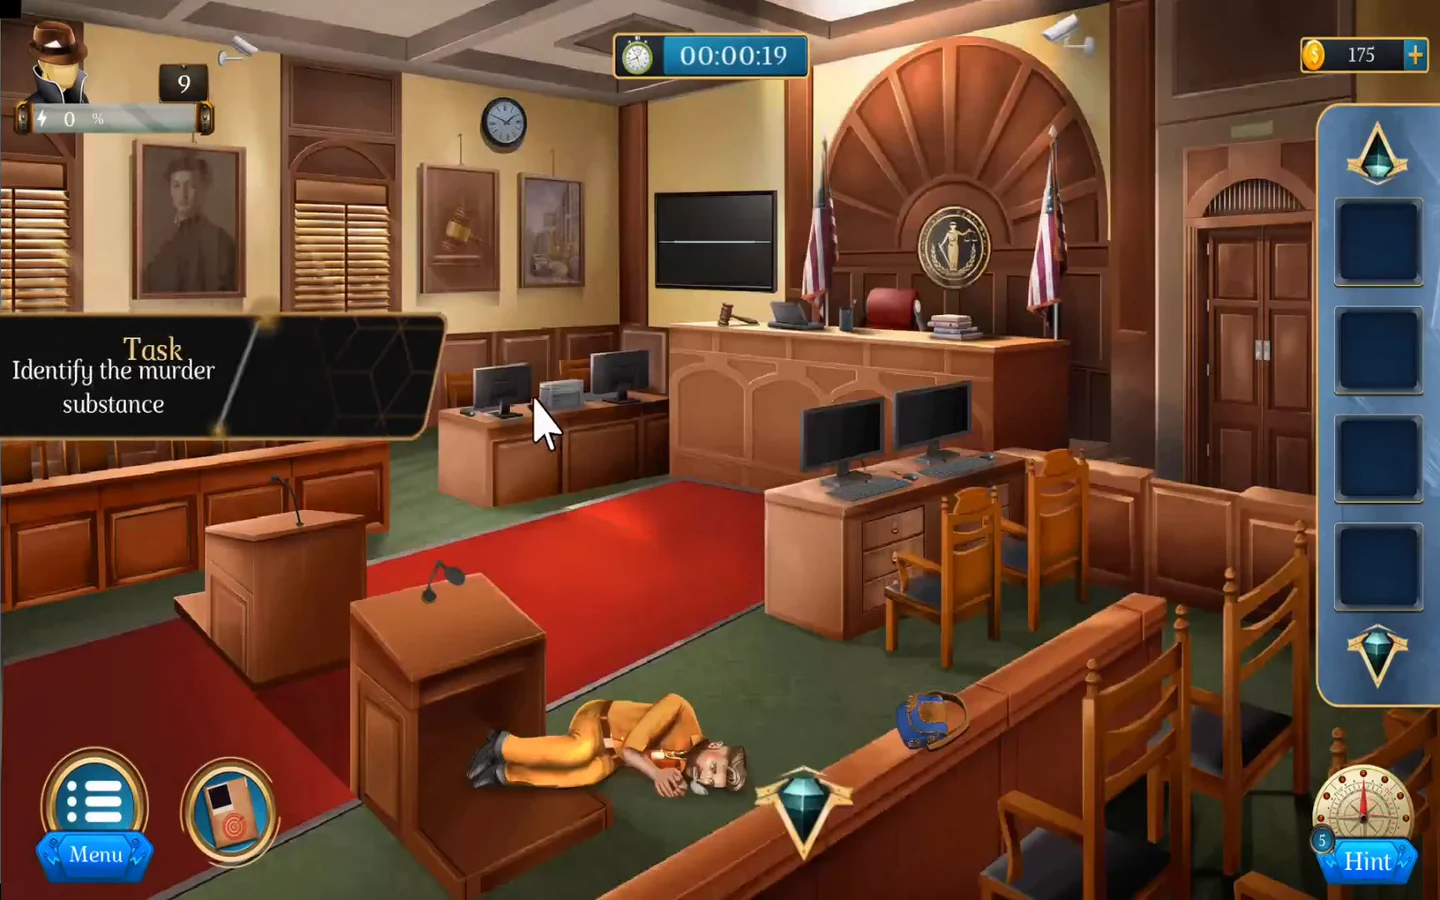
Frederic collapses in the courtroom. Identify what killed him, then defuse the Black Spider's bombs before the courthouse explodes.
- In the courtroom, take the Satchel and open it for the Glass Cutter. Take the Wire Cutter from the top drawer on the right. Take the Walkie-Talkie from the table in the top-right corner, remove its lid and take the Battery.
- Go outside. Take the Metal Panel from the street, the Jacket from the green box (its pocket holds the Screw Heads), the Notepad from behind the stand and the Button from the dumpsters. Press the green button on the machine to get the Toolbox, which holds a Chainsaw and a Hand Drill. Open the back of the van for the Microscope and the Bag, which holds Swabs, a Microscope Slide and Immersion Oil.
- Back inside, use the Swabs on the body. Open the Microscope, insert the Slide, add the Immersion Oil and the sample, then tap it. Tap matching pairs of molecules to remove them until one is left: hydrogen cyanide. The Black Spider appears on the screen and reveals he has planted bombs.
- Open the police car door and take the Box and the Bomb Detector. Fit the Metal Panel onto the panel on top of the metal detector to complete a picture of seven symbols. Open the Box and use its arrow buttons to rotate the symbols into the same layout, then take the Bomb Defusal Manual.
- Put the Battery in the Bomb Detector and scan the courtroom: there are bombs under the red carpet in the middle and behind the large desk on the left.
- Lift the red carpet. Place the Hand Drill and the Screw Heads on the metal plate and remove all four screws, then cut the glass with the Glass Cutter. Insert the Button in the empty slot on the left. Find the manual page with the same red line shape as the bomb's screen and press the grid squares in the order its arrows show.
- Cut the front of the large desk on the left with the Chainsaw and place the Wire Cutter by the bomb. The bomb's display keeps changing between four numbers: 2517, 6831, 4327 and 1692. The manual matches 2517 with the yellow wire. Wait until the display shows 2517, then tap the yellow wire on the board to cut it. The side display lights up with the code E#0Z1A.
- The note on the TV screen says E is a square, # a triangle and 0 a hexagon; the Notepad says A is a diamond, Z a star and 1 a circle. Find the manual column that starts with square, triangle, hexagon. Its red dots read left, left, right, right from top to bottom, so set the bomb's four switches the same way.
- In the CCTV room, take the Books from the desk; one of them holds the Love 3D CD. Take the Wire Cutter from the desk on the right. Open the green locker on the left and fit all the steel shapes onto the grid so every chip is covered, then take the Pocket Memo. Its last entry reads LOVE 3D = EXHO.
- The monitor in the top-left corner shows the time 12:0#, which supplies the missing characters. Insert the CD into the computer on the left and enter the product key with six button presses: E, X, H, O, 0 (zero) and #. The semicolon in the middle of the entry field is already filled in. Press Enter, then open the third folder.CODEEXHO0#
- Open the small box on the left wall to find the last bomb. Its wires are numbered from 1 to 5: cut blue, then green, grey, purple and pink. The countdown still starts, and Kyle jumps out of the window as the building explodes. The level is complete.
Level 10: Into the Sewer
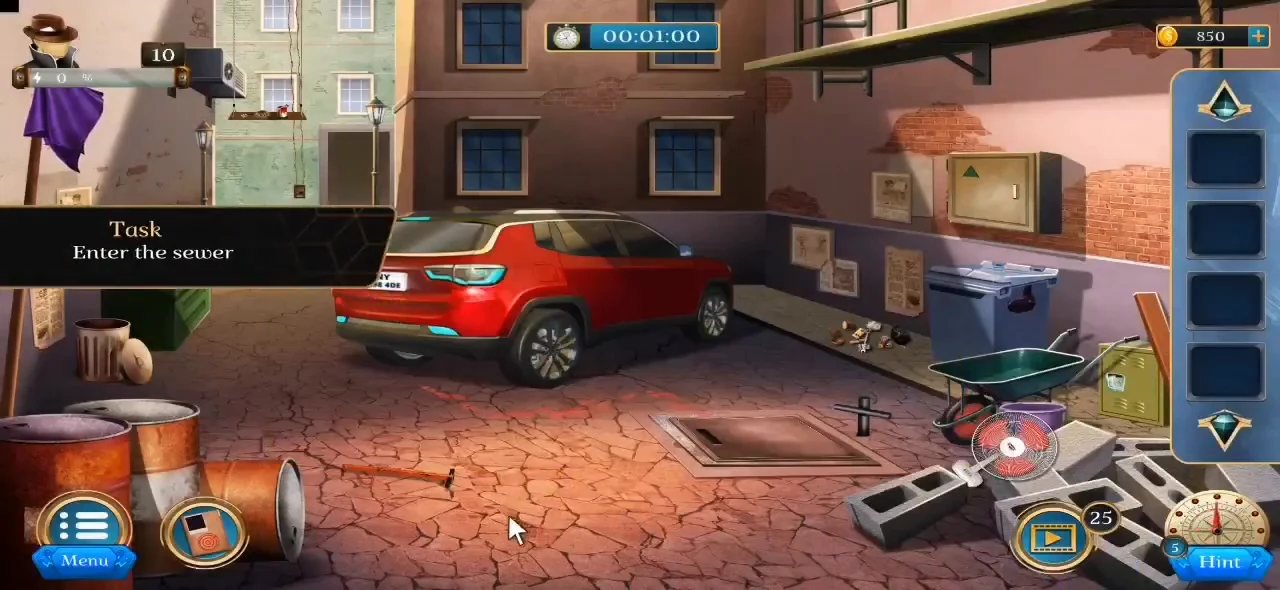
A witness photographed a suspicious car near the courthouse. Track it to an alley, follow the trail into the sewer and find the Black Spider's lair.
- In the alley, take the Handle from the left of the floor and the Bolt and Spanner from the rubbish on the left. Open the large box on the left wall to take the Lever. Look inside the car door to see a card with a line pattern.
- Open the dumpster on the left and take the Remote. Use it on the car's boot and draw the card's pattern on the remote to open it. Take the Box and look at the paper of symbol sums in the boot.
- Open the Box and swap icons until each column matches a sum on the boot paper. For example, the gun plus the policeman make the police cap. Take the Lifter Base.
- Attach the Handle to the Lifter Base, insert the Bolt and tighten it with the Spanner to make the Magnetic Lid Lifter, then tap the assembled lifter to take it. Insert the Lever into the box on the wall across the street and take the Rope. Lift the manhole cover with the Magnetic Lid Lifter, tie the Rope to the bars and climb down.
- In the sewer, pick up the Crowbar, remove the bars on the left with it and take the Wheel. Fit the Wheel to the machine on the left and turn it to raise the water. Take the Tin from the rubbish floating in the water and open it for two Paper Pieces.
- Add the Paper Pieces to the torn poster on the wall to reveal nine symbols. On the grey box on the left wall, use the left arrow, ring and right arrow buttons to shift the symbols until they match the poster layout. Take the Gear.
- Tap both sides of the waterfall on the right to part it and reveal a drawing of the gear layout. Put the Gear in the empty slot of the wall machine, then swap gears until their numbers match the drawing. Pull the lever to open the door.
- In the lair, take the Taser from the small wooden box. Take the Gloves and the four Paper sheets from the workbench on the left and the Safety Stick from the vent above it. Use the Gloves to lift the Box out of the chemical pool under the right staircase.
- At the coat stand, use the Safety Stick to snap shut the jaw traps, then take the fifth Paper from the brown coat. View all five Papers: each shows two rows of red and green dots. Open the Box to find two rows of five disks, each disk ringed with red and green dots. Each Paper matches one column, in paper number order: its first row is the top disk and its second row the bottom disk. Select a disk, then another, to swap them, and keep swapping until every column matches its Paper. Take the Powder, Tape and Brush.
- Examine the Taser. Dust it with the Powder and Brush, then lift the fingerprint with the Tape and tap the Fingerprint to take it.
- The chalkboard on the right shows a grid marked Zn, Ca, He and Mg. On the central machine, use the arrow buttons beside the grid to steer each element box to its square on the chalkboard grid. The boxes appear in this order: Zn, Ca, Mg, He.
- Place the Fingerprint on the scanner of the wall safe. The number keys light up and a small red maze preview appears in the display above them; tap that preview to open the full laser grid.
- The laser grid has eight columns and six rows. You start in the box left of the top row, and the exit is right of the bottom row. Along the way you must collect three bombs: one in the second column, one in the bottom row and one in the right-hand column. Beams fire down the columns from the emitters at the top every so often, so before stepping into a column, wait for its beam to switch off. Use the arrows to move: right 2, down 5, right 2, up 3, right 4, down 3, right 1. This route passes all three bombs. The safe opens to show the murder weapons, but Kyle realises the lair was a decoy. The level is complete.
Level 11: The Musical Code
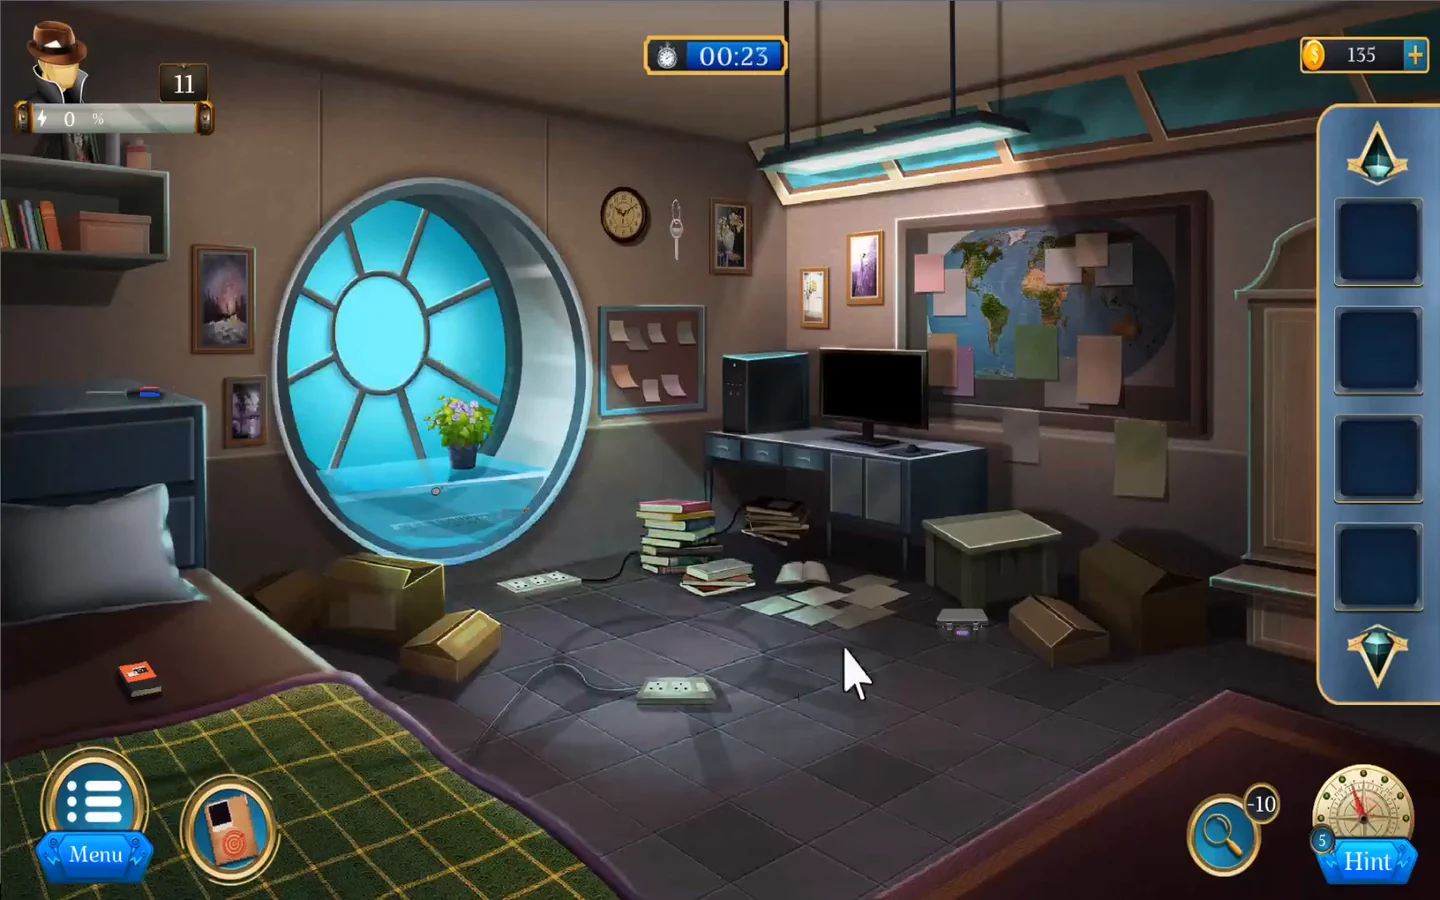
Kyle wakes at home remembering a mobile phone clicking while he was unconscious. Decode the hidden message, trace it to a subway station and open the station door.
- In the bedroom, collect the Book, the Screwdriver from the floor, the Sheet and the Tool Box. Open the Tool Box and place the Sheet on it. Tap the coloured lenses until they match the Sheet's colours from left to right: purple, blue, cyan, green, orange, red. Take the Soldering Iron.
- Take the Key from beside the wall clock and the Keyboard from the porthole window ledge. Unlock the desk drawer with the Key and take the Paste, Cable, Chip and Soldering Wire.
- Examine the power strip on the floor in front of you and place the Keyboard there. Tap the Keyboard to flip it over and remove its screws with the Screwdriver. Plug the Soldering Iron into the power strip. Set the Paste and then the Soldering Wire out beside the open circuit board, fit the Chip into the empty socket and tap the Soldering Iron to start the repair. The case closes again; take the repaired Keyboard.
- Switch on the computer at the tower. Place the repaired Keyboard in front of it first, then use the Cable to connect the Keyboard to the computer. When a green puzzle appears on the monitor, tap it to open the music decoder.
- Play the piano keys in the order shown in the solution image. Counting keys from the left, press 6, 7, 1, 8, 9, 10, 2, 4, 5, 3 so the notes fill the track in the right order. The screen shows the codes 02, 08, 15, 01, and Kyle photographs them with his Mobile. Tap the Mobile to take it back, then continue the dialogue.CODE02,08,15,01
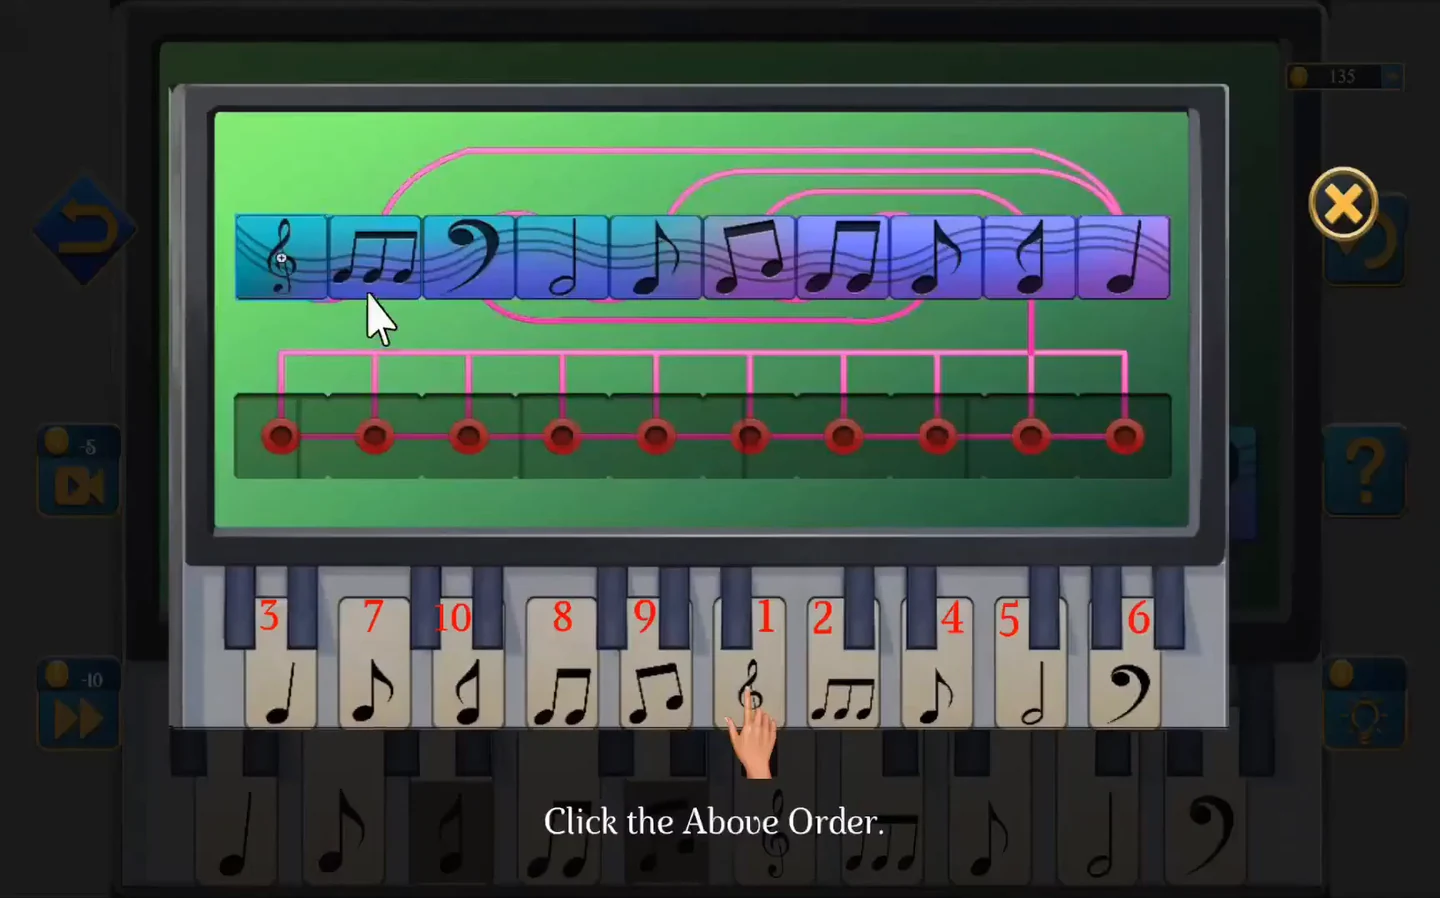
Press the keys in the order of the red numbers, starting with 1. - At the office, take the Key from the key rack, unlock the left door of the wooden cabinet and take the File. The map board behind the desk has coloured notes with symbols. Set the four selectors on the top drawer of the metal filing cabinet to the cyan, purple, red and orange note symbols, then take the EIMA Decipher.
- Connect the EIMA Decipher to the blue charger cable on the right desk and wait until its battery indicator fills. Tap the charged EIMA Decipher to take it back into your inventory, then select it again to open it. Use the File's symbol table to convert the codes: 02, 08, 15 and 01 each match a symbol. Press those four symbols in that order to get RLW-08.CODERLW-08
- Switch on the office computer and open the map. Take the City Layout from the cork board on the left wall. Press the blue search button to cycle the location codes until RLW-08 is shown, then press the green Enter button beside it. Use the City Layout on the map to mark the station. The second task is complete.
- On the subway platform, take the Cloth, Rust Remover and Cotton from the red bin, the Cover from under the cracked floor tile and the Spanner from the water basin on the wall. Use the Spanner on the grille under the front of the train and take the Box.
- Select the Rust Remover in your inventory, place the Cotton beside it and tap the bottle to soak the Cotton. Tap the soaked Cotton to take it, then use it on the rusty vent on the side of the train. Tap each of the clips to remove the vent cover and take the two Pins.
- Insert both Pins into the Box. Move the green bars up and down so the top bar can slide all the way from left to right, then do the same for the bottom bar from right to left. Take the Control PCB.
- Soak the Cloth in the water basin on the wall between the blue elevator doors and the front of the train, where you found the Spanner. Tap the wet Cloth to take it back, then use it on the Cover to reveal an invoice with the code H2U9. Fit the Control PCB into the empty wall slot immediately to the right of the blue doors, then tap it to open its keypad. Enter H, 2, U and 9 and press the Enter arrow at the bottom right.CODEH2U9
- Tap the console beside the blue elevator doors. Swap tiles to rebuild the coloured links exactly as shown in the solution image: each icon connects to its matching lock or symbol. The door unlocks and the level is complete.
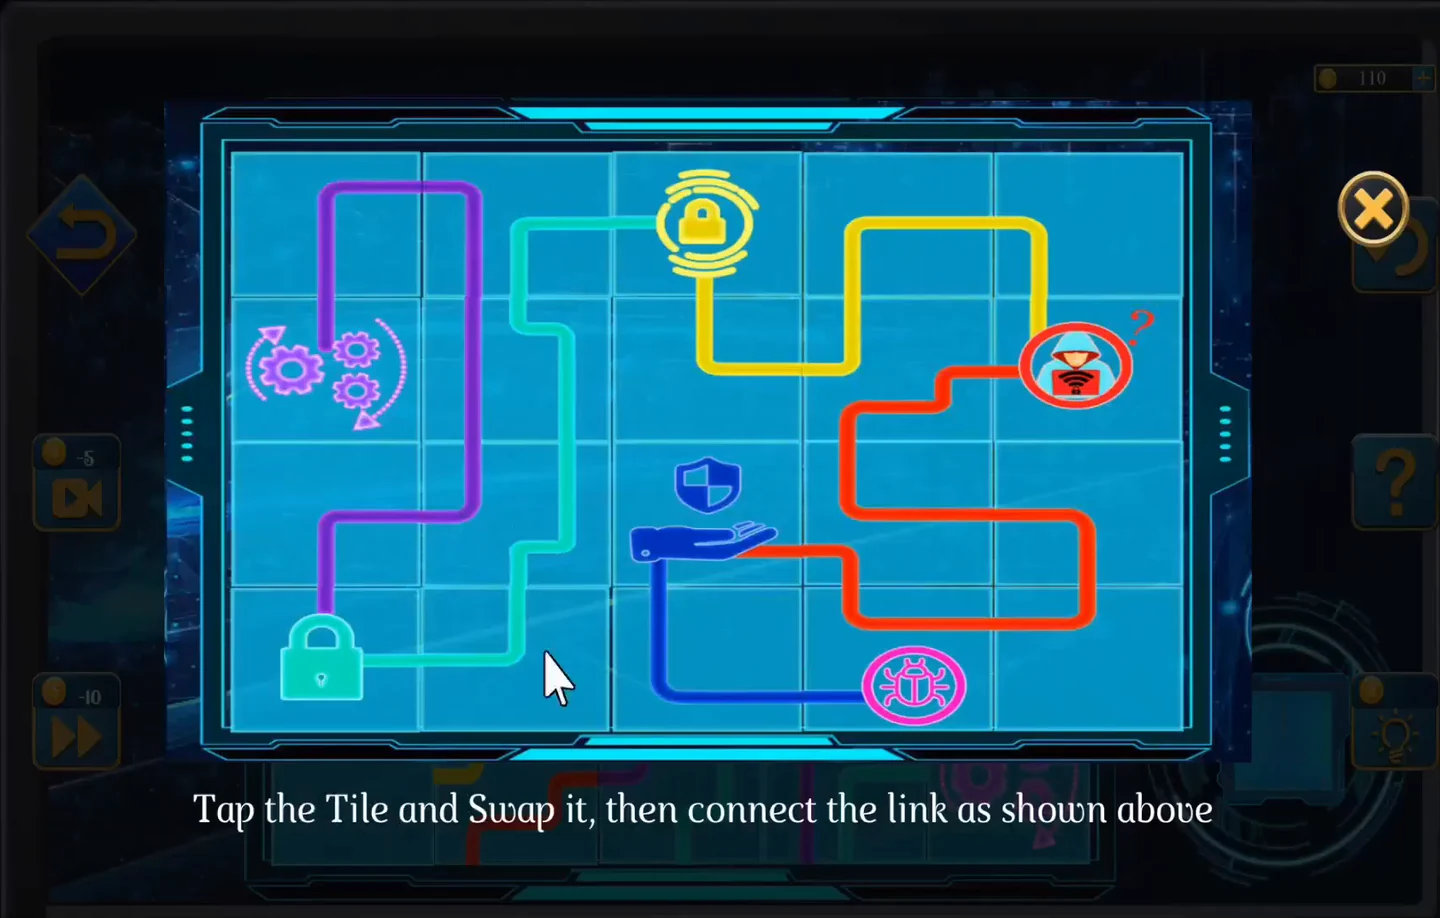
Finished link layout for the elevator console.
Level 12: The Girl in the Subway
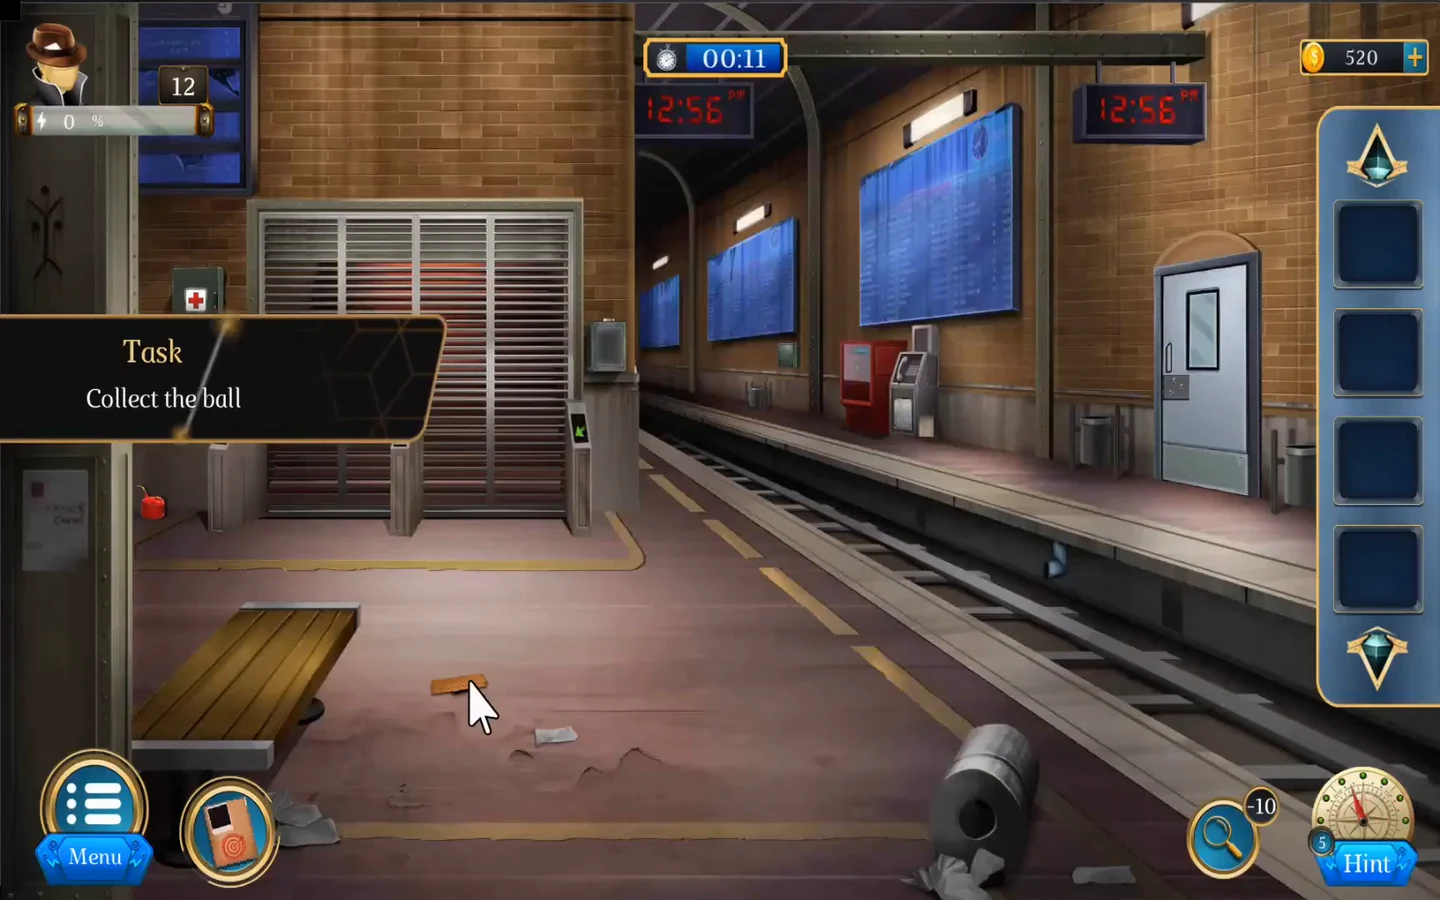
A girl named Jennie is held in a spiked trap below the subway platform. Collect the ball, open the locked room and remove her collar.
- On the platform, take the Oil Can from the pillar by the turnstiles. Move aside the loose wooden planks on the floor by the bench and take the Ticket from under them. Take the Scalpel from the first-aid box and the Spray from the unit above the turnstiles. Use the Spray on the poisonous spider in the fallen pipe and take the Paper. It shows a fuel can, a right-facing microphone, a lightning bolt and a leaf.
- Unscrew the panel on the side of the ticket machine with the Scalpel and take the four Coins. At the turnstile coin reader, the display asks for $5. Drag the $3 coin and then the $2 coin into the slot; the other two coins are not needed. The way down to the basement opens.
- In the lower room, open the top drawer of the wooden cabinet on the left to find four symbol slots. For each slot in turn, tap the slot to select it, press Play, then press Pause when it shows the Paper's symbol: fuel can, right-facing microphone, lightning bolt and leaf. Take the Catalogue.
- Take the Key from the metal locker right of the stairs and use it on the wall cabinet to get the Button. The rusty wall box near the stairs is stuck, so oil it with the Oil Can and take the Battery.
- Open the generator's round compartment, insert the Battery and press the power button.
- On the screen left of the generator, place arrows on the grid so the ice cream flows through every cone, then press Play. Rows are counted from the top and columns from the left; the outlined arrows already on the board stay where they are. There are three rounds. Round 1: right arrow on row 1 column 1, down arrow on row 1 column 6, left arrow on row 3 column 6 and up arrow on row 3 column 2. Round 2: down arrow on row 1 column 1, left arrow on row 1 column 6, right arrow on row 3 column 1 and up arrow on row 3 column 6. Round 3: left arrow on row 1 column 6, right arrows on row 2 column 1 and row 3 column 1, left arrow on row 4 column 5 and up arrow on row 4 column 1. After the third round, take the Ball from the cabinet that opens.
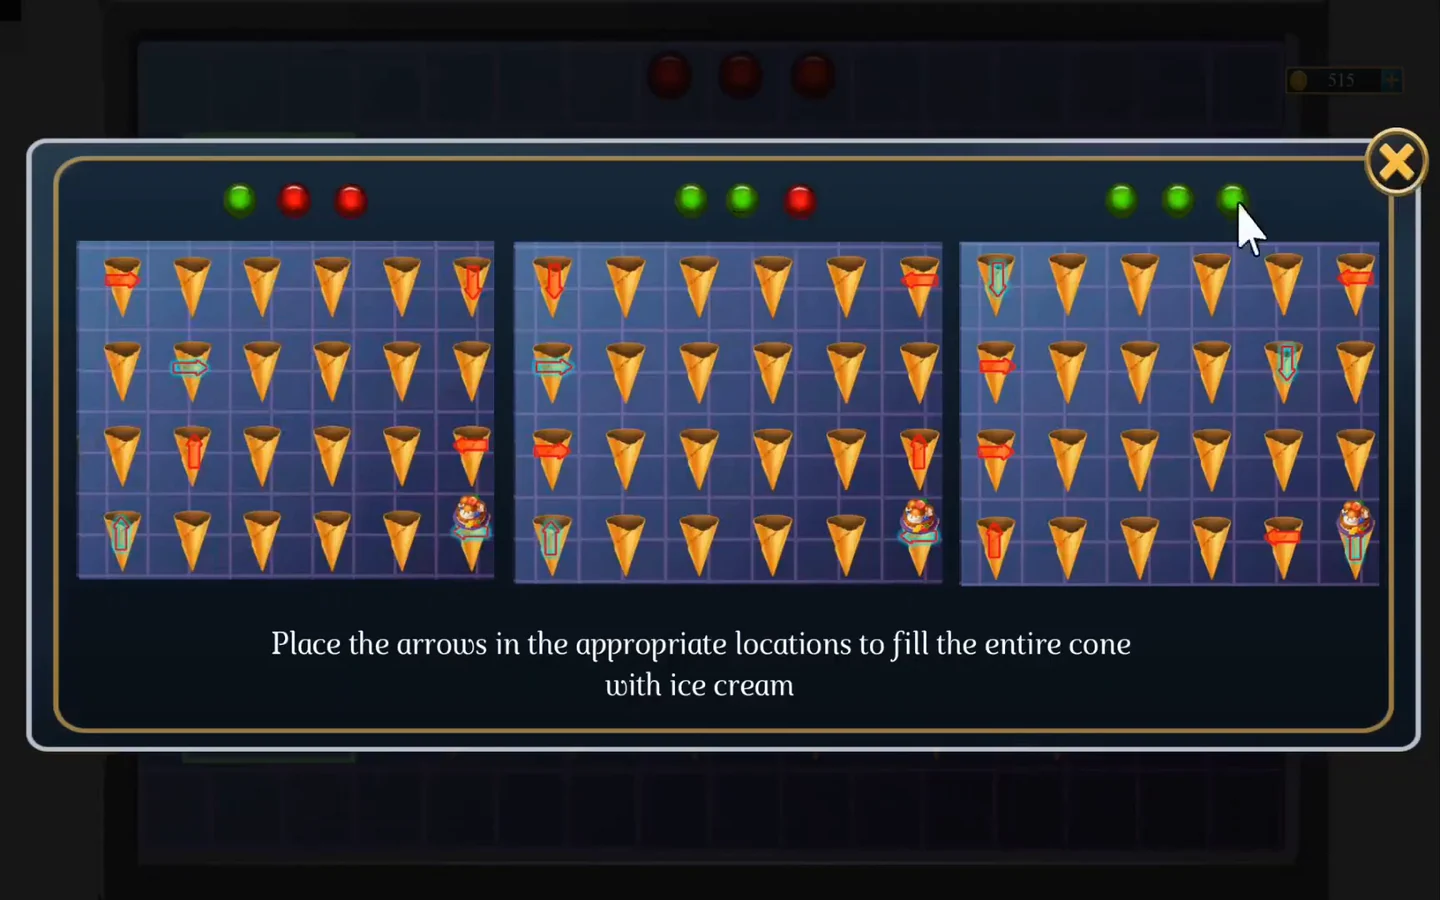
Arrow positions for all three ice cream rounds; the solid red arrows are the ones you place. - In the lower room, pick up the second Ticket from the floor and take the Ticket Piece from the blue drum under the stairs. Go back up to the platform and put the Ball into the round maze on the utility box. The arrows rotate the whole maze, and the ball rolls downhill after each turn. Rotate it step by step to steer the ball into the hole, watching where it settles after each tap; the reset button restores the start if it gets stuck. The box opens: take the third Ticket.
- Examine the Tickets in your inventory and complete the middle ticket with the Ticket Piece. Each ticket's QR code matches a symbol in the Catalogue. On the panel under the schedule board, insert the Button into the empty slot in the top row first. Then slide the rows until the highlighted rings hold the three ticket symbols as shown in the solution image. The room opens, completing the second task.
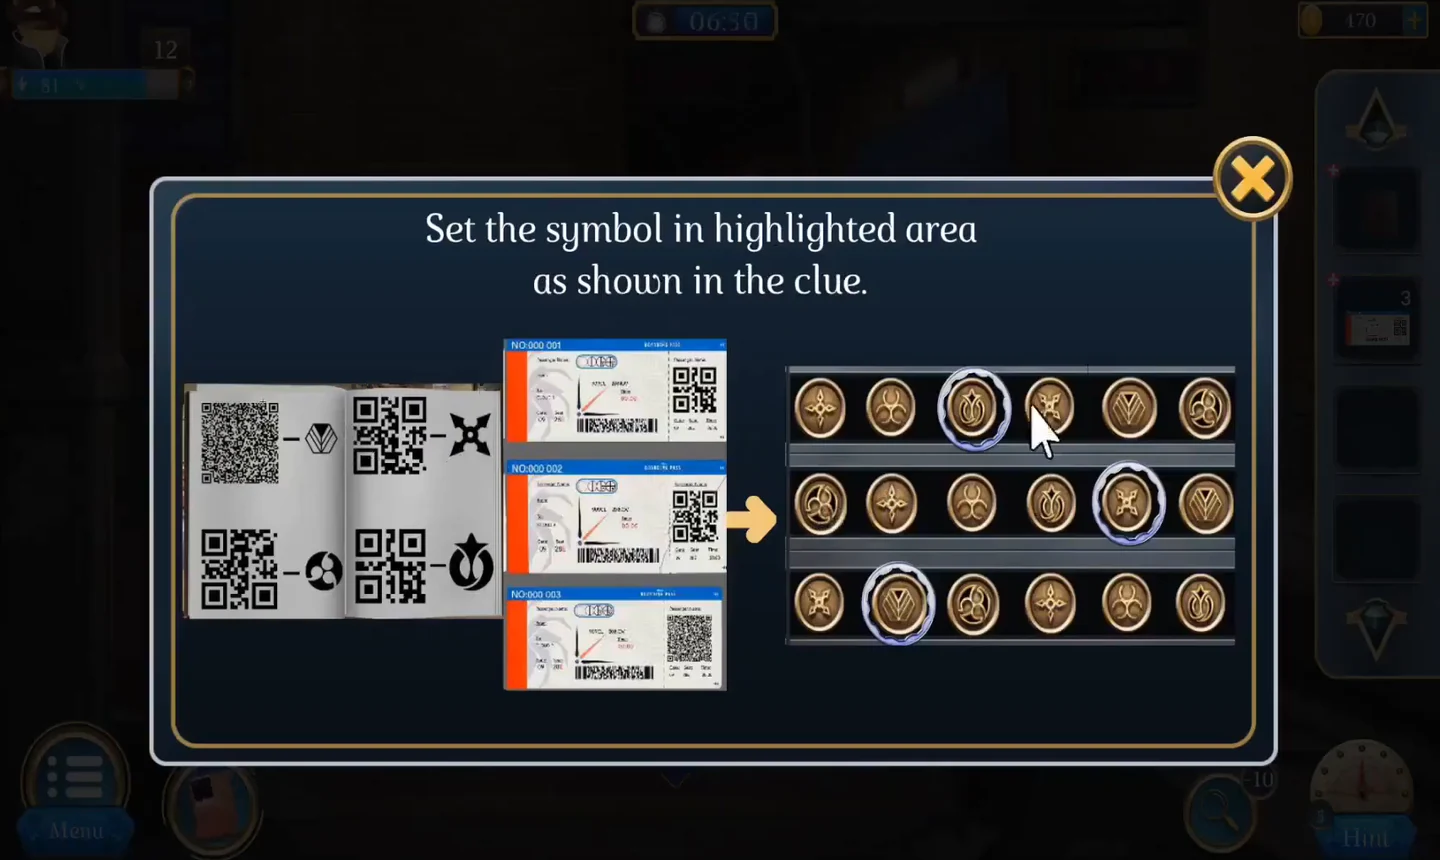
Set the highlighted rings to the three ticket symbols. - In the room, take the Nut and a Cutter Handle from the support beam. Take the Coil Wire spool from the floor near the large pipe in the foreground, and the second Cutter Handle from the boxes on the right. Select the Coil Wire in your inventory, tap the spool to unroll a length of wire and tap the extended Coil Wire to take it. Use it through the grate under the press to fish out the Keychain. Join the two Cutter Handles with the Nut and tap the finished Cutter to take it.
- Cut the hanging chain with the Cutter to lower the machine and take the Box. The snake drawing beside the warning locker and the scroll on the left wall lead to the code 2741. Press the Box's buttons as the solution image shows (5, 5, 2 and 2 times) until it reads 2741, then take the Broken Piece.CODE2741
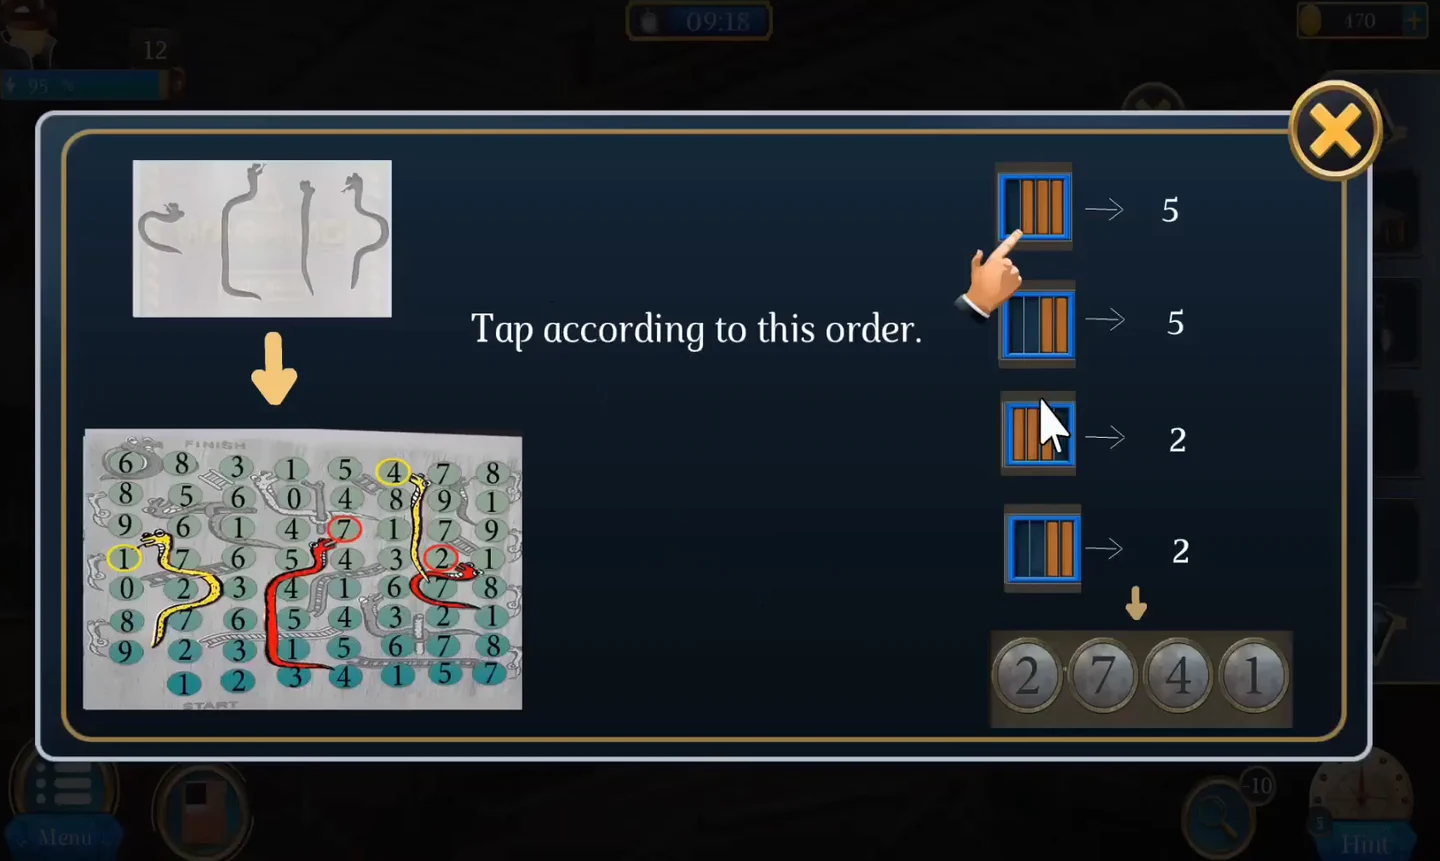
Press the four buttons 5, 5, 2 and 2 times to show 2741. - Fit the Broken Piece into the Keychain to complete its emblem, then examine it: it shows four symbols from top to bottom, a crescent moon, a gear, a gear with a skull and a hand holding a gear. Tap the spike machine. It has seven switches under its sliders. Counting from the left, tap them 1, 2, 3, 4, 5, 6 and 2 times respectively to balance the sliders. The spikes stop.
- Tap Jennie's collar. It holds four rows of symbols, and each row has one socket with a yellow outline; these sockets are staggered, not in a single column. Use the arrow buttons on both sides to shift the symbols along the rows and diagonals until the highlighted socket in each row holds the Keychain symbol for that row, from top to bottom: crescent moon, gear, gear with a skull and hand holding a gear. The collar comes off and Jennie is freed. Kyle finds a sedative powder used for hypnosis, and the level is complete.
Level 13: The ANN Package Warehouse
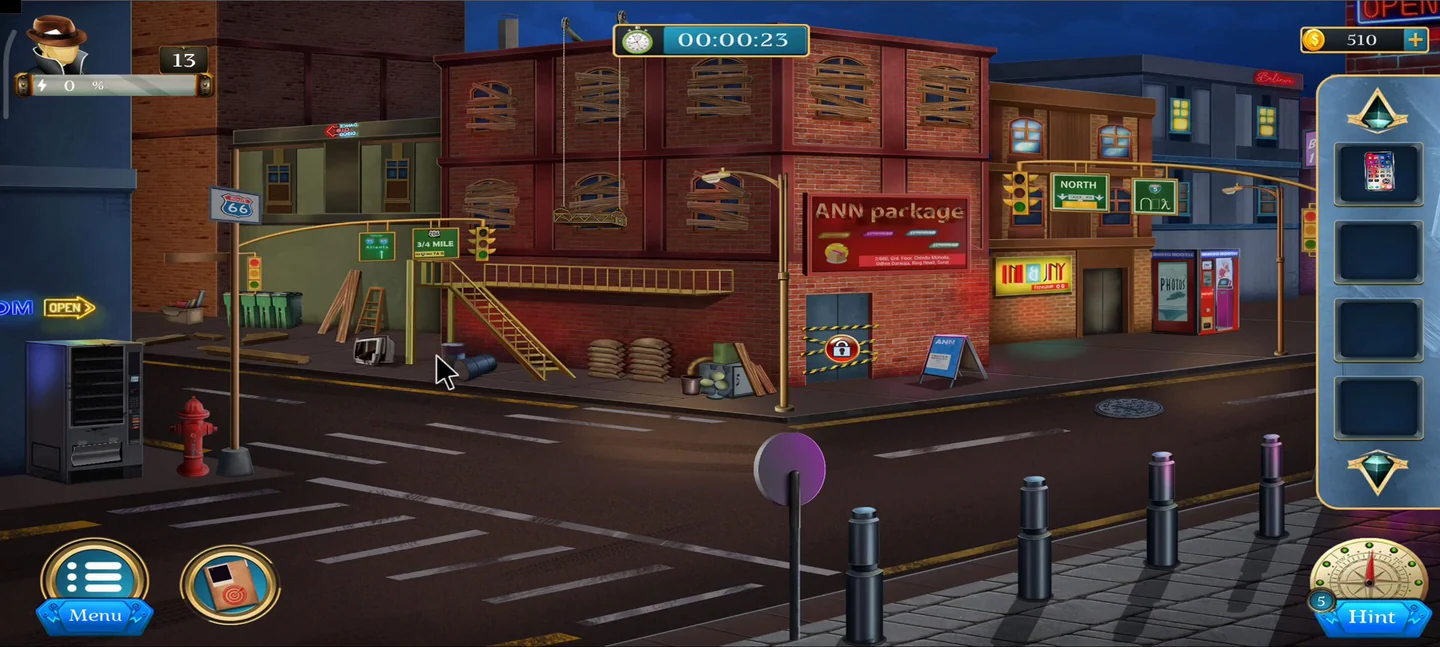
Intel points to the ANN Package warehouse as the source of the hypnotic powder. Repair the window-cleaning gondola, get through the rooftop door and search the office for records.
- In the street, open the green dumpster and take the Fishing Net. Select it in your inventory: its handle and net are separate, so tap to join them, then tap the repaired Fishing Net to take it back. Use it on the manhole to scoop out the Button Piece. Take the Screwdriver from the gondola, then use it to open the flap of the vending machine and take the Box.
- Insert the Button Piece into the photo booth's mechanism. On the circuit board, set each switch so its symbol matches the solution image, then the screen shows three coloured arrows: green up-left, red straight up and pink up-right.
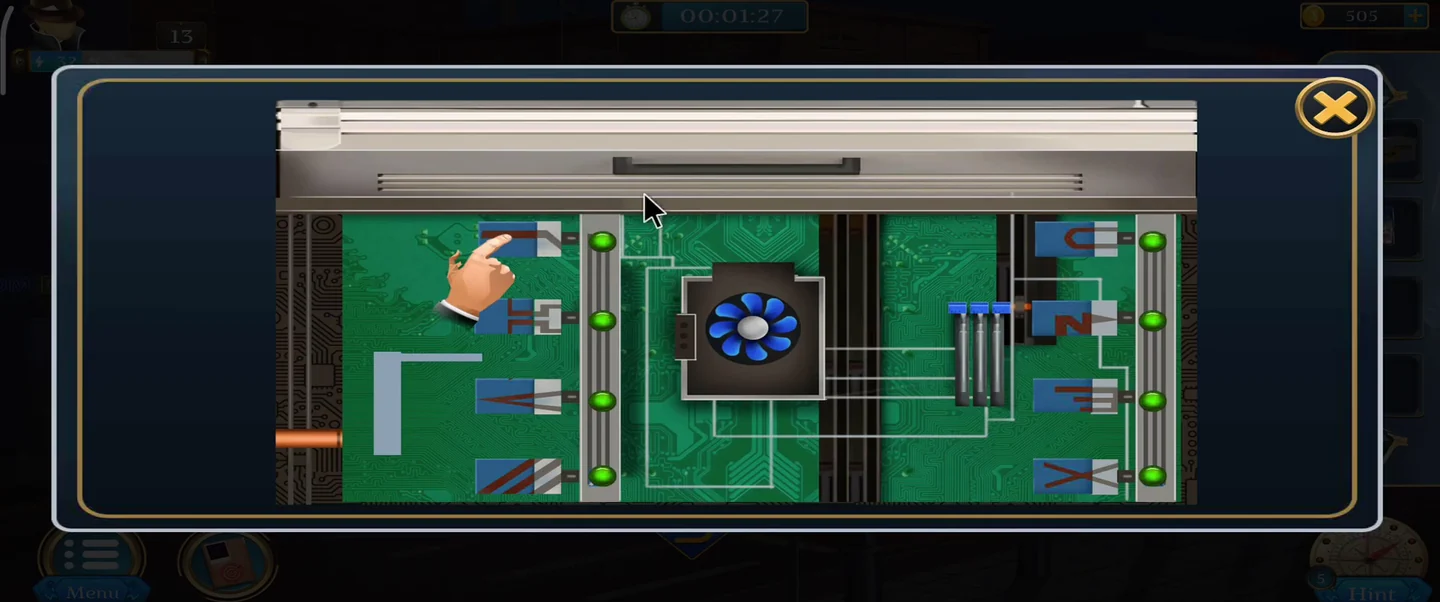
Correct switch settings on the photo booth circuit board. - Open the Box and turn its three arms to the arrow directions: green up-left, red up and pink up-right. Take the Insulation Tape and the Wire. Fix the gondola's cut cables with the Wire and wrap them with the Tape, then ride it up to the roof.
- On the roof, take the Steel Box from under the tarp and the Glass Piece from the debris. Ride down and take the Sign Board from the purple street sign. Slash a sack by the stairs with the Glass Piece to get Grains, then ride back up. Use the Grains beside the tall chimney on the left where the bird is perched. The bird flies off after the grain and knocks the Sheet Holder down to the floor by the chimney. Take the Sheet Holder and unroll it for the Transparent Sheet. Smash the fourth and second hanging bulbs with the Sign Board, then take the Chain from the tarp.
- Move the boxes on the right-hand shelf to reveal four coloured dots in a 2 x 2 square. The Chain's lock shows one symbol per colour. Open the Steel Box and use the side buttons to put each colour's symbol where its dot is: leaf top left, wave top right, diamond bottom left and swirl bottom right. Take the red Button Piece.
- Go down to the street and place the Transparent Sheet over the sandwich board to see six red symbols in a hexagon pattern. Back on the roof, tap each hexagon of the lock until it shows the matching symbol, then take the Key Spanner.
- Open the door lock housing with the Key Spanner and insert the red Button Piece. Clear every number by building four sums: 15 × 05 = 75, 30 − 18 = 12, 88 ÷ 11 = 08 and 21 + 44 = 65. The door opens, completing the second task.
- In the office, collect the Sheet from the floor, the Weight Machine beside the boxes, the Powder and Brush from the desk and the Painting from the lower shelf. Examine the dragon statue on the left: tap its legs and arms to change its pose until it matches the small dragon outline in the top-right corner. The door under the statue opens; take the File. Dust the painting's page with the Powder and Brush to reveal a bar chart. Set the five wooden sliders above the shelves to the same heights, then take the Silver from the cupboard.
- Examine the File and use the Powder and then the Brush on its cover to reveal a fingerprint. Photograph the fingerprint with the Mobile. On the safe's scanner, tap the fingerprint segments until they match the photo on the phone, then take the Coins and the Ledger.
- Take the Suitcase from the bookshelf and examine it. Every coin inside is locked. The rotate button turns the coins in the highlighted block, and the buttons on the edges move that block around the grid. When a coin's opening lines up so it can move into a neighbouring empty space, tap it: it slides over and its lock comes off. Keep shifting the block, rotating and moving coins through the empty spaces until every coin is unlocked; the solution image shows the finished layout. Take the Golds.
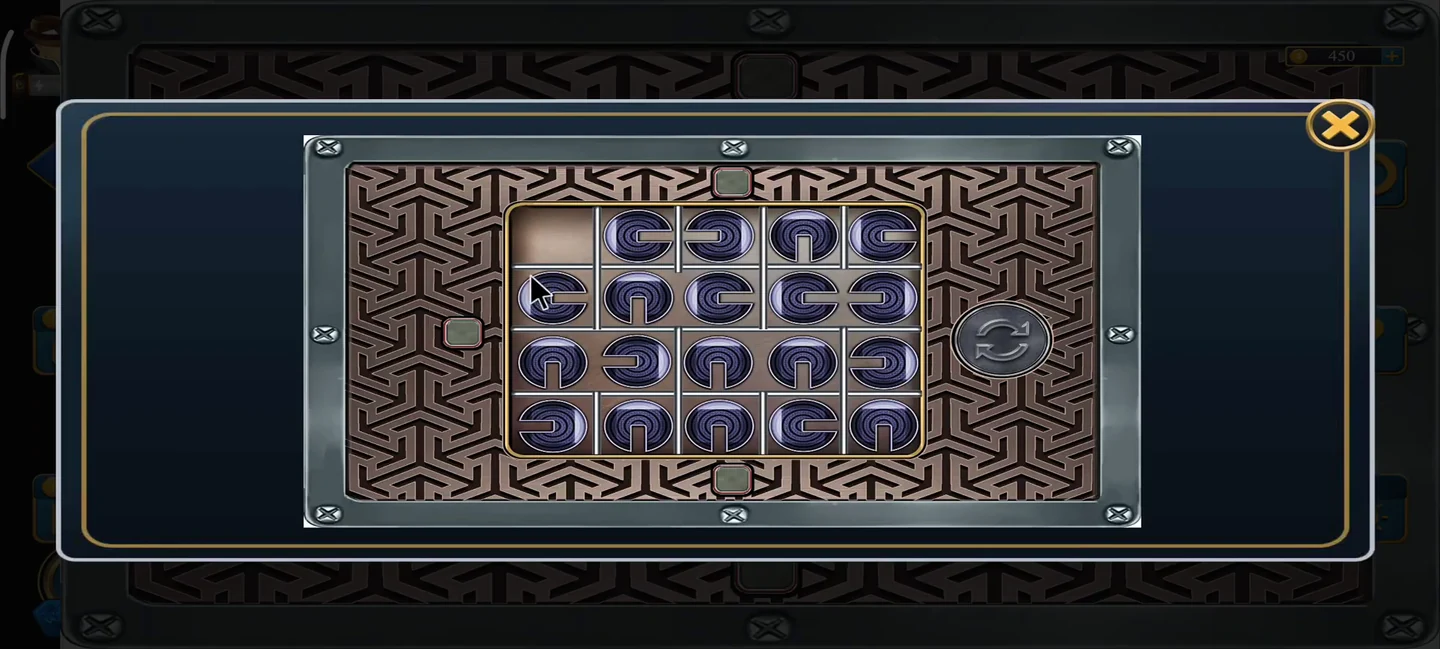
Target suitcase tile layout. - The Sheet says 2 silver bars + 3 gold bars + 4 coins. Load exactly that onto the Weight Machine to read 37294. Set the middle row of the Ledger's tumblers to 3 7 2 9 4, then tap the padlock at the lower left of the tumbler panel to open the Ledger. The ledger shows the powder was delivered to Broadway Lane, so the level is complete.CODE37294