Searching Emily's room
Go through the door on the left of the lab into Emily's room. New task: "Search Emily's room".
- Open the bead abacus on the desk. Take the TOY MOUSE (+) and the RED HANDLE.
- Open the bedside drawer and attach the RED HANDLE. Take ABACUS PART (1/3) and the ORNATE FRAME PIECE. Something else is stuck deeper in the drawer.
- Open the painting with flasks on the left wall and fit the ORNATE FRAME PIECE into the missing corner.
Flower path painting
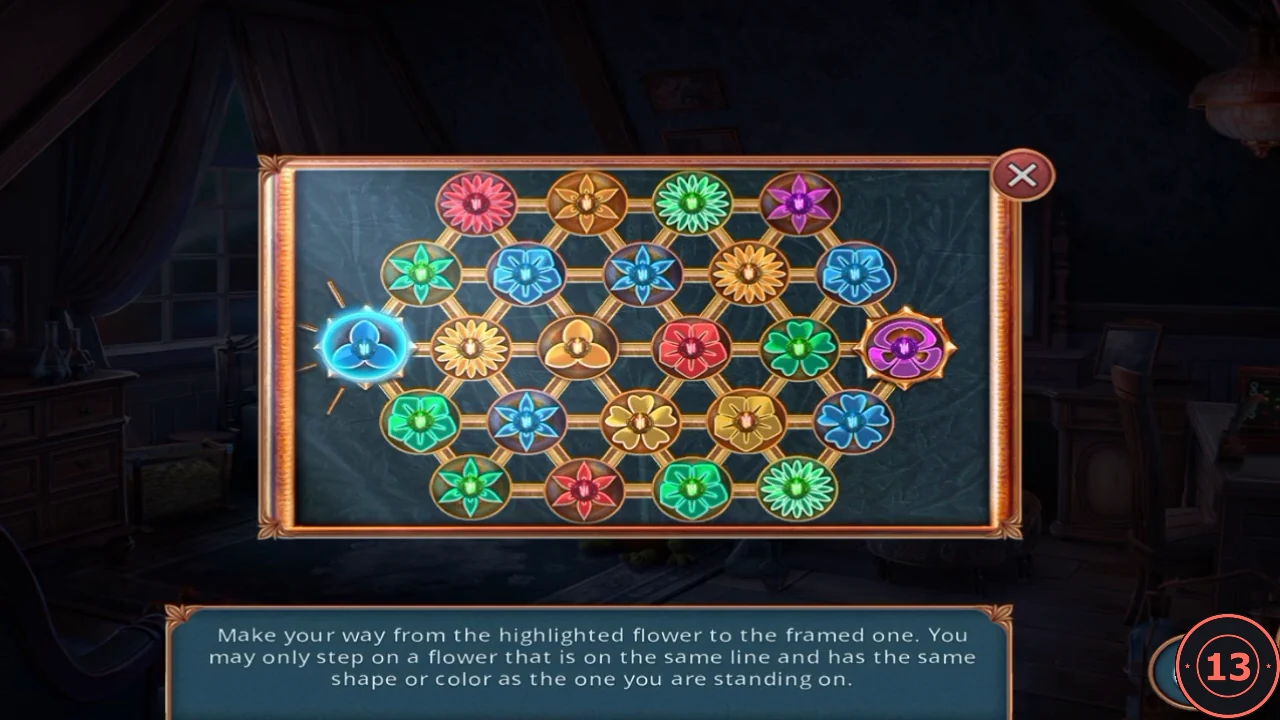
Rule: "Make your way from the highlighted flower to the framed one. You may only step on a flower that is on the same line and has the same shape or color as the one you are standing on." The start is the blue trefoil at the left end of the middle row; the goal is the framed purple flower at the right end.
- One working path: blue trefoil -> orange trefoil (middle row, same shape) -> orange daisy (middle row, same colour) -> orange lily (top row, diagonal, same colour) -> purple lily (top row, same shape) -> framed purple flower (diagonal, same colour).
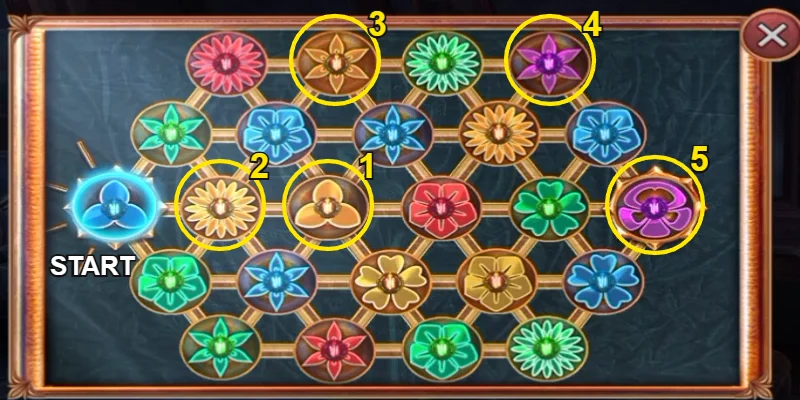
One working path: tap the circled flowers in order 1 to 5. - Take the CRANK HANDLE from the compartment.
Microscope and scales
Start on the lab equipment: the microscope, the scales and the mineral cabinet.
- Return to the lab and open the microscope on the counter. Take RED BUTTON (1/2) and attach the MICROSCOPE OBJECTIVE. More parts are still missing.
- Open the scales on the table. Use the HAIRPIN to pry the green button out of a crack in the table, then take the RED PERFORATED CYLINDER. The hairpin stays in your inventory marked 1/2; its second part turns up at the harbour.
- Place the JAR of dirt at the base of the scales. You need a fixed scale and a manual before you can analyse it.
- Open the mineral cabinet on the back wall and place both BUTTONS in the two-socket panel.
Poster differences
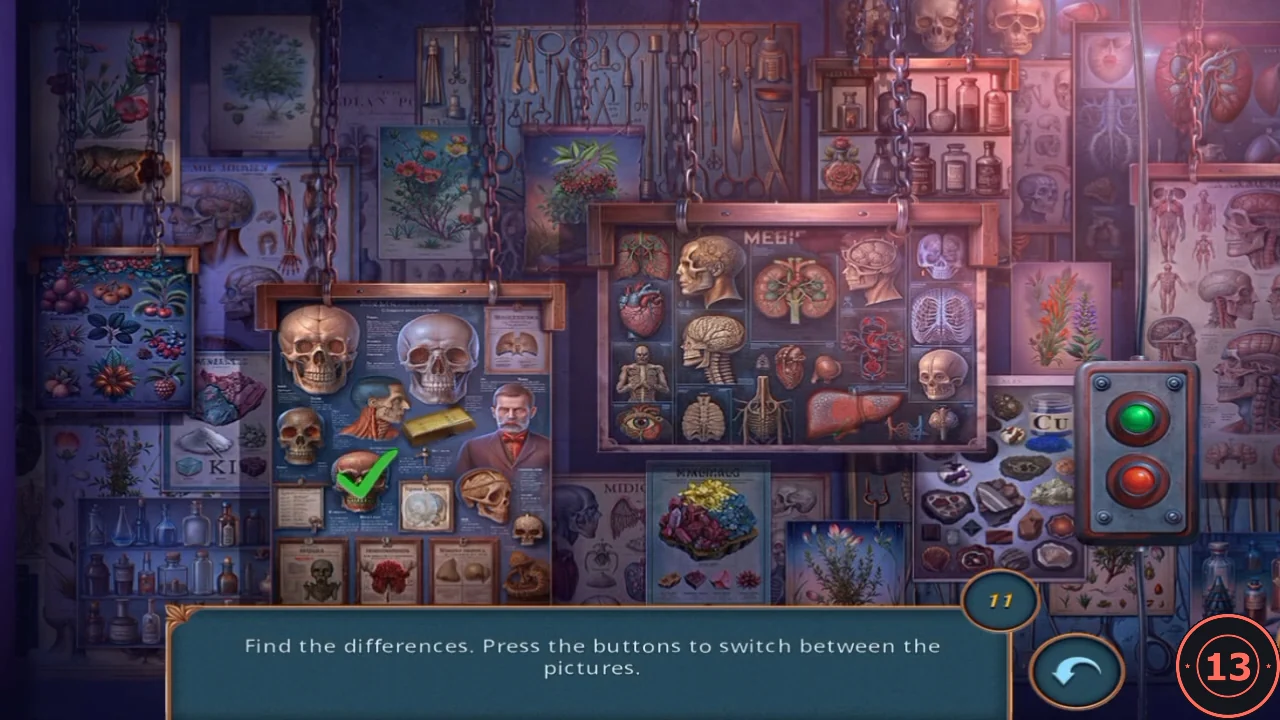
Rule: "Find the differences. Press the buttons to switch between the pictures." There are 12 differences.
- The 12 differences: fruit poster (left); flower poster (top left); small skull at the lower left of the skull poster; man's portrait in the skull poster (bow tie); the bottom-left corner picture of the central "MEDIC" panel (an eye in one version); kidneys in the top row of that panel; ribcage on its right side; bottle shelf (top right); poster right of the bottles; red-flower poster; mineral tray (lower right); anatomy poster (far right).
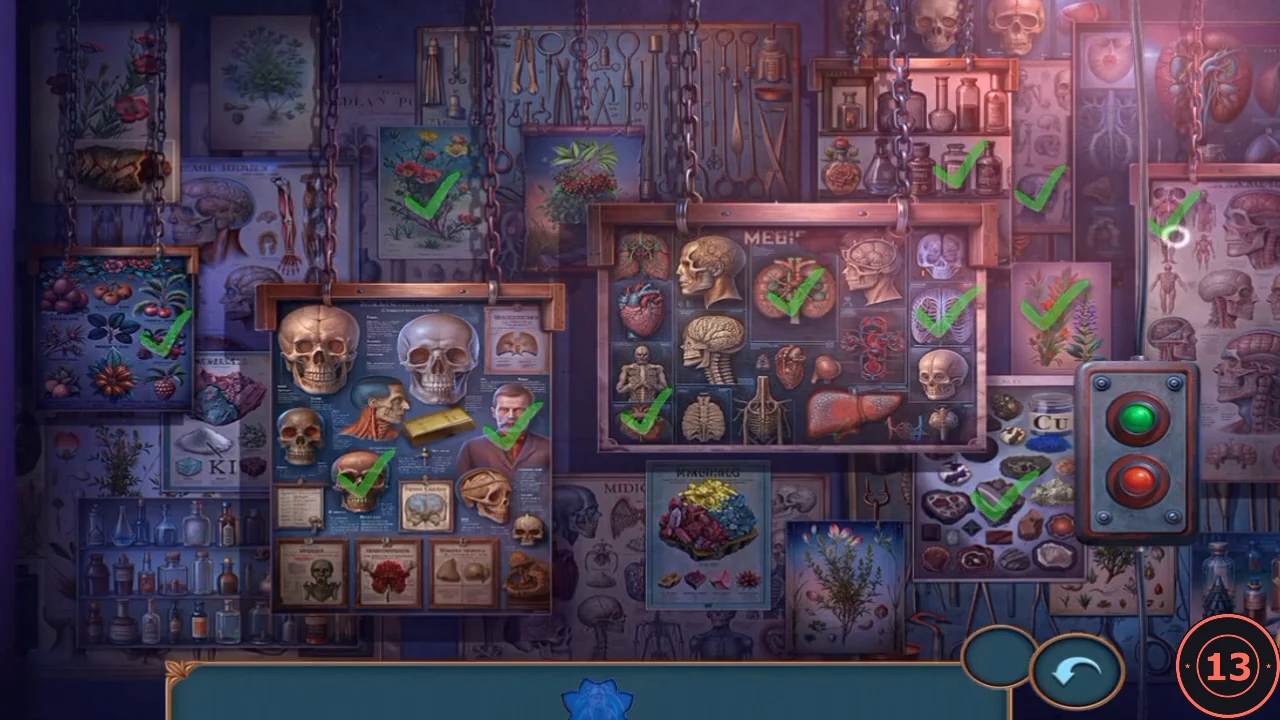
All 12 differences marked with green ticks.
The accusation
The amulet opens the tall glass cabinet, which holds an accusation against Emily's father.
- Open the tall glass cabinet left of the lab door and place the DOCTOR AMULET in the star-shaped socket.
- Read the Summons to Appear for Mr. Charles Banks, Emily's father, suspected of involvement in the sailor murders. This unlocks GUILTY! OR NOT....
- Take the GLASS CUP. The painted box beside it has a six-letter roller lock; leave it for now.
Courtyard toys
Go out to the courtyard.
- Open the flowerbed with the frog statue. Use the GLASS CUP to dig beside the frog and take the RED-TIPPED CRANK.
- Look at the pump by the drain: it needs a lever. A coin glints in the drain.
- Use the CRANK HANDLE on the red jack-in-the-box. Take the LOLLIPOP the jester holds.
Ants and a toy mouse
Use the lollipop and the toy mouse to recover the pet tag that opens the painted box.
- In Emily's room open the ant farm and drop the LOLLIPOP into the top hole. The ants carry out a WIND-UP KEY; take it.
- Open the TOY MOUSE (+) in your inventory and attach the WIND-UP KEY.
- Open the narrow gap under the dresser and use the WIND-UP MOUSE. It brings back a pet tag reading PRINCE.
Painted box letter lock
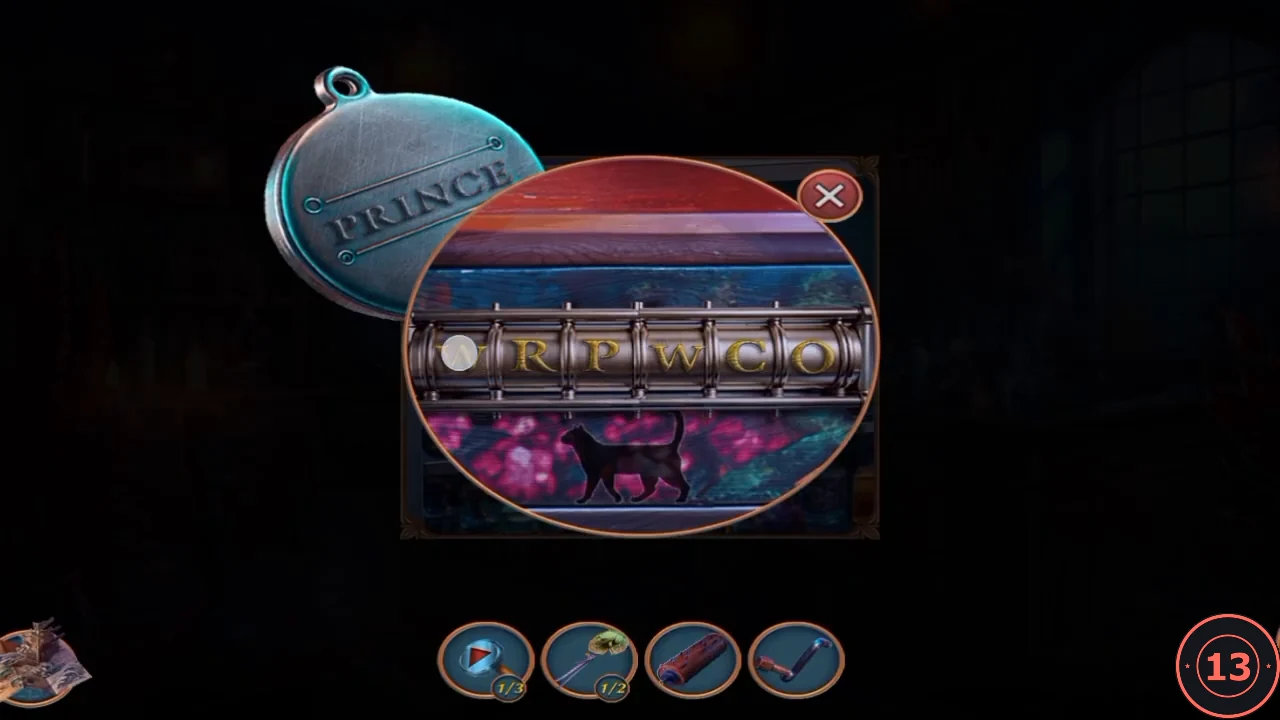
The painted box in the lab's glass cabinet has six letter rollers.
- Use the PRINCE TAG on the box and turn the rollers to spell PRINCE.CODEPRINCE
- Take ABACUS PART (2/3) and the MAGNET.
- In Emily's room open the bedside drawer again and use the MAGNET on the gap. Take ABACUS PART (3/3).
Emily's bead abacus
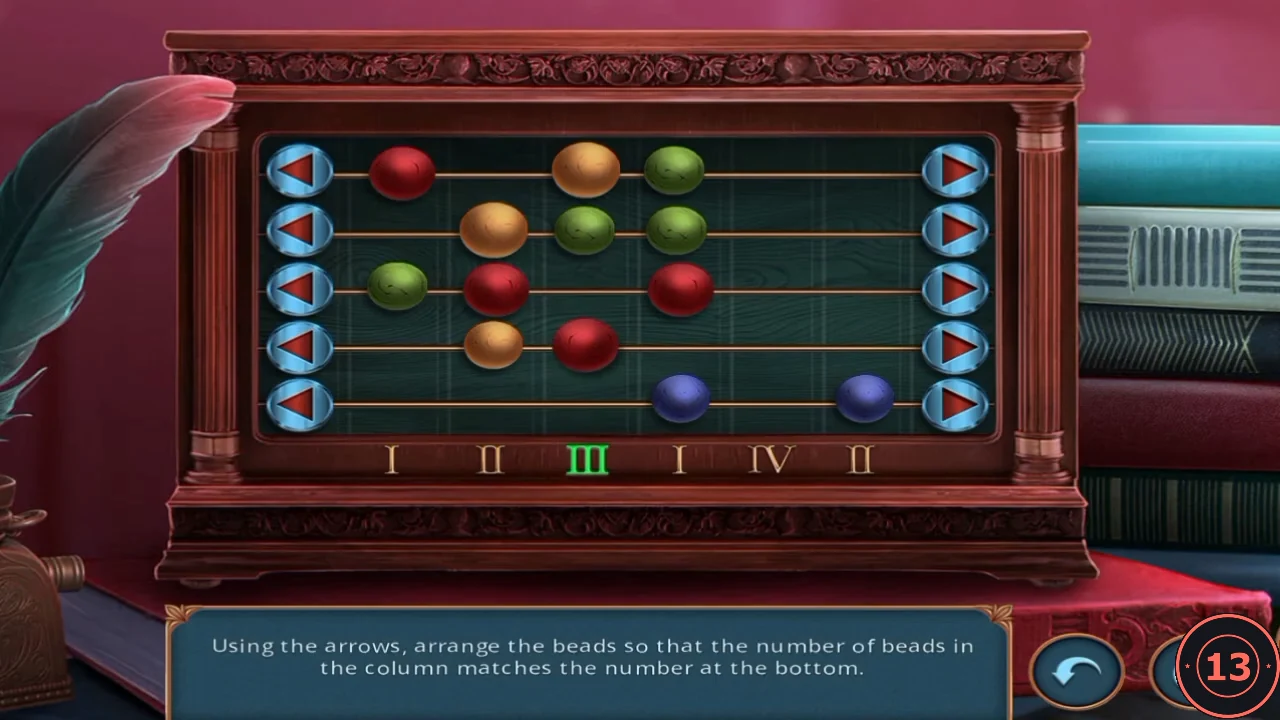
Rule: "Using the arrows, arrange the beads so that the number of beads in the column matches the number at the bottom." The arrows slide a whole row of beads left or right. The six column targets are I, II, III, I, IV, II.
- Open the abacus on the desk and place the ABACUS PARTS.
- Shift the five rows until the six columns hold 1, 2, 3, 1, 4 and 2 beads. Each arrow moves its whole row, so the beads in a row keep their spacing. Solved layout (columns numbered 1-6 from the left): row 1 beads in columns 3, 5, 6; row 2 in 4, 5, 6; row 3 in 2, 3, 5; row 4 in 1, 2; row 5 in 3, 5.
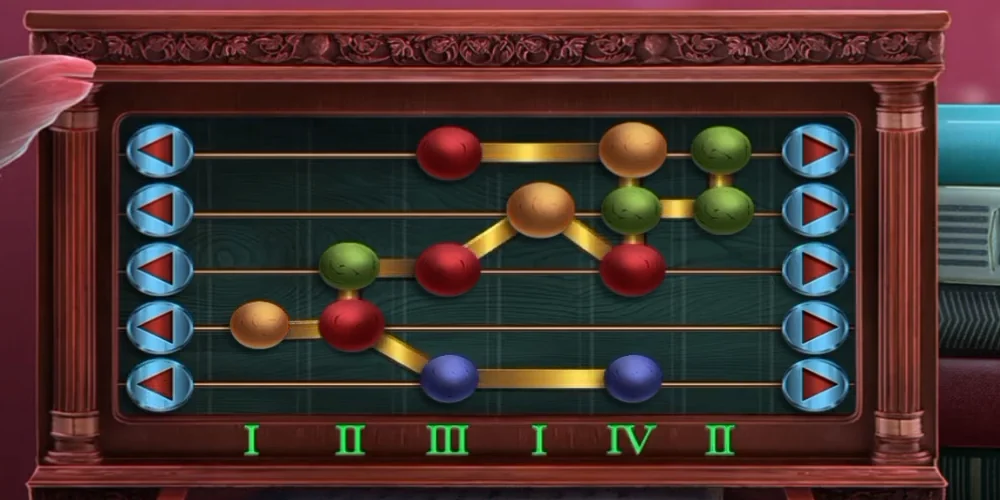
Solved: the columns match I, II, III, I, IV, II. - Read Emily's NOTE: her father sent her to the market near the docks and she hoped to find evidence that he is innocent. DETECTIVE ON GUARD unlocks and the task "Search Emily's room" completes.