Into the alley
A second decision point at the murder scene, then a first look around the alley and the street.
- George worries about being at a murder scene. Choice: "Of course! We're looking for Emily." costs 35 coins and earns 1 point (Be positive); "We're really breaking the law..." is free and earns 0 (Be skeptical).
- Look at the briefcase on the ground. Its fancy lock cannot be opened yet.
- Go back to the street and open the crate with the paper list attached.
Crate manifest
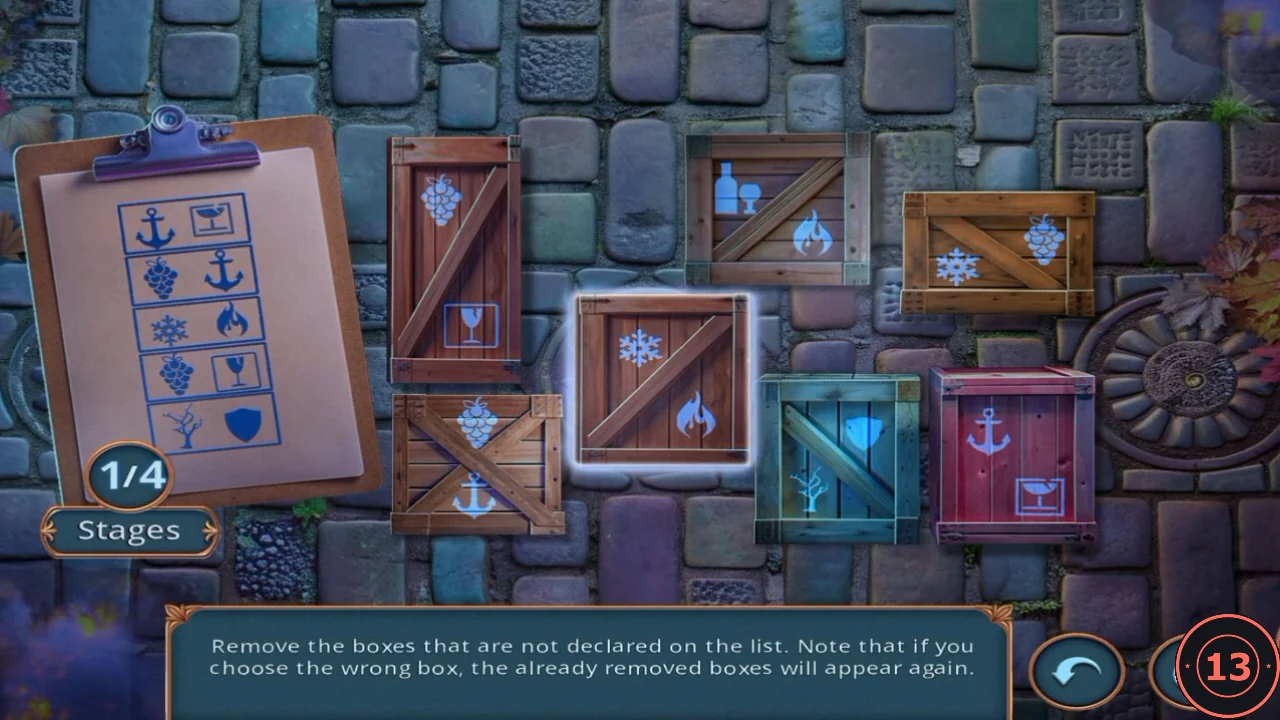
Rule: "Remove the boxes that are not declared on the list. Note that if you choose the wrong box, the already removed boxes will appear again." The list shows pairs of symbols; every crate shows two symbols.
- For each crate, check whether its symbol pair appears on the list (in either order). Tap only crates whose pair is missing. Stage 1 lists anchor+glass, grapes+anchor, snowflake+fire, grapes+glass and branch+shield, so the glass+fire crate and the snowflake+grapes crate go. Stages 2-4 use longer lists (up to 10 pairs) with the same rule.
- Open the crate and take the MAGNIFYING GLASS.
First clues in the alley
Examine the victim and the broken window for the first clues and supplies.
- Open the victim close-up and use the MAGNIFYING GLASS on his sleeve to spot strange dirt. Take the LEATHER STRAP from the sleeve.
- Open the broken window on the left building and use the STRAP on the broken glass. Take the CLOTH from inside.
- Go back to the street vendor; he now has new goods. Tap him to start his hidden-object scene.
Bargain hunt
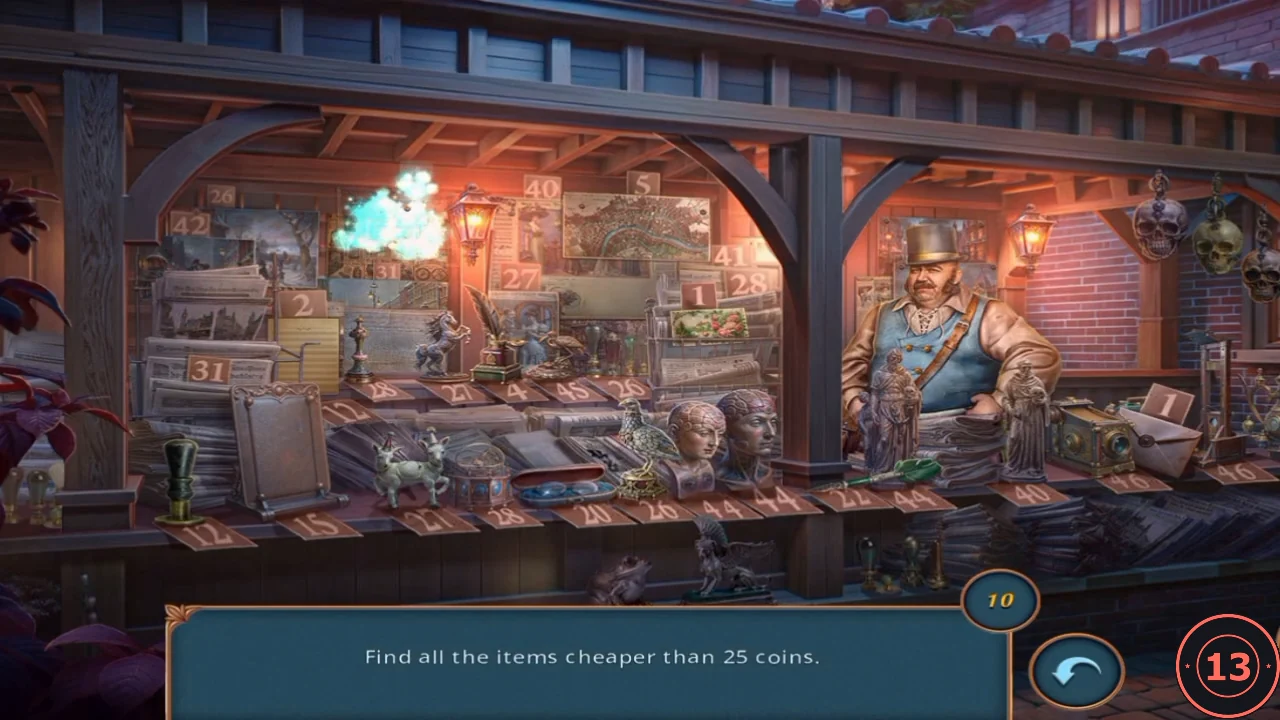
Task: "Find all the items cheaper than 25 coins." Every item has a price tag; there are 12 to find.
- Find the 12 items listed here by their price tags, all below 25: 22 (picture, top left), 4 (calendar), 5 (map), 1 (seed box), 2 (papers on the left shelf), 12 (small easel), 4 (quill and inkwell), 12 (seal stamp), 15 (picture frame), 20 (glasses), 22 (green pen) and 1 (envelope).
The dog, the jar and two emblems
Collect the fish and anchor emblems for the briefcase, plus a glass jar holding a dirt sample.
- Give the HAM to the dog by the vegetable stall. When it moves, take the FISH EMBLEM from the ground.
- Hang the BULL FIGURINE on the hook of the bowl container. The lid opens; take the GLASS JAR.
- Open the cobblestones close-up in the alley. Use the JAR to collect the dark dirt, then use the CLOTH to wipe the last stain and take the ANCHOR EMBLEM.
Fish and anchor briefcase
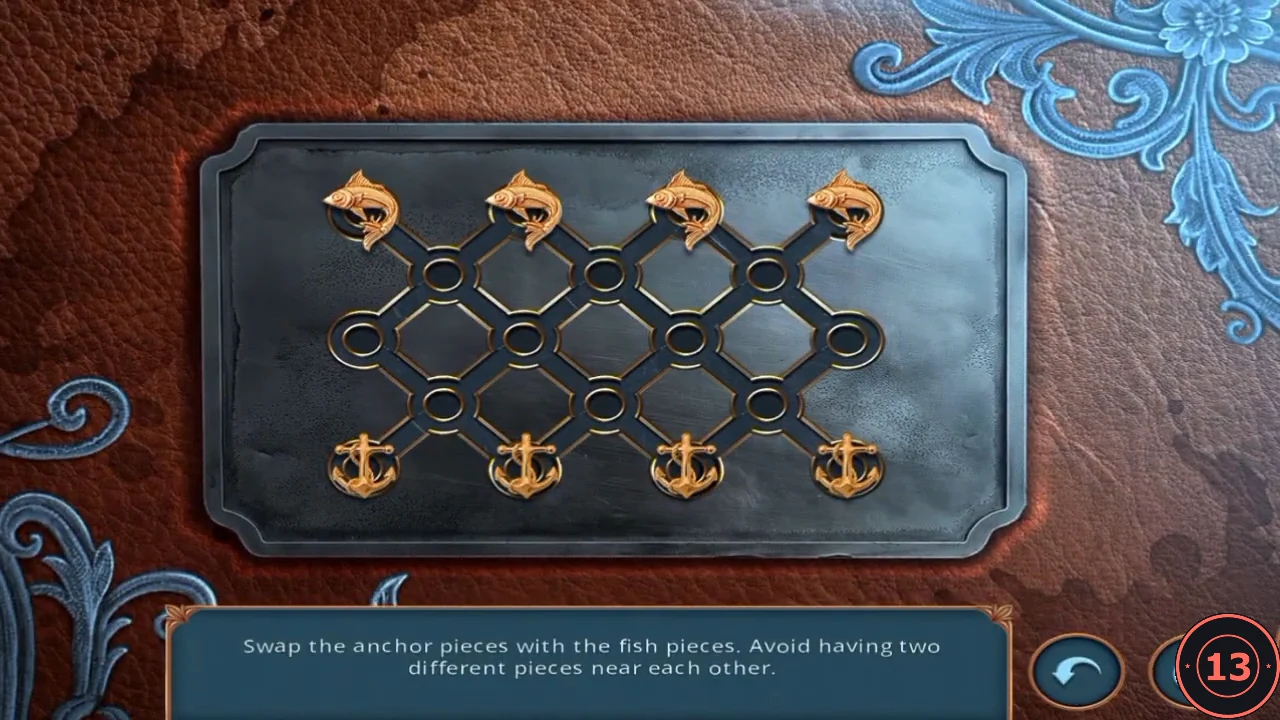
Rule: "Swap the anchor pieces with the fish pieces. Avoid having two different pieces near each other." Four fish start in the top row and four anchors in the bottom row of a diamond-shaped grid.
- Open the briefcase and place the FISH EMBLEM and the ANCHOR EMBLEM.
- Tap a piece to see its possible moves (blue rings), then tap a ring to move one step. A fish and an anchor may never stand on neighbouring spots. A workable approach: send the anchors up the left side and the fish down the right side, moving them alternately so the two groups pass without touching. Use the reset arrow if you get stuck. Pieces glow green on their target row.
- Take EMILY'S HAIRPIN from the open briefcase.
- Thomas wants to talk to Emily's father, but a constable is standing outside the pharmacy. Choice: "Shrug" (free, 0 points), "Ask George to distract him" (25 coins, 2 points) or "Sneak into the backyard" (35 coins, 4 points). With the free option George suggests sneaking in anyway, and the 35-coin option leads to the same backyard. The scene for the 25-coin option was not verified for this guide.
Making a long rope
Behind the pharmacy, assemble a long rope to reach the upper window.
- Open the flowerbed with the frog statue. Use the SCISSORS on the rope reel and take the ROPE COIL.
- Open the playhouse on the right. Take the brass MICROSCOPE OBJECTIVE and the knotted SHEET ROPE.
- Open the RED ROPE (+) in your inventory and add the ROPE COIL and the SHEET ROPE to make a LONG ROPE.
- Open the balcony above the red-lit window and use the LONG ROPE on it.
Rope timers
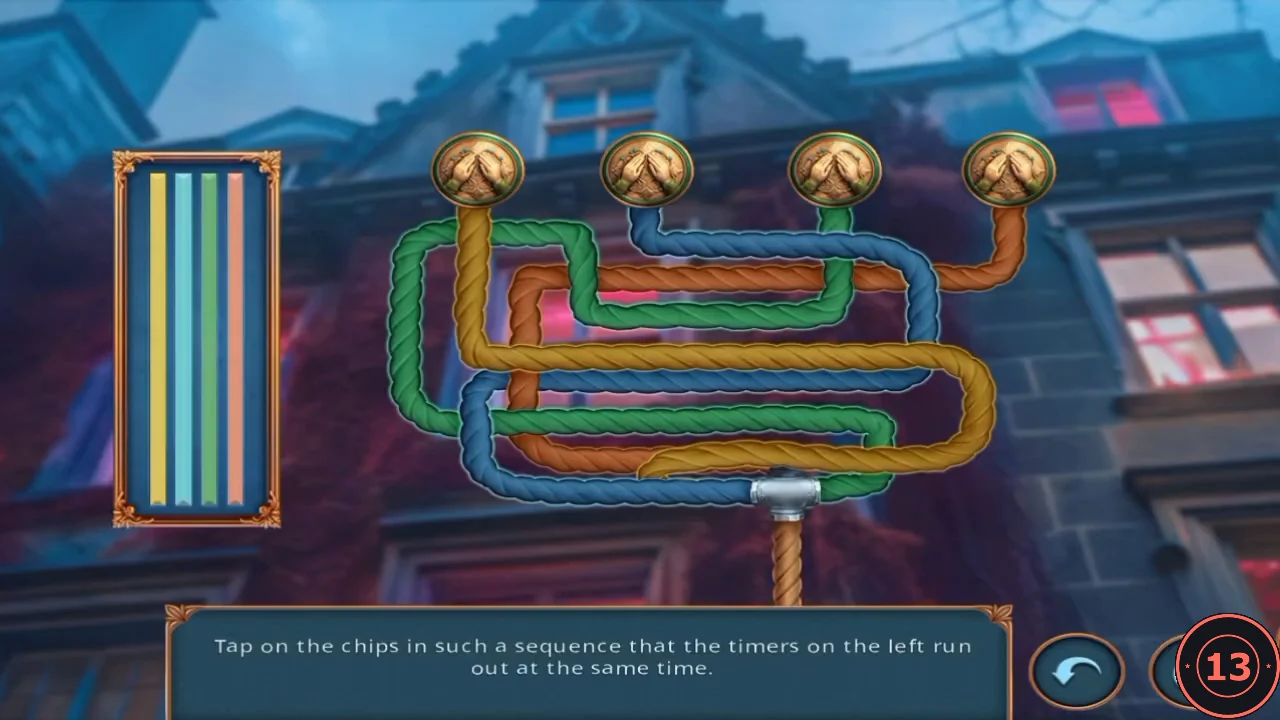
Rule: "Tap on the chips in such a sequence that the timers on the left run out at the same time." The four chips at the top (yellow, blue, green, orange from left to right) each start one of the four bars on the left. Bars on longer ropes drain more slowly.
- Tap the chips in this order, about 1.5-2 seconds apart: 3rd (green), 4th (orange), 2nd (blue), 1st (yellow). All four bars empty together. If they do not, press reset and adjust the gaps.
The key gate and Emily's room choice
Keys are a separate currency from coins and recover over time (the game offers key-recovery notifications). Entering the lab costs 1 key; searching Emily's room costs a second key.
- At the lab the game shows a padlock: "Use the key to continue the adventure." Spend 1 key to continue.
- George suggests searching Emily's room. Choice: "I'm in! It's for her sake." costs 1 key and earns 6 points; "Going through her stuff seems wrong." is free and earns 0. The main walkthrough below follows the search route; the next section covers the free option.
If you choose not to search Emily's room
Choosing "Going through her stuff seems wrong." costs nothing but earns 0 decision points. The route is shorter: Emily's room and its puzzles are skipped entirely.
- Pick "Going through her stuff seems wrong." George answers: "Yeah, but... I mean, she could be in danger! Okay... it's your choice." The task "Get into the pharmacy lab" completes and the new task "Examine the dirt from the crime scene" starts in the lab; Thomas does not go into Emily's room.
- Skip Part 3 except its lab and courtyard steps: do "Microscope and scales", "Poster differences", "The accusation" and the frog dig in "Courtyard toys" exactly as written. The flask painting, the jack-in-the-box, the ant farm, the toy mouse, the painted box and the abacus are not needed on this route. The painted box stays locked; Thomas only remarks that the drawing on it is no accident because Emily's family has a cat.
- Continue with Part 4 as written: crank and drum roll into the barrel organ, the doll on the cabinet shelf, then the microscope. The rest of the episode is the same. DETECTIVE ON GUARD (check out Emily's room) is not earned on this route.