First look around the ground-floor apartment
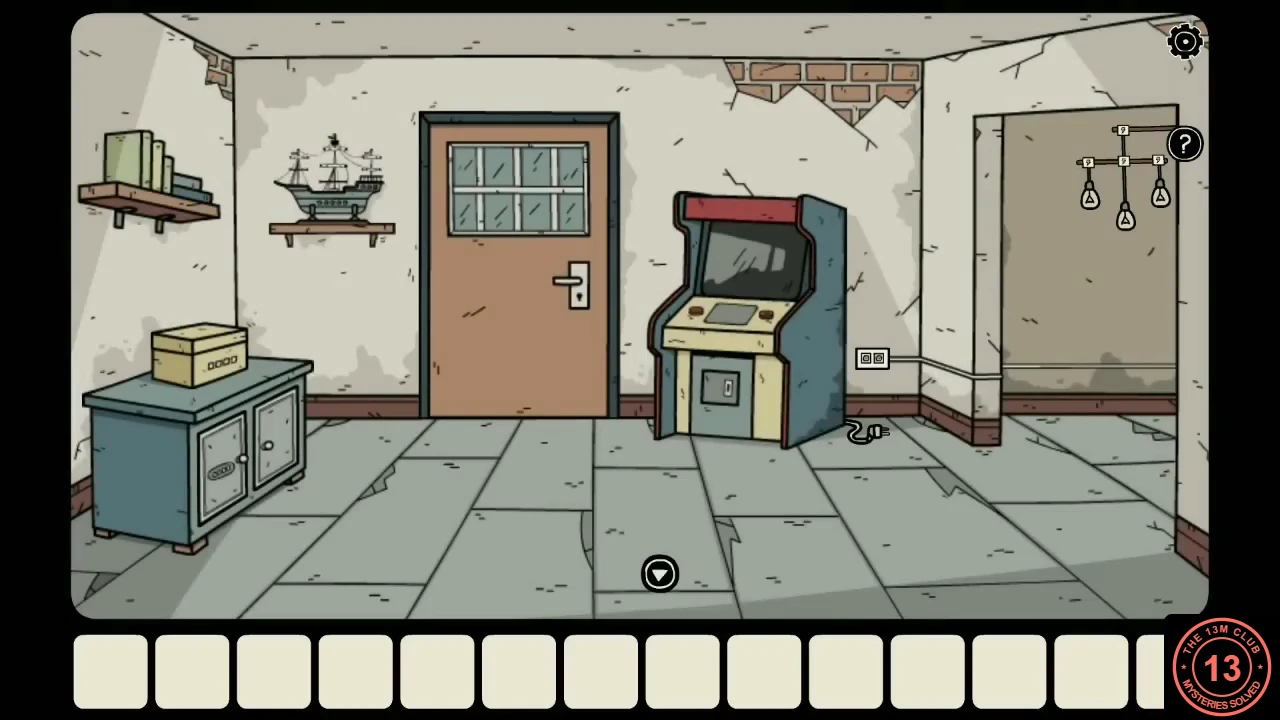
Darien enters the building's ground-floor stairwell. The elevator needs a key, so go through the apartment door marked 1. Its hallway has a toy train set on a rug, a table with a blue box on the right and pictures on the walls. The archway at the back leads to the arcade room, which has a ship model on a shelf, a door to the backyard and an arcade machine; the doorway on the right of the arcade room leads to the power room, with a chandelier of bulbs, a power box, a red box on a shelf, a three-drawer cabinet and a table where a spider sits on some files.
- In the stairwell, examine the keyhole beside the elevator: Darien notes that it needs a key. Go through the apartment door marked 1.
- Go through the hallway archway into the arcade room. Take the fingerprint scanner from the open right-hand side of the blue cabinet on the left. The cabinet's left-hand door has a four-tile lock, and the small yellow box on top of it needs a four-digit code.
- Plug the arcade machine's loose cable into the wall socket to its right. Nothing happens, because the building has no power yet.
- In the power room, open the middle and bottom drawers of the three-drawer cabinet: take the toy train manual and the toy train engine. The top drawer has a four-symbol lock.
- Go through the door at the back of the arcade room into the backyard. Open the can on the shelf next to the toolbox and take the note with a hint: it shows the bulb chandelier with four bulbs highlighted.
- Look closely at the trunk of the tree on the left: a small grid of bricks with five crosses is scratched into the bark. You need it for the ship model inside.
The ship chest and the treasure map
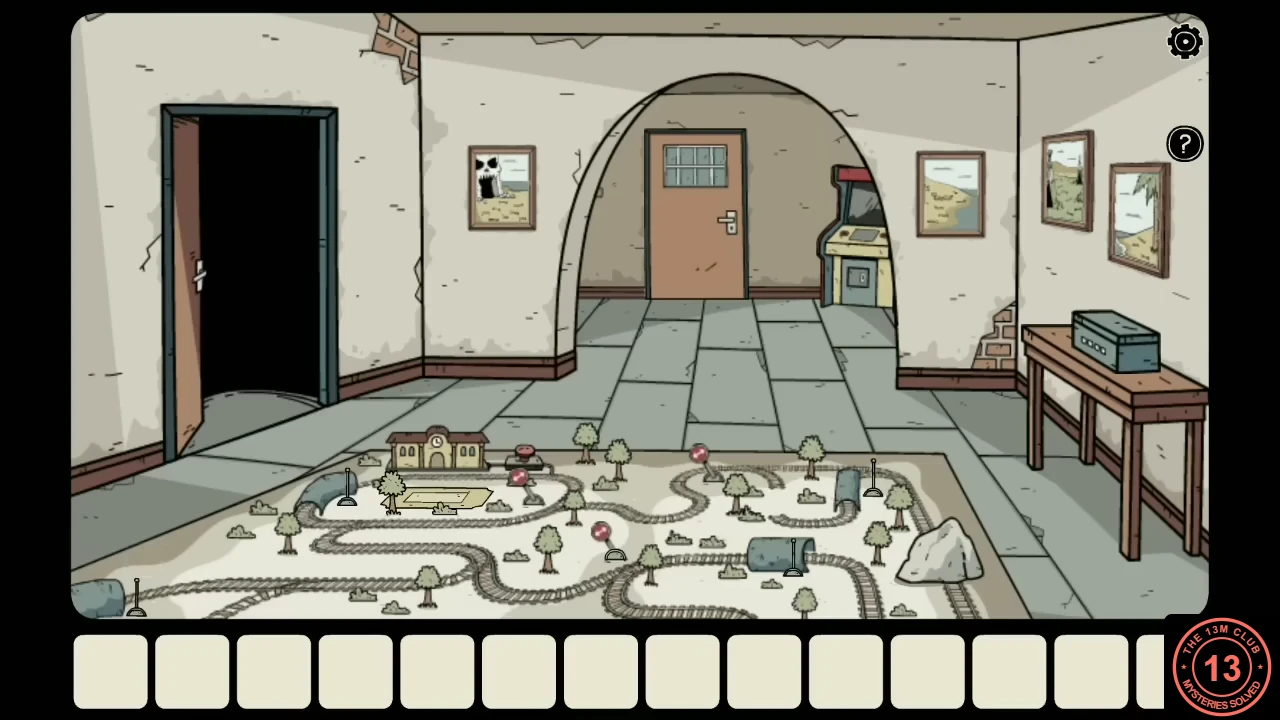
The ship model on the arcade-room shelf carries a small wooden chest on its deck, and the chest's lid is made of bricks. The carving on the tree shows which bricks to press, and the map inside turns the hallway pictures into a code.
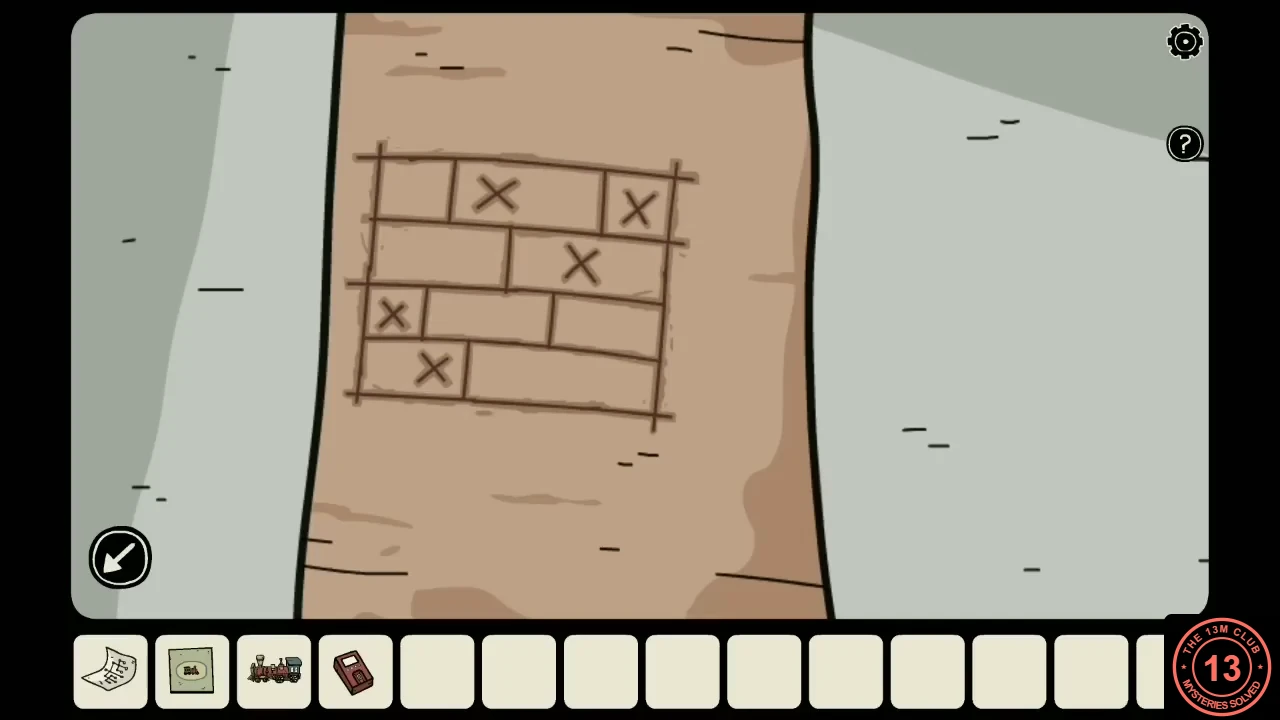
- Examine the ship model on the shelf to the left of the backyard door, then look closely at the small chest on its deck. Press the bricks in the same positions as the crosses on the tree: in the top row the second and third bricks, in the second row the right-hand brick, in the third row the small brick on the left and in the bottom row the left-hand brick. The chest opens: take the metal hook and the map.
- Examine the map. A dashed route leaves the ship and visits, in order, the skull island, the palm island, the island with tents and finally the sea serpent.
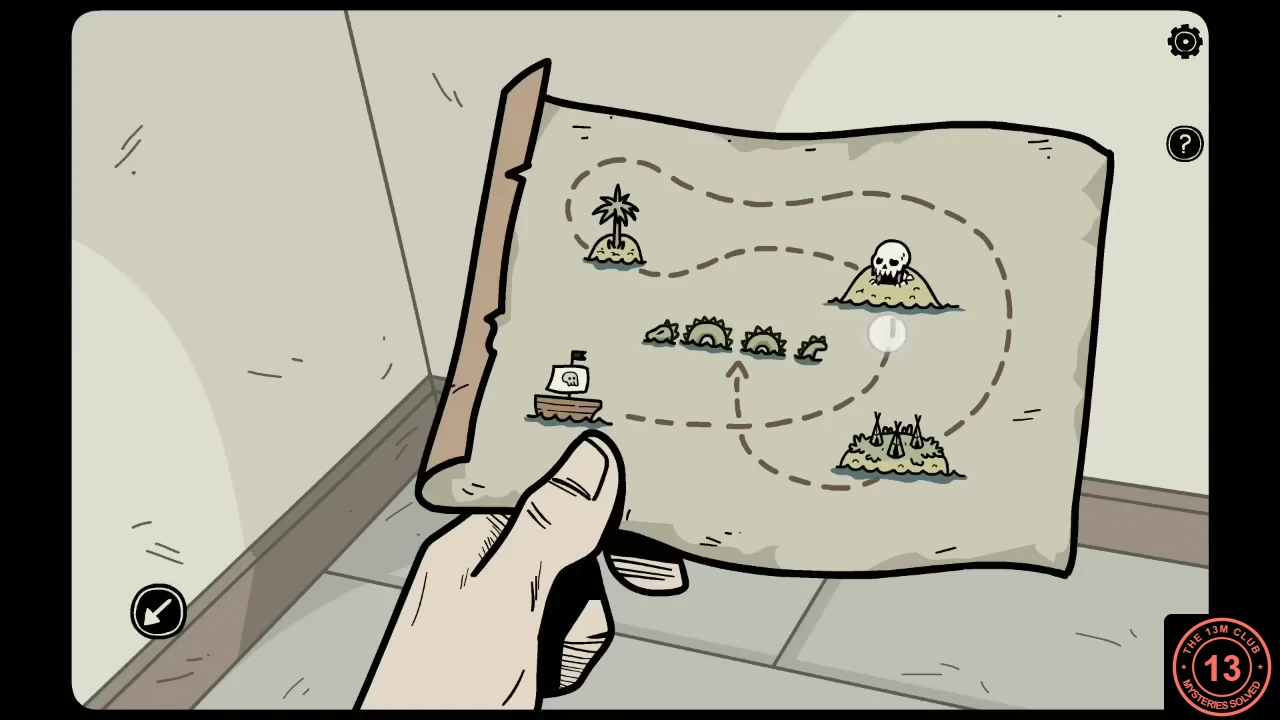
The map's route: skull island, palm island, tent island, then the sea serpent. - Each stop on the route has a matching picture on the hallway walls. Count the bones in each picture in route order. Example: skull island 8, palm island 3, tent island 5 and sea serpent 4.
- In the arcade room, set the four tiles on the blue cabinet's left-hand door to those numbers; each tile shows its number as a row of marks. Open the door and take the rubber snake and the shovel.CODE8354
The bird's nest, the swing and the symbol drawer
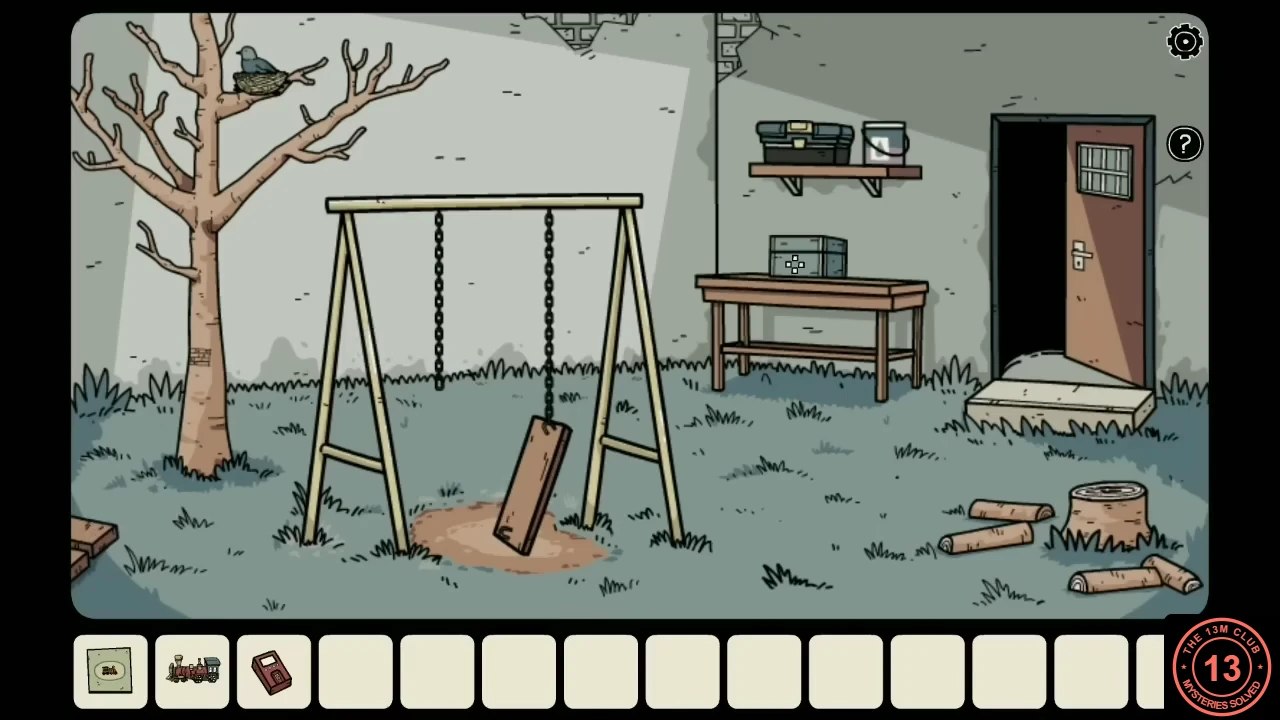
In the backyard, a bird guards its nest in the tree and the swing is missing a hook. Both lead to items for the power box and the toy train.
- Put the rubber snake on the branch next to the nest. The bird flies away: search the nest and take the grey key and the note with symbols.
- Attach the metal hook to the swing. The ghost of a boy appears on the seat and points at a spot on the ground. Dig there with the shovel and take the railroad switcher from the hole.
- In the power room, read the note with symbols and set the four tiles on the top drawer of the three-drawer cabinet to its symbols from left to right. Example: two vertical lines with a dot between them, an X with a dot at the bottom, a diagonal line with a dot in the upper corner, and a triangle with a dot inside. Take the token for the arcade machine.
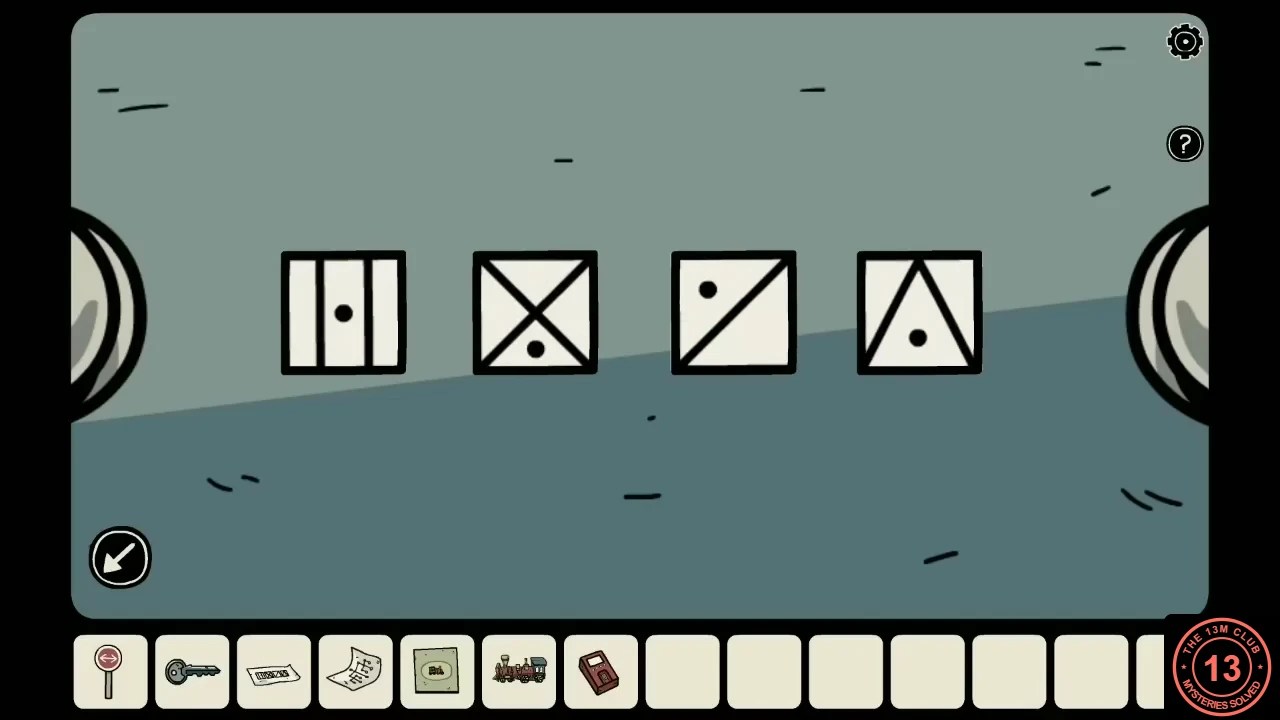
Example: the top drawer's lock set to the four symbols from the nest note.
Restoring the power
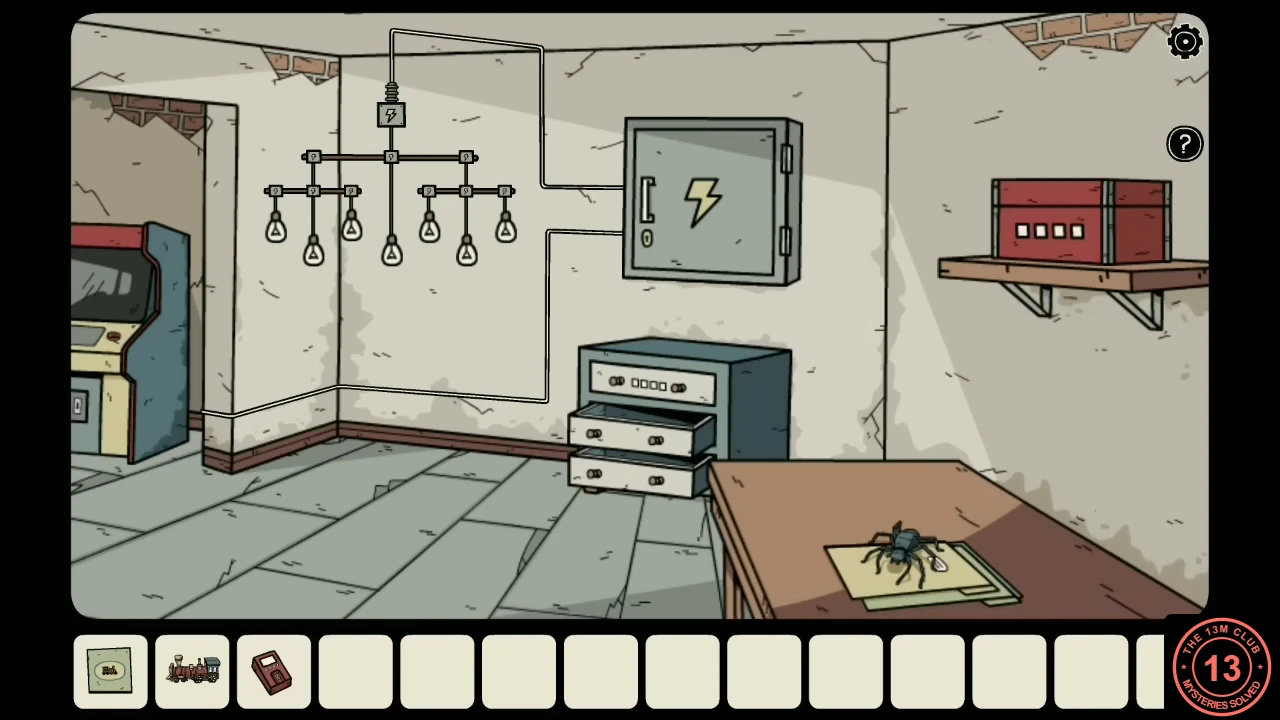
The grey key opens the power box next to the chandelier. Its small screen shows how the chandelier is wired: you route the current from the top down to each of the four bulbs marked on the note from the can.
- Unlock the power box with the grey key and open it. Its panel has four arrow buttons, a clear button and an Enter button.
- Check the note with a hint to see which four bulbs to light. Example: the outermost left and outermost right bulbs on the left-hand branch, and the left bulb and the lower middle bulb on the right-hand branch.
- Light one bulb at a time: enter the path from the top junction down to that bulb with the arrows, then press Enter. Every path starts by going down, then turns left or right at each junction until it reaches the bulb. For the example bulbs the paths are: down, left, down, left, down; down, left, down, right, down; down, right, down, left, down; and down, right, down, down. After the fourth correct path, power returns to the building.CODE↓←↓←↓ · ↓←↓→↓ · ↓→↓←↓ · ↓→↓↓
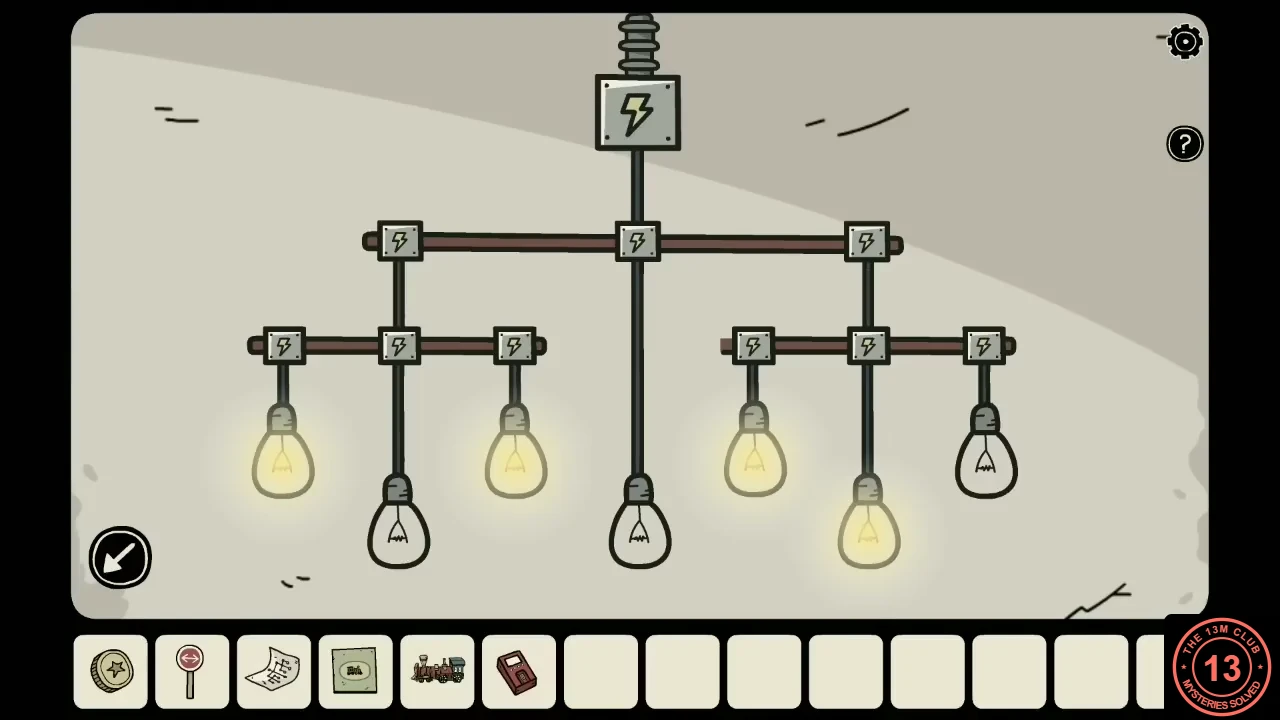
Example: the four bulbs from the note lit once the last route is entered.
The arcade, the spider and the fingerprint files
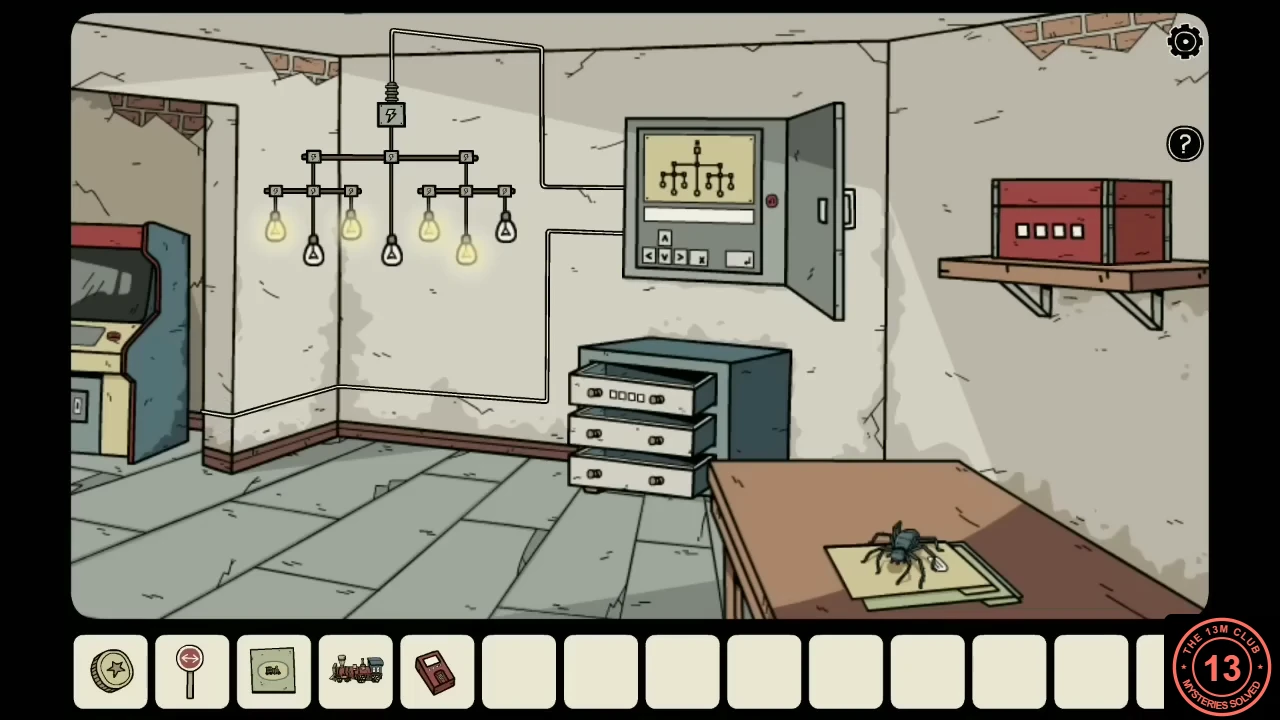
With the power back on, the arcade machine works. Its prize code opens the yellow box, the box holds a container for the spider, and the files under the spider explain the red box in the power room.
- Insert the token into the slot at the bottom of the arcade machine and press Start. Use the left and right buttons to move the little figure and catch the apples thrown down from the platforms. Catch ten apples to see PERFECT SCORE followed by a four-digit number; if an apple reaches the ground, the game ends and you can start again. Example: 5736.
- Enter that number on the small yellow box on top of the blue cabinet and take the plastic container.CODE5736
- In the power room, use the plastic container on the spider sitting on the files. The lights flicker and a shadow passes behind Darien; he calls out that he has come to help, but nobody is there.
- Open the files. Each of the four pages (Laura, Kay, Jim and Bobby) has a photo, a fingerprint and a small red mark made of three linked dots. Use the fingerprint scanner on each fingerprint to reveal a symbol. Example: Laura, a circle with a black lower half; Kay, a circle with lines from the top and the left meeting at a dot in the centre; Jim, a circle with three vertical lines; Bobby, a triangle inside a circle.
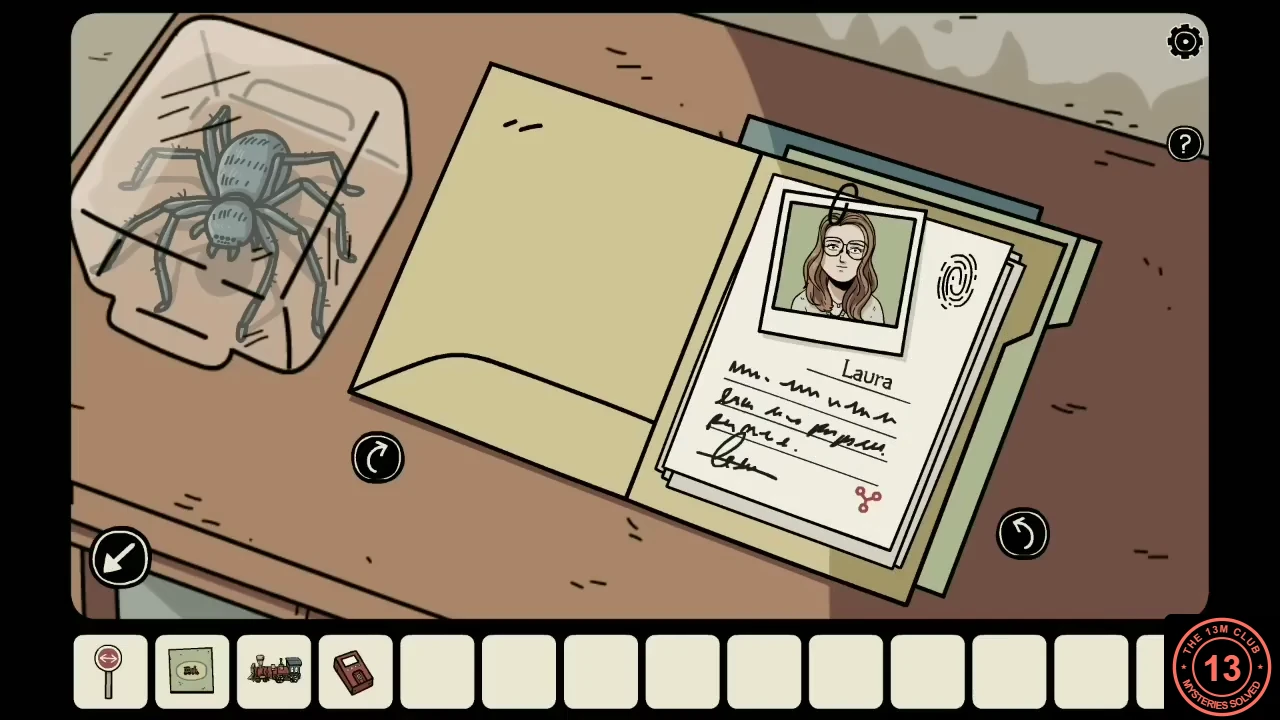
Laura's page: scan the fingerprint and note the red three-dot mark at the bottom. - Examine the red box on the shelf. Each of its four slots has one of the red three-dot marks above it. Set each slot to the symbol from the page with the same mark. Example, left to right: three vertical lines (Jim), half-black circle (Laura), triangle (Bobby) and the circle with two lines (Kay). Take the hammer and the miniature ship's wheel.
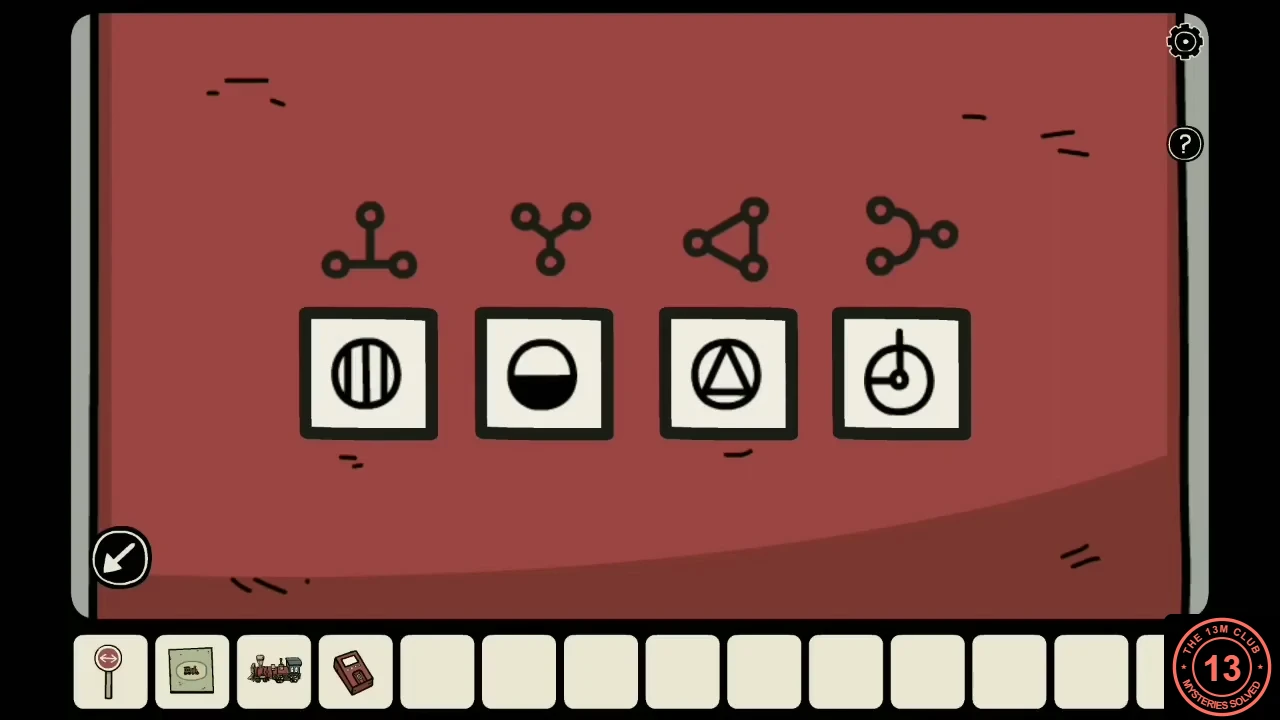
Example: each red-box slot set to the symbol from the file page with the matching mark.
The ship's sails and the toy train
Steering the ship model unfurls its sails, and their symbols open the blue box in the backyard. The piece of rail inside completes the toy train set in the hallway. The manual shows the goal: send the train through all four tunnels to raise four flags, then bring it back to the station.
- Fit the miniature ship's wheel into the slot on the ship model in the arcade room. The sails unfurl, and each one carries a symbol.
- In the backyard, examine the blue box on the table. Its four tiles form a cross that mirrors the sails: the left tile for the front sail, the right tile for the rear sail, the top tile for the upper middle sail and the bottom tile for the lower middle sail. Set each tile to its sail's symbol and take the piece of rail.
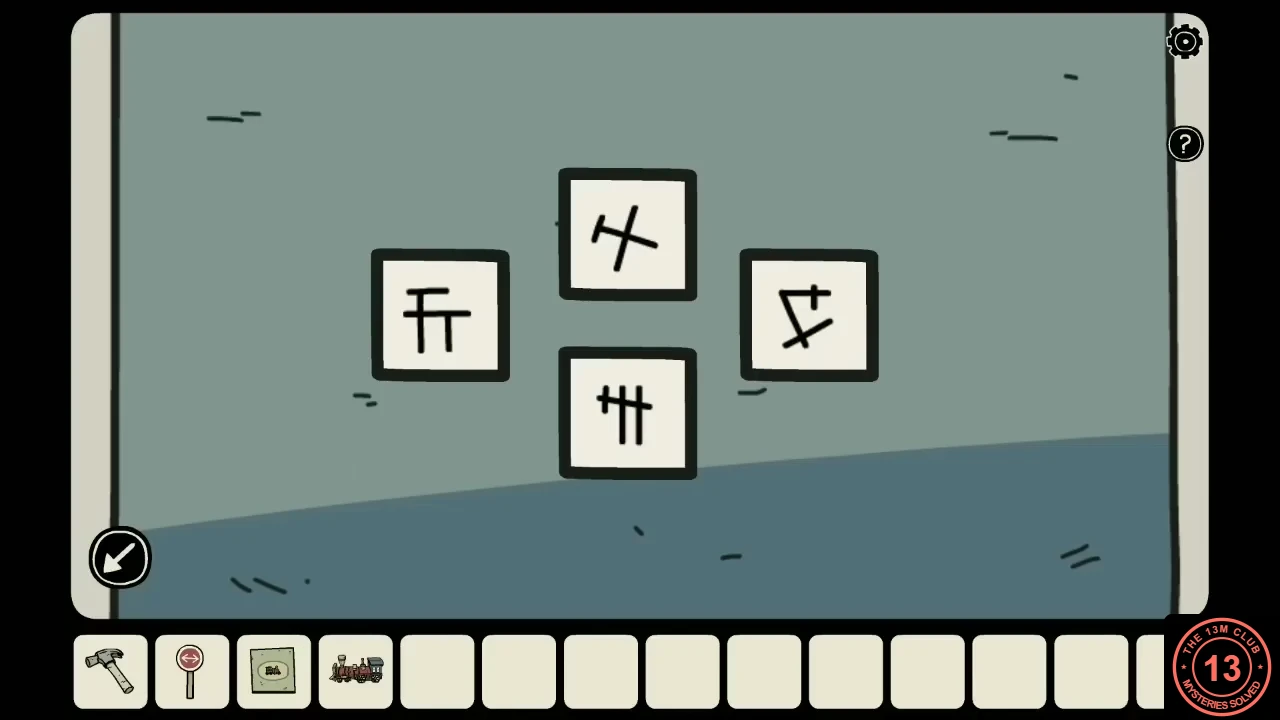
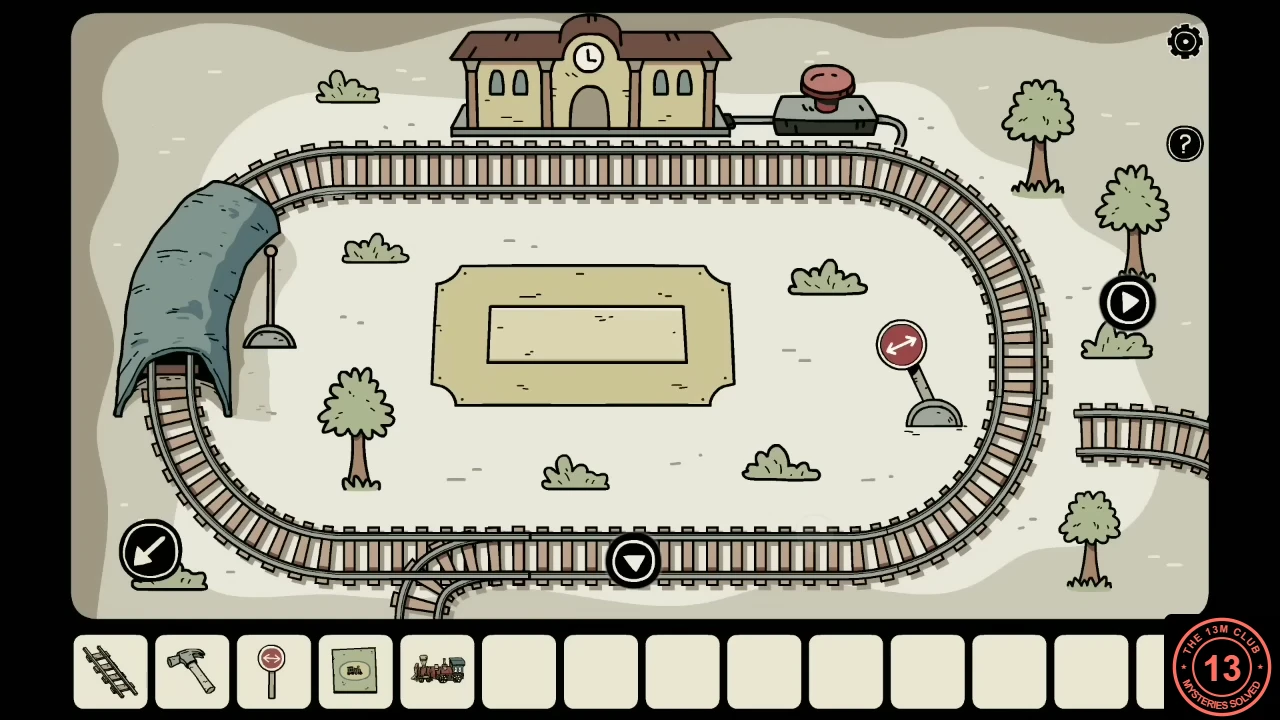
Example: the backyard box set to the four sail symbols, arranged like the sails. - Examine the toy train set in the hallway. It spreads over four boards arranged in a square: the station board, the board with an S-shaped track to its right, the board with a rock below that, and the fourth board (with a tunnel on its left) below the station. Use the arrows to move between them. Put the toy train engine on the track in front of the station.
- On the S-curve board, lay the piece of rail into the gap in the track. On the rock board, smash the rock with the hammer and insert the railroad switcher into its empty slot.
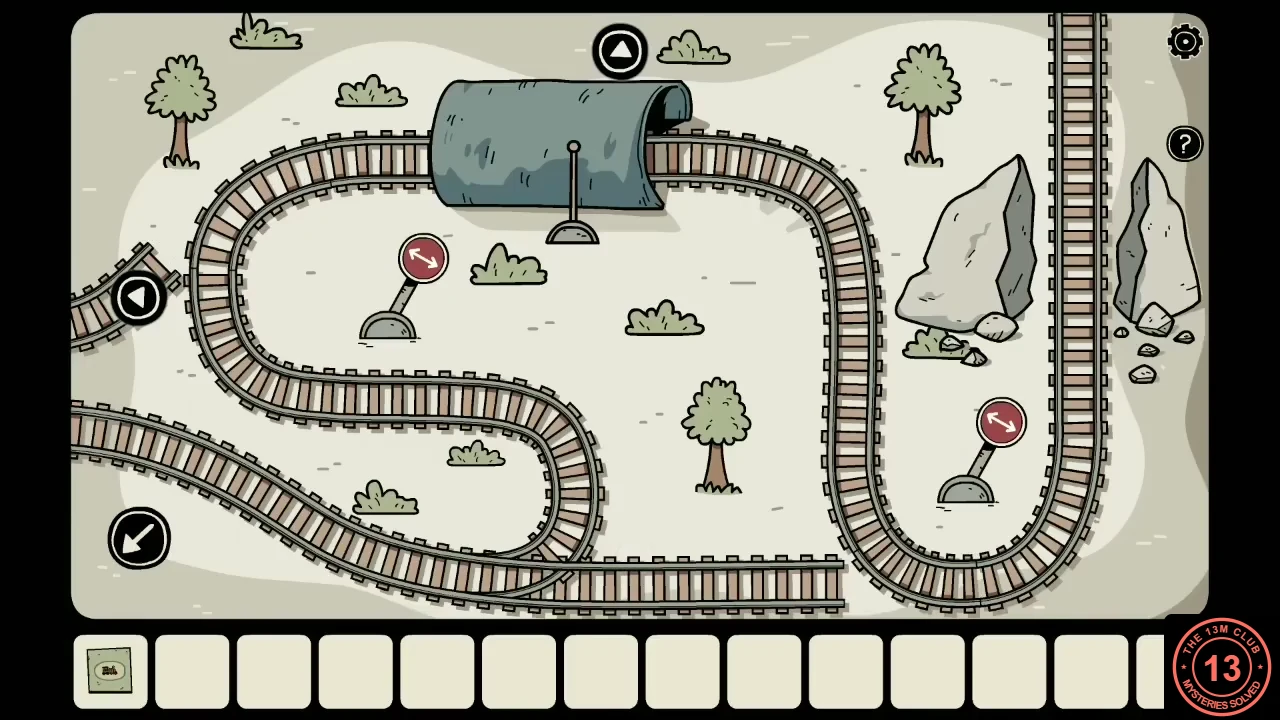
The rock board after the hammer and the switcher are used: both of its switch signs must be tapped. - Before starting the train, tap every red switch sign once: one on the station board, one on the S-curve board, two on the rock board and one on the fourth board. The station switch now sends the train off the right-hand side of the station board, and the other switches carry it through all four tunnels. This setting does not yet lead it back into the station.
- Press the red button beside the station. The train leaves on the right and runs through the four tunnels, raising a flag at each one; the view follows it from board to board. After the fourth tunnel it comes back onto the station board from below, along the bottom track. Tap the station board's red switch again straight away, before the train reaches the junction on the right: the track now curves up to the station instead of out to the right. The train stops at the station and the panel in the middle of the board opens to show four symbols. Example: a sign like a 4 (Jupiter), a sign like an h with a crossbar (Saturn), three wavy lines and a rectangle with bars above and below.
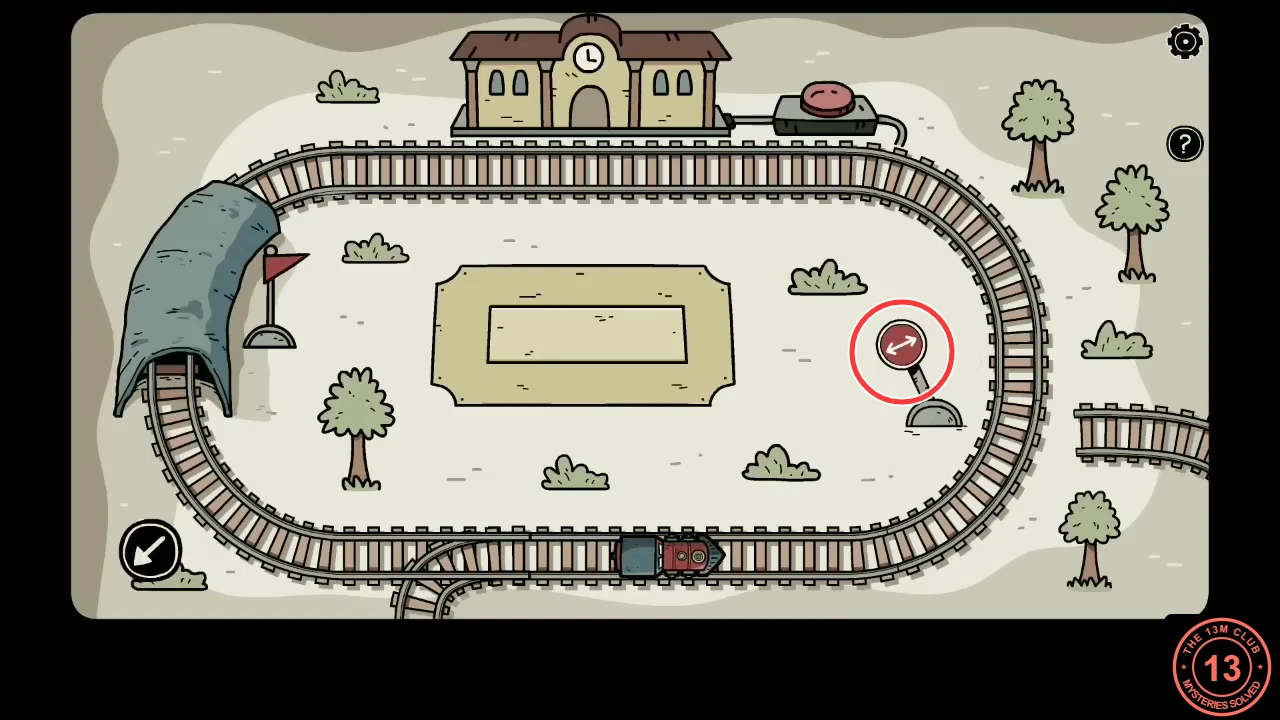
On the train's return: tap the circled station switch again so the line turns up to the station. - Set the four tiles on the blue box on the hallway table to those symbols and take the white key. Darien realises it is the key to the second floor.
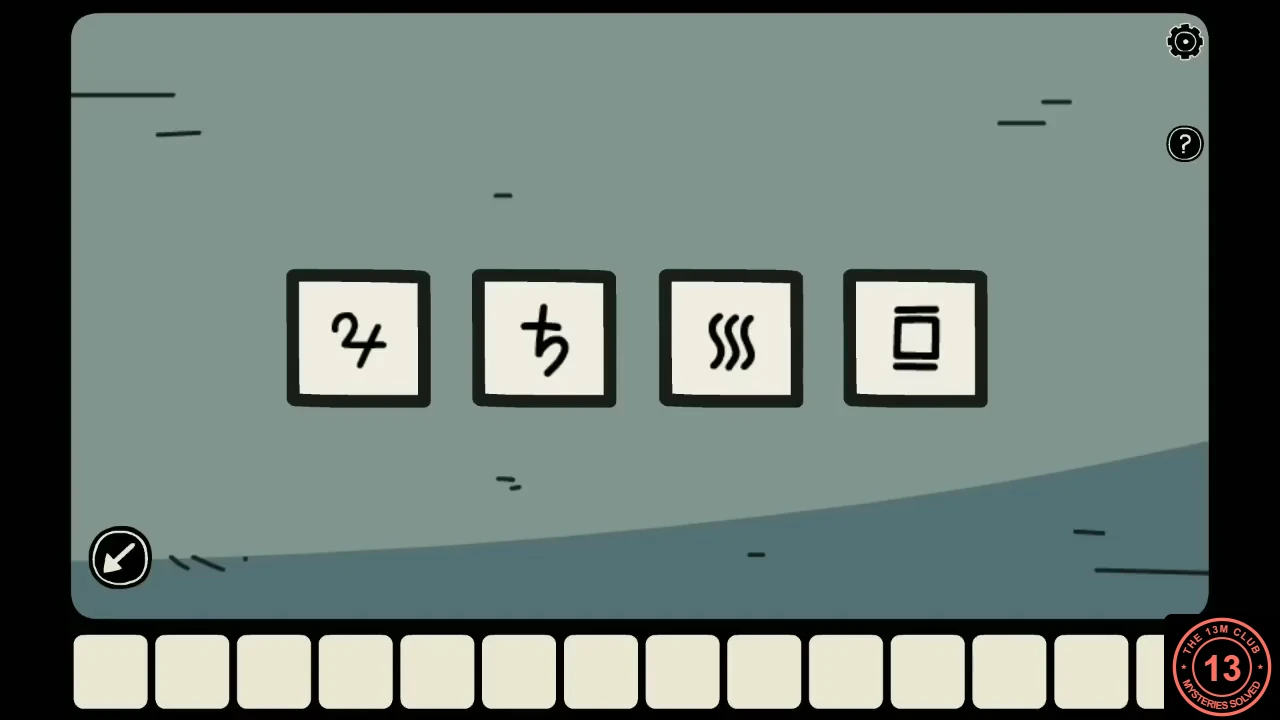
Example: the hallway box set to the symbols revealed at the station.