Setting Up a Co-op Game
Unsolved Case is played by two people at the same time, each on their own device, and the devices do not have to be the same platform. One player is Detective Old Dog and the other is Detective Ally. Both devices need a stable internet connection for the whole game and compatible versions of the game, so update both copies before you start. The game has no built-in voice chat, so start a call or another voice chat app separately: most clues are split between the two detectives, and you will need to talk the whole time. Many close-up views also show a Draw On Anything button for marking clues.
- One player chooses Play Co-op, taps Continue through the tips if they appear, then chooses Create Game and shares the invitation code shown in the lobby.
- The other player also chooses Play Co-op, taps Continue through any tips, then chooses Join Game, types in the invitation code and presses Join.
- Decide who plays Detective Old Dog and who plays Detective Ally, then press Start. Tap the arrow in the lower-right corner to move through the opening comic.
Fixing the Walkie-Talkies
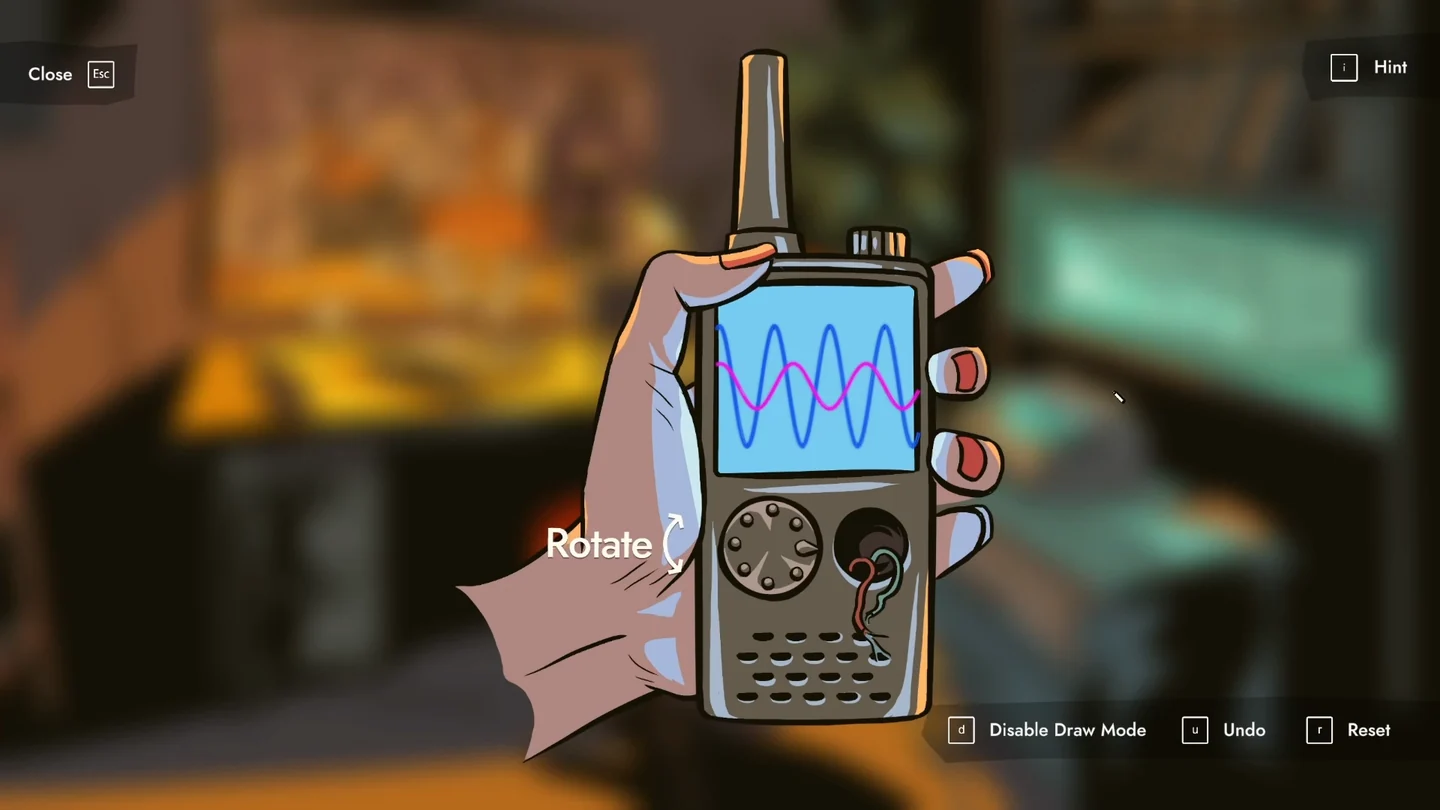
Each detective starts alone in their office with a locked metal case on the desk. First, get the two walkie-talkies talking to each other.
- Both detectives tap the walkie-talkie lying on the front-left of the desk. Its screen shows two waves, and each radio has only one working knob.
- Old Dog turns his knob to change the height of a wave. Keep turning until both waves on his screen are the same height.
- Ally turns her knob (marked Rotate) to change how tightly the wave is packed. Keep adjusting together until the peaks line up and both waves merge into one.
Pin-Up Board: The First Digit
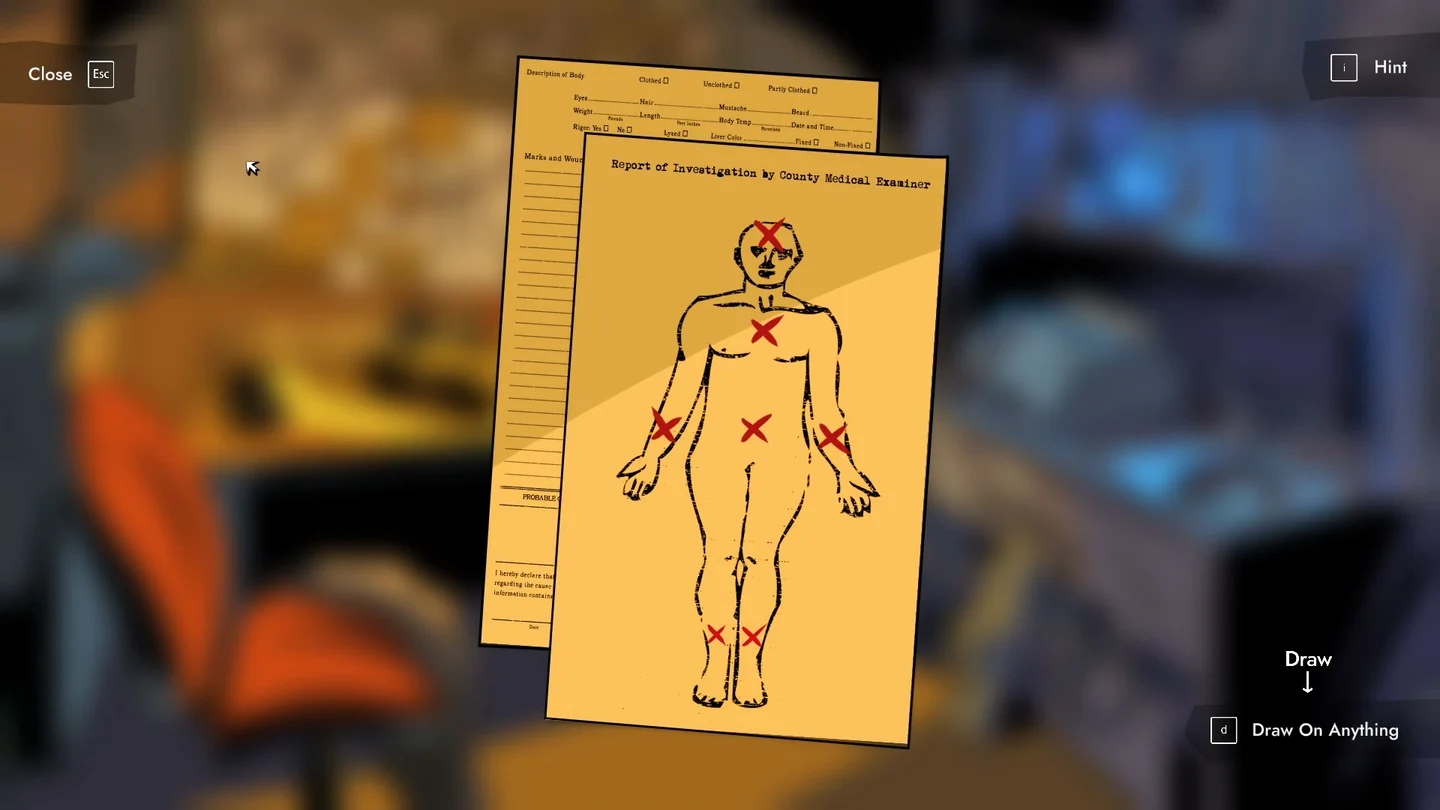
The left side of the case lock has three pictures, one for each digit: a pair of feet, a fax machine and a tape recorder. The feet point to the medical report and toy photo on the pin-up boards.
- Ally opens the photo on her pin-up board. It shows four broken toys on a shelf: a teddy bear missing a leg, an orange creature missing its head, a doll missing an arm and a box robot missing its other arm.
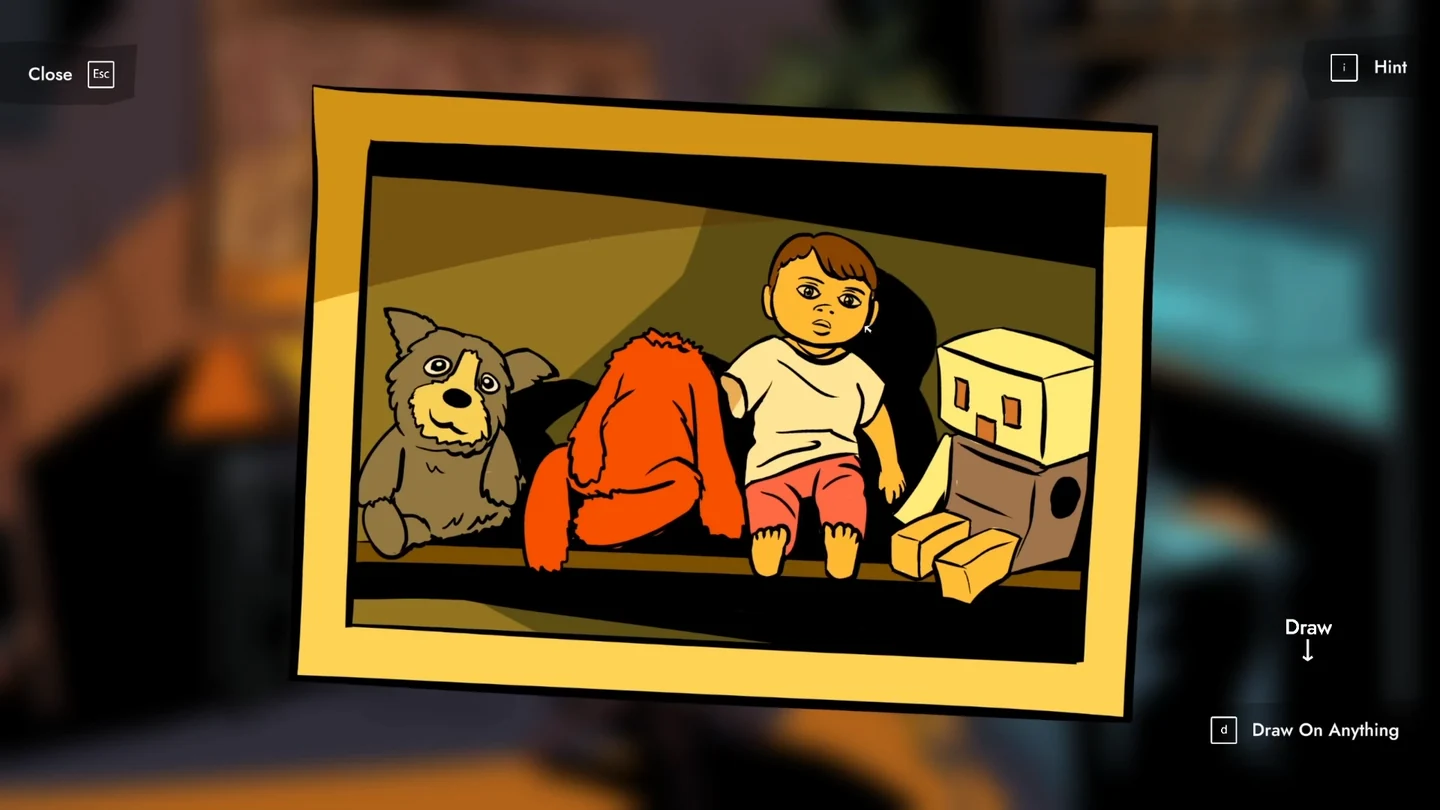
Ally's photo: each toy is missing a different body part. - Old Dog opens the Report of Investigation by County Medical Examiner on the left of his board. The body chart has red crosses on the head, chest, belly, both wrists and both lower legs just above the ankles. Turn on Draw Mode and join the crosses that match the toys' missing parts, in the toys' order: leg, head, arm, other arm. On screen, start at the cross on the right lower leg, draw straight up to the head, then diagonally down to the cross on the left wrist, then straight across to the cross on the right wrist. The lines form the number 4.CODE4
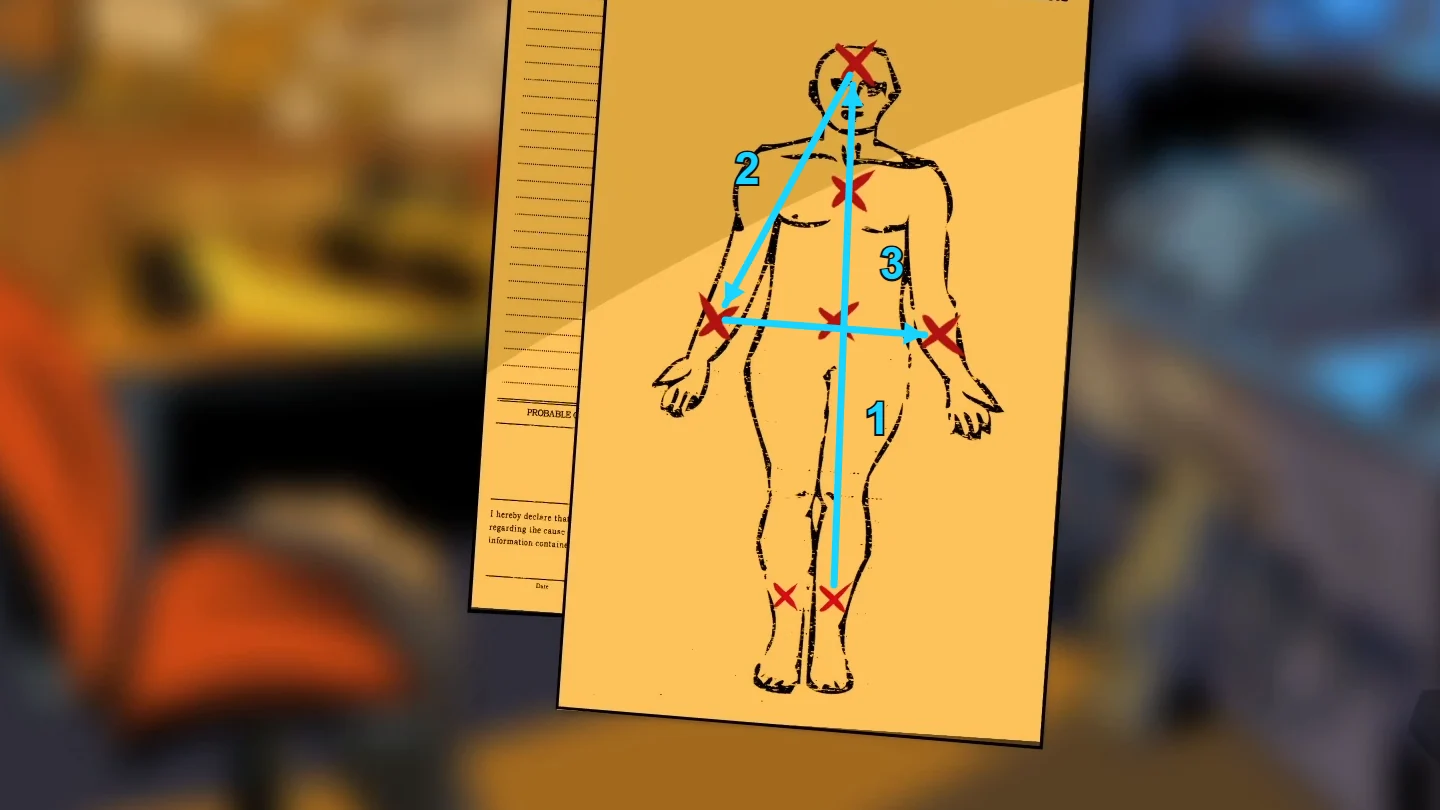
On screen, join the crosses in this order: 1 right lower leg up to the head, 2 head down to the left wrist, 3 across to the right wrist. The lines form a 4. - Old Dog sets the first wheel of the case lock to 4. The three pictures (feet, fax machine, tape recorder) sit to the left of the latch, and the three number wheels sit to the right of it in the same order.
Fax Letters: The Second Digit
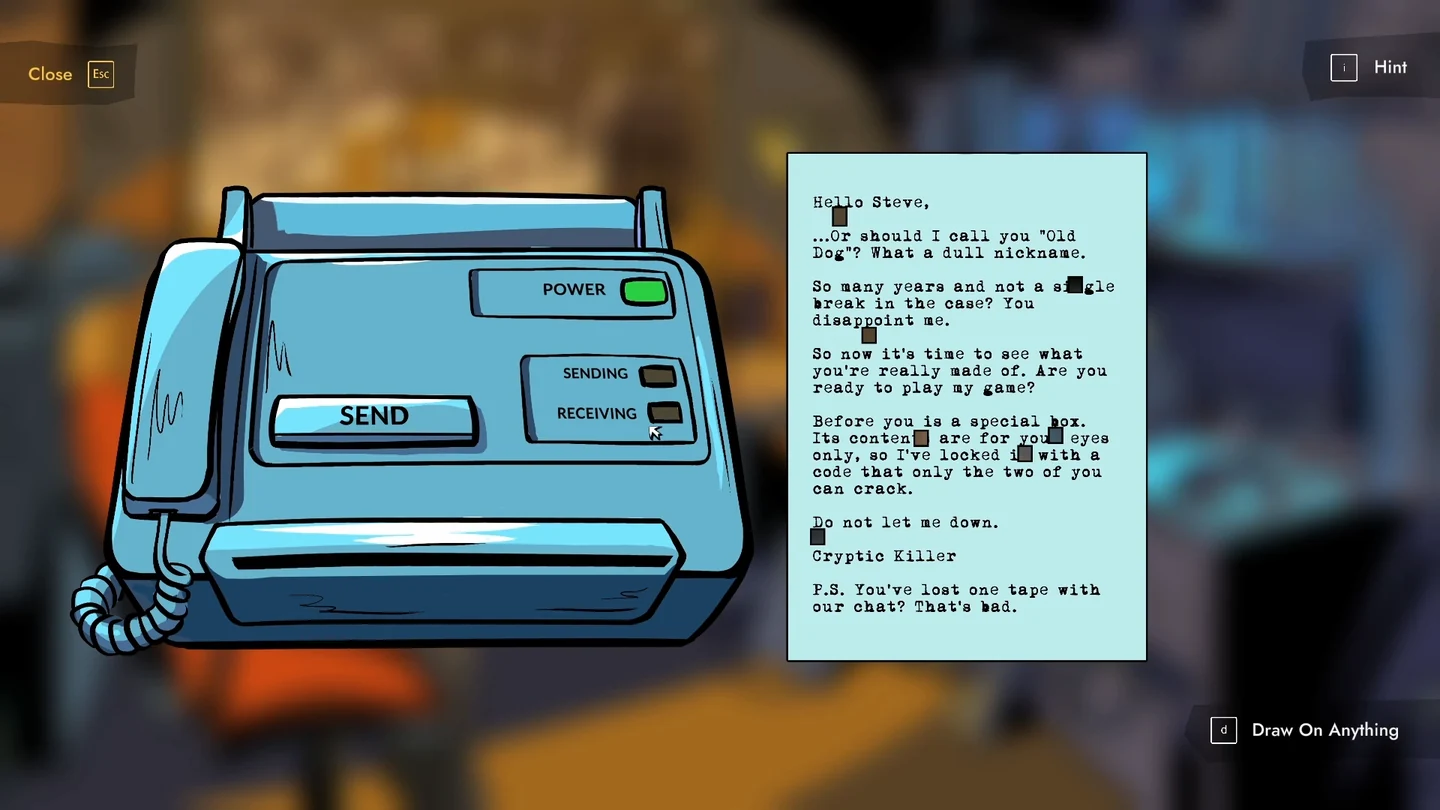
Both detectives have a fax machine on the sideboard and a typed letter from the Cryptic Killer. Each letter has a few small square windows cut into it.
- Each detective opens their fax machine and checks the POWER light. Both detectives should look for a loose fax power cord on the floor of their own office and plug it into the power strip next to it. If Ally's POWER light is green but her fax won't send, and she hears that Old Dog's plug extensions aren't working, the problem is in Old Dog's office: Old Dog checks and plugs in his own cord.
- One detective puts their letter in the tray and presses SEND. The partner's machine prints a copy. Then the partner sends their own letter back the same way.
- Each detective lays their own letter over the copy they received, lining up the edges. Something shows through each window, and how it looks can depend on your version. If the windows show signed numbers, such as +2 or -5, each detective adds up the numbers in their own windows, then the pair adds their two results together. If the windows spell out words, such as TWO PLUS for Old Dog and ONE PLUS for Ally, add the two numbers: two plus one. Either way, the second digit is 3.CODE3
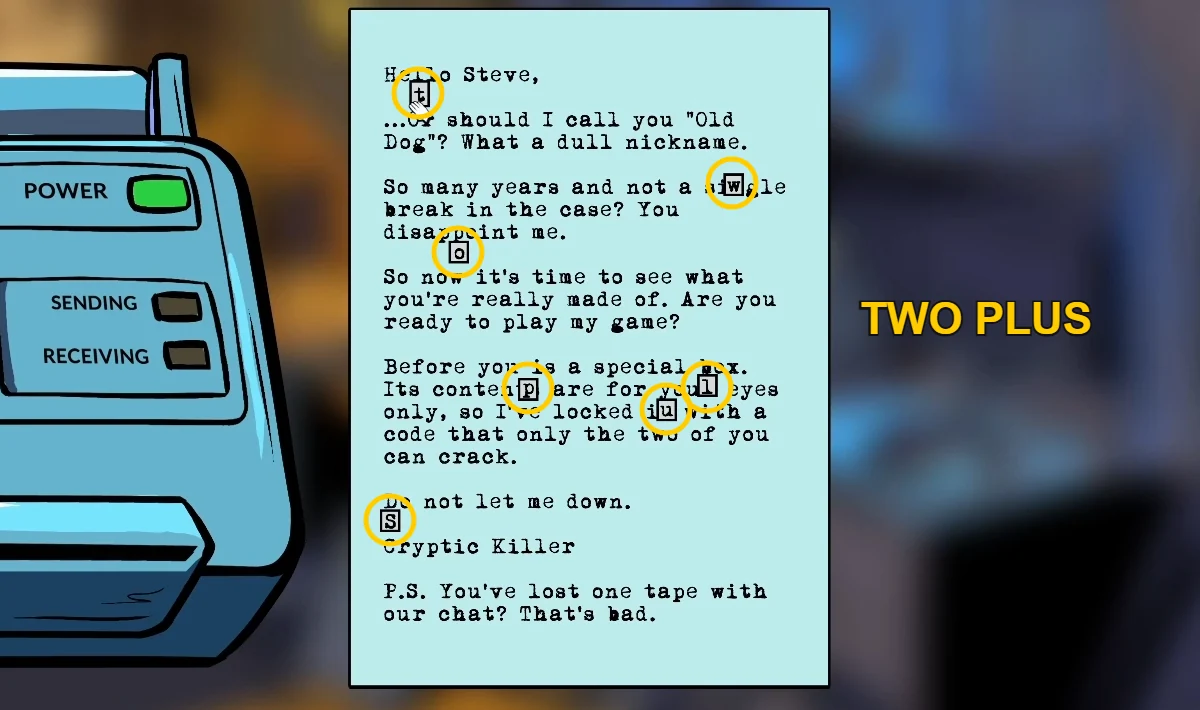
Old Dog's letter lined up over Ally's copy. In this version the circled windows spell TWO PLUS. - Set the middle wheel of the case lock to 3.
Interview Tapes: The Third Digit
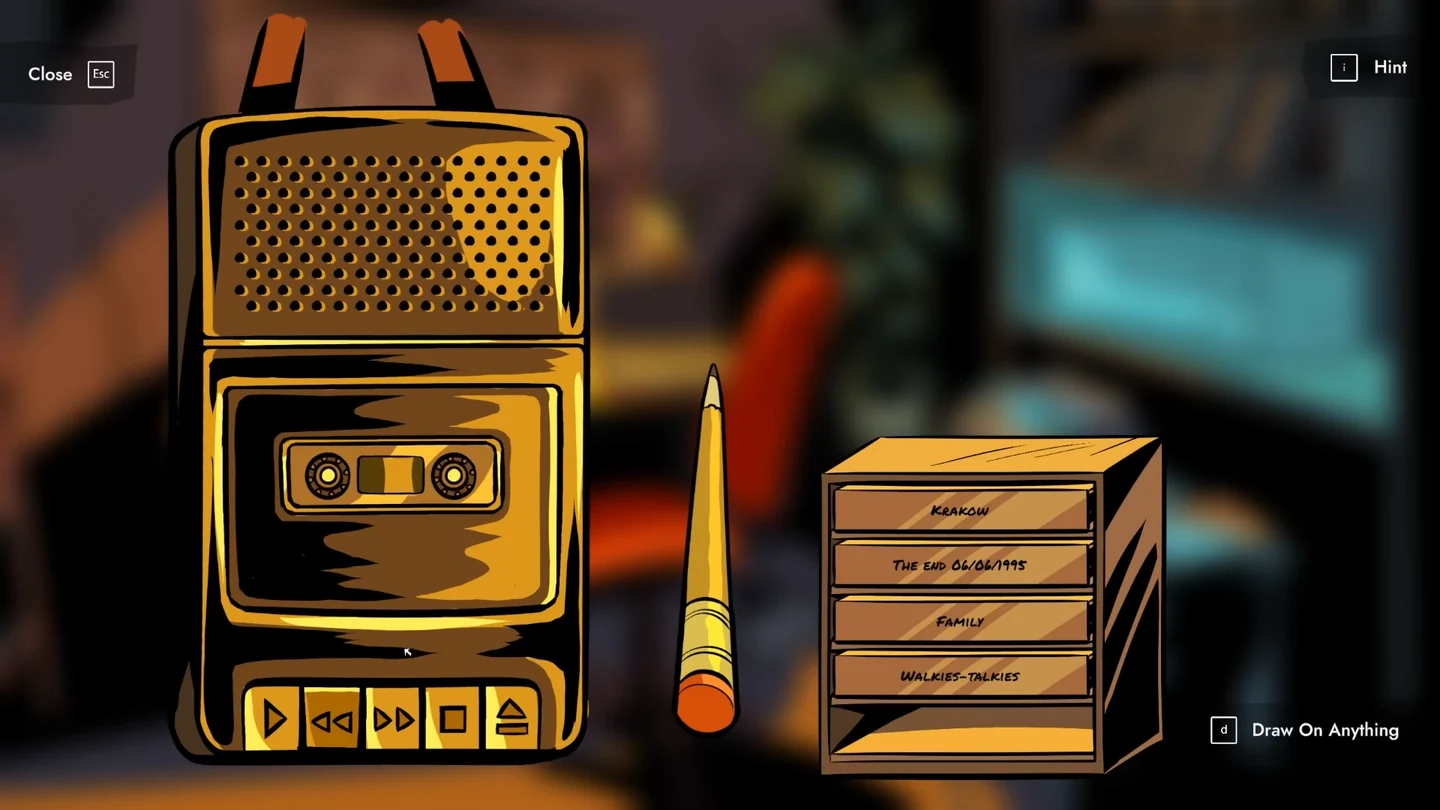
The tape recorder hangs on the right of the pin-up board, and a small rack of labelled cassettes sits on the desk. Each detective has different tapes from old interviews with the suspect.
- Open the tape recorder. Put each of your cassettes into the player and press play. A transcript of the recording appears, and it says which tape it is, for example "This is Tape 1" or "End Tape 5".
- Each detective has one cassette whose tape comes out tangled: Old Dog's The Police Report and Ally's Walkies-Talkies. When loose tape spills out, eject the cassette. Take the pencil beside the tape recorder and cassette rack, put it in the cassette's reel and turn it until all the loose tape is wound back in. Put the cassette back in the player and play it.
- Once both repaired tapes have played, compare tape numbers with your partner. Old Dog's tapes are numbers 1, 3, 5 and 9, and Ally's are 2, 4, 6, 7 and 10. Tape 8 is missing, so the third digit is 8.CODE8
Opening the Case
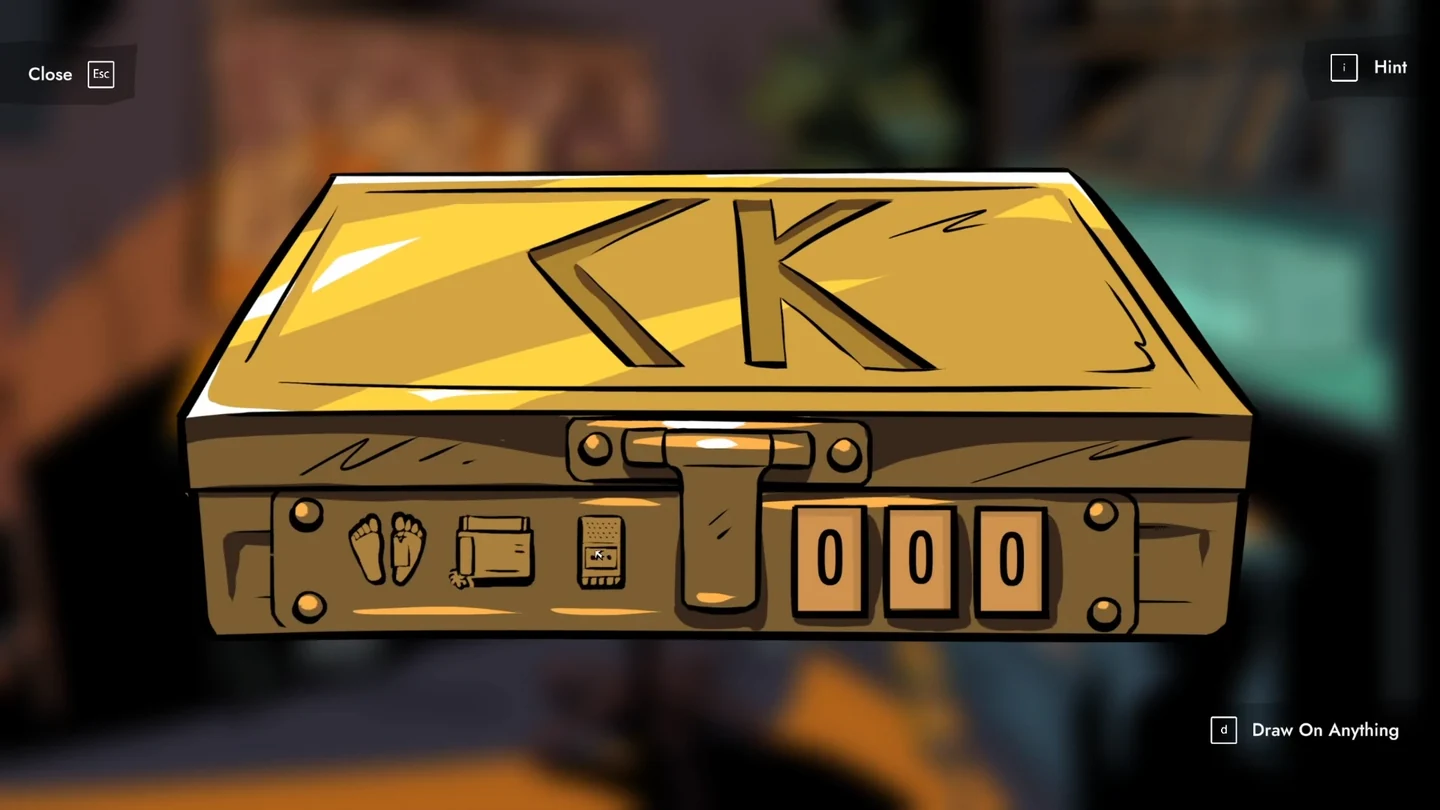
Both detectives have the same lock on their own case.
- Each detective sets their case lock to 4 3 8. The screen fades out and the story moves on to the warehouse.CODE438