Crib Station
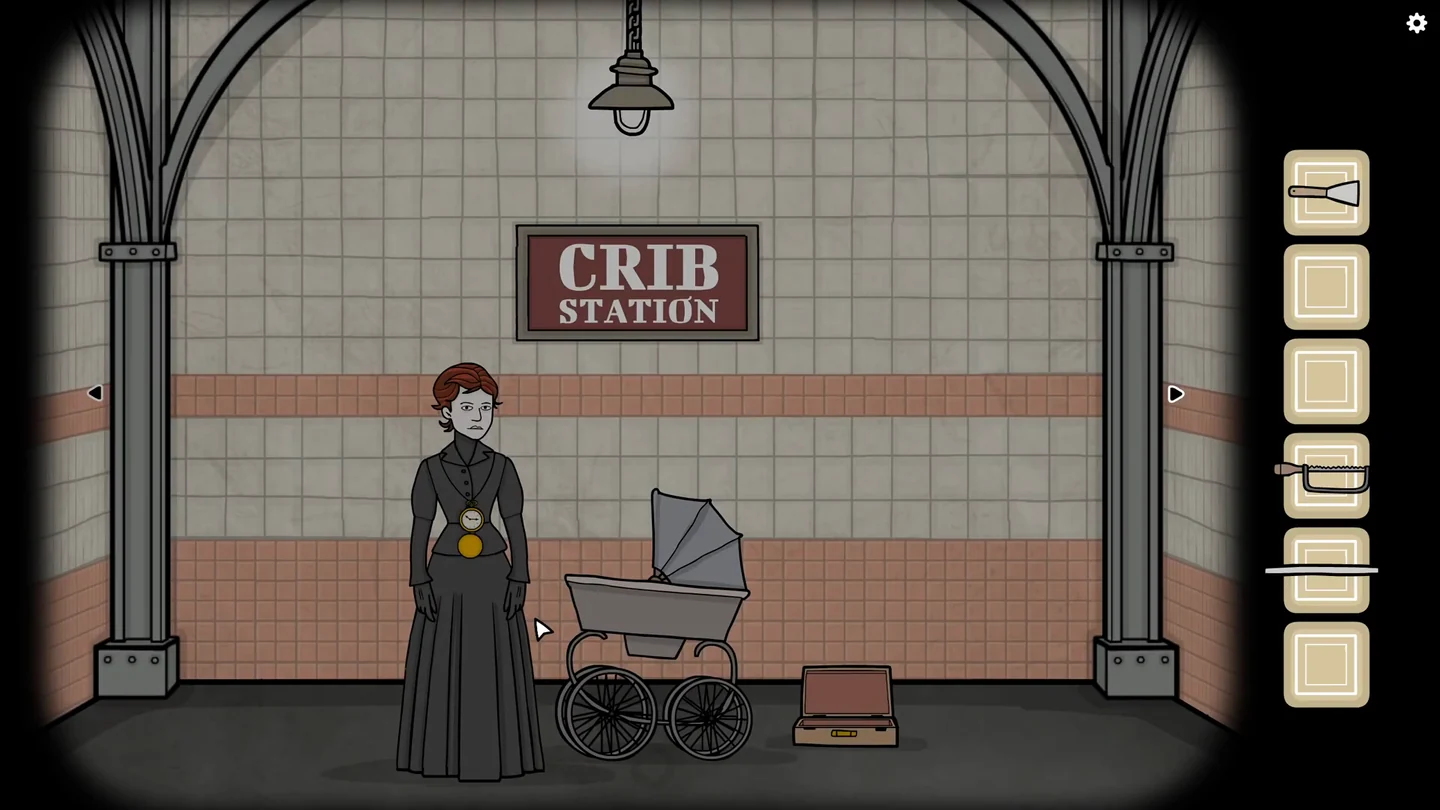
Rose leaves baby Laura in your care on the first platform. Feed and change her, wake the ticket seller and set the platform clock to call your train.
- Talk to Rose. Note the symbol on her gold medallion.
- Look into the pram, drag the blanket away and take the safety pin from the hood. Optional achievement "Are you proud of yourself?!": tap Laura's face a few times until she cries.
- Open the brown suitcase beside the pram and take the matches and the bottle with milk. Give the bottle to Laura.
- Go right. Open the toolbox on the floor and take the cloth and the iron saw. Use the saw on the left bar of the floor drain and take the loose rod.
- Back at the pram, put the cloth on Laura and fasten it with the safety pin. Keep tapping the fastened diaper until it is dirty, then take the dirty diaper (achievement "Fast metabolism").
- Go left to the ticket booth wall and open the trash can. Put the dirty diaper inside and light it with the matches. Tap the burning can to make it explode, then take the scraper from the wreckage.
- Use the scraper on the "Win a trip to Rusty Lake" poster to reveal "The future will arrive" and the medallion symbol.
- Zoom in on Rose's medallion and tap the four segments of its symbol that match the red fragments on the scraped poster. The medallion opens into a watch showing 10:15.
- At the floor drain, use the rod to pull the hanging key over to the gap left by the cut bar, then take the key.
- Unlock the lower door of the ticket booth with the key, then drag the lower shutter up. Wake the sleeping ticket seller with the rod. She asks for one coin.
- Set the platform clock beside the tracks to 10:15 and the train pulls in.CODE10:15
- When the train stops, tap its closed doors to open them and reach the conductor. Tap the conductor and take the coin from his chest pocket. Give the coin to the ticket seller to get a metro ticket, then give the ticket to the conductor. When he holds out his punch, drag the ticket into it to punch it, then tap him again until he finishes talking. Board the train, close the doors and tap the doors again to depart.
Child Lane
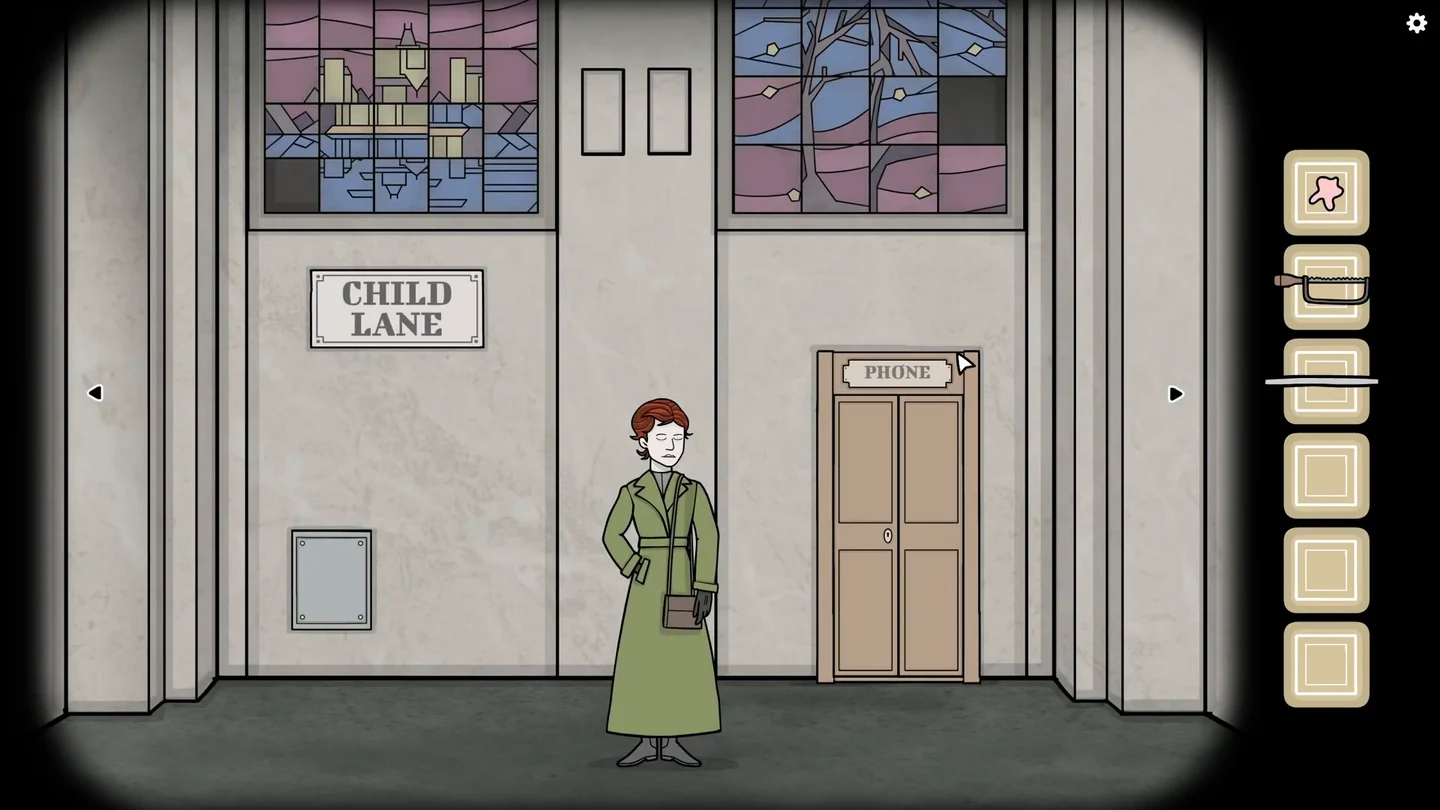
Laura is now a little girl waiting on the platform with Rose. Work through the posters, the Mr. Owl statue and the kiosk, repair the two stained-glass windows and fix the hanging clock to bring the train.
- Talk to Rose; Laura asks for candy. Use the scraper on the gum stuck to the small metal panel left of Rose, give the old gum to Laura. Tap her mouth so she blows a bubble, tap the bubble to pop it, then take the chewed gum.
- Go right. On the "Holidays from small to big" poster, tap the pictures from smallest to largest: cocktail glass, hat, kite, camel, aeroplane, pyramid, sun. Take the key from the folded corner (achievement "A place of relaxation").
- From the kiosk wall, go right twice: past the tracks to the wall with the Mr. Owl statue, the ticket machine and the man on the bench. Laura has started hide-and-seek: her head peeks out behind the bench next to the man, so tap her there now (the first of her three hiding places). Pick up the rolled poster from the floor below the ticket machine. Then unlock the phone booth beside Rose with the key.
- Hang the poster in the empty frame by the kiosk: put the chewed gum near the bottom of the frame, put the rolled poster at the top, then drag the roll down onto the gum so it unrolls and sticks. Tap whatever the headline names each time: Smile = mouth, Sparkling eyes = eyes, New bracelet = wrist, New hair = hair, Large eyes = eyes, Bigger smile = mouth, Surprise = the box, then the knife. The poster reveals "Emergency? Call 53114".CODE53114
- Continue the hide-and-seek (you already found Laura behind the bench in step 3). Tap her where she peeks out above the closed newspaper kiosk, then zoom in on the head of the Mr. Owl statue and tap her behind it. Go back to the kiosk wall, where Laura is waiting with a piece of stained glass; tap her and take the glass.
- Zoom in on the tree window above the phone booth. Place the glass in the empty slot, then swipe each tile horizontally or vertically to flip it in that direction until the bare tree and pink hills line up. Take the crank from the compartment that opens on the left.
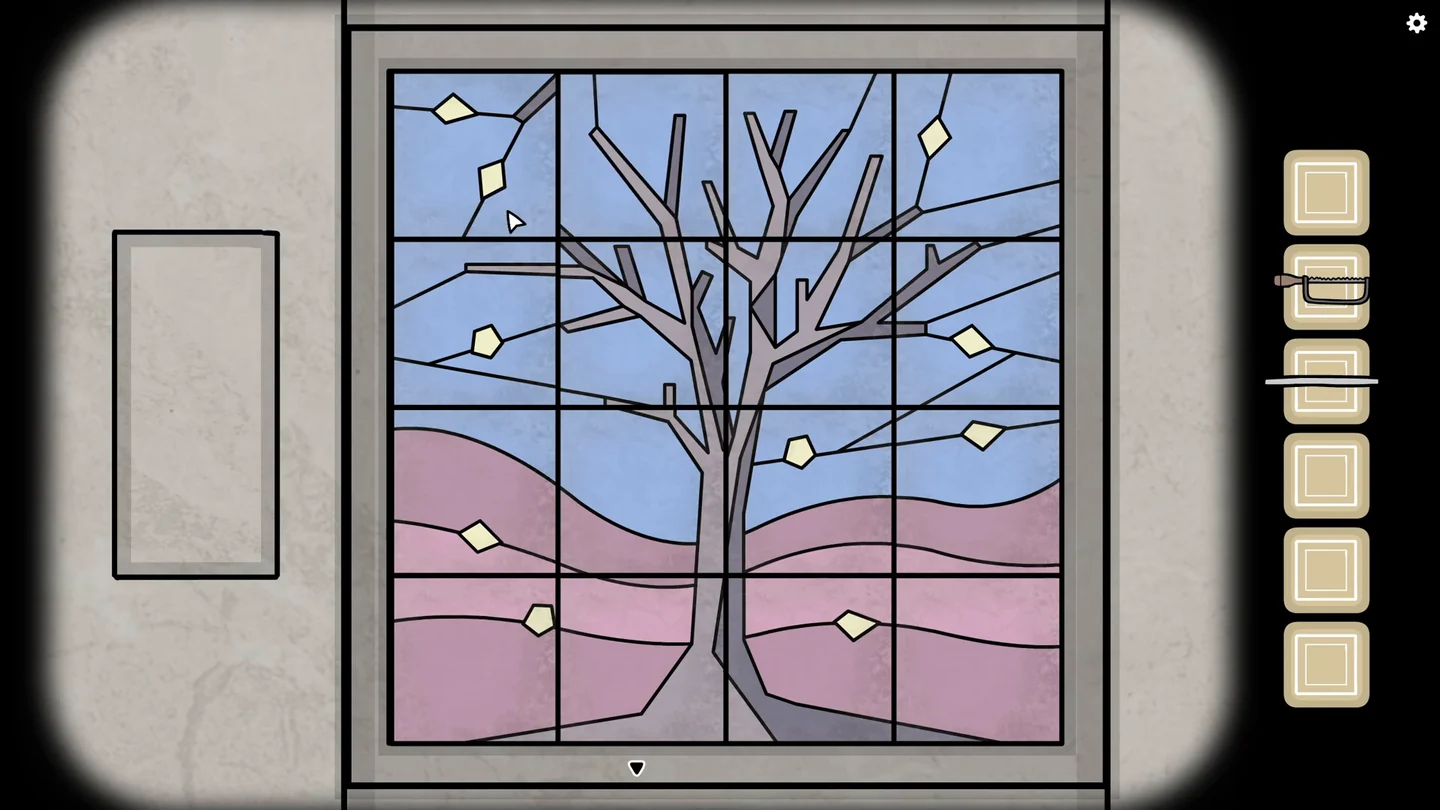
The completed tree window. - Attach the crank to the kiosk shutter and turn it. Take the newspaper. Optional achievement "Bothersome": keep straightening the crooked "Photo Service" sign until a hand appears and says "I am not here".
- Give the newspaper to the man on the bench. Drag one headline onto another to swap them. The finished paper reads, column by column from left to right (top, then bottom): Birthday Massacre / Hotel Renovation, Factory Opened / Ageless Dog, New Station Opening / Holiday Season, Suitcase Found / Painting Lost. Once every headline fits, open the pocket of his coat below the paper (he does not need to lower it) and take the coin.
- Put the coin in the payphone and dial 53114: tap the dial to zoom in, then for each digit drag its numbered hole clockwise to the metal stop and release, and repeat for the next digit. Then lift the receiver and listen to the whole call; the caller ends with "Look into the eyes of the bird."CODE53114
- Zoom in on the Mr. Owl statue and tap its eyes; they light up and the pedestal door unlocks. Pry the pedestal door open with the rod to see 8827.CODE8827
- Enter 8827 on the briefcase beside the man on the bench, press the square release button on the right and open the lid. Take the camera. Find Laura by the newspaper kiosk, give her the camera and keep tapping the camera until she takes her photos and reacts. Then go to Rose and keep talking to the antlered figure beside her until they leave together.CODE8827
- Go to the tracks and watch the train leave; it leaves Rose's handbag behind. Open the bag: take the nut driver and the golden timepiece and read her letter. Laura is now hiding inside the Mr. Owl statue pedestal; tap her so she shuts the pedestal and drops the roll of film, then take it.
- Undo the four nuts on the metal cover below the Child Lane sign with the nut driver, remove the cover and take the second glass pane behind it. Put it in the city window above the sign and swipe each tile horizontally or vertically to flip it until the image of the city and its reflection is complete. Take the clock hand.
- Fit the clock hand on the hanging clock. At the Photo Service window, put the roll of film in the basket, then tap the "Photo Service" sign ("Come back in 20 minutes"). Move the clock 20 minutes forward to 12:20 and collect the photos. One photo shows the clock at 4:05.CODE12:20
- Optional detour: before you set 4:05 and board, you can already visit the hidden Best Kept Memory station by calling 74222 from the payphone (see "Best Kept Memory Distribution Center" in the secrets part); its return train brings you back here. Set the clock to 4:05; the train arrives. Tap its closed doors to open them: the conductor asks for a ticket. The doors stay open while you get one.CODE4:05
- Read the four windows high on the walls: triangle = middle row, circle = top-right and bottom-left, bar = top-left and bottom-right, diamond = middle-left and middle-right. The ticket machine asks for triangle + circle + bar - diamond, so press the four corners and the centre (an X), then the round orange button, and take the ticket. Go back to the train and tap the conductor in its open doorway, drag the ticket into his punch and tap him again until he finishes talking ("Mind the gap"). Board the train, close the doors and tap them again to depart.
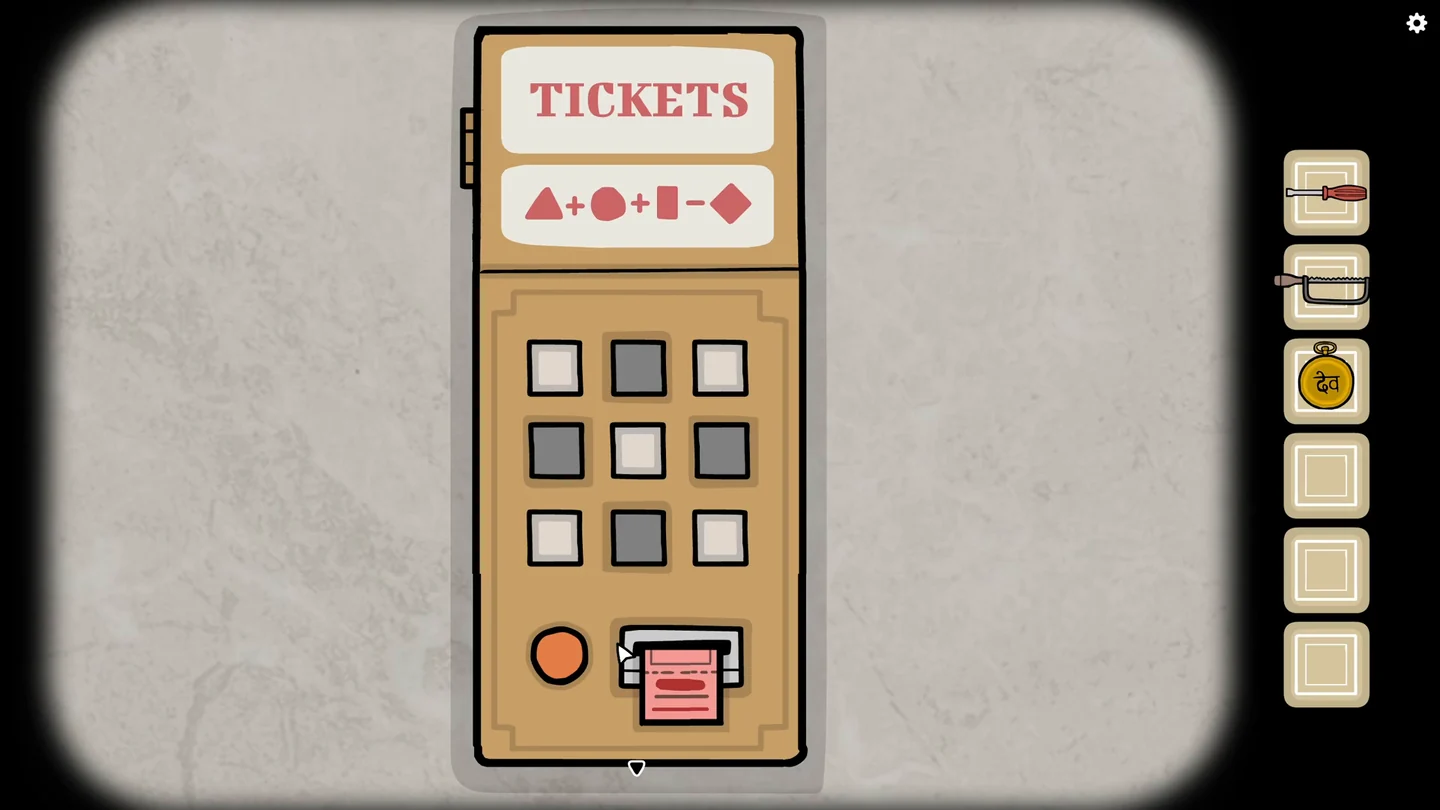
Ticket machine solved: the four corners and the centre form an X.
School Street
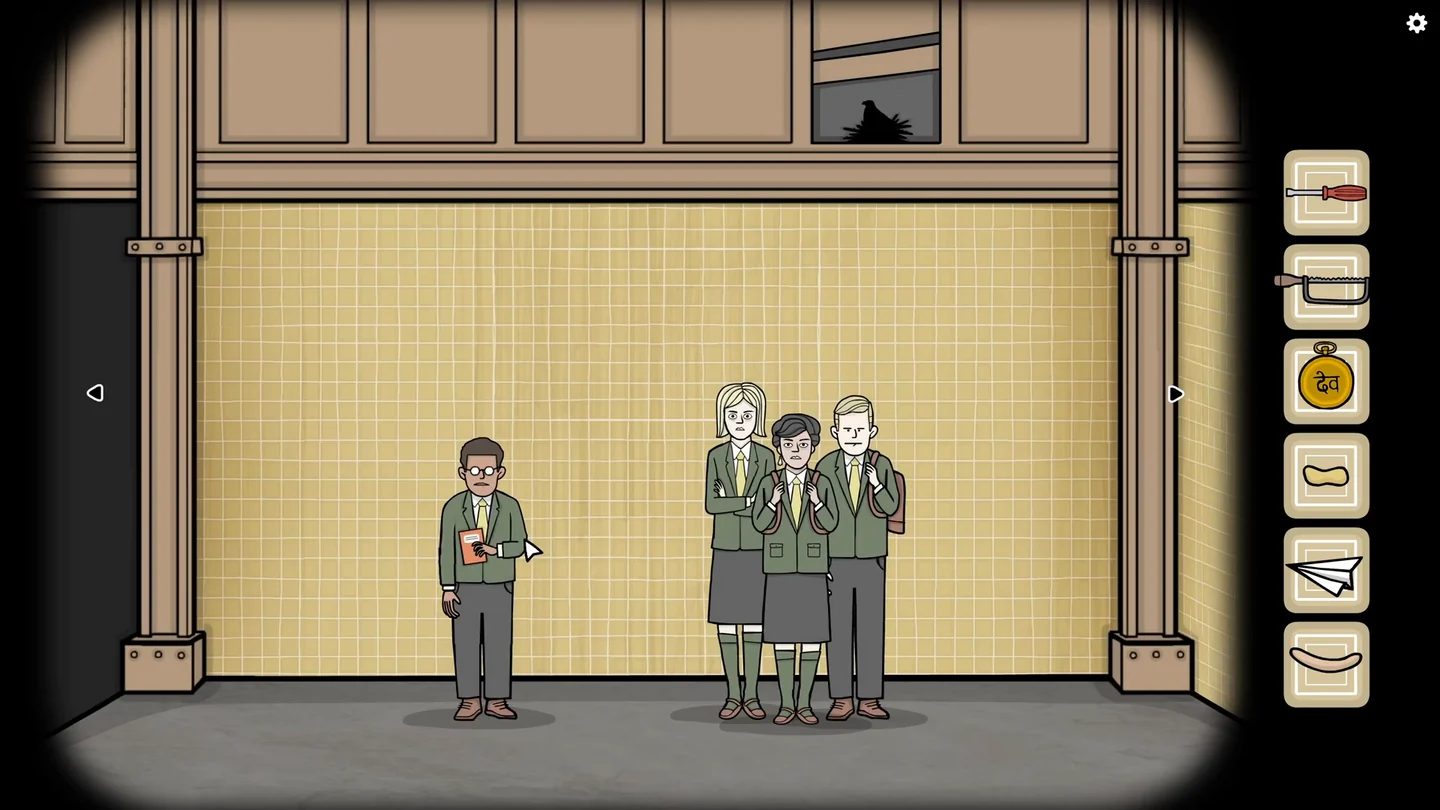
Teenage Laura's photos have been stolen. Help Hank finish his class book, trade for a worm, make the bird drop its egg on Johnny and open his diary.
- Talk to Laura ("Someone stole my photos"). Take the peanut from the striped bag on the floor, and pick up the drawing of Laura and fold it into a paper plane.
- Go right to the group of four students. Saw open the tin can on the floor with the iron saw and take the sausage.
- Go right past the clock (a bird nests in the broken window above). Open the pocket of the dark-haired girl in the middle of the group of three and look at the drawing of two students joined by a heart.
- Talk to the boy with glasses holding the orange book ("Help me with my book") and open it. Throwing the sausage at the blonde girl makes her say "Ewww!" (Tess hates sausages); take the sausage back from her head afterwards, because you need it again. Swap photos until the names read: Jimmy = blond boy with glasses, Tess = blonde girl, Alex = dark-haired girl with earrings; Hank = the boy with glasses holding the book, Sam = red-haired boy, Johnny = blond boy with a backpack; Franky = girl with curly red hair, Bobby = girl with hair buns, Laura = Laura. The book closes (achievement "Can't sit with them").
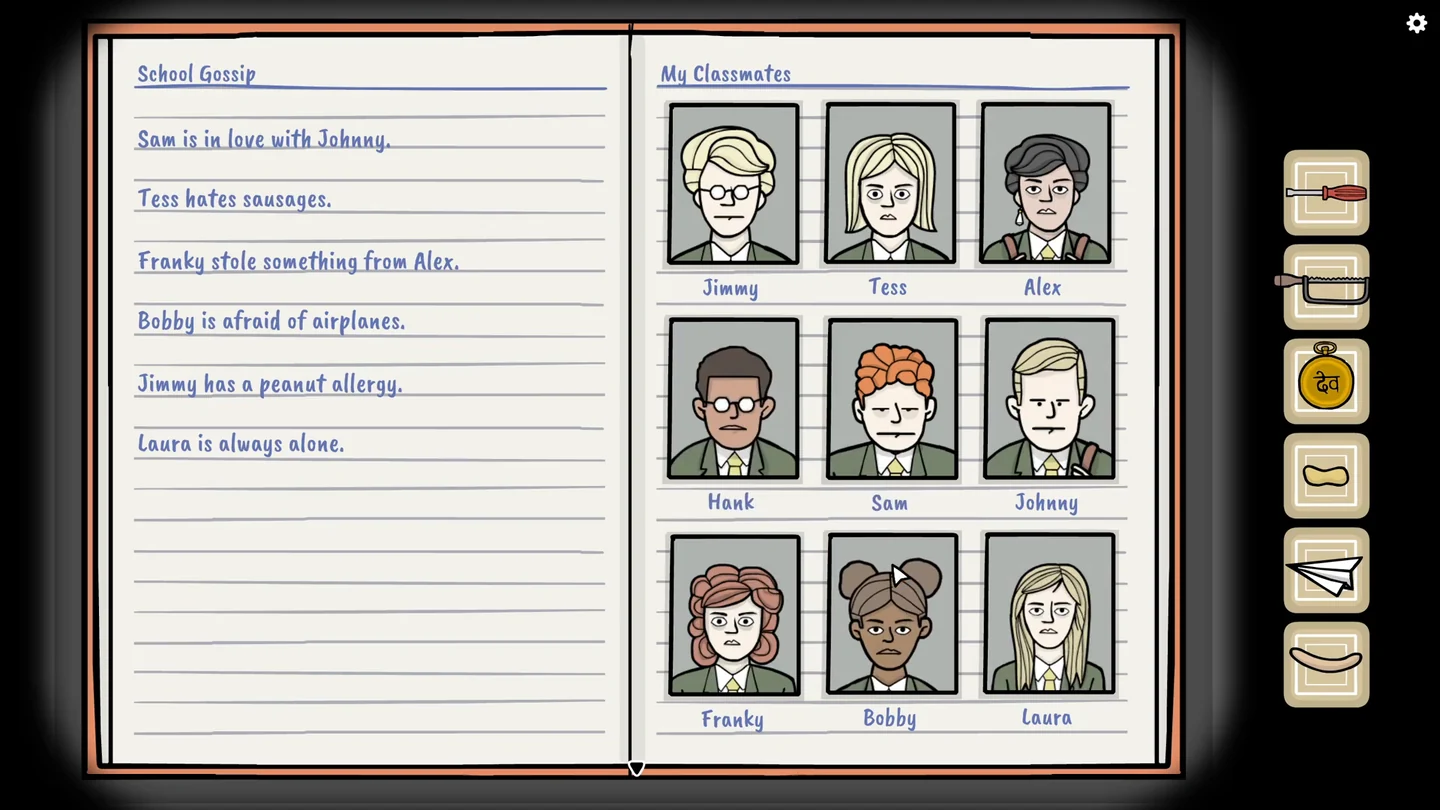
Hank's class book with every photo in the right place. - Hank now asks for things one at a time: give him the peanut, the paper plane and the sausage. He gives you a worm.
- Give the worm to the bird in the broken window. Tap the bird so it flies away, then tap the exposed egg to drop it on Johnny, who drops his bag. Optional achievement "Not cool Johnny": keep tapping the crying Johnny until Tess snaps "Shut up, Johnny!"
- Open Johnny's bag. The diary lock shows a lollipop, a pencil sharpener and a cigar: measure each of them, in that order, against the triangular ruler to get 6, 3, 7. Enter 637 and take Laura's photos.CODE637
- Give the photos to Laura. She says your train arrives at 14:45, which is 2:45 on the platform clock.
- Use the arrow ticket machine beside Laura. Each button points to the next one, so press all 16 in one chain. Number the rows 1-4 from the top and the columns 1-4 from the left (row, column): 4-4, 4-3, 3-3, 3-1, 1-1, 1-2, 4-2, 4-1, 2-1, 2-2, 3-2, 3-4, 1-4, 1-3, 2-3, 2-4. Take the ticket.
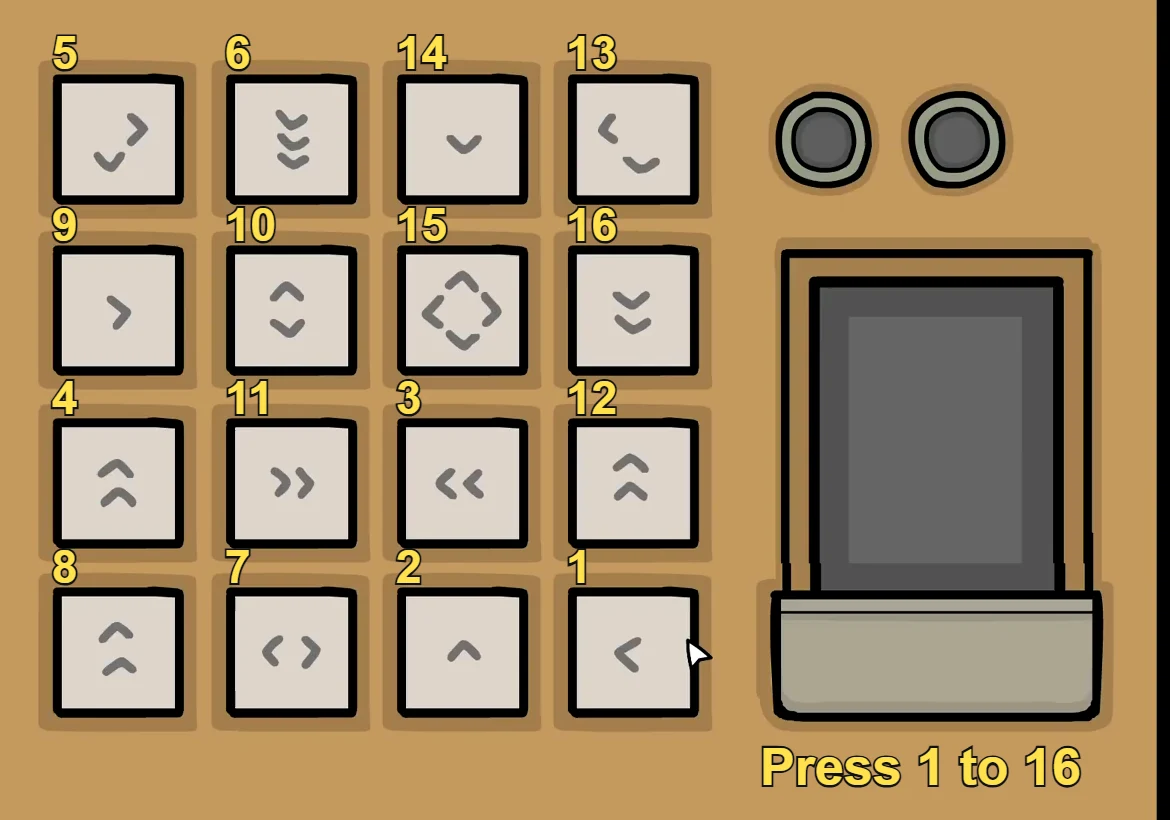
Arrow ticket machine: press the buttons in the numbered order, 1 to 16. - Set the platform clock to 2:45. When the train stops, tap its closed doors to open them and reach the conductor. Give him the ticket and drag it into his punch, then tap him again until he finishes talking. Board the train, close the doors and tap them again to depart.CODE2:45
Bird Bridge Station
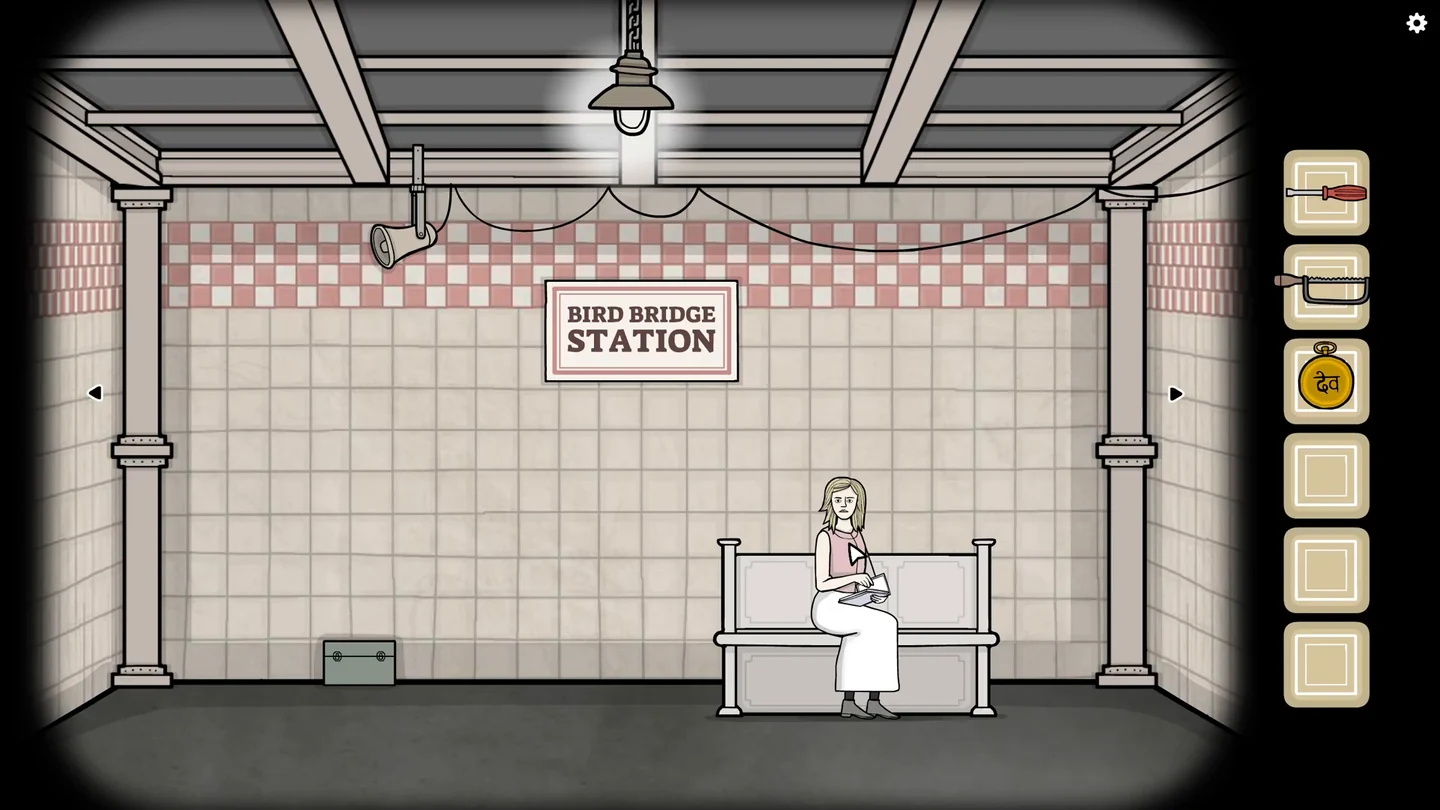
Laura is a young woman sketching on a bench. Most clues here are musical: each note symbol you see is a single note or a group of two or three joined notes. Count the notes in each symbol and press the trumpet valve with that number (1 = left, 2 = middle, 3 = right).
- Talk to Laura ("I have to finish my sketch"). Open the green toolbox beside the bench and take the pencil and the pink piece of meat. Give the pencil to Laura, then drag the pencil in her hand across the sketch. Tap the line she draws to collect it.
- Go right to the Food & Drinks kiosk. Slide the manhole cover open. Attach the line from Laura's drawing to the stick lying beside the open manhole. (The hook comes next, from the trumpet.)
- From the kiosk and manhole, turn around (right twice, past the tracks) to the theatre poster wall, zoom in on the singer and hold your finger on her mouth until all six symbols have appeared: one note, two notes, three notes, one, two, three. Tap the trumpeter's trumpet and press valves 1-2-3-1-2-3 (left to right). After his tune, keep tapping the trumpet's bell until a fish falls out onto the floor. Zoom in on the fish and tap it so the hook comes out of its mouth, then take the hook.CODE123123
- Optional achievement "Music to die for": play a long melody of your own on the trumpet valves.
- At the manhole, add the hook and the meat to the stick. Tap the rod to lower the bait into the hole, then tap it again to lift it: a rat comes up and drops beside the manhole. Tap the rat; it runs off. Follow it to the theatre poster wall and tap it again by the small flap low on the wall; it slips inside. Tap the flap to open it and take the flyer that comes out: a Johnsson hiring notice with a daily drop-off at Bird Bridge St. at 5 o'clock.
- Set the platform clock above the tracks to 5:00. A white train arrives: open its doors and tap the workers inside to bring them out onto the platform. Talk to the man in the green jacket (Bob): he gives you money for a coffee for Laura and a sandwich for himself. Buy both at the kiosk.CODE5:00
- A man in a trench coat lurks beside the kiosk and asks for a cigarette. Give the coffee to Laura, then tap her cup so she drinks. Zoom in on the cup, take the cigarette from it and return to the man. Give him the cigarette; he now wants a lighter.
- Give the sandwich to Bob. In his hands, move the top slice of bread and the fillings (tomato, cheese) aside to uncover the maggots, and remove each maggot, including ones hidden under other pieces. He eats it; then take the breadcrumbs from his hand.
- Follow the workers' hints: the man next to Bob points to the man with the red hat, who sends you to the man with the brown suitcase. Take the glasses from his pocket and give them to the man in the yellow hard hat. Take the tie from the tall smiling man's pocket and give it to the man without a tie. Of the twins with green ties, the one by the theatre poster has the lighter in his pocket.
- Give the lighter to the man in the trench coat. Tap the lighter in his hand until his cigarette is lit and keep talking to him until he vanishes, leaving a paper bag ("Sorry for robbing you"). Take the paperclip from the bag. The lighter comes back to your inventory; keep it for Soul Street. The workers leave on their train.
- Pick the padlock of the electrical box beside the kiosk with the paperclip. Move the three cables to match each target number. Count sockets by row and column from the top-left. 587: row 1 col 1 to row 1 col 2; row 2 col 1 to row 1 col 3; row 3 col 1 to row 3 col 2. 192: row 1 col 1 to row 3 col 3; row 1 col 2 to row 2 col 3; row 2 col 1 to row 3 col 2. 361: row 1 col 1 to row 3 col 3; row 2 col 1 to row 1 col 2; row 1 col 3 to row 3 col 1. The light turns green.
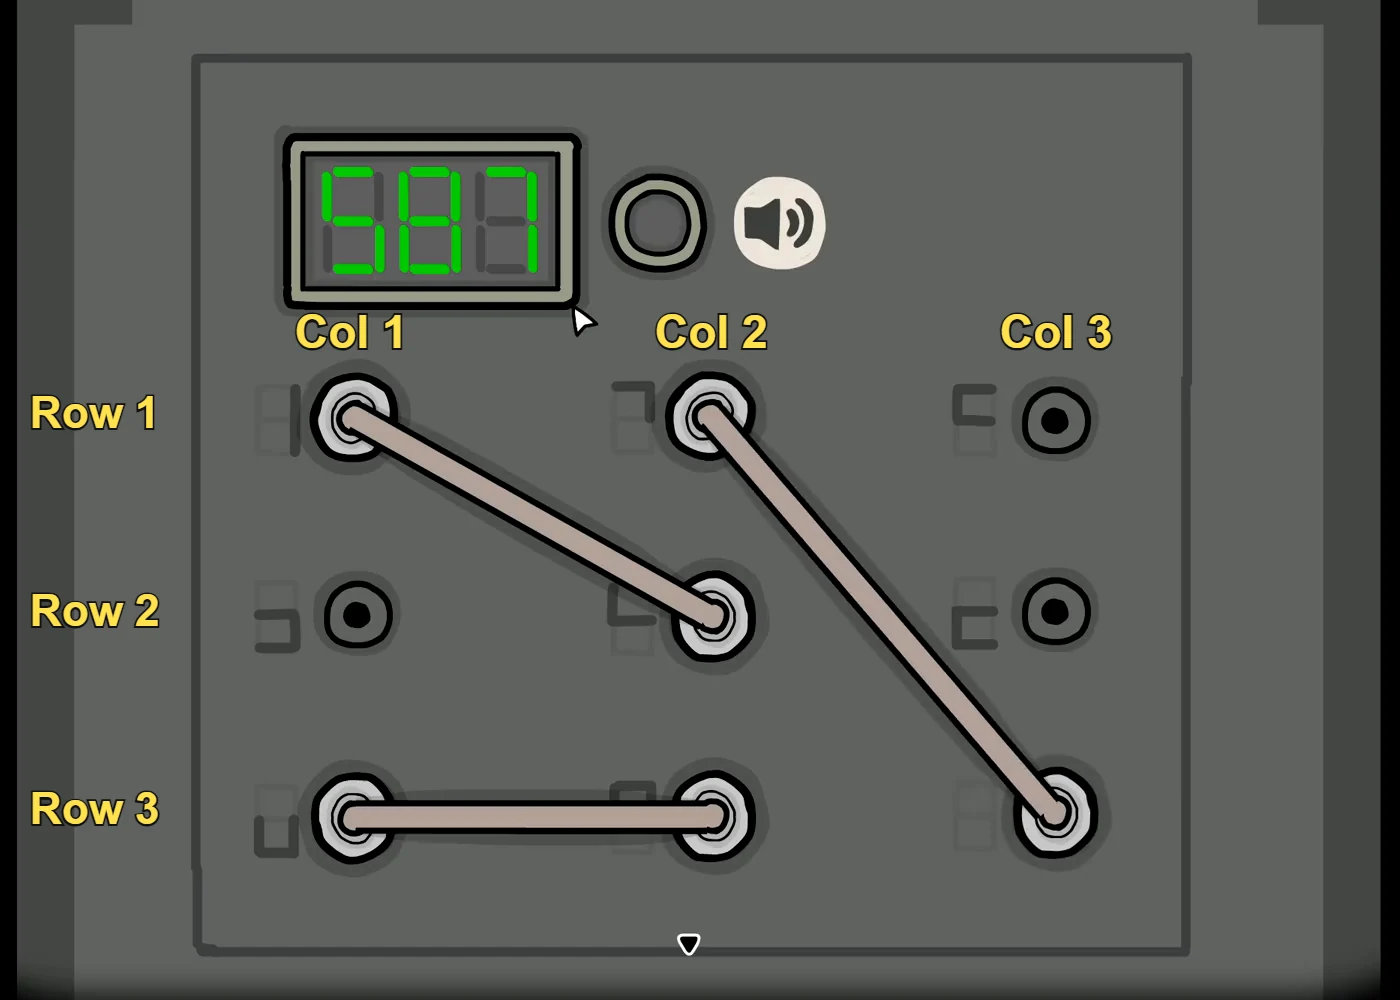
Socket numbering for the electrical box: rows from the top, columns from the left. The display shows the first target number, 587. - Tap the loudspeaker on Laura's screen: the announcement symbols are one note, one note, two notes, two notes, three notes, three notes. Play 1-1-2-2-3-3 on the trumpet, then keep tapping the trumpet's bell until a robin flies out. Go to the bench where Laura sits with Bob; the robin lands on Bob's shoulder. Tap Laura so she calls it ("Come here"), then tap the robin to move it onto her hand. Zoom in, feed it the breadcrumbs and tap it to hear its song: three notes, three notes, one note, three notes, one note, one note.CODE112233
- Read Laura's sketchbook on the bench. The last page says the long hand points to the tree (page IX) and the short hand almost catches the dark soul (page IIII): 3:45.
- Play the robin's song on the trumpet: 3-3-1-3-1-1. Then tap the trumpet's bell until a hand reaches out of it holding a metro ticket, and take the ticket (achievement "Nice acoustics").CODE331311
- Set the clock to 3:45. When the train stops, tap its closed doors to open them and reach the conductor. Give him the ticket and drag it into his punch, then tap him again until he finishes talking. Board the train, close the doors and tap them again to depart.CODE3:45
Sorrow Cross
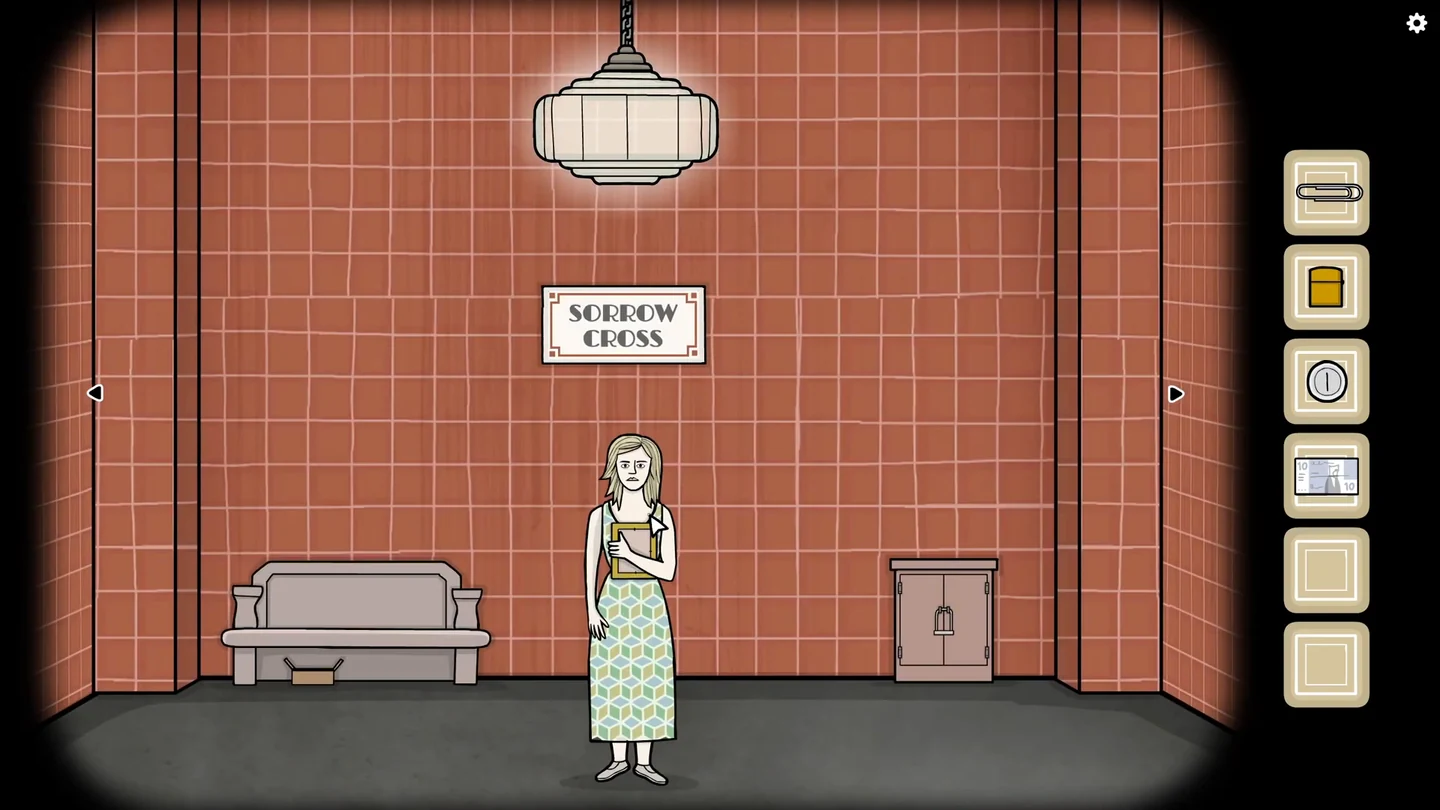
Laura sends Bob away. Get a key from the pigeon, deal with the thief, finish the long painting search and guide Laura through her dream.
- Laura tells Bob his train leaves at four. Open the cardboard box under the bench and take the clock hand. Go right twice, past the wall with the barred door, to the tracks opposite the bench. Fit the hand to the clock there and set 4:00. When the train stops, open its doors and keep talking to Bob until he boards; he drops his wallet. From the wallet, take the coin (100) and the banknote. The card inside reads "The White Door".CODE4:00
- At the Snacks machine, insert the coin (100) and buy the snacks priced 20, 45 and 35. Open the tray and sort the sweets onto the three wrappers: animals on the dog, vehicles on the bicycle, food and drink on the fruit wrapper. Take the corn cookie (achievement "Sweet tooth").
- Give the corn cookie to the pigeon by the bin; it breaks into a row of crumbs. Rearrange them so that, read from the pigeon towards the left, every red crumb is followed by one white crumb and every green crumb by two white crumbs. One working order, left to right with the pigeon on the right: yellow, yellow, white, red, yellow, white, white, green, white, red, yellow. The pigeon eats the crumbs. Tap it and it flies off; follow it and tap it again at the trash can, then at the light above Laura's screen, then at the barrier post on the platform by the clock. There it is hit by a train. Take the key from its remains.
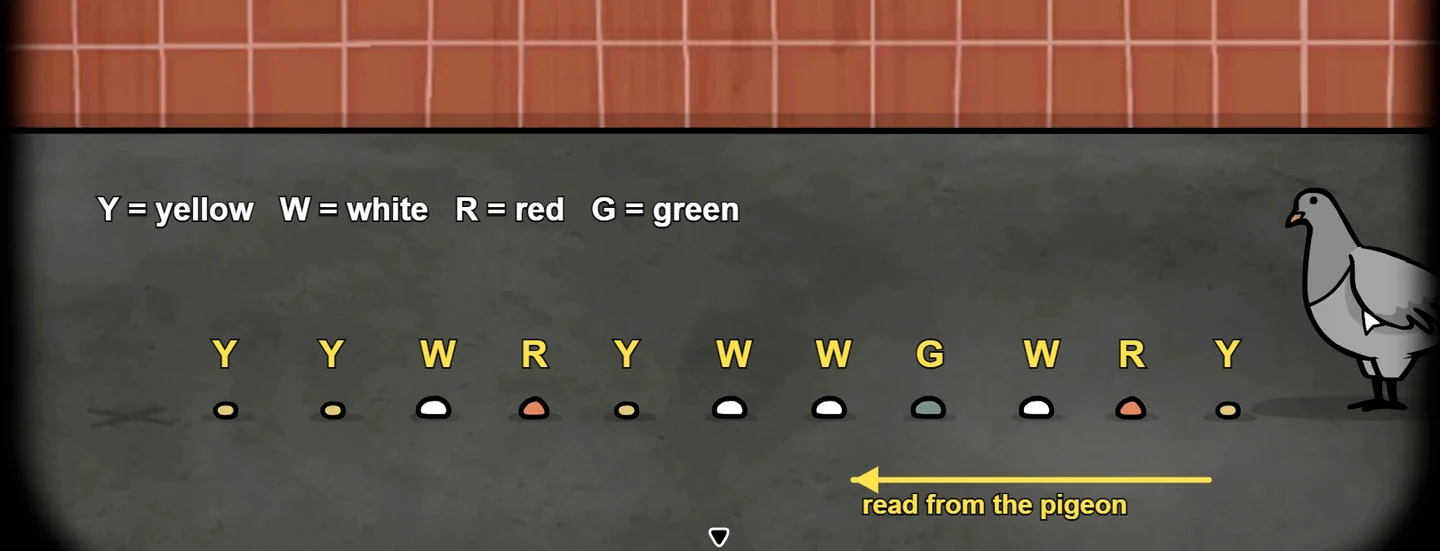
One working crumb order. Read from the pigeon to the left: each red crumb is followed by one white, each green crumb by two whites. - Unlock the barred door beside the snack machine. The man inside has Laura's timepiece and asks for money under the bench and to come back at nine. Put the banknote in the box under the bench, set the clock to 9:00 and check the box again: he keeps the timepiece but leaves an iron saw.CODE9:00
- Saw through the padlock of the small cabinet to the right of Laura and take the painting panel. Place it in the framed picture above the bin.
- This is a long search puzzle. Drag the centre picture around; each of the 12 round windows on the frame shows one small scene. When the scene inside the small centre ring matches one of the outer round windows (a steamboat, a bird, a rowing boat, a glowing light, a dark orb, a walking figure, a moon, a white tree and so on), tap that matching outer window and it lights up. Light all 12 windows; the scenery changes to a dark forest part way through. The bin below falls over when you finish.
- Look at the spilled rubbish ("Make pairs") and drag the pieces together in eight pairs: the loose PAIRS slip up onto MAKE, the chip onto the crisp packet, the cheese onto the cracker, the finger onto the bloody paper, the leaf onto the twig, the pencil onto the envelope, the straw onto the cup and the pink strip onto the pink-patterned paper. Open the envelope to Laura Vanderboom, read Dr. Clark's letter and take the pill.
- Give the pill to Laura. In the dream, go back to Laura for each new line, then drag the floating object to the figure that appears. The pairings: baby to her mother, broken heart to Bob, the face to young Laura, the hand to the headless Rose, the large fish to the detective, the rat to the bird-headed man, Rose's head to the antlered shadow, the blossom branch to the parrot-headed man, and the black cube to her aged mother. Then go back to Laura and keep talking to her until the dream ends and she collapses on the platform.
- Take the metro ticket from Laura's hand. Optional achievement "Creepy vermin": keep tapping the head of her dark body until a bug crawls out.
- Tap the small gold frame lying on the floor near Laura: it is a portrait with a paintbrush beside it. Take the brush, dip it in the pigeon's blood on the platform by the clock and paint over the portrait's face to reveal 19:55.
- Set the clock to 7:55. When the train stops, tap its closed doors to open them and reach the conductor. Give him the ticket and drag it into his punch, then tap him again until he finishes talking. Board the train, close the doors and tap them again to depart.CODE7:55
Soul Street
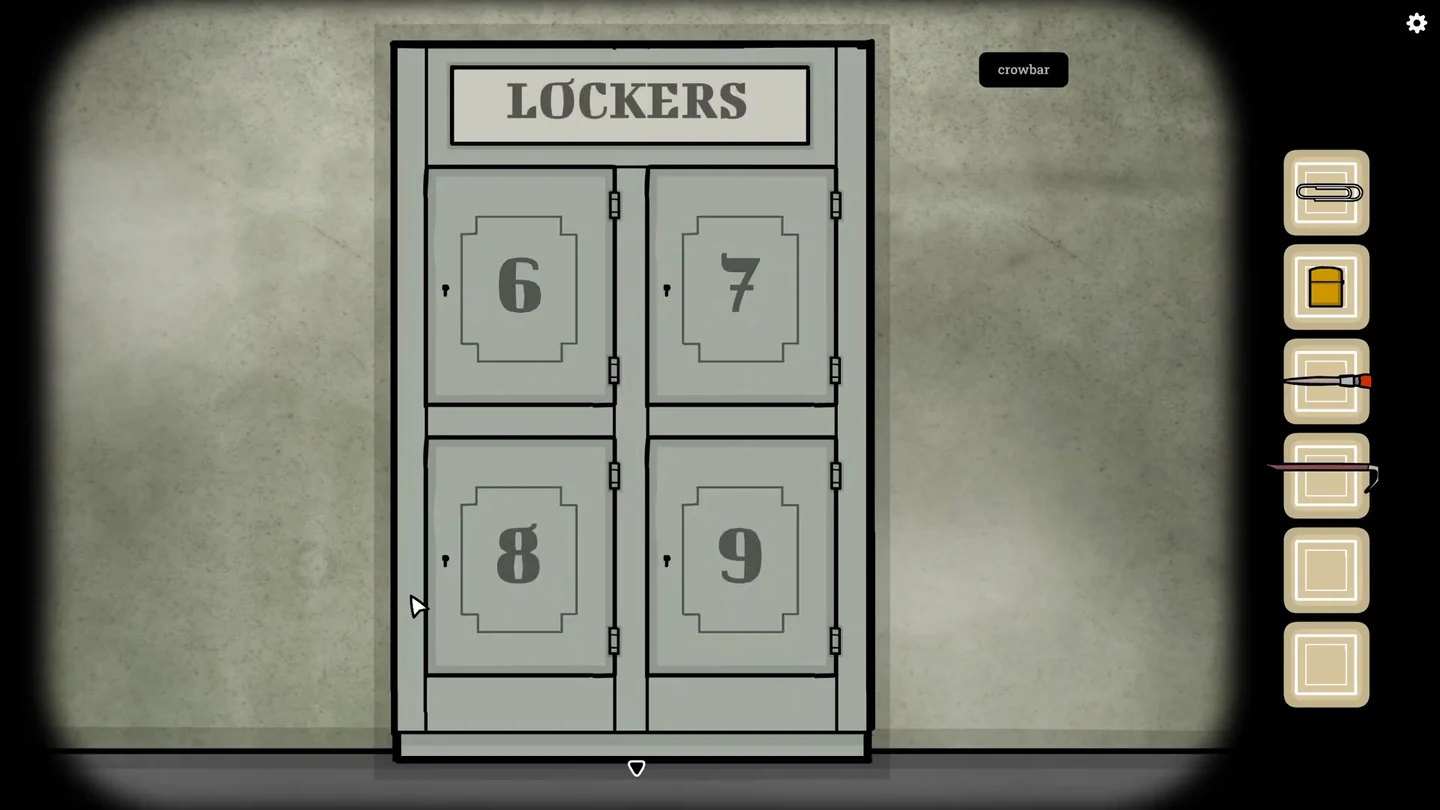
A ruined station where Laura's shadow waits. Free the soul from the ash, rewire the breaker box three times, make the tied-up man talk and return the golden timepiece. Breaker knob settings are listed left to right.
- From the wall where you step off the train (ash pile and breaker box), go left once to the lockers. Take the crowbar leaning on them, pierce the oil drum with it and set the leaking oil alight with the lighter.
- On the wall with the dotted pattern, pry open the small metal box on the floor with the crowbar and take the key for locker 6. Open locker 6 and take the bucket.
- Zoom in on the dotted wall. The white stones carry arrows and an insect follows them from hole to hole; move the stones into empty holes so the arrows lead it to the circled hole at the top right. When it gets there it flies off to the pile of ash on the first screen.
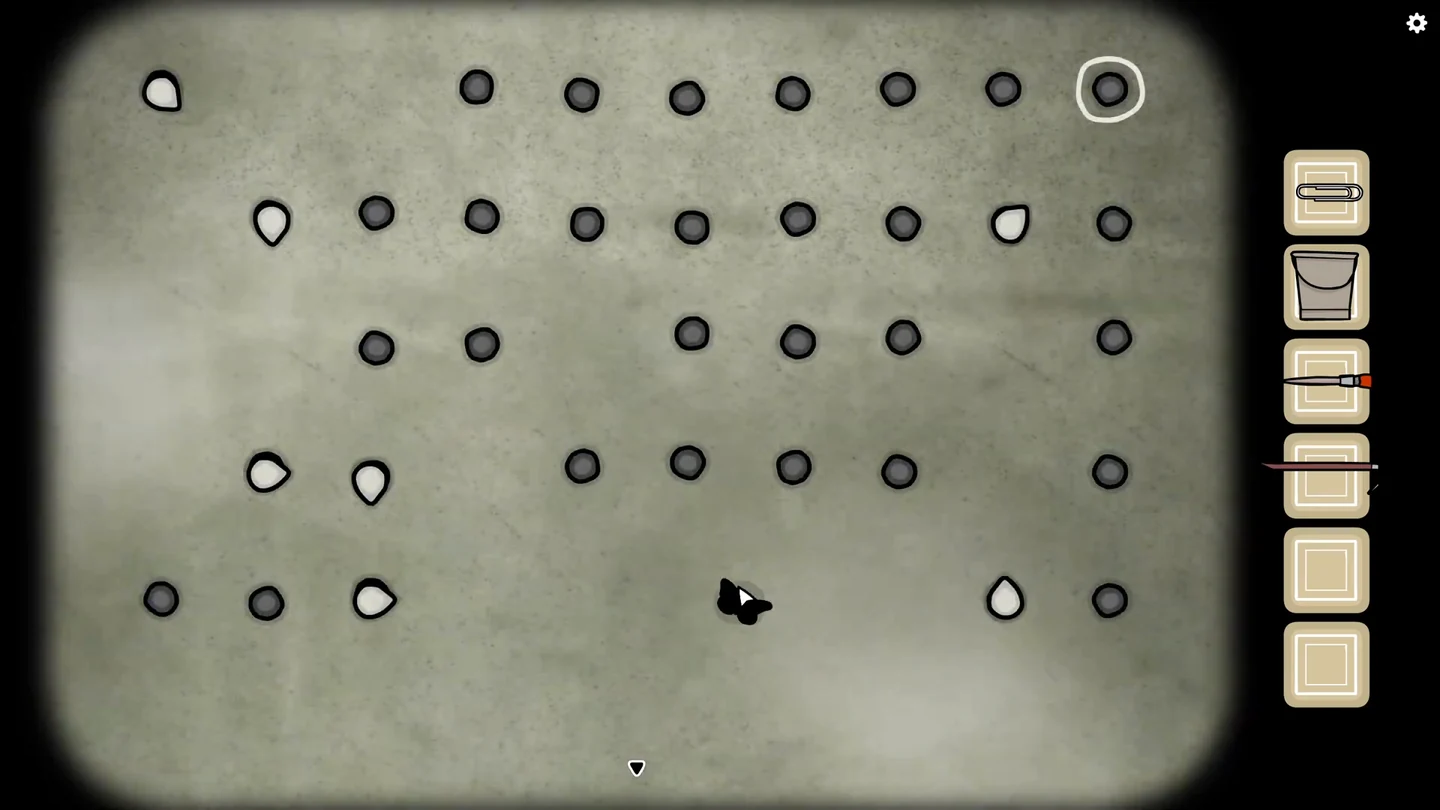
The finished stone layout that leads the insect to the circled hole. - Tap the ash pile: a shadow sits up ("The butterfly, I remember... You have to find my mother's timepiece") and hands you the key for locker 7. Open locker 7 and take the pliers.
- Cut the cable lock on the door under the dotted wall with the pliers. Pull the tape off the tied-up man's mouth to get a piece of tape. Optional achievement "Nice technique": zoom in on one of his nipples and keep dragging it to stretch it until the achievement appears.
- On the first screen, join the cut cable above the breaker box with the tape. Open the breaker box and turn the five knobs to: up, up, down, down, down. At the locker wall the small grey cabinet now has power: press and hold the control at its top right to raise the shutter, then take the red valve. Fit the valve on the standpipe beside the dotted wall and turn it; water runs out into a puddle. Fill the bucket from the puddle.
- Pour the water on the burning oil and take the iron wire from the ash. Twist it around the other cut cable above the breaker box and set the knobs to: up, right, up, left, down.
- Fill the bucket again. On the tracks screen, open the floor drain with the crowbar and pour the water in; take the clothespin that floats up.
- Clip the clothespin and the paperclip to the man's chest, one on each nipple, then pull the switch on the wall ("Could you stop doing that?"). Fill the bucket again, throw the water over him and pull the switch once more. He says the key is behind the hand of the dead woman (achievement "Time to tell").
- Peel back the "The Dead Woman" poster by her hand and take both the key for locker 8 and the second piece of tape behind it. Open locker 8; a green combination box drops out onto the floor beside the lockers. It stays there (it does not go into your inventory); its code comes in the next step.
- Connect the last cut cable above the breaker box with the second piece of tape and set the knobs to: up, right, up, up, right. The ceiling lamp lights four drawings on the wall: an animal, a bird, a boat and a tree. Each matches a tattoo on the tied-up man's arms, and the number beside that tattoo gives one digit: animal = bone (4), bird = egg (1), boat = anchor (9), tree = flower (5).CODE4195
- Go back to the green box on the floor beside the lockers, enter 4195, open it and take the golden timepiece. Give it to the shadow and zoom in on it: tap the four segments of its symbol that match the red symbol painted on the wall. The watch opens, its hands spin and the timepiece shatters.CODE4195
- Go to the train on the tracks screen and talk to the tall shadow by the doors ("It's time to leave this place"). Board the train, close the doors and tap them again to depart; no ticket is needed.
The Lake
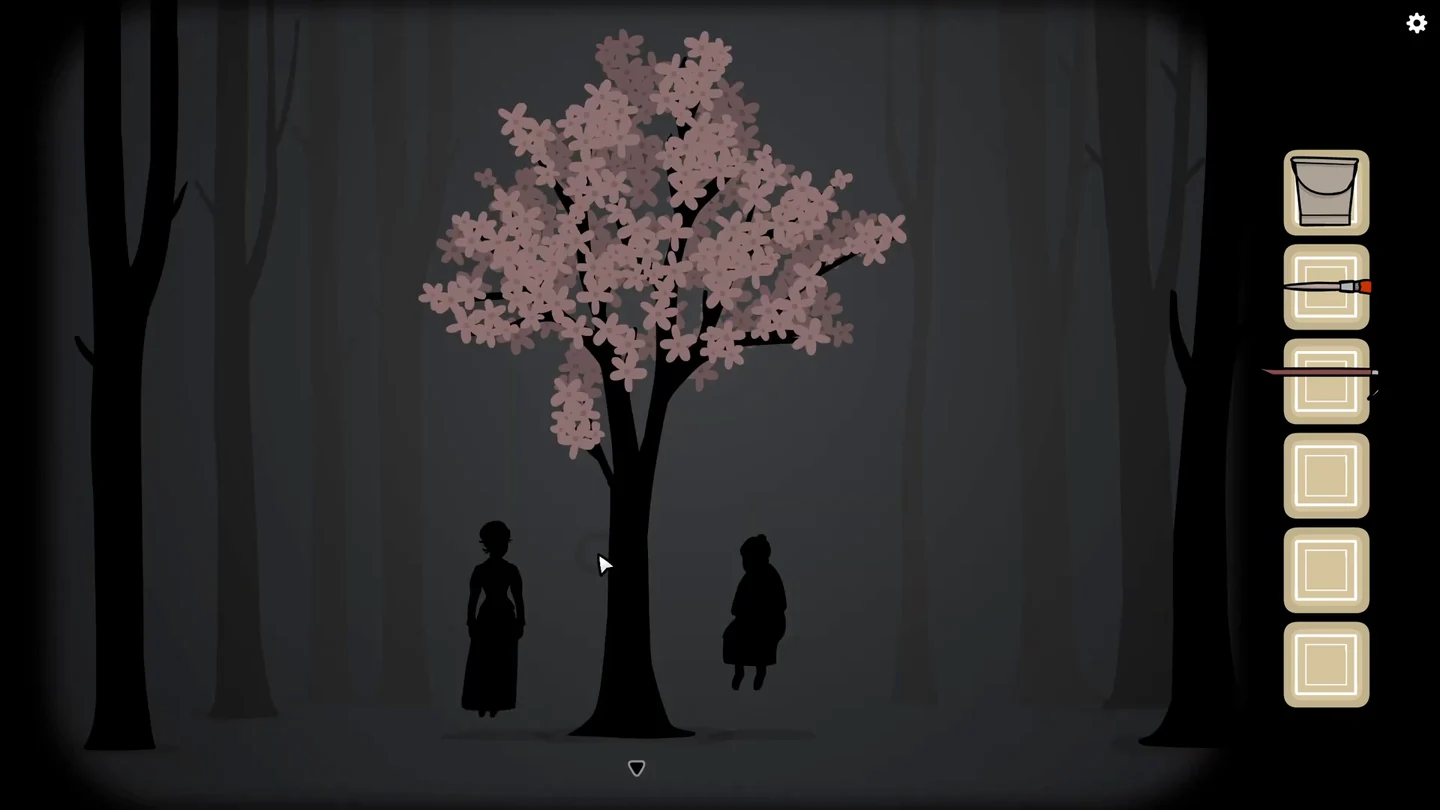
The last stop is a misty forest. This short chapter ends the main story; collect the three butterflies before you talk to the shadow if you want the achievement.
- Optional achievement "The Future in The Past, The Past in The Future": tap the small black butterfly on each of the first three forest screens - above the bench by the lamp, on the roof of the train, and to the left of the tall shadow.
- Talk to the tall shadow ("I remember now, the tree. Look behind you"). A blossoming tree appears with two women beneath it; talk to both (achievement "Blossom"), then tap the tree until all its petals fall.
- Return to the shadow and tap it: the petals restore Laura. Keep talking to her until she walks away into the forest, then board the train, close the doors and tap them again to depart. The credits roll (achievement "Departing The Lake").