CHAPTER 2
Basement pipes and door code
Kate wakes up tied up in the stranger's basement and has to escape.
- Take the Glass of Water when it is offered, break it on the pipe and use the Broken Glass to cut the rope around your hands.
- Hidden star 1: tap the star on the shelf at the top right of the basement, near the mounted deer head.
- Collect the Bucket, the Drill Bit under the floor covering by the hole, and the loose Pipe on the worktable. On the shelf, read the West Harbor Fishing Lures magazine (it numbers nine lures) and take the Paperclip from its upper corner.
- Pick the storage room lock with the Paperclip and take the second Pipe. Take the Folding Chair, place it in the main basement under the high shelving and climb up to take the Drill Battery. In the opened storage room on the left, find the unfinished yellow drill on the shelf above the sink. Use the Drill Battery and then the Drill Bit on it, and take the working Drill.
- Drill the boards off the window. Take the third Pipe on the sill and note the truck plate outside: PCF 4DW.
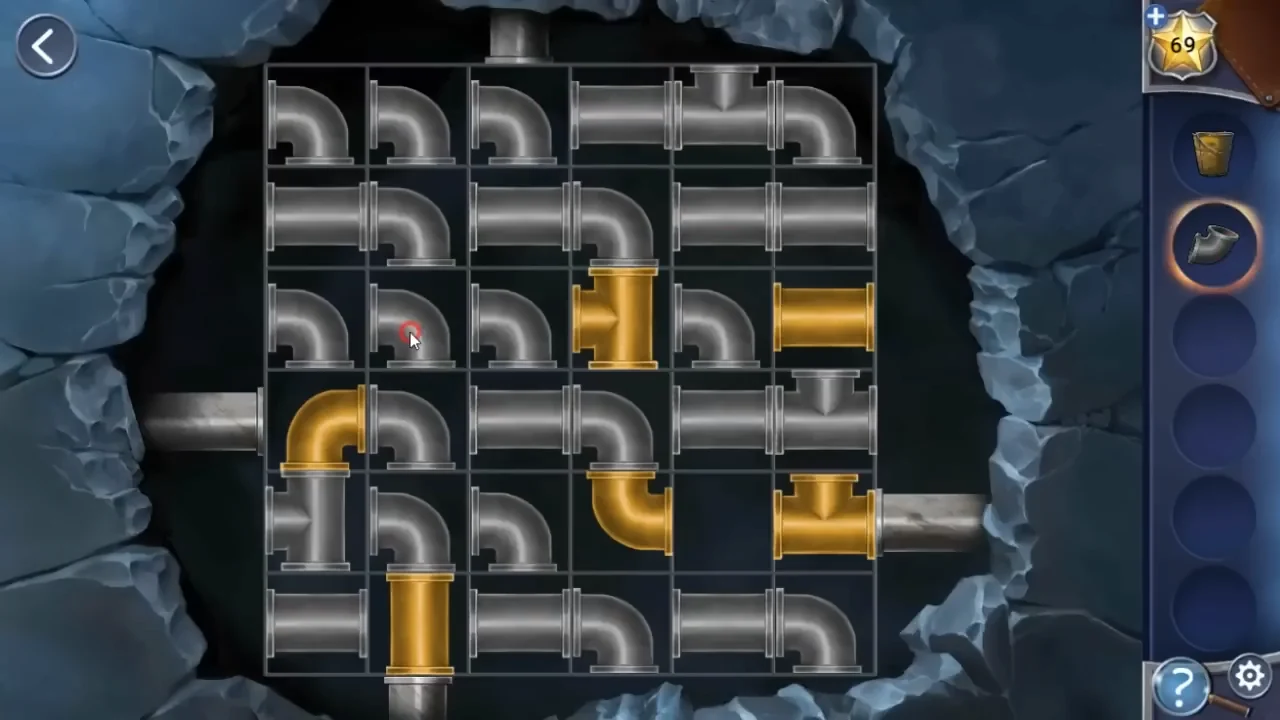
- Remove the deer head with the drill to reveal broken plumbing and place the three Pipes. The pipe grid has four openings at its edges: top, bottom, left and right. Tap a grey piece to turn it in place. Tap one gold piece and then another to swap them. Arrange the pieces until all four openings are joined into one connected network with no loose ends. A few spare pieces are not needed and can stay unconnected.
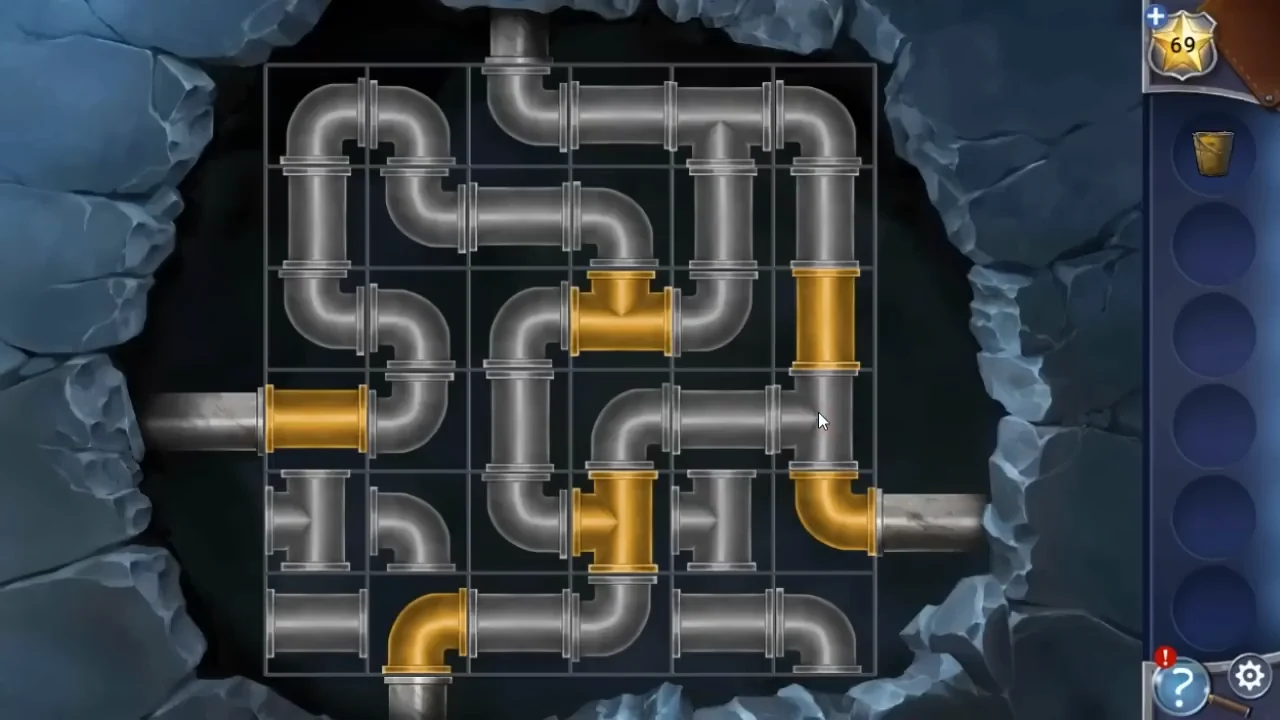
The completed pipe network: the top, bottom, left and right openings are all connected. - Fill the Bucket at the sink and pour it into the hole in the floor to float up the Flashlight.
- Shine the Flashlight on the dark stairs to light up the door on the right. Open the keypad on the basement door. Swap each plate character for its lure number in the magazine: P (Popper) 9, C (Crankbait) 2, F (Feathered spinner) 1, 4 stays 4, D (Deep diver) 3 and W (Walker) 7. Enter 921437.CODE921437
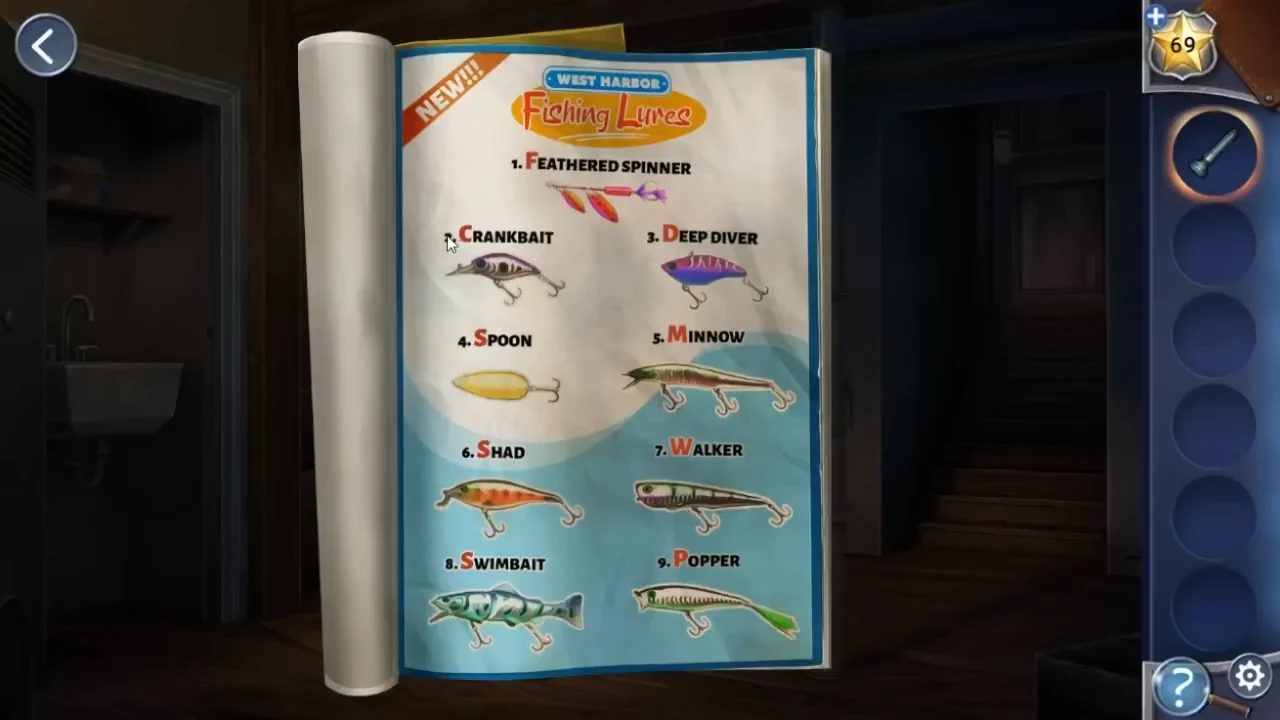
The lure magazine: Feathered spinner 1, Crankbait 2, Deep diver 3, Spoon 4, Minnow 5, Shad 6, Walker 7, Swimbait 8, Popper 9.
CHAPTER 2
Animal head ladder
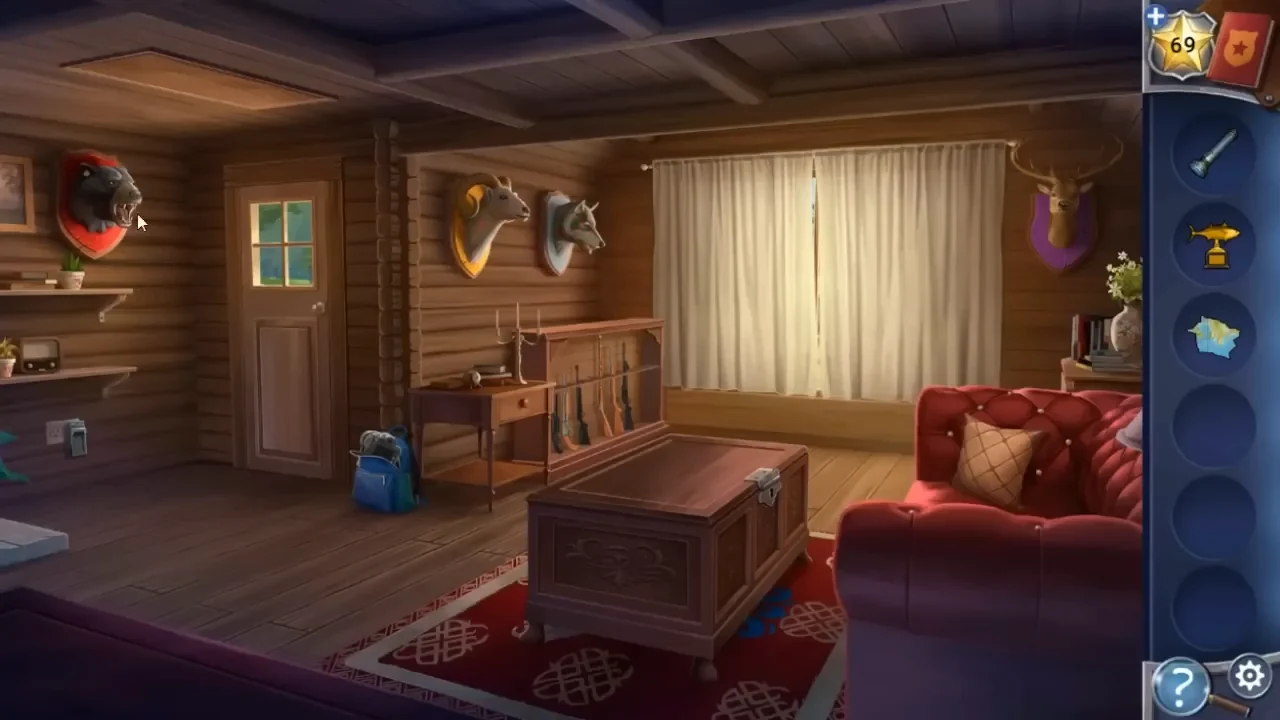
Upstairs, collect evidence while the stranger is outside.
- Take the Charger from the top of the chest in the middle of the room. Open the blue bag by the door and take Kate's Notebook, then tap the bag again to look at the camera inside and remove its dead battery. Plug the Charger into the wall socket, charge the battery on it and put the battery back in the camera. Take the Map Piece from under the couch cushion and the Fish Trophy from the shelf on the left wall.
- View the camera photos. In the wedding photo, the woman wears a flower crown coloured white, yellow, red, purple, red. The mounted heads have matching plaques: wolf white, ram yellow, bear red, deer purple.
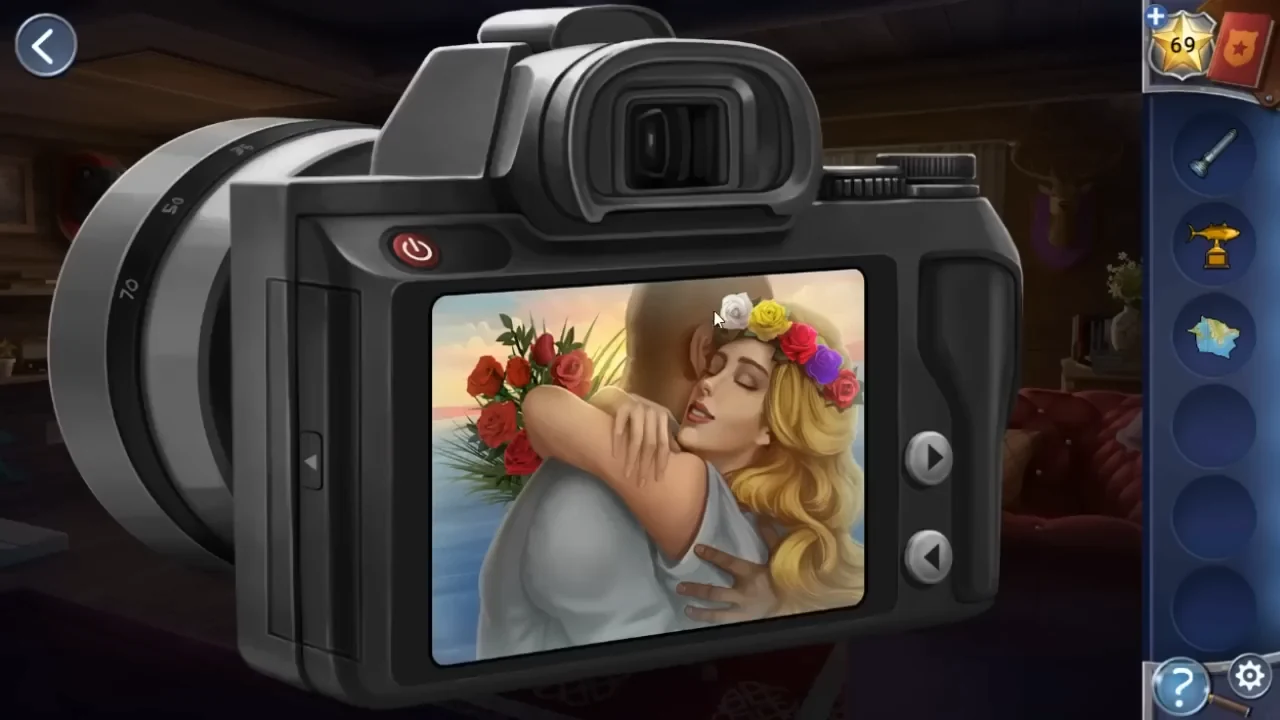
The wedding photo on the camera: the flower crown gives the colour order. - Tap the heads in order: wolf, ram, bear, deer, bear. Then tap the hatch in the ceiling to lower the ladder, and tap the ladder to climb into the attic.CODEwolf, ram, bear, deer, bear
CHAPTER 2
Gun rack
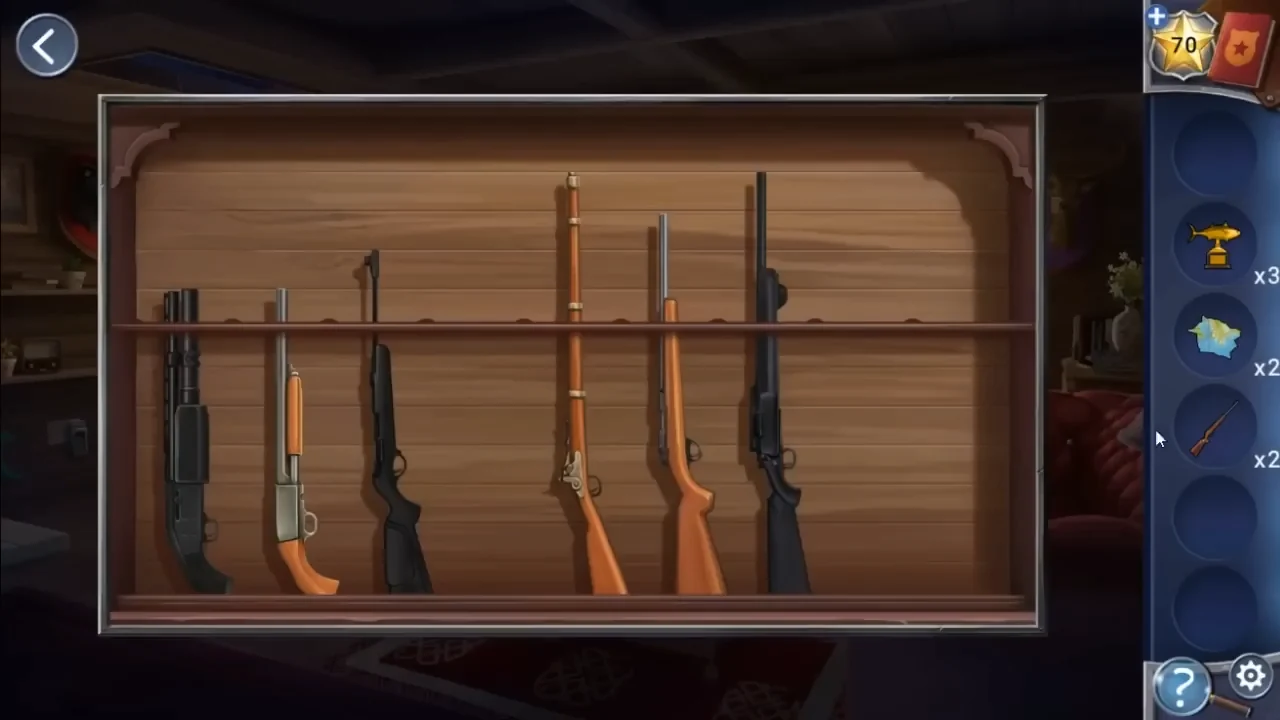
The dark attic and the cabin hide the guns for the rack.
- The attic is dark: drag the Flashlight beam around the room to see what is there. At the red chair, take the Gun. Then tap the yellow rug on the chair to move it aside and take the Fish Trophy it was covering. Take the second Fish Trophy from the shelves at the back right. Open the small box and take the Key.
- Downstairs, open the chest with the Key and take the second Gun. Open the curtains after the truck leaves; take the Map Piece by the window.
- Hidden star 2: with the curtains open, tap the star among the trees at the upper left of the window.
- Place both guns on the rack. Select a gun, then another gun or the empty slot to swap them. The trees outside are the clue: match each gun's shade (light or dark) and size to the tree in the same position, and leave the slot empty where the trees have a gap. The rack's drawer opens: take the Bulb. Before going up to the attic, take the Magnet from the open chest in the living room.
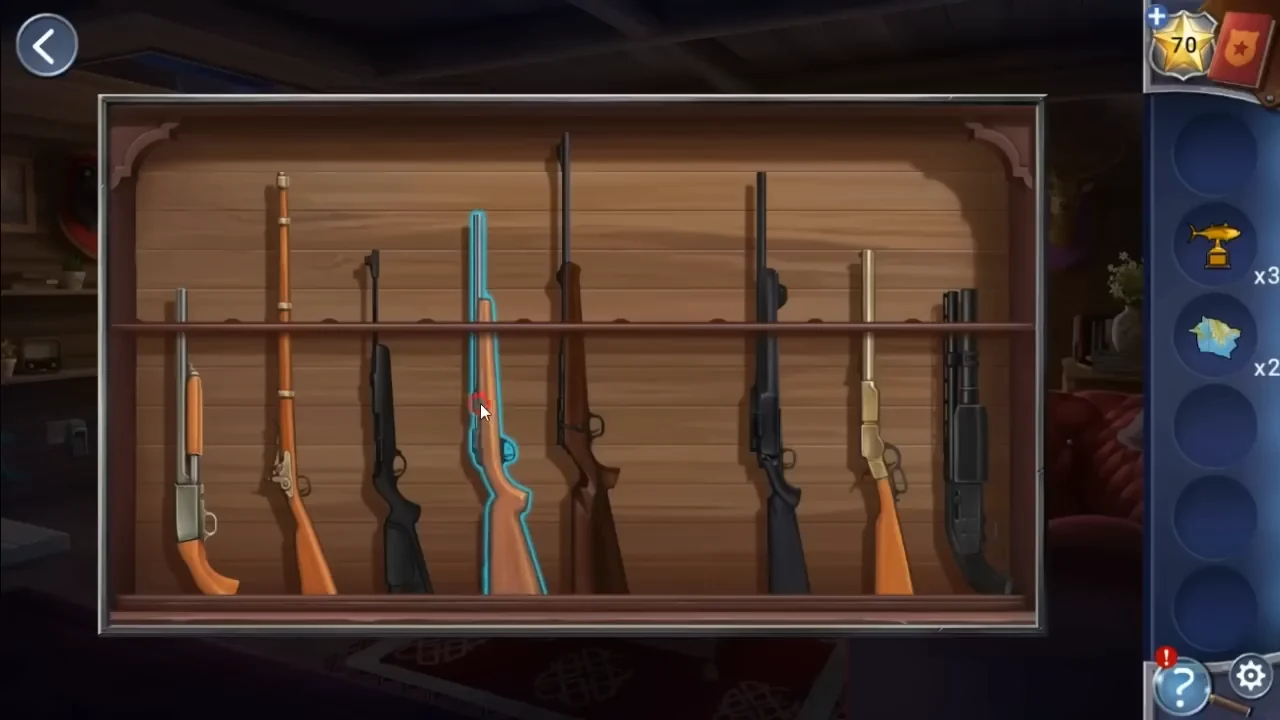
The completed rack arrangement.
CHAPTER 2
Fish map box
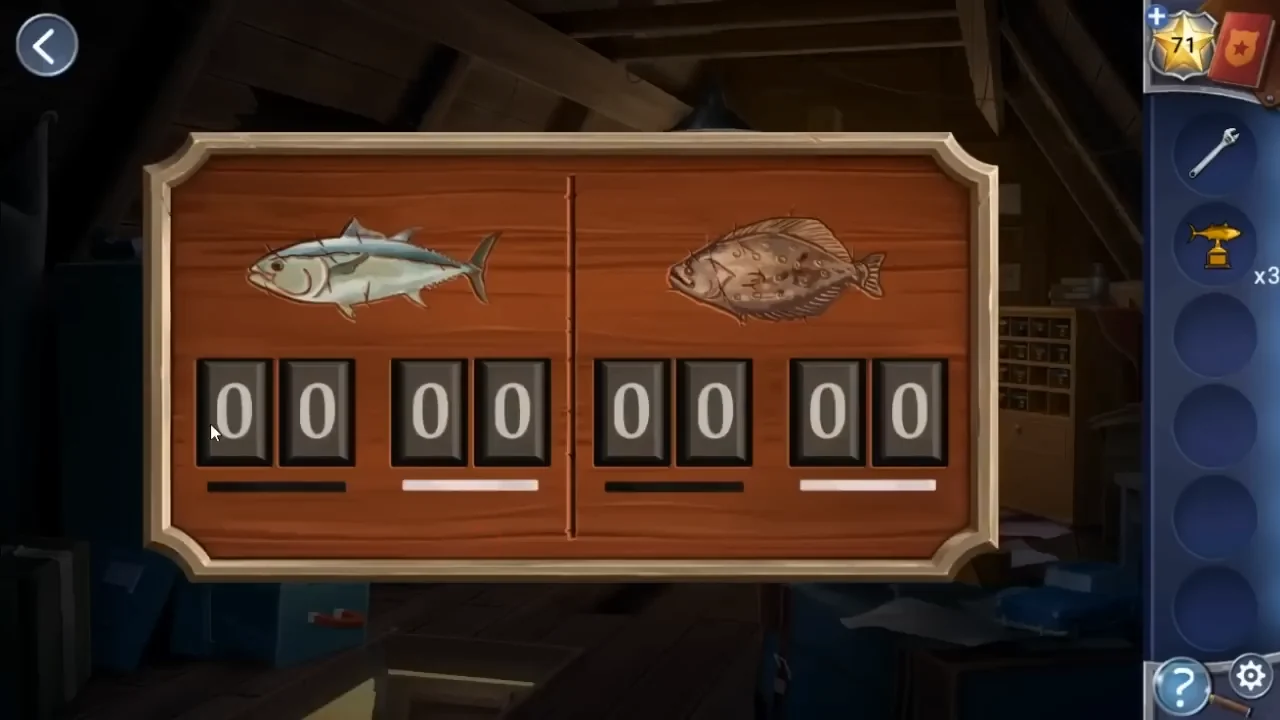
Light the attic and complete the fishing map.
- Fit the Bulb in the attic lamp. Open the drawer with the Magnet and take the Crowbar. Pry up a loose floorboard with the Crowbar for the Wrench, and pry off the loose plank on the left wall for the last Map Piece. Then remove the boards from the attic window.
- Hidden star 3: once the attic window is uncovered, tap the star in the upper-left part of the window view, just inside the frame.
- Put the three pieces on the map. Its note gives scale values (black circle 25, black star 40, triangle 06, outlined star 18). Read the black and white grid coordinates of the two fish shown on the box: tuna black 50, white 27; flounder black 30, white 15. Enter 50 27 and 30 15 on the two-fish box, then take the fourth Fish Trophy from inside. The harpoon launcher stays in the open box; you will use it there later.CODE50 27 / 30 15
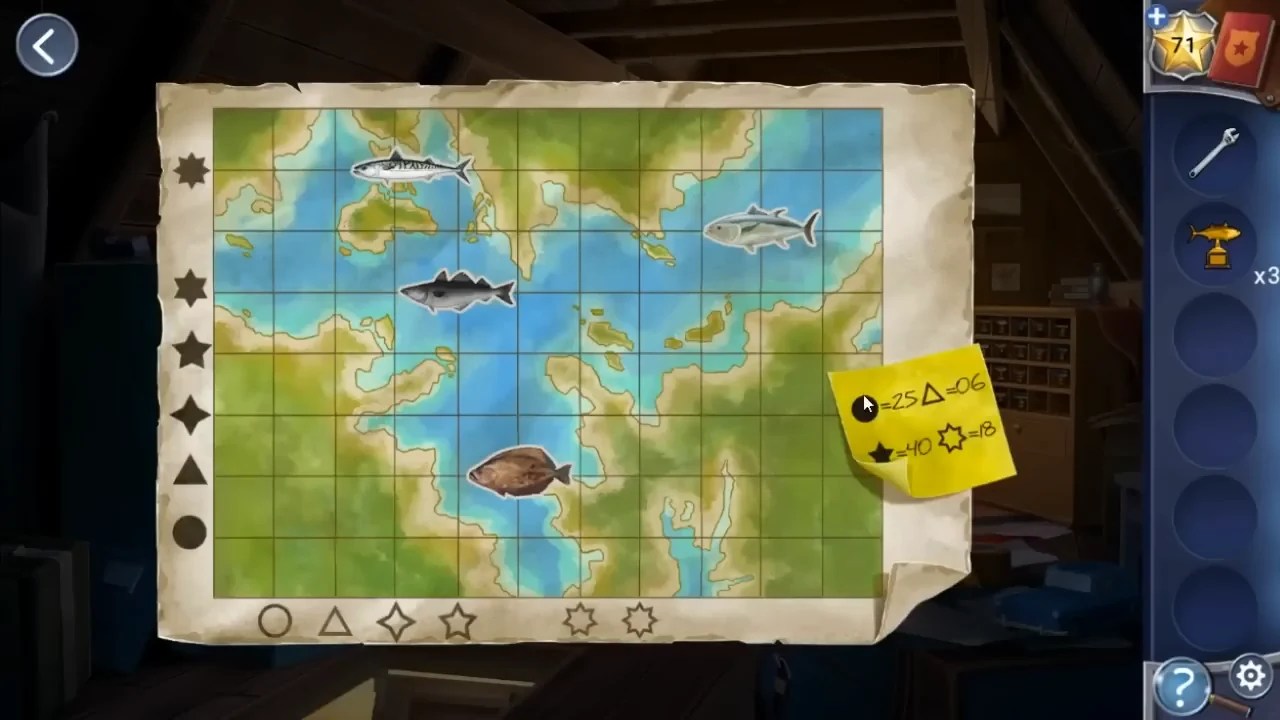
The finished map. Read each fish's position against the edge symbols and the sticky note values.
CHAPTER 2
Trophy shelf and zip line
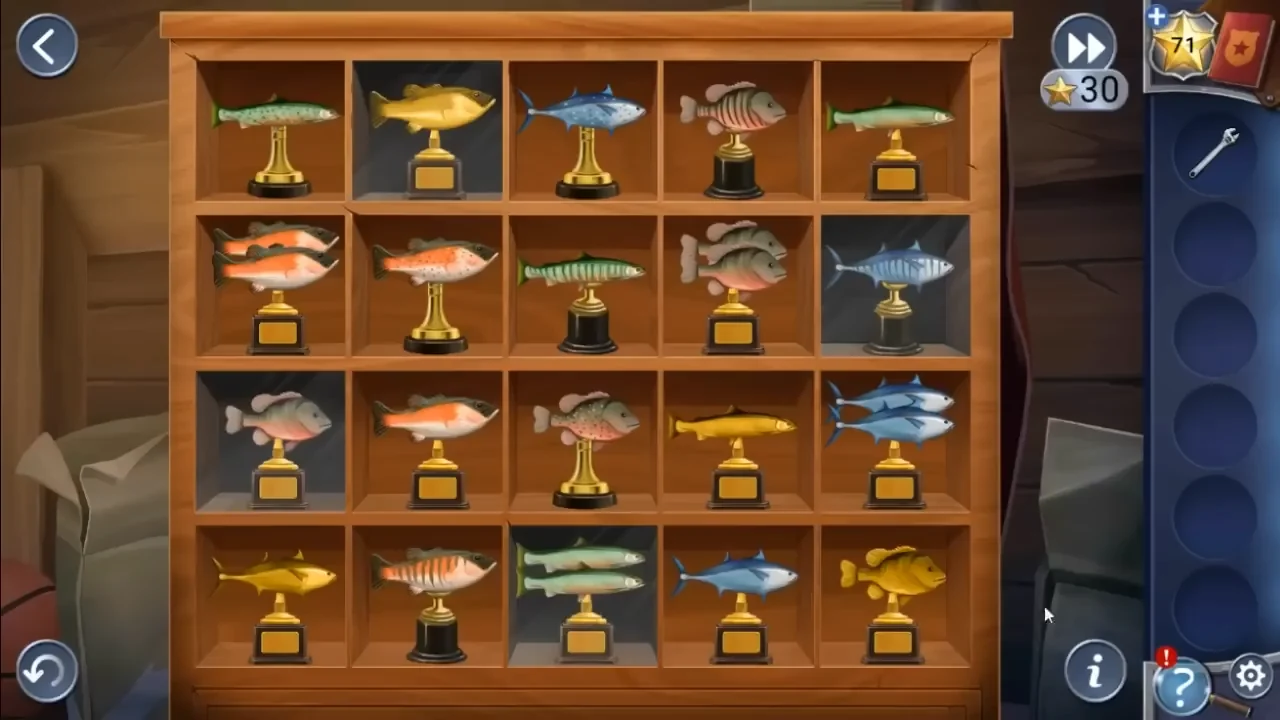
Arrange the fish trophies, then use the harpoon to escape through the attic window.
- Place the trophies on the shelf. Trophies under grey glass are fixed. Each row holds one kind of fish and each column one pattern (plain, golden, pair, spotted, striped). Swap trophies until every row and column matches. This is a lengthy logic arrangement.
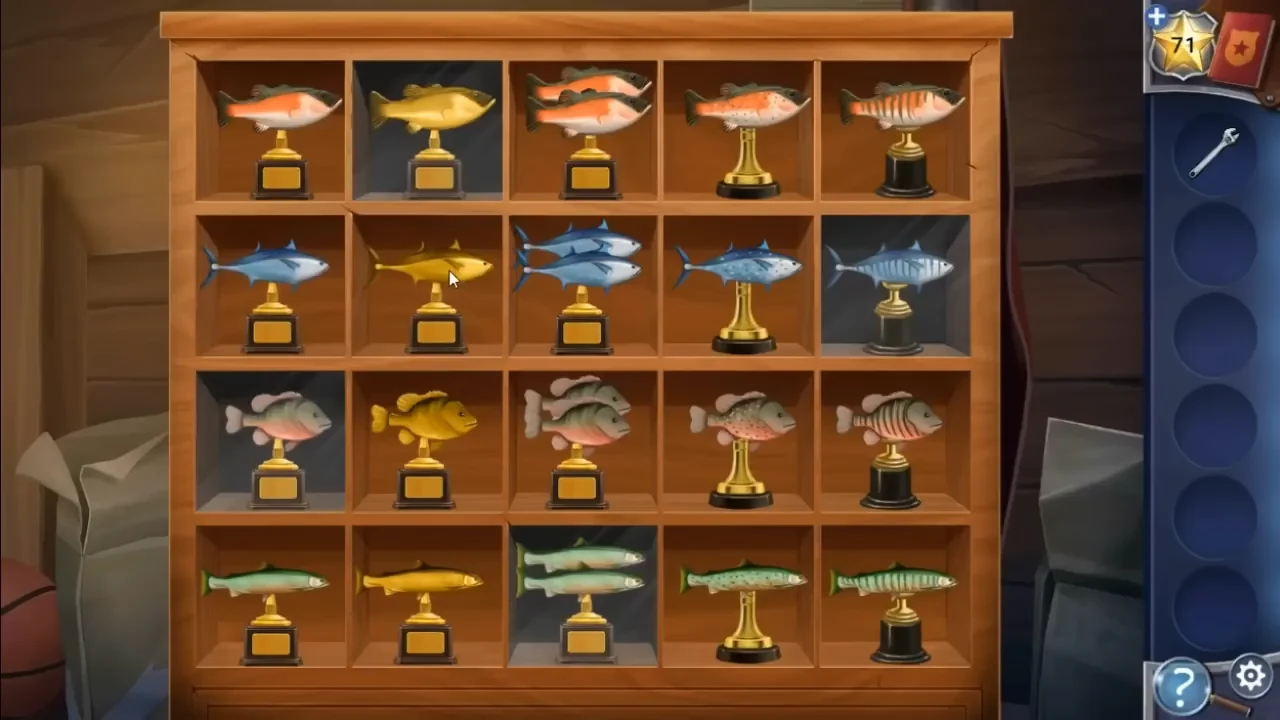
The completed trophy shelf. - Take the Harpoon from the solved shelf. The stranger returns and the attic hatch closes, so the window is the only way out. Use the Harpoon from your inventory on the launcher in the open fish box to make the Harpoon Gun. Fire it out of the attic window to make a zip line, use the Wrench to take the bike Handlebars and ride the line out.