Drill Bit
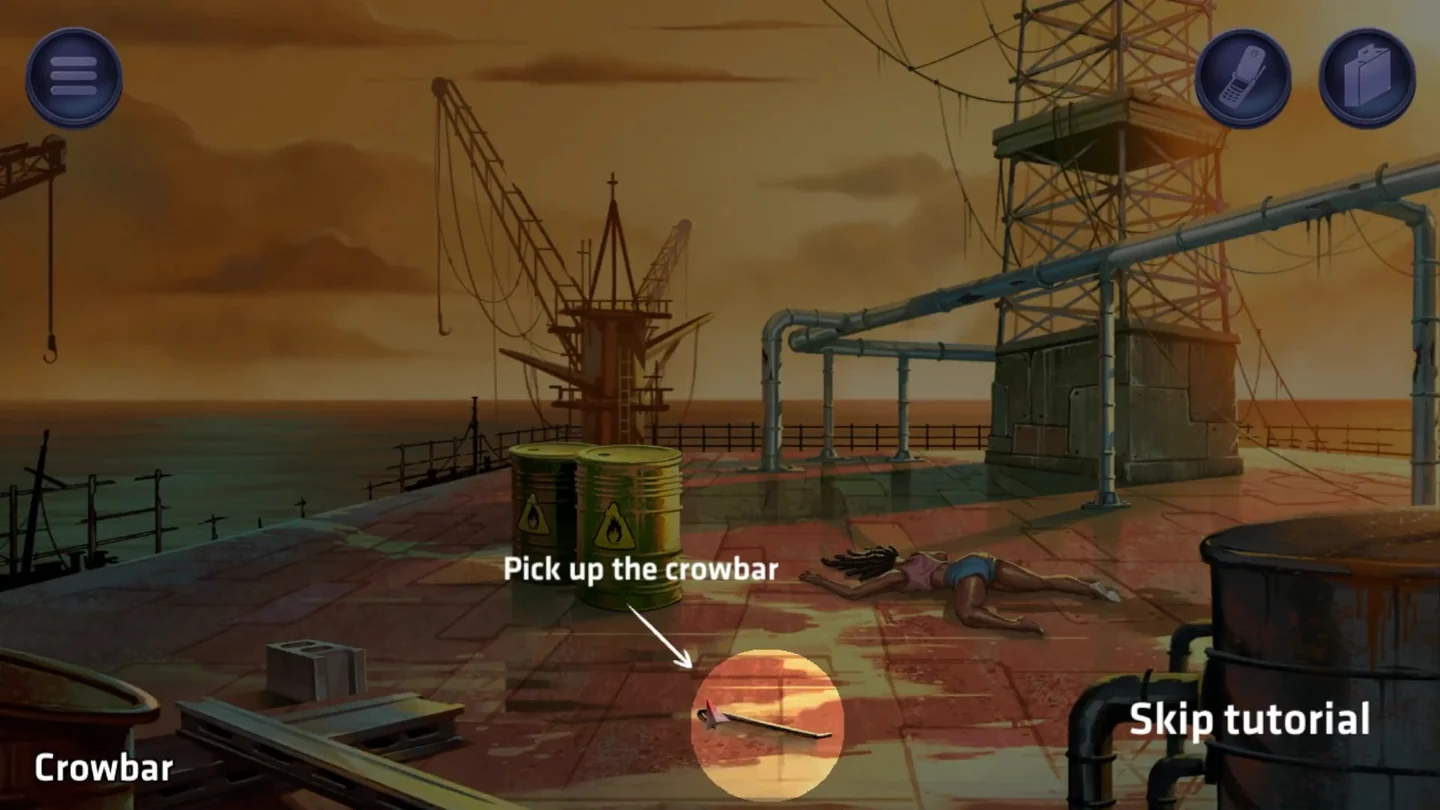
The first mission is a guided tutorial on a derelict oil rig. It teaches the core rules: hide the target, clean up, then put every borrowed tool back where you found it before finishing. If you want the Hint Hater achievement, never press the phone button for help at any point in the game.
- Press Play on the briefing terminal. The hints phone opens automatically with a tutorial message; close it with the red power button at its lower right. Pick up the crowbar lying on the deck, open your inventory, select it and use it on the highlighted front green barrel, the one on the right of the pair, to pry the lid off.
- Pick up the body, then use it on the open barrel to put it inside. Pick up the filled barrel.
- Pick up the concrete block on the pallet at the lower left. In the inventory, drag the concrete block onto the barrel to combine them.
- Use the weighted barrel on the ocean to throw it overboard.
- The phone opens automatically again with a reminder to return everything you are holding; close it with the red power button. Put the crowbar back where you found it on the deck, then press the Finish mission button at the top left. The mission ends at 100% and awards Oil and Water.
Quagmire
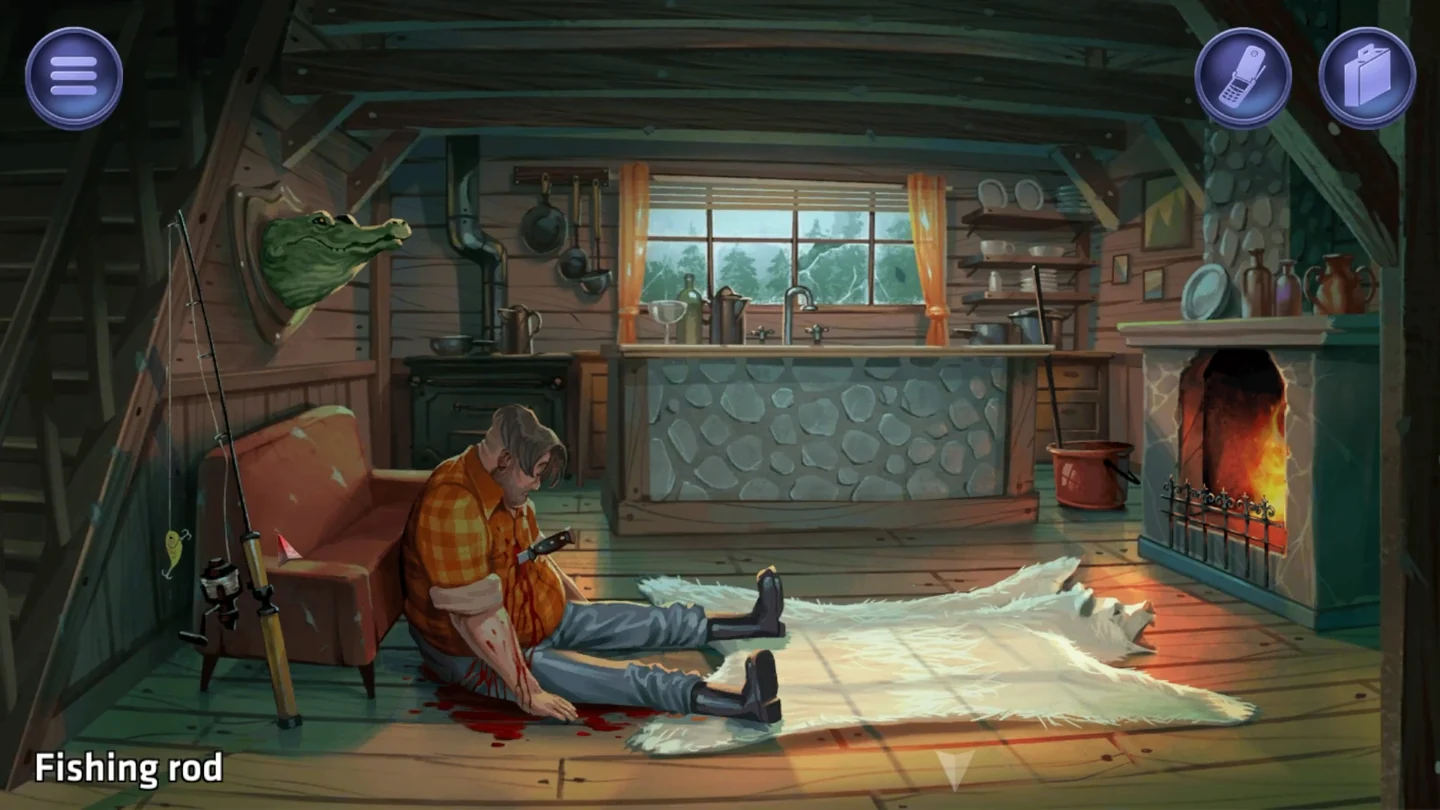
A hunting cabin in the bayou. The alligators outside take care of the body, but they leave the clothes behind, and the mop needs rinsing before it goes back.
- Inside the cabin, take the fishing rod leaning by the armchair and the mop by the counter. Go outside and take the wheelbarrow parked beside the cabin.
- Back inside, use the wheelbarrow on the body to load it. Use the mop on the blood pool on the floor; it becomes a bloody mop.
- Go outside and use the wheelbarrow with the body on the water by the dock. The alligators eat the body, leaving the clothes floating.
- Use the bloody mop on the water to rinse it clean, then use the fishing rod on the floating clothes to reel them in.
- Put the empty wheelbarrow back beside the cabin. Go inside and use the clothes on the lit fireplace to burn them.
- Return the mop to the counter and the fishing rod to the armchair, then press the exit button at the top left. The mission ends at 100% and awards Bogged Down.
Roadkill
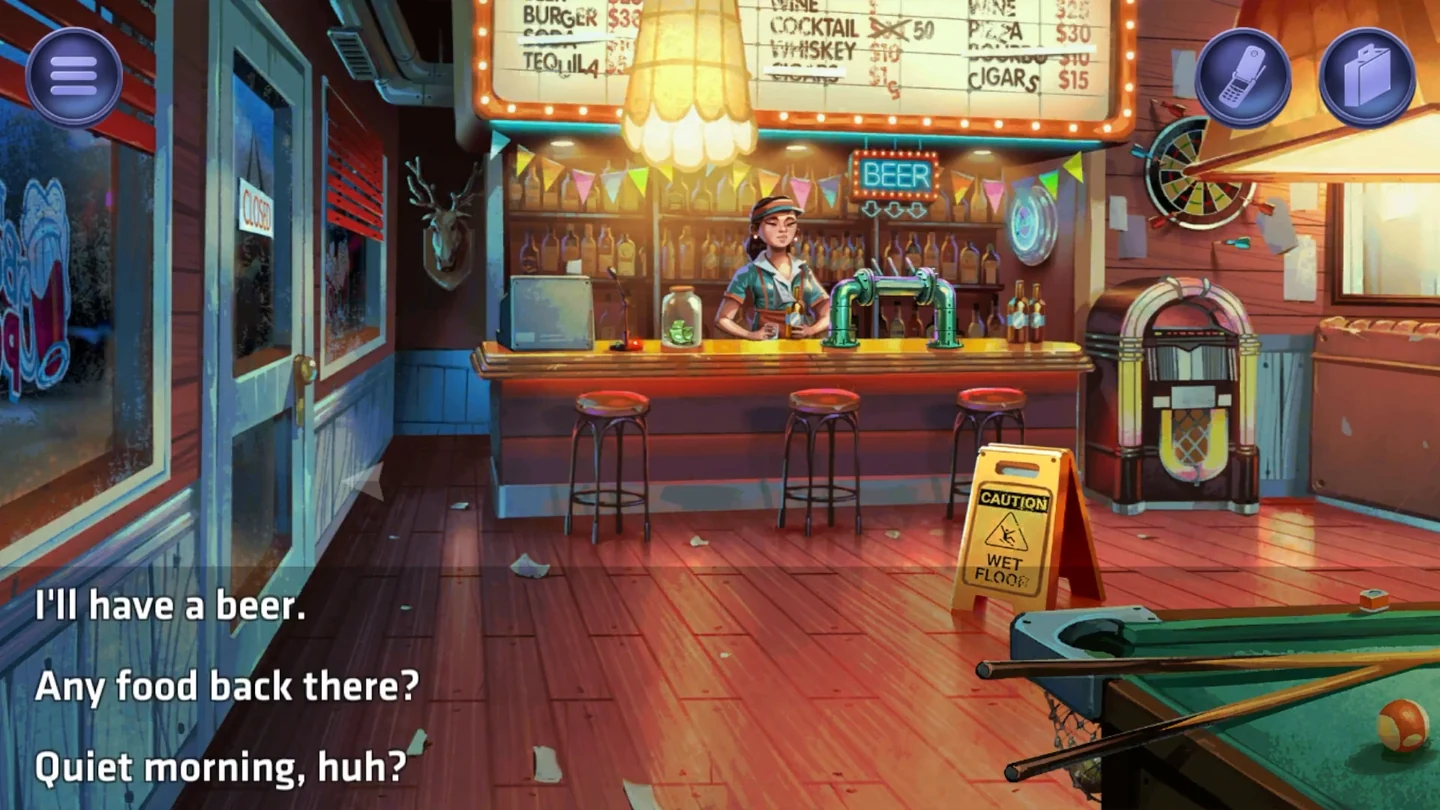
The body is locked in the back of a delivery truck parked outside a roadside diner. Distract the bartender, wake the trucker and feed the road crew so you can bury the body under the fresh road.
- Go into the diner and talk to the bartender. Choose "I'll have a beer." to receive a beer.
- Use the beer on the floor to spill it. While the bartender is busy mopping, take the cash from the tip jar on the bar counter.
- Use the cash on the jukebox. The loud music brings the trucker out of his truck and into the diner.
- Go outside and take the keys from the truck's open cab.
- Go back inside and use the cash on the bartender to order a pizza.
- Go left from the diner to the roadworks and give the pizza to the worker. Both workers leave to eat.
- Return to the truck and use the keys on the rear cargo door to unlock it. Click the door to open it, then take the body from inside.
- Go back to the roadworks and take the shovel. Use the shovel on the soil to dig a hole, put the body in it, then use the shovel again to fill it in. Lean the shovel back where you found it.
- At the truck, close the cargo door and use the keys on it to lock it, then put the keys back in the cab.
- Go inside, put the remaining cash back in the tip jar and press the exit button. The mission ends at 100% and awards Speed Bump.
Undertaker
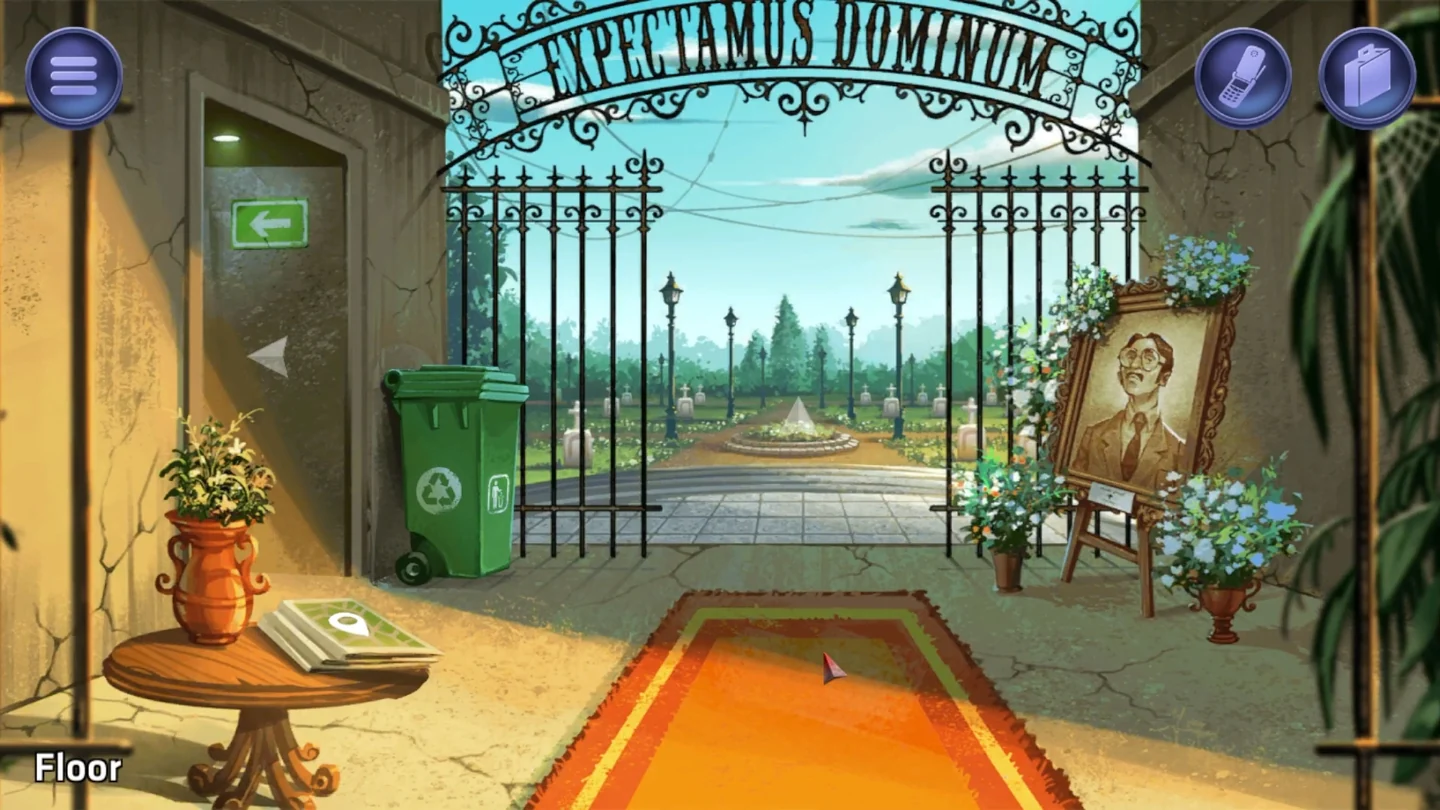
A cemetery with a funeral in progress. Use the map to travel between the numbered buildings and lettered zones. The plan is to clear the mourners with the sprinklers and slip the body into the open casket.
- At the entrance, take the map from the round table and the green garbage bin by the gate.
- Use the map to go to location 3, the mausoleum. Take the body and the rug on the floor. In the inventory, combine the body with the garbage bin.
- Go to location 1, the shed. The caretaker is asleep on a bench beside a noisy gravel path. Use the rug on the gravel, then take the keys from beside the caretaker without waking him.
- Use the keys on the shed door and go in. Take the adjustable wrench from the shelves on the left and the pliers from the shelves on the right, beside the door.
- Open the sprinkler control box. Timer A is running and timers B and C are off. Use the pliers on cable B, then on cable A. Both cables now hang cut. Click the cut end of cable A to splice it into line B.
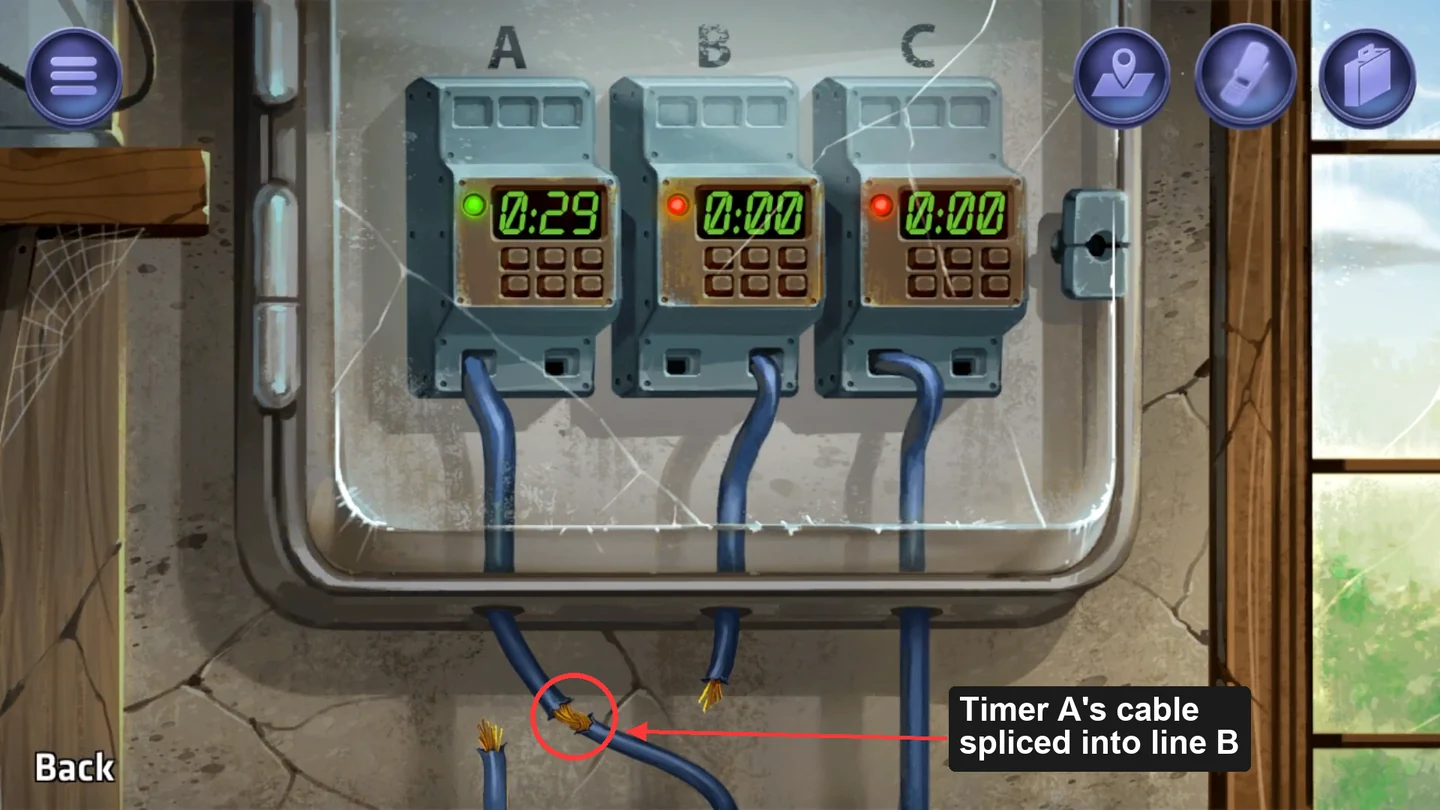
After cutting B and then A, click A's cut end to splice timer A's running cable into line B. - Go to Zone C and use the adjustable wrench on the fence to remove a loose iron bar (broken fence).
- Go to Zone B. The sprinklers have chased the mourners away. Use the broken fence bar on the casket to pry it open, take the body out of the garbage bin and put it in the casket. Click the casket to close it.
- Clean up: in Zone C, put the fence bar back. In the shed, return the wrench to the left shelves, use the pliers on the control box cables to undo the splice, and use the pliers on the right-hand shelves to put them back.
- Outside the shed, use the keys on the door to lock it, put the keys back beside the caretaker and pick up the rug.
- Put the rug back on the mausoleum floor. At the entrance, put the garbage bin back by the gate and the map back on the table, then press the exit button. The mission ends at 100% and awards Coffin Flop.
Stowaway
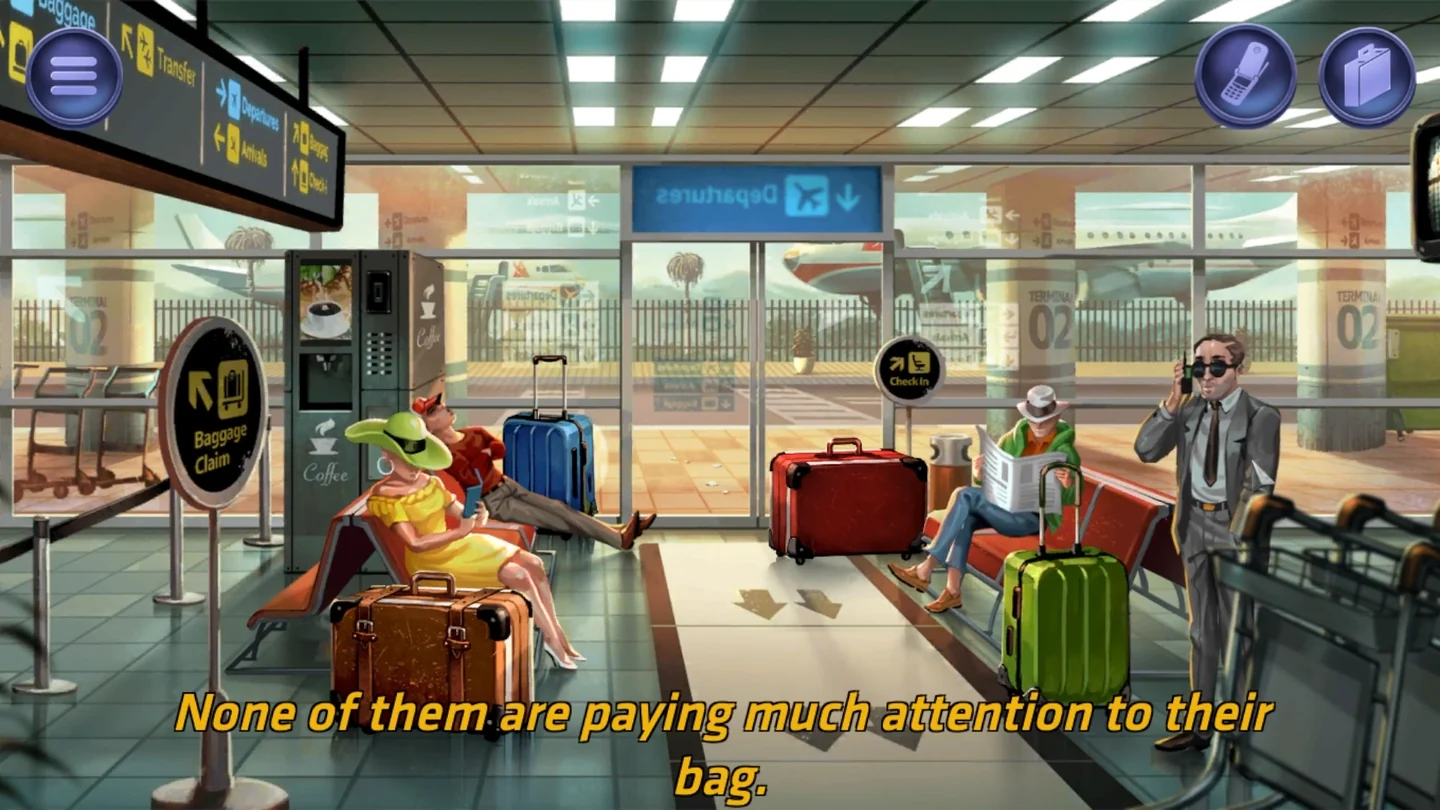
At a small airport, the goal is not to hide the body but to frame the target's contact: a male doctor who likes beaches and tennis. In the departures lounge, the passenger with the plain red suitcase is the match. Get an identical red suitcase from baggage claim, put the body in it and swap the two.
- Outside the terminal, take the luggage cart from the walkway. Go in to check-in, return the cart to the cart dispenser and take the coin it gives back.
- In the departures lounge, use the coin on the coffee machine to get a coffee.
- Go to baggage claim and look at the red suitcase among the bags. Its tag reads "Flight 6249: Ken Keyton".
- At check-in, use the coffee on the clerk. He storms off to clean up. Use the computer on the desk, enter flight number 6249, then press 5 for Ken Keyton to print his boarding pass. Take the boarding pass.CODE6249
- At check-in, take the employee badge from the Tourist Information desk and the rubbing alcohol from the first-aid kit on the wall. Keep the badge with you until the cleanup. It also lets you question the passengers in the departures lounge, which is optional.
- At baggage claim, use the boarding pass on the attendant. He hands over the red suitcase.
- Go outside. In the inventory, use the rubbing alcohol on the red suitcase to clean off its stickers. Take the body from the bench and combine it with the red suitcase.
- In the departures lounge, use the red suitcase with the body on the red suitcase standing between the passengers. You now hold the contact's original red suitcase.
- Give the contact's original red suitcase to the baggage claim attendant ("Found an unattended bag over there"). At check-in, put the rubbing alcohol back in the first-aid kit on the wall, click the kit to close it, and return the employee badge to the Tourist Information desk.
- Go outside. Click the green garbage bin to open it, use the boarding pass on it to throw the pass away, then click the bin again to close it. Press the exit button. The mission ends at 100% and awards Body Bag.
Canary
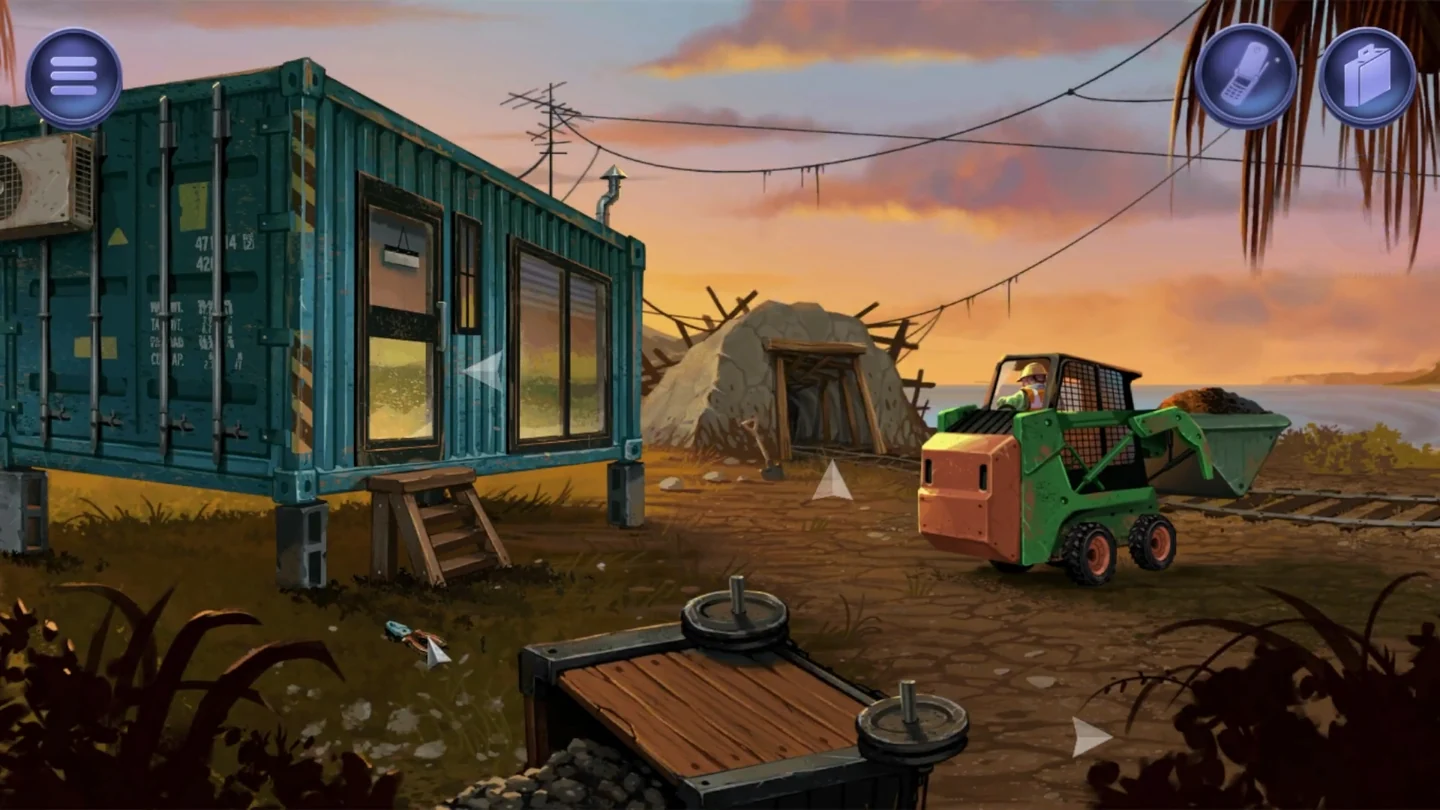
A coastal mine with a beach below the cliffs. The body is in the trunk of the car at the checkpoint. Empty the mine with a fake earthquake, then seal the body behind a collapsed tunnel. Inside the mine, each junction offers Left and Right, and some also have a Center tunnel; the entrance itself has only two choices. The photographed mine map shows your mine cart's position, and once you have visited a spot you can travel back to it by tapping it on the map.
- At the checkpoint, take the orange uniform from the car. Go left to the mine yard and take the pliers on the ground by the office steps.
- From the mine yard, go Right back to the car checkpoint, then take the stairs down to the beach. Take the rotten fish from the seagull, then use the fish on the sunbathers' umbrella. The seagulls drive them away. Take the camera from the bag they left, then use the pliers on the hut to remove the bird spikes.
- In the mine yard, use the bird spikes on the moving bulldozer. It gets a flat tire, and the driver leaves to find a replacement. Pick the bird spikes up again and take the jack.
- Go into the office and use the camera on the mine map on the wall. The photo becomes your mine map.
- Outside, use the jack under the office, then click the jack to start jacking. The shaking makes the supervisor evacuate the mine. Fifteen minutes later, take the jack back from under the office before you enter the mine.
- Enter the mine and go to Sector 01: Left, Left, Right. Take the mallet from the toolbox.
- Go back to the entrance and drive to Sector 02: Right, Center, Center, Right, Left, Right. Take the rope.
- From the entrance, drive to the cliff opening: Right, Center, Left, Right, Left, Right, Center. Use the rope on the rock to tie it, then go down the rope to the beach.
- On the beach, use the mallet on the boarded hut and take the oxygen tank inside. Go up to the checkpoint, open the car's trunk, take the body and close the trunk.
- Go back down to the beach and on to the foot of the cliff. Use the body on the hanging rope.
- At the foot of the cliff, open the mine map and tap the Entrance on it to return to the mine yard. Enter the mine there and drive to the boarded-up cave-in with the warning sign: Left, Center, Right, Right. Use the map to jump to the cliff opening, click the rope to haul the body up into the tunnel, then pick the body up. Use the map to return to the cave-in.
- Use the body on the boards to push it through, use the oxygen tank on the boards, then use the mallet on the tank. The tunnel collapses over the body.
- Clean up: return the mallet to the Sector 01 toolbox and the rope to the rocks in Sector 02. In the yard, drop the pliers by the office and use the jack you are carrying on the bulldozer to put it back. At the checkpoint, return the uniform and throw the map photo in the trash can. On the beach, put the bird spikes back on the hut and the camera back in the bag, then click the hut to close its shutter. Exit. The mission ends at 100% and awards Shafted.
Caldera
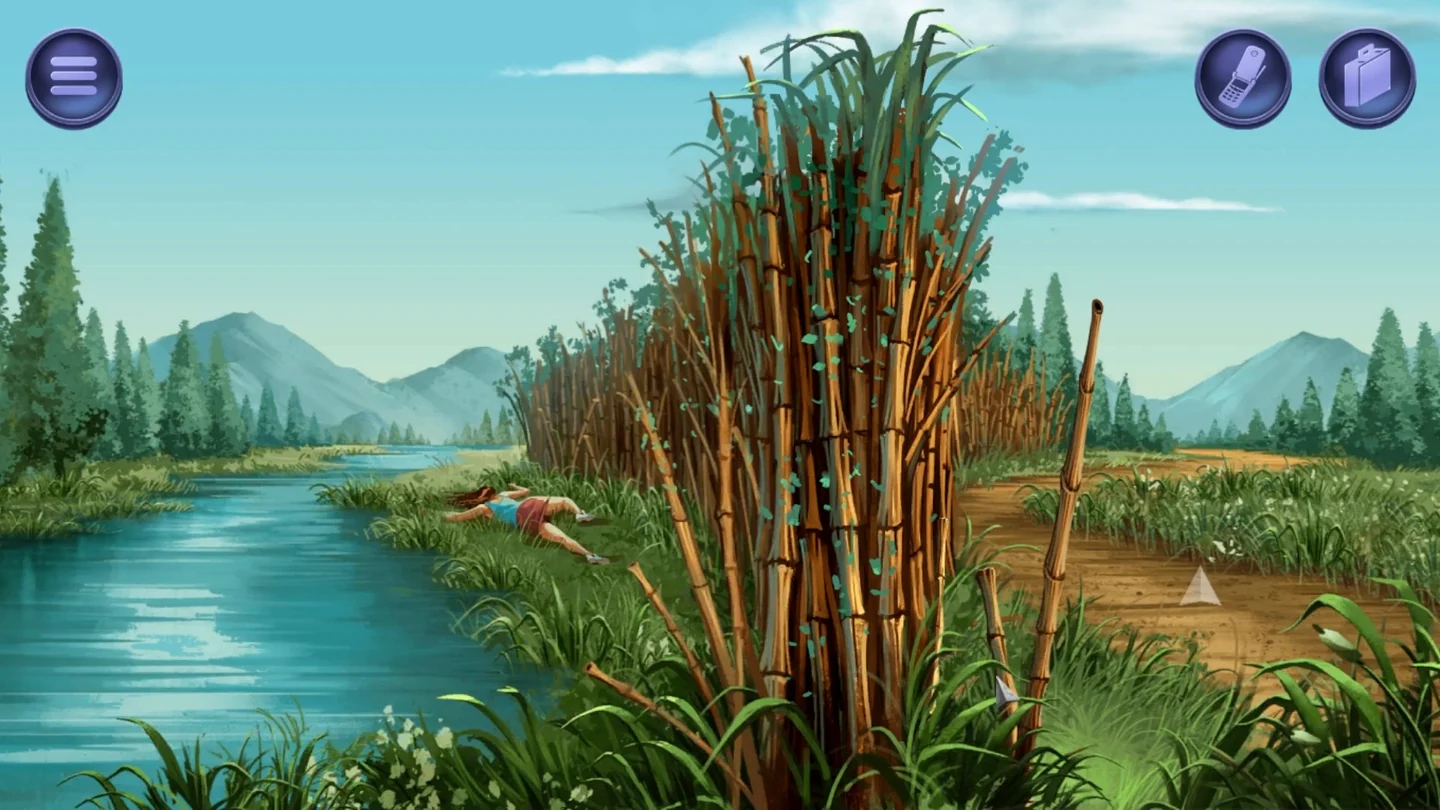
A national park with a river, a campsite and three geysers. The body floats down the river on a raft to the campsite, then goes into the one geyser that never erupts. The park map lets you jump between the places you have found.
- From the riverbank where the body lies, take the path to the park entrance and pick up the licence plate on the ground.
- Continue to the bathrooms. Take the machete from the log, the map from the signpost's orange box, the pitchfork from the shed and an empty bottle from the green trash can. Read the signpost: the geyser marked with an X is the extinct one that never erupts. In the example shown below, Geyser A erupts every 2 minutes, Geyser B every minute and Geyser C carries the X. Always use the geyser your own sign marks.
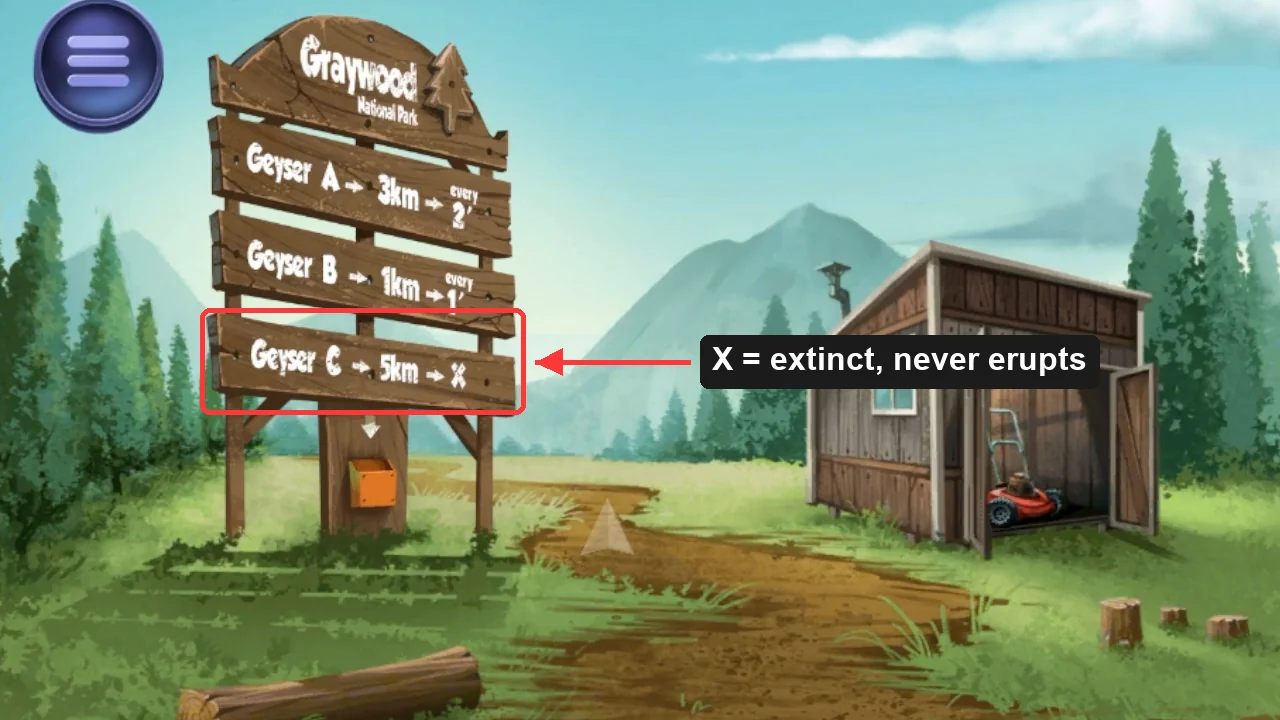
Example signpost: Geyser C is marked with an X, so here C is the extinct geyser. Use the geyser your own sign marks. - Walk on to the trail by the footbridge. Pick up the rocks and the bean pods lying on the ground, and use the machete on the footbridge's railing rope to take the rope.
- Use the map to go to the campsite. Combine the bottle with the bean pods to make a rattle, then use the rattle on a camper at the campsite. The campers think there are snakes and run away. Take the cart, the multi-tool and the backpack.
- Go to the bathrooms and use the multi-tool on the red lawn mower in the shed to take its wheel.
- Return to the riverbank and use the machete on the bamboo. Combine the bamboo with the rope to make a raft, and combine the pitchfork with the licence plate to make a paddle.
- Put the raft on the water, take the body and use it on the raft. Click the raft once: it flips over so the body is tied underneath. Click it again to give it a push, and it drifts away downstream.
- Use the map to go to the campsite. Take the yellow kayak and use it on the river to bring back the raft with the body ("Nice, there's one way to sneak in a body.").
- In the inventory, combine the cart with the wheel, combine the kayak with the repaired cart, then put the body in the kayak on the cart. Use the machete on the raft to take it apart into bamboo and rope.
- Use the map to go to the extinct geyser your sign marked. Click the kayak-on-cart item in your inventory to take the body out of the kayak. Combine the rocks with the backpack, combine the weighted backpack with the body and use it on the geyser. The body sinks.
- Clean up: at the trail, use the rope on the footbridge. At the campsite, use the multi-tool on the kayak-on-cart item to separate the kayak from the repaired cart, then use the multi-tool on the repaired cart to take its wheel off. Put the cart, the kayak and the multi-tool back.
- At the bathrooms, click the paddle in your inventory to split it back into the pitchfork and the licence plate. Open the green trash can if its lid is closed, put the rattle in, then click the lid to close it. Put the pitchfork in the shed, the wheel on the lawn mower, the machete in the log and the map back on the sign. Drop the licence plate on the path at the entrance, and use the bamboo on the bamboo clump at the riverbank. Exit. The mission ends at 100% and awards Natural Causes.
Midnight
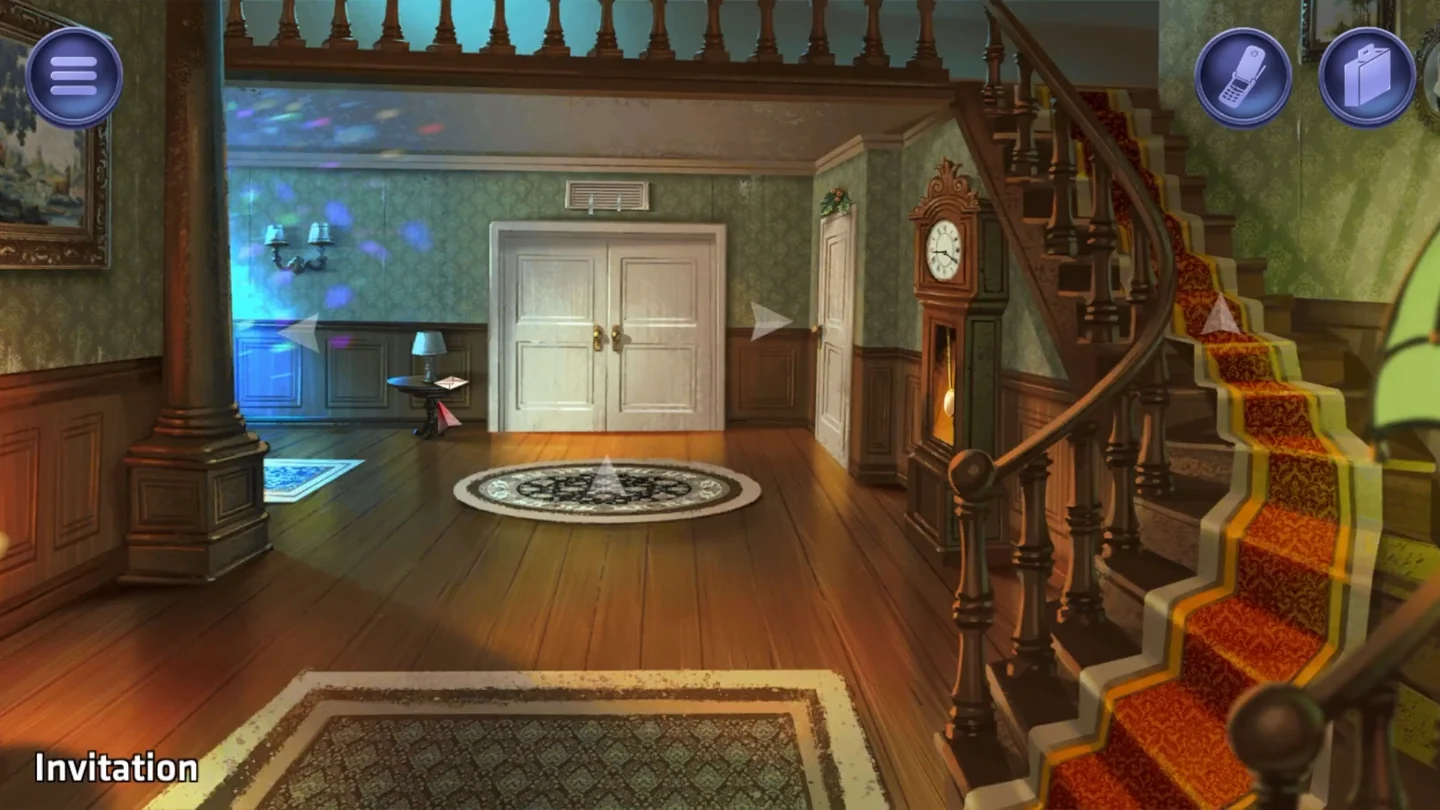
A New Year's Eve party in a mansion. The target lies in his locked study upstairs. The DJ will start the fog machine at the stroke of midnight, so spike it, get rid of the chef and make the clock strike twelve early.
- In the foyer, take the invitation from the top of the side table under the lamp on the left, and the mistletoe hanging on the right side beside the grandfather clock. Go through the door on the right beside the clock to the basement and take the knitting needle and the ball of yarn from the shelves beside the basement stairs. Take the gas mask from the red laundry basket in front of the washing machine.
- Go back up and enter the lounge through the blue-lit opening on the left side of the foyer. Talk to the DJ and choose "Cool fog machine!": he will turn the fog on at the stroke of midnight. Take the matches from the side table.
- In the kitchen, take the can opener from the counter.
- Go upstairs and take the framed diploma off the hallway wall. Use the can opener on it to separate the diploma from the frame. Slide the diploma under the locked study door, then use the knitting needle on the keyhole. The key lands on the paper, so pull the diploma back to get the key.
- Use the key on the study door. Inside, take the small key from the desk. Back in the hallway, combine the ball of yarn with the mistletoe and use it on the railing.
- Go through the kitchen's back door to the yard. Take the shovel and a log from the firewood, then use the small key on the shed and take the chloroform.
- In the lounge, use the chloroform on the fog machine.
- In the basement, use the log on the furnace and light it with the matches. Open the valve panel and turn valves 1, 2 and 4, leaving only the third pipe carrying heat.
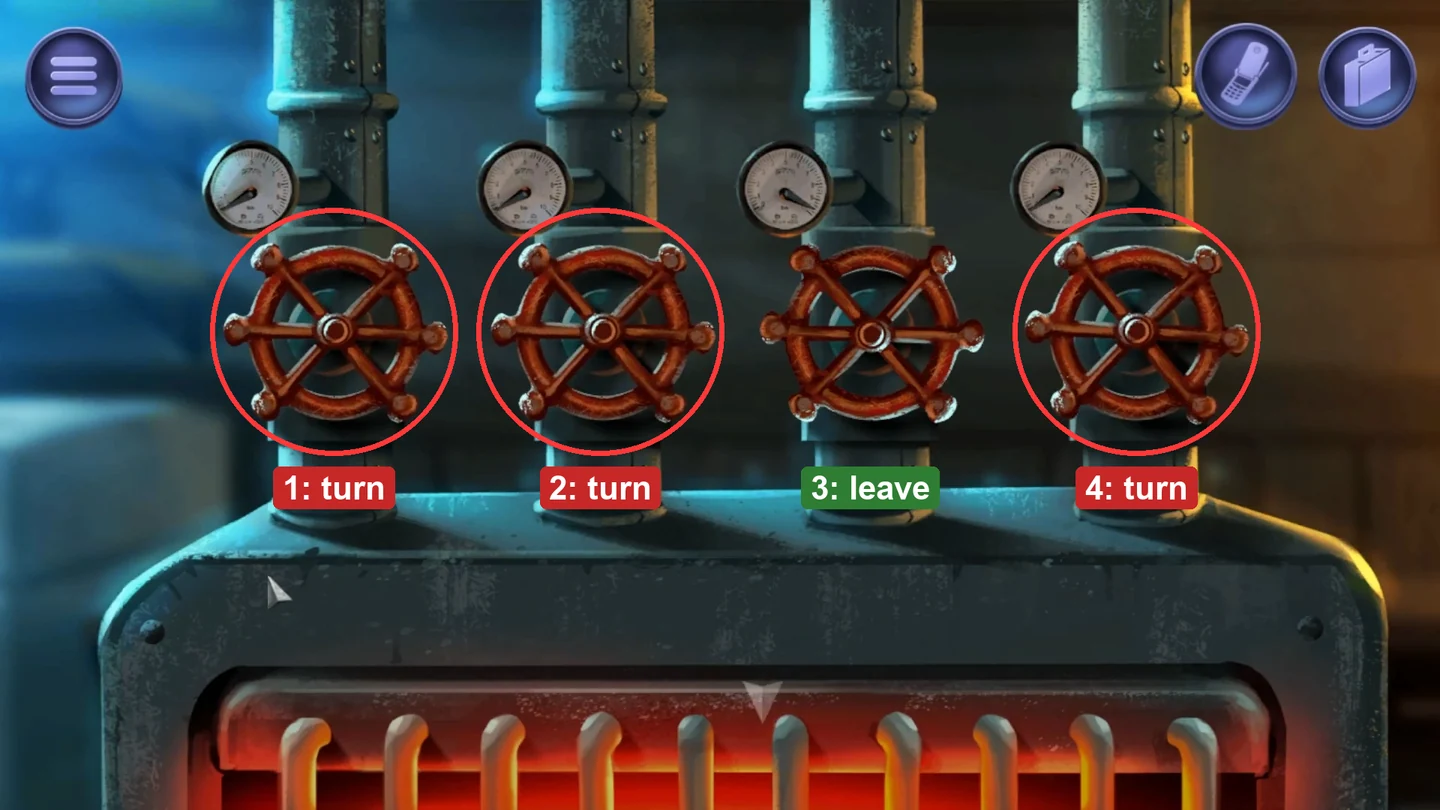
Valves are numbered 1 to 4 from left to right. Turn valves 1, 2 and 4 and leave valve 3 alone. - In the kitchen, the heat has ruined the cake and the chef runs off to find a replacement. Take the cake server from the island.
- In the foyer, use the cake server on the grandfather clock's panel to open it and set the hands to 12:00. The clock strikes midnight, the fog fills the lounge and everyone falls asleep.
- Take the body from the study. In the kitchen, use the body on the liquid nitrogen to freeze it, use the shovel on the frozen body to break it into chunks, then use the chunks on the drawers to feed them into the disposal unit.
- Clean up: cake server and can opener on the kitchen counter; chloroform on the shed shelf, then lock the shed and lean the shovel back; matches on the lounge table. Upstairs, take the mistletoe off the railing, put the small key back on the desk, lock the study with the key and slide the key under the door, then reframe the diploma and hang it.
- In the basement, click the furnace to turn it off. Return the ball of yarn, the knitting needle and the gas mask. In the foyer, close the clock panel, put the invitation back and hang the mistletoe over the right-hand door again. Exit. The mission ends at 100% and awards Crushed Ice.
Dead Drop
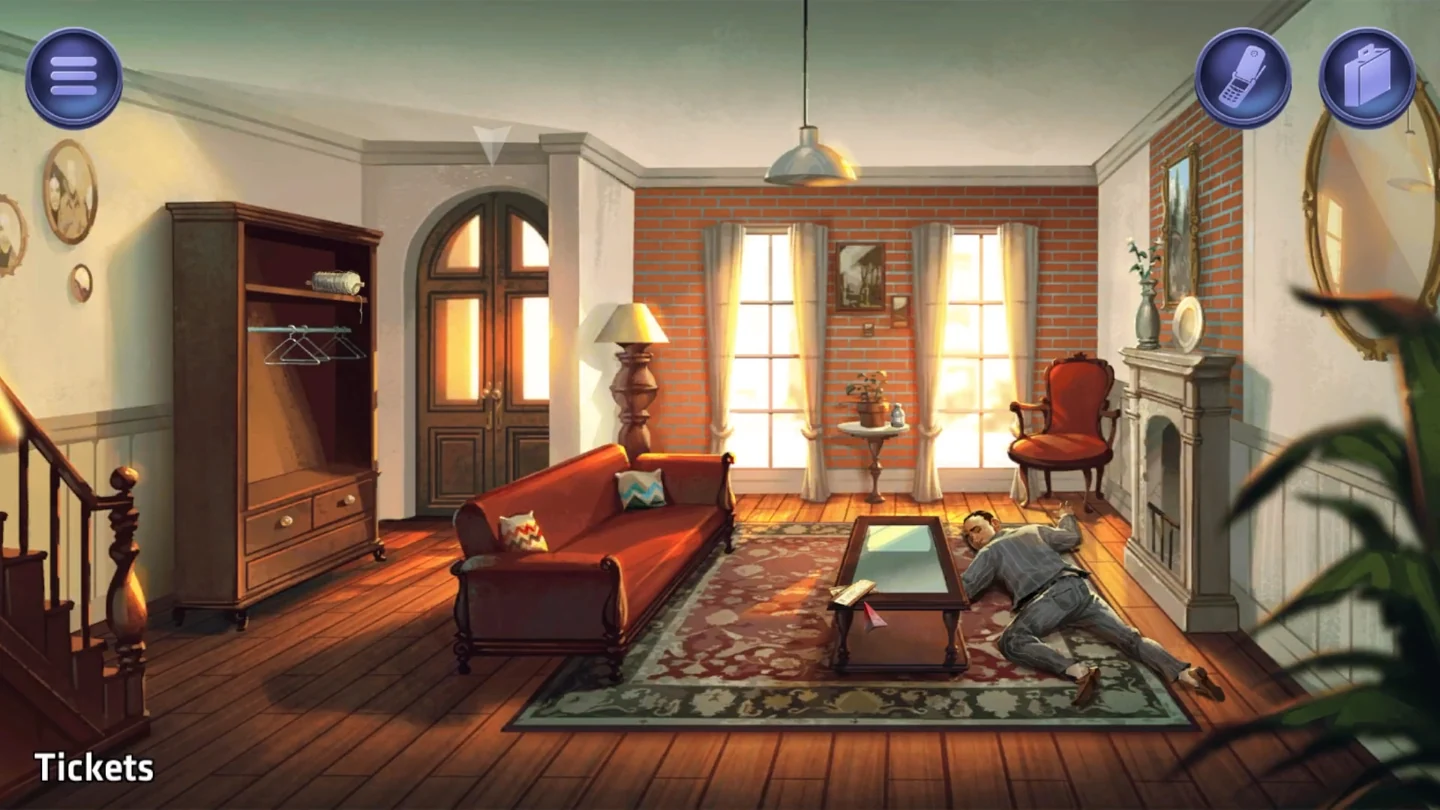
This time the death must look like a spectacular accident. Sneak the body up Sky Tower disguised as a visitor in a wheelchair, get rid of the bungee attendant, loosen the bungee winch and send the body off the observation deck.
- In the apartment, take the tickets from the coffee table, the laxative from the side table, and the string from the wardrobe on the left. Leave the wire hanger in the wardrobe for now.
- Go out to the street and left to the Sky Tower plaza (going right from the plaza brings you back). Take the gum from the payphone. Inside, show the tickets to the guard; he will check you for metal. Locker 14 has been left unlocked: click it to open it and take the sunglasses. Take a water bottle from the water cooler.
- Read the maintenance card beside the elevator: NH Elevators, 395-2438, technician Keyton Douglas. Ride to Observation.CODE3952438
- On the deck, use the gum directly on the coin slot of the binoculars. Back out of the binoculars, then click them again to collect the coin. Keep the string separate; you need it for the balloons.
- Go down to the lobby and out to the payphone. Use the coin on the phone and dial 395-2438. Tell Daisy you lost the maintenance access code and give the name Keyton Douglas. She gives you the code 9364.CODE9364
- In the elevator, press Maintenance. When ENTER CODE appears, enter 9364 on the restricted keypad; the elevator takes you straight to the maintenance floor. Return to the elevator and select Observation. There, combine the laxative with the water bottle and use the doctored water on the attendant's cooler.CODE9364
- Return to the apartment. Take the wire hanger from the wardrobe and the wrench from the wardrobe's drawer. Outside, use the hanger on the car to unlock it. Click the trunk to open it, take the wheelchair, then click the trunk to close it.
- In the apartment, take the body and combine it with the wheelchair, then add the sunglasses to disguise it.
- At the Sky Tower plaza, use the wrench on the balloons tied to the bike rack, then use the string on the balloons. Click the balloons to send them up to the roof with the wrench. Wheel the body past the guard ("Just my Uncle Bernie").
- Ride to Maintenance, take the orange uniform from the hook and climb the ladder to the roof. Take the wrench from the balloons, use it on the bungee winch, then put the wrench back on the balloons.
- Ride to Observation. The attendant is gone. Use the disguised body on the bungee harness at the edge of the deck so it hangs from the cord, then click the hanging body to push it. The loosened cord sends the body all the way down.
- Clean up: return the uniform to the maintenance hook and the sunglasses to locker 14, closing the locker if it is open. Outside, click the balloons to bring them down and take both the string and the wrench. Put the wheelchair back in the car's trunk and close the trunk. In the apartment, hang up the hanger, return the wrench to the drawer, and put back the string and the laxative. Exit. The mission ends at 100% and awards Splat.
Wonderland
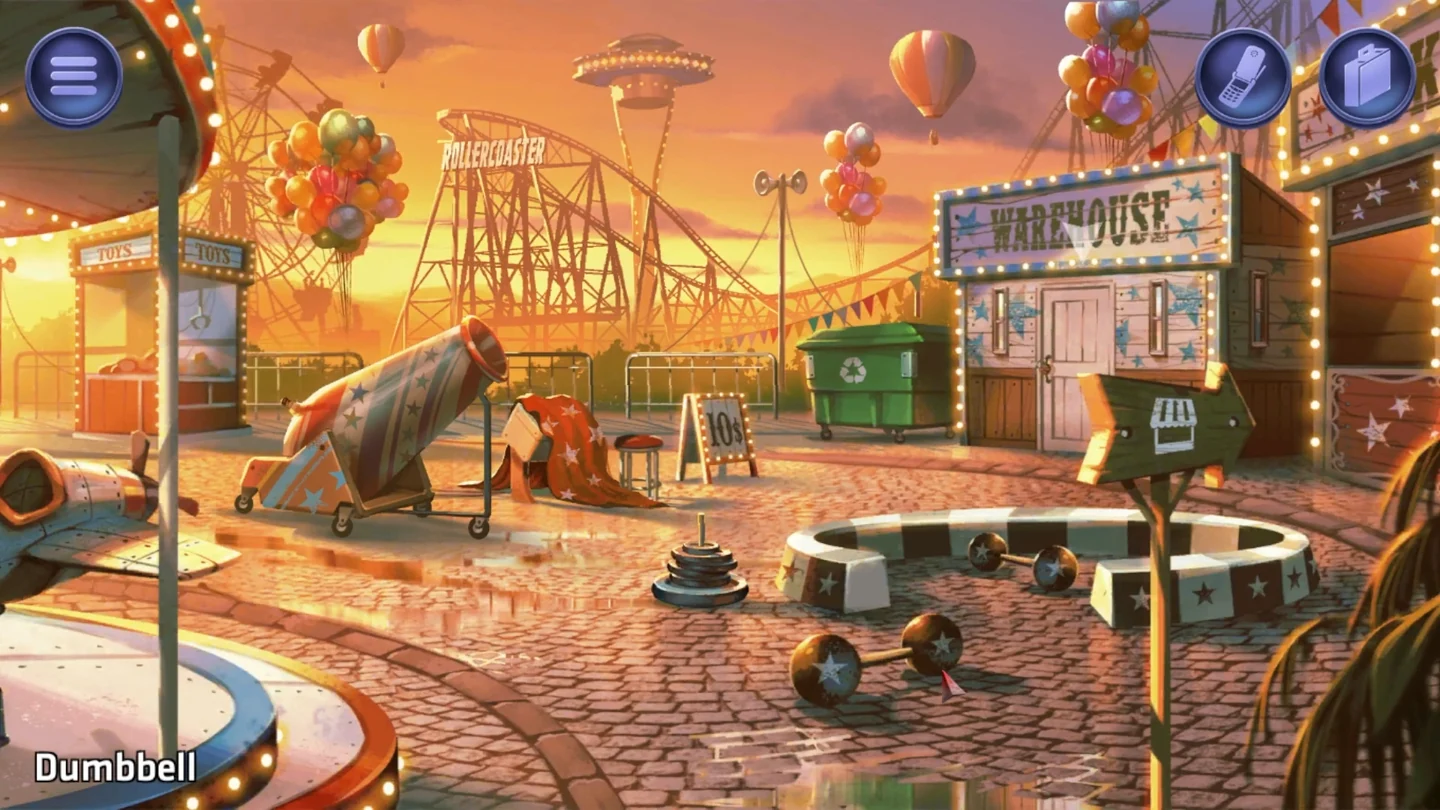
A busy amusement park. The body lies by the green dumpster next to the warehouse. Weigh it, fire it from the stunt cannon into the unfinished ride, clear the haunted house and dissolve it in the witches' cauldron.
- In the plaza, take all the weight plates from the performance ring. By the green dumpster, take the pliers from under its wheel.
- Go right to the Bottle Toss stall and talk to the attendant ("This looks too easy."): the game is free. Continue right to the haunted house and talk to the mouse mascot. Choose "Nice pins." and ask for one; he gives you a souvenir pin.
- Enter the unfinished ride through the clown's mouth. Take the caulk from the wooden frame and the wool gloves from the crate. The padded target mat is in here.
- Back at the warehouse door by the dumpster, combine the pliers with the souvenir pin to make a safety pin and use it on the padlock. Counting the seven pins from left to right, lift them in this order: 7, 1, 4, 6, 5, 2, 3. The lock opens.CODE7146523
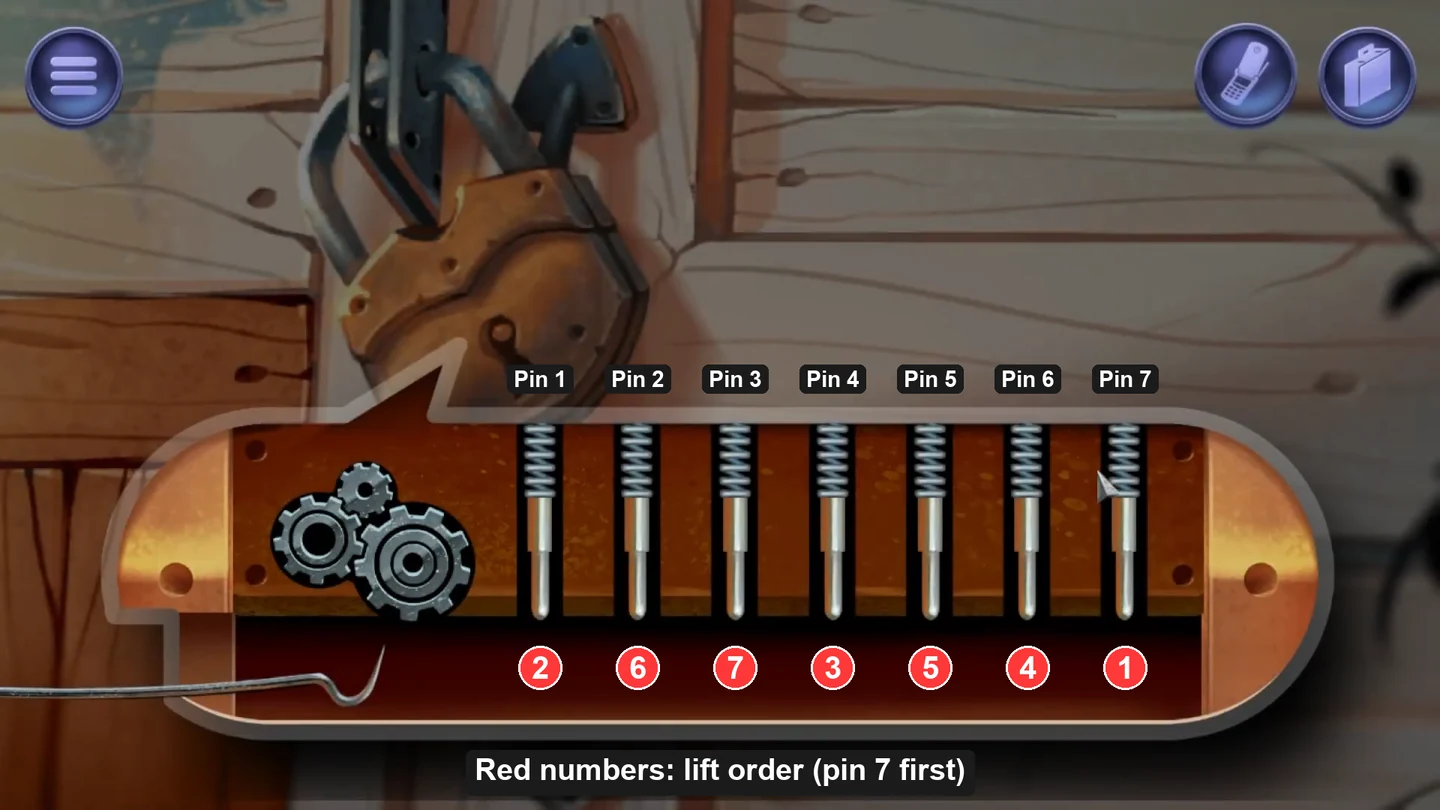
Pins are counted 1 to 7 from left to right. Lift them in the order of the red numbers: 7, 1, 4, 6, 5, 2, 3. - Inside the warehouse, take the bucket, the lye and the empty oil can. Outside, use the bucket on the water tap to fill it.
- In the unfinished ride, use the pliers on the red barrel to open it and fill the empty oil can from it. Outside the haunted house, combine the caulk with the wool gloves to make non-slip gloves. Use the oil can on the queue stanchions, then use the gloves on them to twist off a metal ball.
- The stall attendant will not accept a metal ball of the wrong color. Use the metal ball on the orange paint in the warehouse, then throw the painted ball at Bottle Toss. It knocks down all the pins; the prizes stay on display. Take the fake vomit as your prize, then pick the painted metal ball back up from the counter.
- At the haunted house, use the fake vomit on the sickly tourist. Fifteen minutes later the area is deserted.
- Use the painted ball on the water tap to wash it. Take the body by the dumpster. In the warehouse, put the body on the seesaw and balance it with weights: 50 kg + 10 kg + 10 kg + 5 kg. "Looks like the seesaw is balanced at 75kg." Take the weights and the body back.
- In the plaza, pull the blanket off the cannon console to uncover it and use the body on the cannon. Open the console, turn the dial to 75 and press the button. The body lands on the target mat in the unfinished ride.CODE75
- Return all weight plates to the performance ring, starting with the 50 kg plate and finishing with the 5 kg plate, and put the blanket back over the cannon console. Take the body from the target mat. Inside the haunted house, take the witches' brew prop from the cauldron, put the body in, then add the bucket of water and the lye. Put the witches' brew back.
- Clean up: screw the metal ball back onto the stanchion. In the unfinished ride, put back the non-slip gloves and the caulk and use the pliers on the barrel to seal it. In the warehouse, return the lye, the empty oil can and the bucket. Put the pliers back under the dumpster and exit. The mission ends at 100% and awards Toil and Trouble.
Countdown
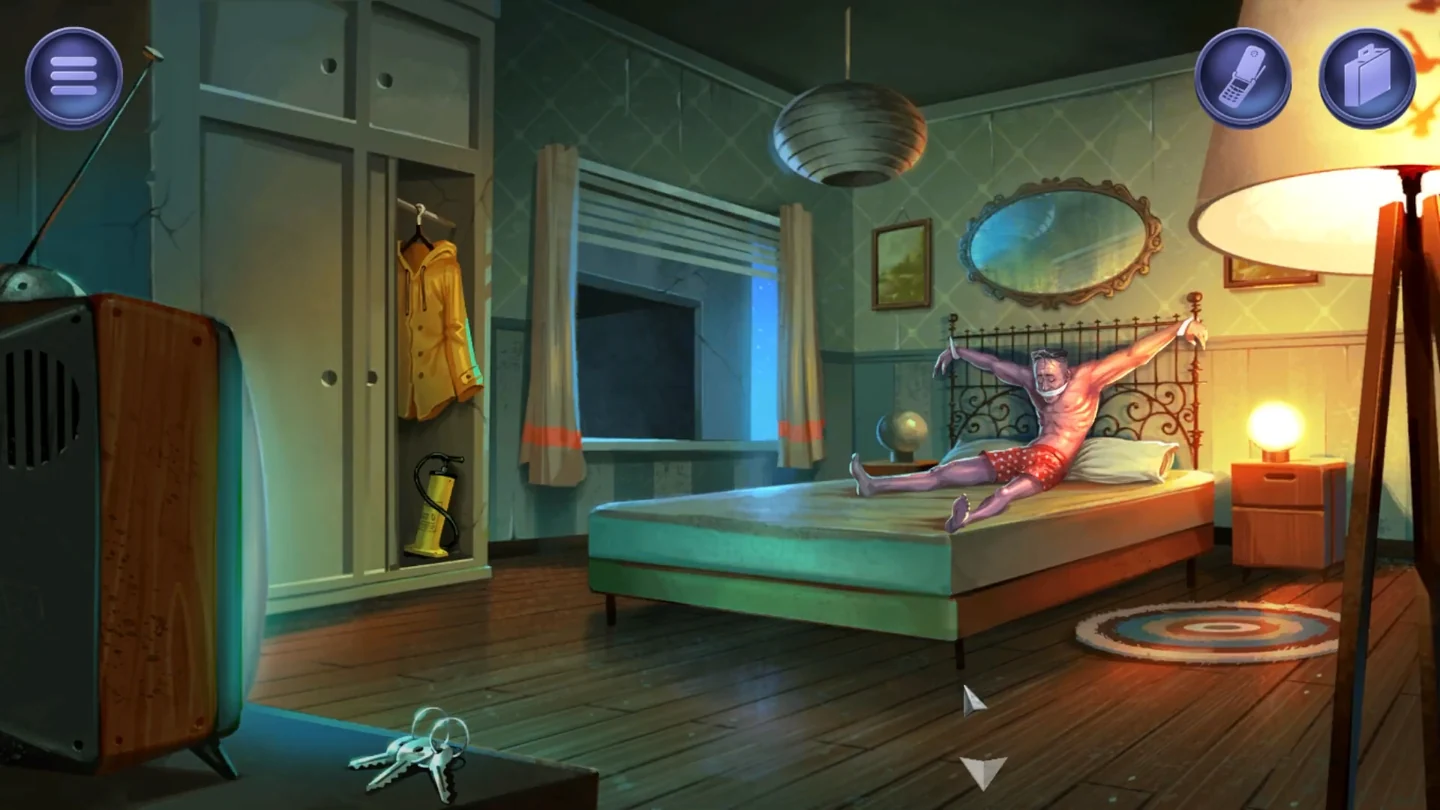
The target is a space-travel enthusiast, so send him to space. Get the body out of the apartment with the construction hoist, float it through the sewers to the rocketry club and launch it on the club's rocket. The traffic cone outside is optional for the clean route; it is only used for the Orange Herring achievement.
- In the bedroom, take the keys from the low TV stand in the foreground, the hand pump from inside the open wardrobe below the raincoat, and the raincoat. Go down to the street.
- Use the keys on the garage shutter. Inside, take the deflated inflatable boat from bay 03 and the chemical lights by the pillar. Go into the alley and take the scissors by the dumpster.
- Enter the construction site. On floor 01 take the ratchet strap. Use the hoist's control box to move between floors: take the ladder on floor 02, the steel rod on floor 04, and the glue and sandbags on floor 05.
- On floor 05, use the sandbags on the hoist, then lower it to floor 03 opposite the bedroom window. Use the ladder on the window, climb across and take the body. Climb back and take the ladder.
- Send the hoist down to the alley. Use the steel rod on the manhole to open it, take the sandbags off the hoist and climb down into the sewer. Use the sandbags on the water channel to dam it.
- In the inventory, use the scissors on the raincoat to cut a waterproof patch, use the glue on it and use the glued fabric on the boat: "I've patched the hole in the boat." Put the boat on the water, use the hand pump on it to inflate it and put the body in the boat.
- Climb the ladder up from the sewer to the alley, go to the street, then take the City exit at the lower left of the street to open the city map. Use the chemical lights on the sewer entrance at the bottom right, near the coffin, then keep placing lights on manholes to form a connected trail toward the rocket club at the top left. You have only a few lights, so plan the shortest chain of neighboring manholes before you place them. In one game, a trail running diagonally up and to the left did the job; if your map differs, build the chain from your own manholes in the same way.
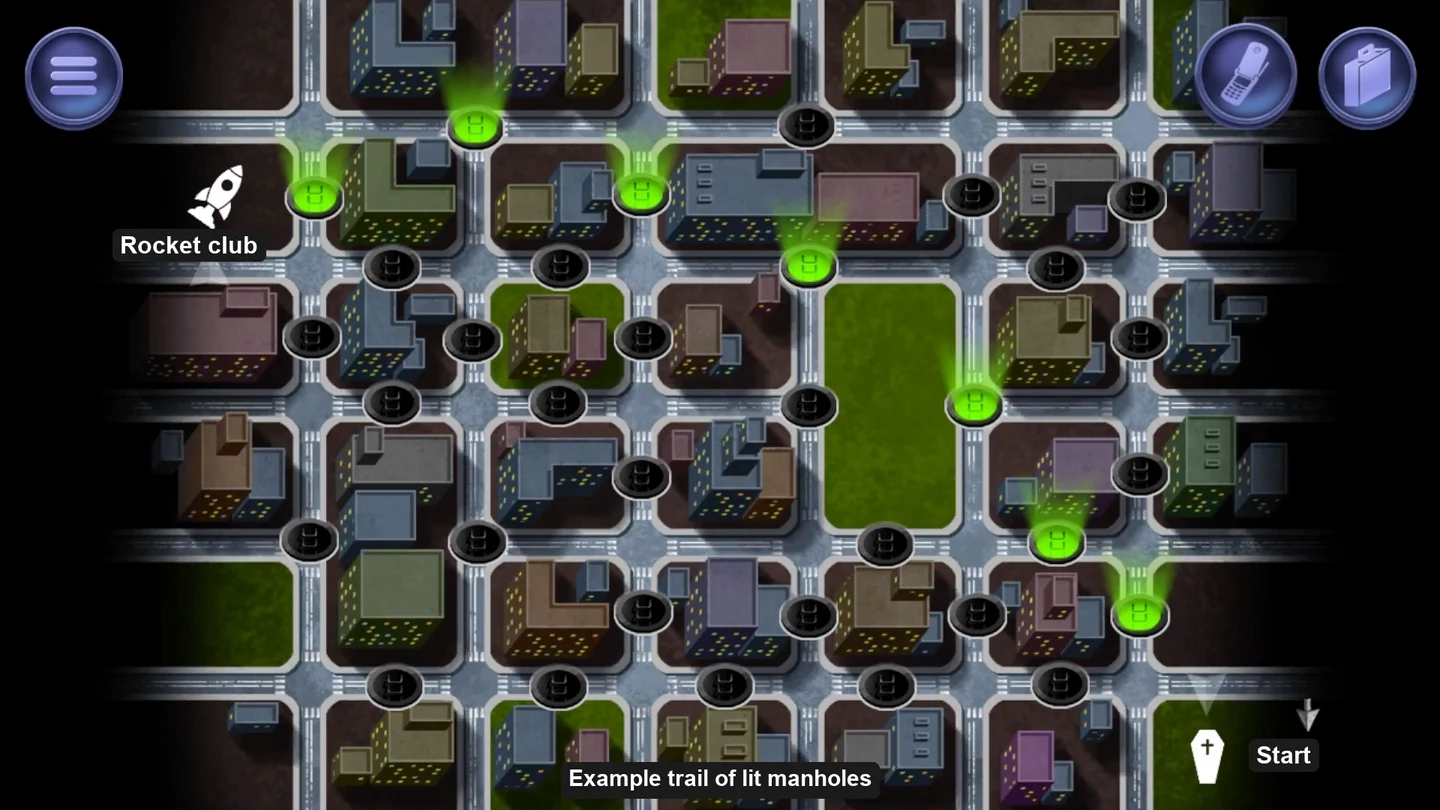
An example of a finished trail of chemical lights from the start to the rocket club. Your map may need a different chain. - Return to the sewer and click the boat. At each fork, choose the tunnel lit by a green glow. When you hear "The rocketry club should be right up there," take the body and climb up to the street by the club.
- Use the ladder on the club's upper window and climb in. Take the ladder back from the window (the game insists, so nobody gets suspicious). Take the dolly and the wrench. Use the dolly on the rocket and take it out through the side doors; use it on the launch pad.
- Use the ladder on the rocket, use the ratchet strap on the rocket, then use the body on it. Take the ladder back.
- Go back into the club and click its upper window to climb out to the alley; take the ladder from the window outside. Then go back to the garage. Click the red car's trunk to open it, use the wrench on the nitrous bottle to take it, then click the trunk to close it. Return to the club, use the ladder on its upper window again, climb in and take the ladder back. At the launch pad, use the ladder on the rocket, use the nitrous bottle on the rocket and take the ladder. Press the red button in the launch booth: the rocket lifts off into orbit.
- Clean up: return the wrench and the dolly in the club, then click the upper window to climb out and take the ladder from the window outside. The game will not let you enter the sewer while the ladder is still against the wall. In the sewer, take the boat back to the start. Use the hand pump on the boat to deflate it, then click the patch to recover the glued fabric. Take the sandbags out of the water channel to remove the dam, then take the deflated boat. In the alley, close the manhole with the steel rod, drop the scissors and put the sandbags on the hoist. Put the cone back on the sidewalk if you picked it up, and return the boat and the chemical lights to the garage.
- In the garage, use the glued fabric on the raincoat to stick the patch back on. Close the manhole outside the rocket club with the steel rod. Hang the raincoat in the bedroom, lock the garage with the keys and return the keys and the hand pump to the bedroom. In the construction site, put the ladder on floor 02 and the steel rod on floor 04. On floor 05, take the sandbags back off the hoist, put them on the floor and return the glue, then lower the hoist to floor 01. Exit. The mission ends at 100% and awards Blastoff.
Overdraft
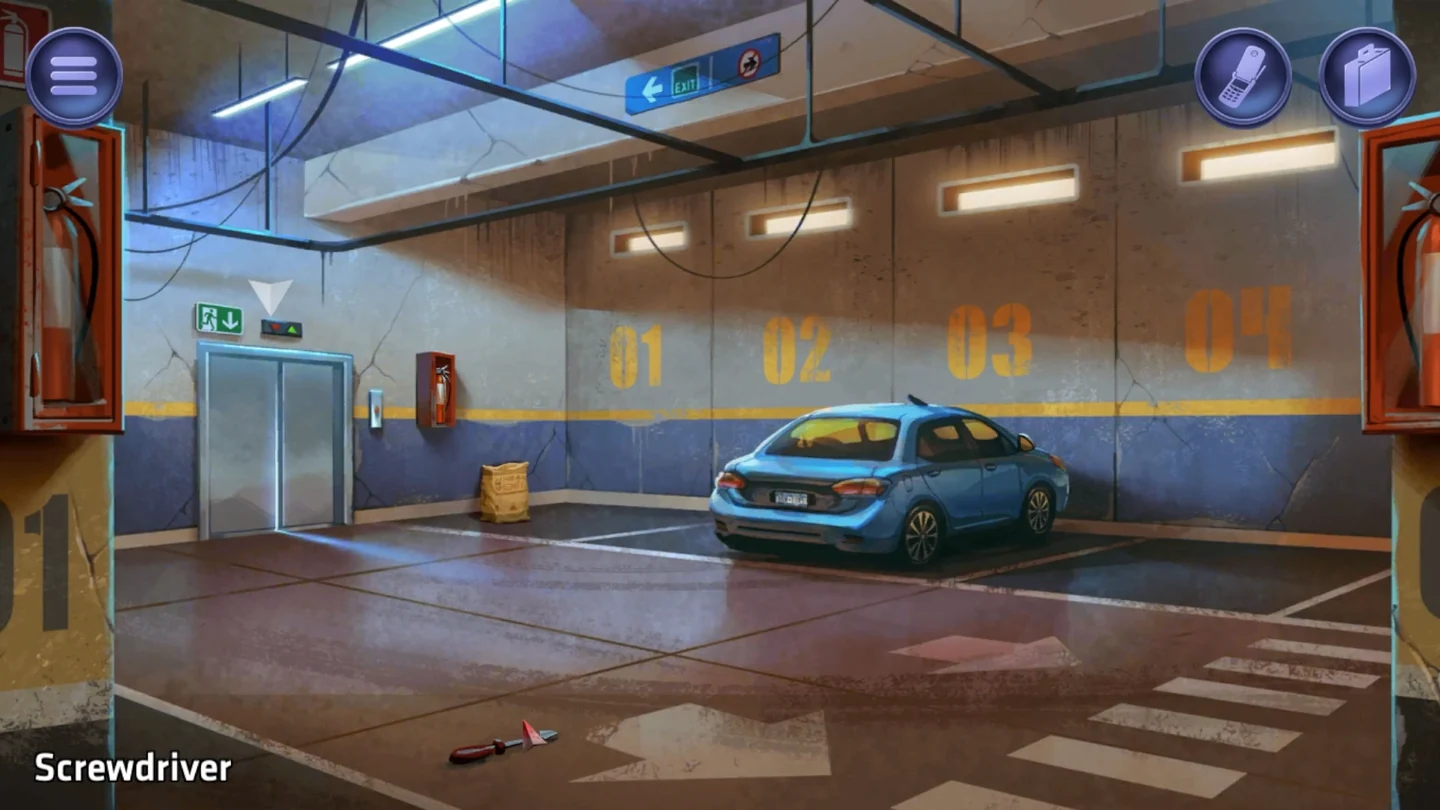
A bank after hours. Get past the fingerprint lock and the lasers, open the manager's office, crack his safe and computer, and file the body away in his alias's safe deposit box together with the alias's passport.
- In the garage, take the screwdriver from the floor in the foreground, the bag of lime from the floor beside the elevator, and the fire extinguisher from the small red wall case to the right of the elevator. Take the elevator to the lobby and take the tape dispenser and the letter opener from the teller counters.
- Back in the garage, look at the blue car's dirty rear window. Use the letter opener on the bag of lime, dust the window with the lime powder, then use the tape on the prints to lift a copied fingerprint. Use the screwdriver on the car's side mirror to take it.
- In the lobby, use the copied fingerprint on the scanner by the red door. In the corridor, combine the tape with the side mirror, spray the fire extinguisher to reveal the lasers and place the taped mirror among the beams to reflect them: "It worked!"
- In the conference room, take the stethoscope from the first-aid cabinet on the wall, the box cutter from the table, the electrical cord from the power strip and the hard drive from the top drawer of the filing cabinet.
- Use the box cutter on the cord, the screwdriver on the hard drive to get its magnet, then combine the magnet with the stripped cord. Use it through the bars of the office gate to fish the keys off the desk, and unlock the gate.
- In the office, take the videotape from the video recorder and the paper shreds from the shredder. Rearrange the strips: they read 05-02-94 and 06-03-94. Now look at the office calendar. Its note says to change the password monthly, and clicking a month tells you its first business day: May's is 05-02-94 and June's is 06-03-94, the two old codes on the shreds. Today's date is 07-14-1994, so the current code is July's first business day. July 1, 2 and 3 are printed in red, so it is Monday the 4th: 07-04-94.CODE070494
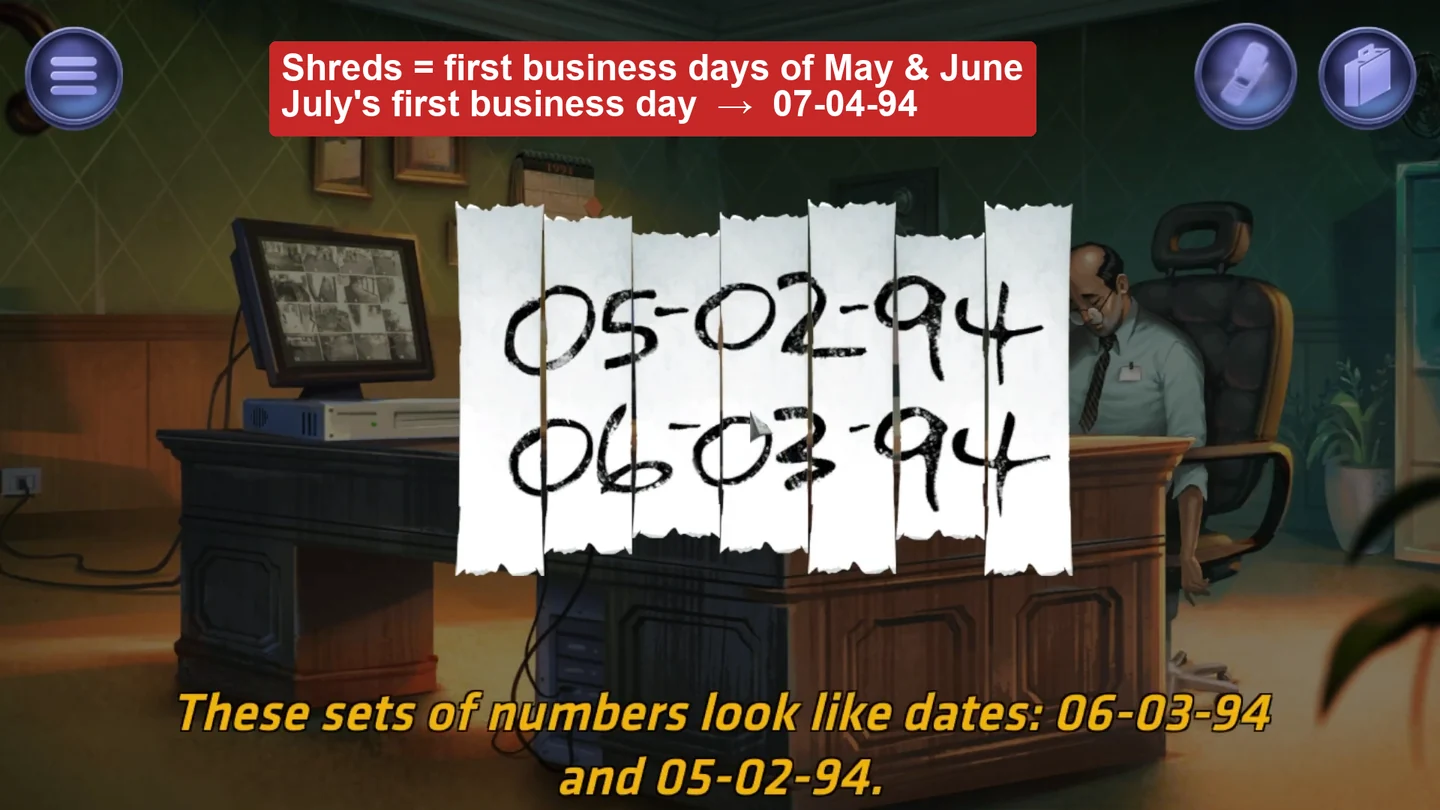
The shreds show the last two codes, the first business days of May and June. July's first business day, the 4th, gives the current code: 07-04-94. - Click the wall safe above the desk, then use the stethoscope on the Dial in the close-up. Turn the middle and outer rings until the three numbers in every wedge add up to 12, the number in the center. Take the small key and the passport for "Juan Friz," the manager's alias.
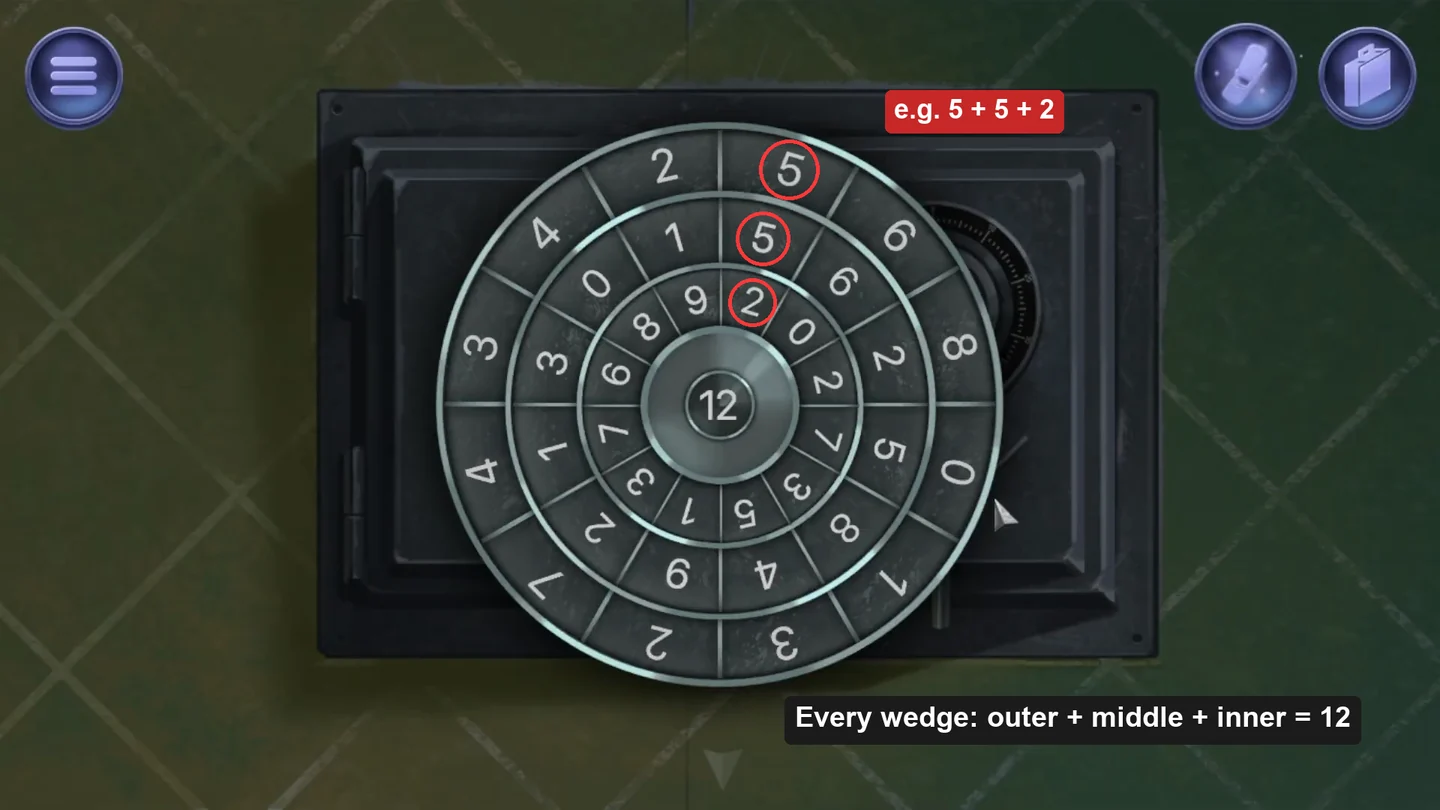
The solved safe: in every wedge the three numbers add up to 12, for example 5 + 5 + 2. - Use the computer. The username is RENFORD. For the password, type FRIZ using the letters on the keypad: 3749. In the client list, scroll to FRIZ, JUAN: box 1051.CODE3749
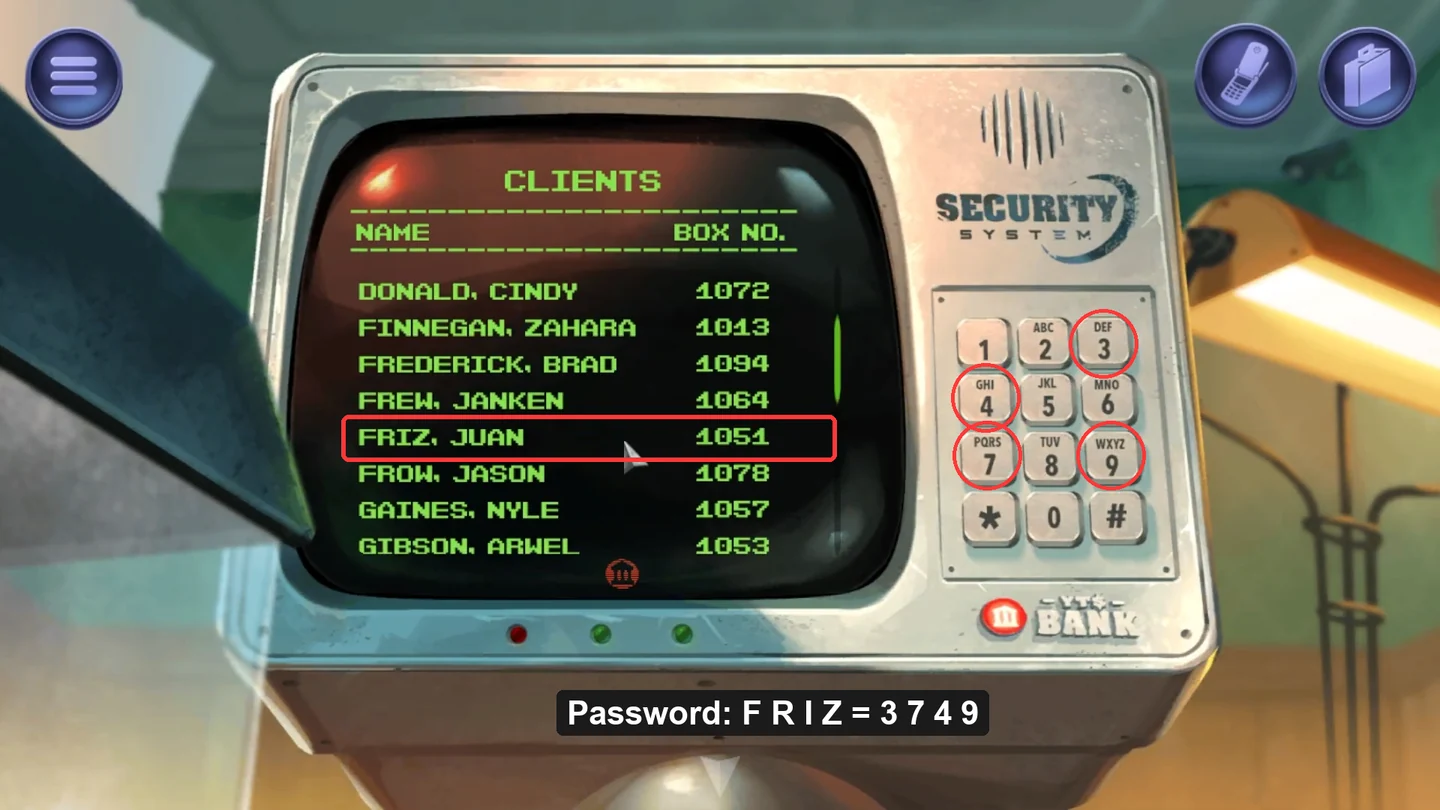
Log in with RENFORD and 3749 (F-R-I-Z on the keypad letters), then find FRIZ, JUAN: box 1051. - At the vault door keypad, enter 070494. Inside, use the small key on safe deposit box 1051 and take the trunk.CODE070494
- In the office, put the passport in the trunk, take the body and put it in the trunk, then add the bag of lime. Put the trunk back in box 1051, lock it with the small key and close the vault door.
- Clean up: use the screwdriver on the cord with the magnet to separate them, then use the magnet on the videotape to wipe it and put the tape back in the recorder. Close the wall safe and return the paper shreds to the shredder. Leave the office, use the keys on the gate to lock it, then throw the keys back through the bars onto the desk.
- In the conference room, return the stethoscope to the first-aid cabinet and close it. Put the magnet back in the hard drive, return the drive to the filing cabinet's top drawer and close it, and return the box cutter and the cord. Take back the mirror from the laser corridor.
- In the lobby, return the tape and the letter opener and throw the small key in the trash can. In the garage, refit the side mirror and return the fire extinguisher and the screwdriver. Exit. The mission ends at 100% and awards Safely deposited.
Dead Sea
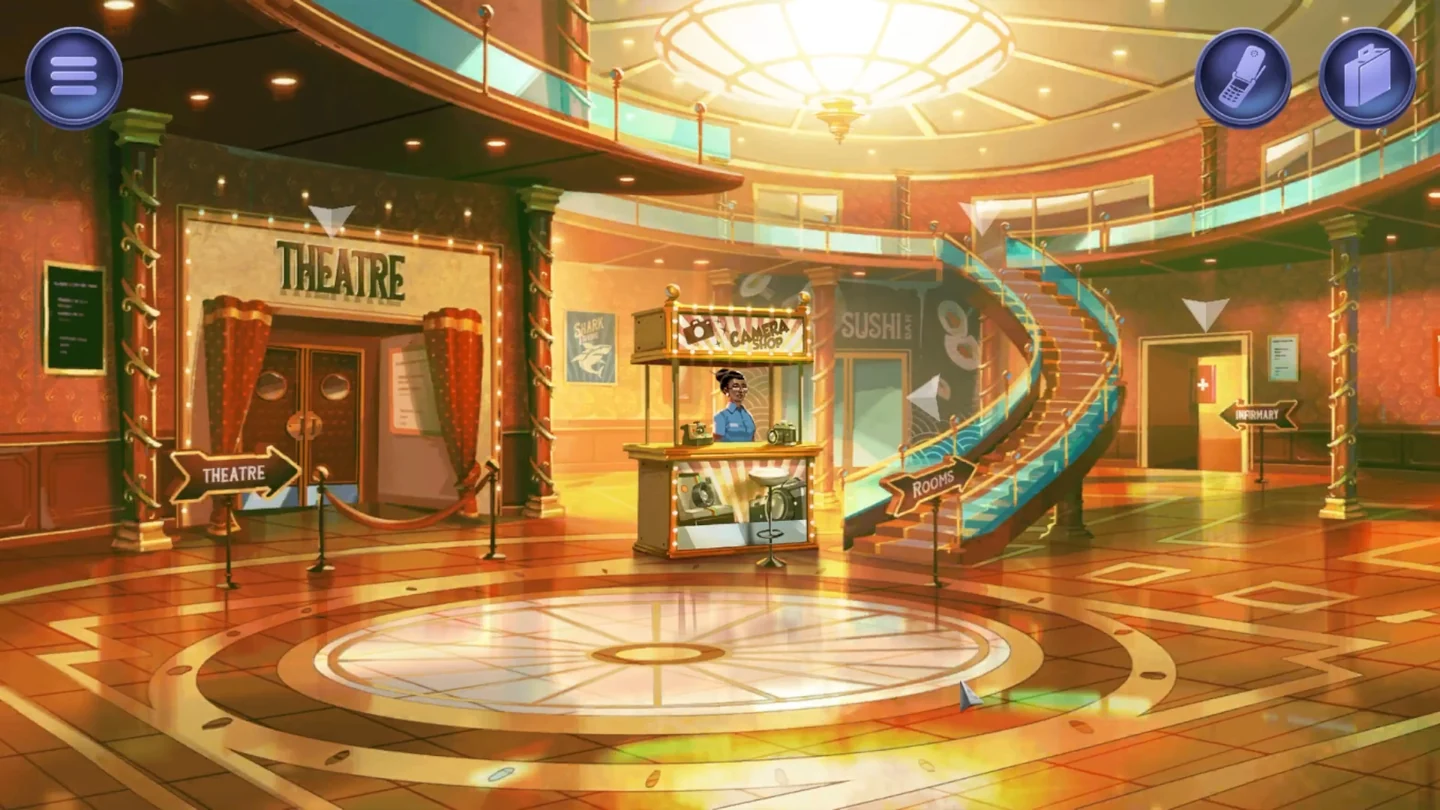
The final mission takes place on a cruise ship. The target is in cabin 42, as the briefing mentions. Raise money in the casino, crack the concierge's door code by ear, make a key card for cabin 42, then feed the body to the shark from the honeymoon suite's shark-dive cage.
- From the lobby, go upstairs to the cabin corridor and on toward the luxury suites. Pick up the coin on the carpet near the honeymoon suite.
- Back in the lobby, enter the Theatre on the left. Take the roll of string from a table, then open the cabinet at the back and take both the uninflated balloon and the helium tank. The casino is through the doorway on the left side of the theatre.
- Go left into the casino. Combine the helium tank with the balloon, tie the string to the balloon and use it on the security camera to block it. Combine the string with the coin and use the coin on a string on the slot machine, then pull the lever. Thirty minutes later, take the jackpot winnings. Click the coin on a string hanging from the front of the left slot machine to take it back, then take the balloon back.
- In the lobby, use the winnings on the attendant at the Camera Shop kiosk to buy the audio recorder ("Do you accept giant piles of coins?").
- In the restaurant, take the serving tray and the spoon from the buffet cart. Combine them, go to the Theatre and use the tray and spoon on the drummer on stage. The band argues and quits; five minutes later the stage is empty. Take the tuner from the stage.
- In the corridor by the infirmary, use the audio recorder on the suggestion box next to the concierge's door, room 32 ("All right, it's rolling."). Enter the concierge's office and tell him an escalator is malfunctioning; when it is running at quadruple speed, he says he has to go and look at it. Go back to the lobby, then return to the infirmary corridor and wait: the concierge comes back, enters the code on his door keypad and goes into his office.
- Follow him through the open door into his office and complain about the hair in the soup ("No, like, an entire head's worth."); he leaves again. Back in the corridor, take the recorder from the suggestion box and combine it with the tuner. Play the six tones: the needle reads D#, A#, F#, B, D, F. The concierge's door keypad rises one semitone per key: key 1 is A#, key 2 is B, key 3 is C and so on up to key 9 (F#). So the code is 619258. Open the keypad on the concierge's door and enter 619258 to unlock it. If your tuner shows different notes, use the tuner on the door keypad to hear which note each key plays, then match the recorded tones.CODE619258
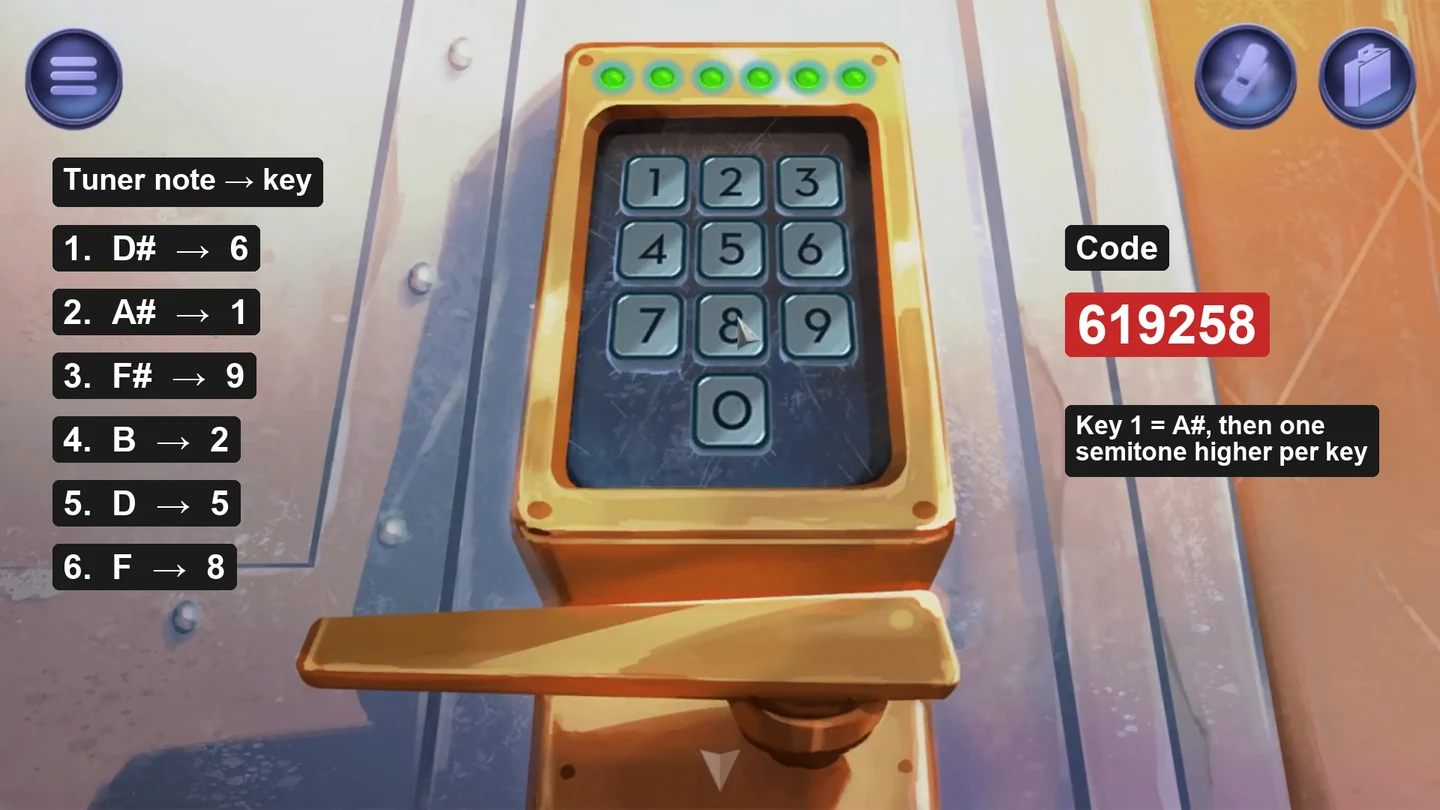
The six tuner notes converted to keys give the door code 619258. Each key is one semitone higher than the key before it. - Enter the concierge's office. Take a basic room key card from the key cards on the desk and use it on the room-card encoder, the old computer at the left end of the desk. On the encoder's own keypad, type room number 42; when it shows CARD WRITTEN SUCCESSFULLY, take the programmed card.CODE42
- Go up to the cabins and use the key card on cabin 42. Take the kettle and the blanket. Use the phone, click the handset to lift it, then press the 0 key marked LOBBY and choose "I'd like to order room service." Fifteen minutes later, take the service cart left in the corridor.
- Fill the kettle at the water cooler by the infirmary, then boil it on its base in cabin 42. When the water is piping hot, take the heated kettle off its base. Use it on the sushi in the restaurant. Thirty minutes later, the diners have food poisoning: take the luxury suite key card from the floor. The doctor is busy here, so open the infirmary fridge, take a blood bag and close the fridge before you leave.
- In cabin 42, take the body and put it on the service cart. Use the luxury suite key card on the honeymoon suite. Inside, use the blanket on the balcony to tie it there, then click the Cart with body in your inventory to take the body off the cart. Click the hanging blanket to climb down to the shark-dive deck.
- Click the cage door to open it, use the body on the cage, use the blood on the cage, then use the crane controls. The cage goes under and the shark does the rest: "One last mission accomplished. Finally a chance to relax!"
- Clean up: raise the cage with the crane controls and close the cage if it is still open. Click the hanging blanket to climb back up to the suite, then take the blanket from the balcony. Leave the suite key card on the suite bed and drop the coin on a string on the corridor floor. In cabin 42, return the kettle and the blanket, and leave the service cart in the corridor in front of cabin 42's door. In the theatre, open the cabinet, put the balloon on a string back inside and use the helium tank on it, put the roll of string back on the table and the tuner on the stage, then close the cabinet. In the concierge's office, hang the oar back on its wall mount if you took it, and put the basic room key card back on the desk. Return the tray and spoon to the restaurant. Throw the recorder into the ocean from the outer deck and exit. The mission ends at 100% and awards Time to eat!