The chief doctor's office
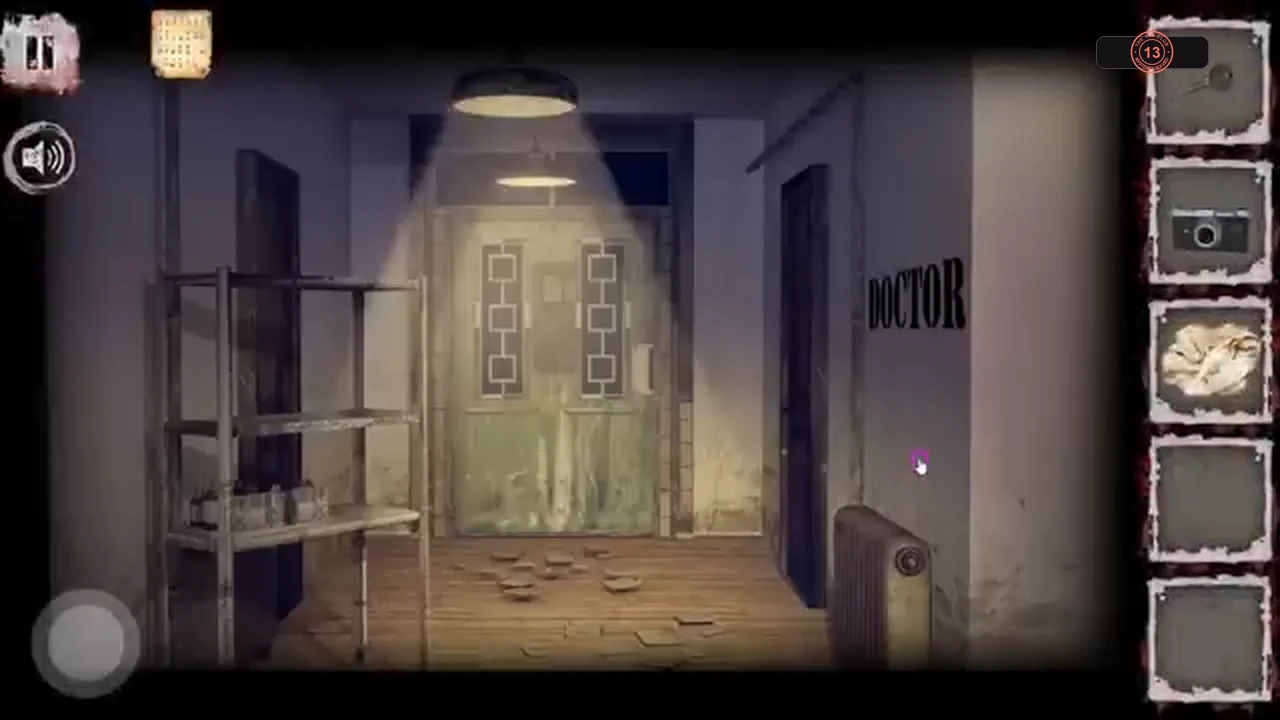
The dark key from the container opens the DOCTOR door at the end of the hall. Inside are film for the camera and a grim organ order.
- Go to the end of the hall. The dark key does not fit the green double doors ("This item doesn't fit here"); drag it onto the DOCTOR door to the right of them instead.
- Tap the glass cabinets on the left, then tap the lower shelf of the left cabinet and take the blue film cartridge.
- Tap the corner with the sofa and read the note pinned on the wall above it: the "Next month body organs plan". It lists four equations made of organ pictures (foot, brain, hand, pair of hands and heart).
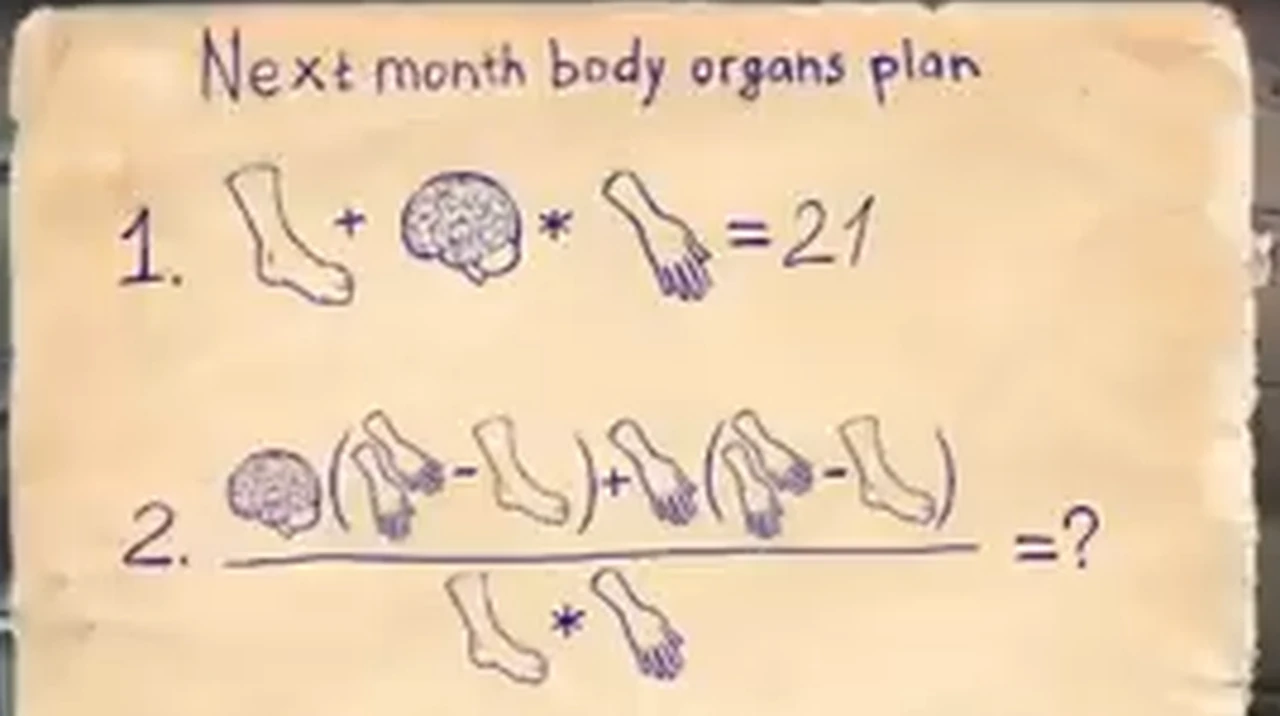
The organ plan, equations 1 and 2. 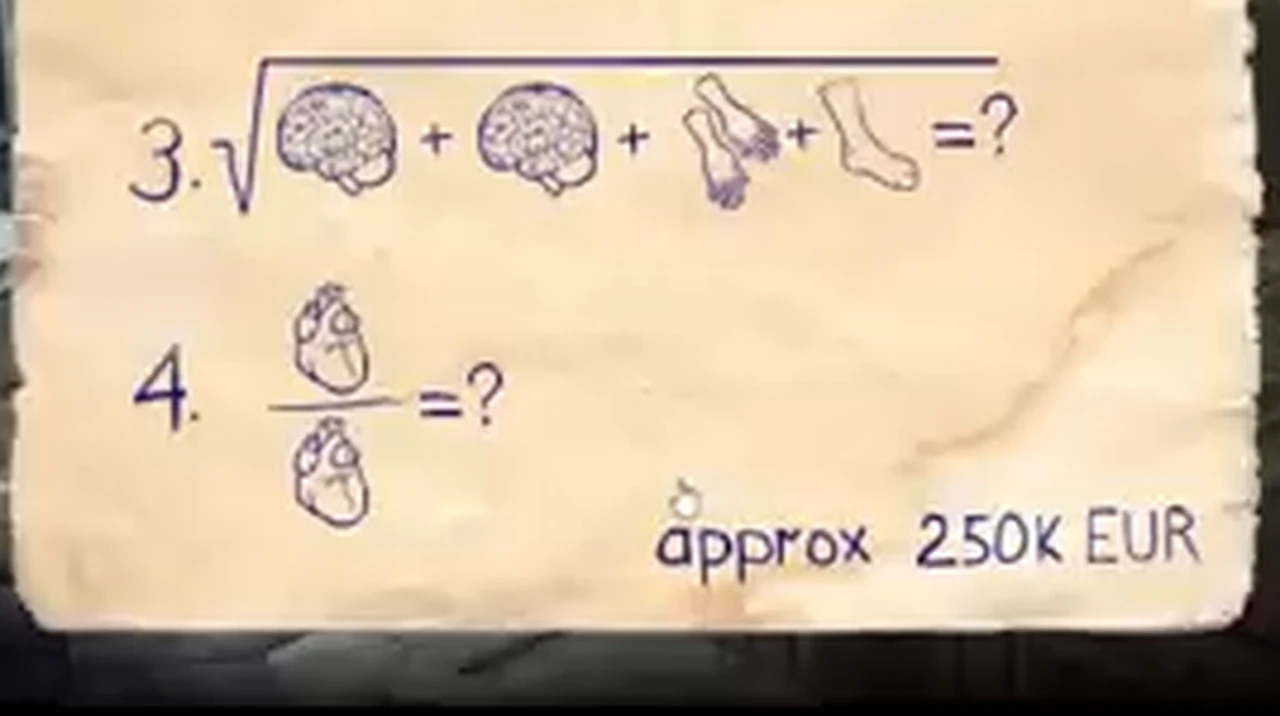
The organ plan, equations 3 and 4.
The organ plan and the TGIF lock
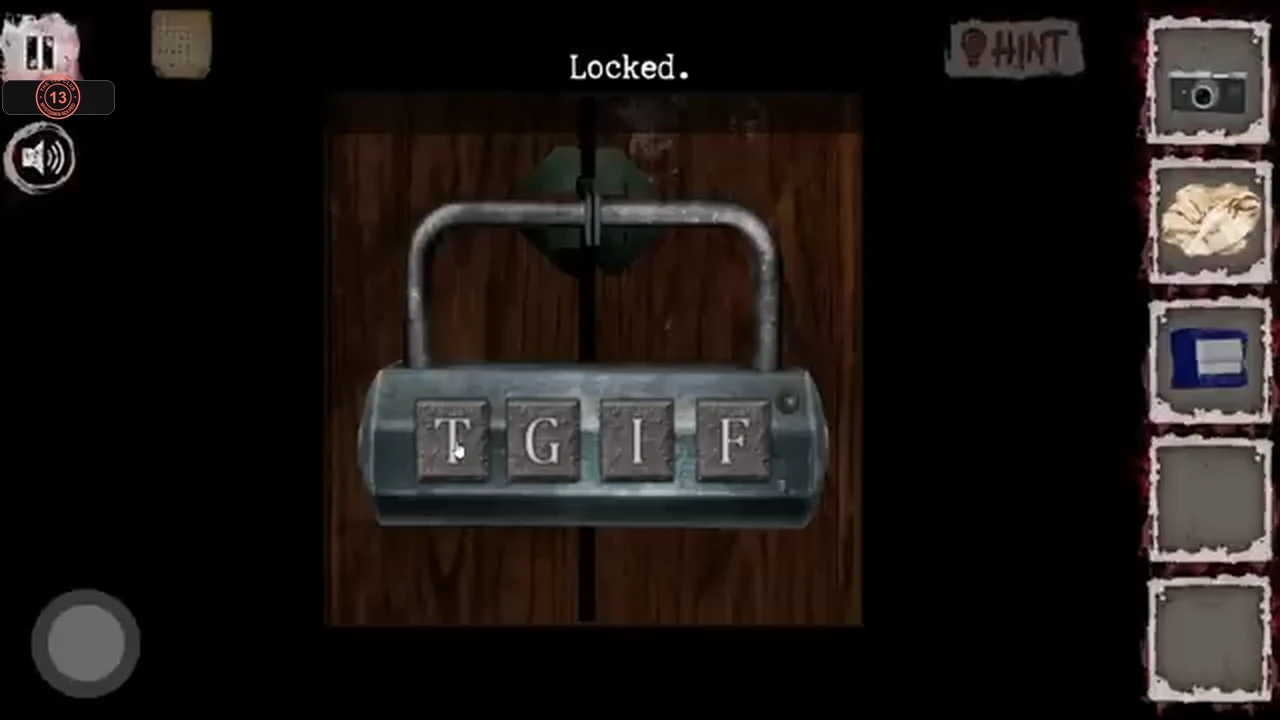
The organ plan gives four numbers; the cipher turns them into the four-letter word for the letter padlock in the hall. You need the table drawings from Chapter 12 and the cipher from Chapter 7.
- Work out the organ values. The table drawing gives brain = 10 and a pair of hands = 4, so one hand = 2. Equation 1 says foot + brain x hand = 21, so foot = 21 - 20 = 1. Heart divided by heart is always 1. The four answers are: 1) 21; 2) [brain x (pair of hands - foot) + hand x (pair of hands - foot)] / (foot x hand) = (30 + 6) / 2 = 18; 3) the square root of (brain + brain + pair of hands + foot) = the square root of 25 = 5; 4) heart / heart = 1.CODE21 18 5 1
- Convert the numbers with the cipher (A = 1 ... Z = 26): 21 = U, 18 = R, 5 = E, 1 = A.CODEUREA
- In the hall, turn to the side with the boxes and tap the letter padlock (showing TGIF) on the door at the right. Tap each letter tile to step it forward through the alphabet until the lock reads UREA. The door opens to stairs leading down.CODEUREA
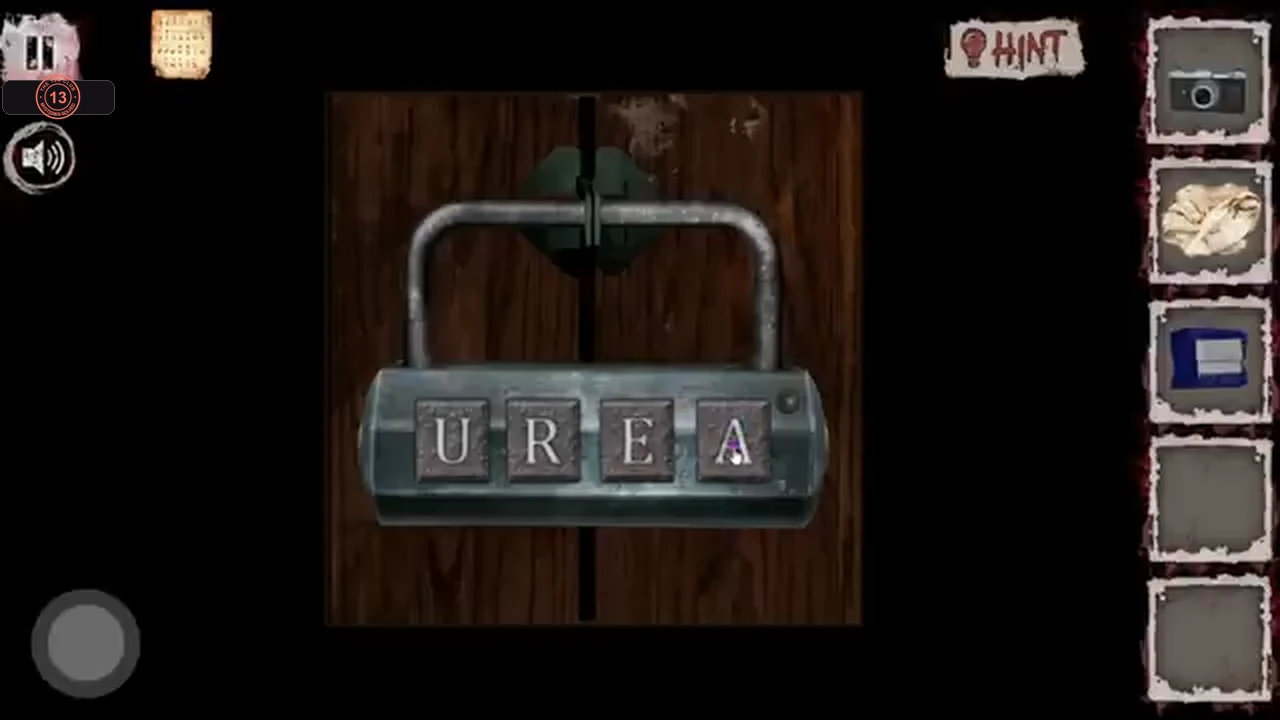
The padlock set to UREA.
The first photo
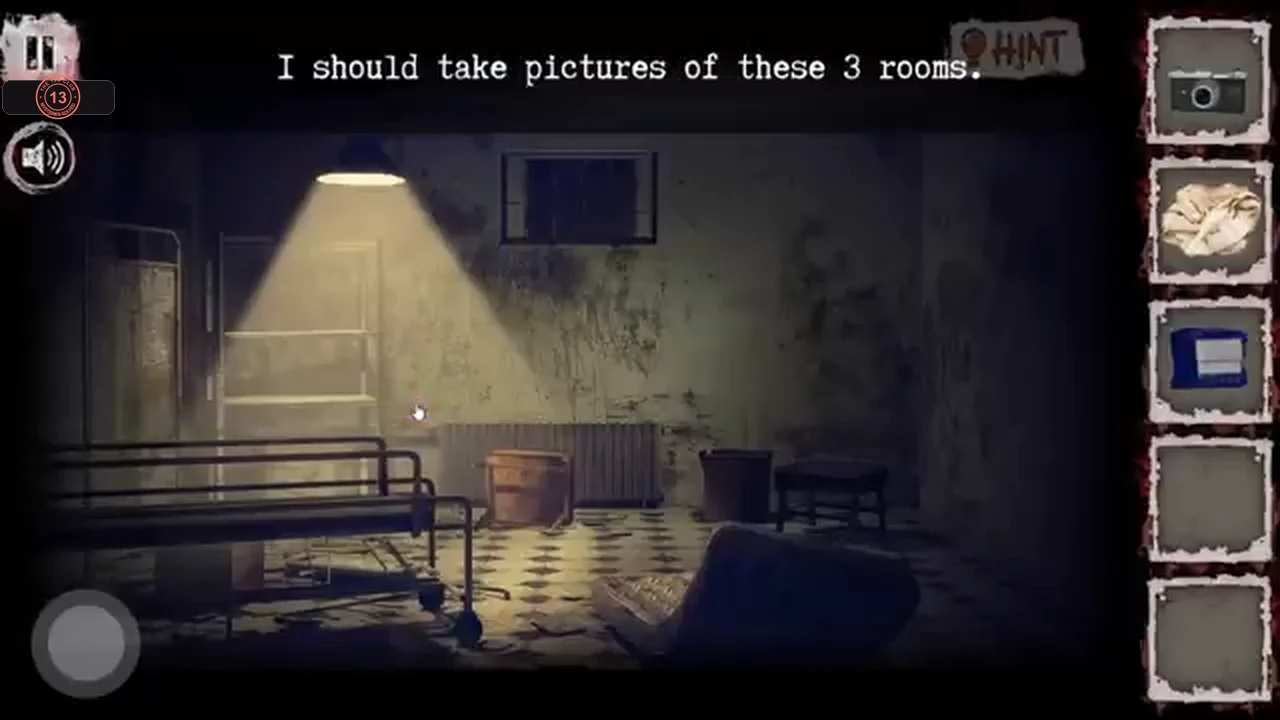
The stairs lead to a second basement with three rooms you need to photograph. A counter tracks the photos (0/3). The camera is reusable.
- In the inventory, drag the film cartridge onto the camera to load it.
- In the second basement corridor, enter the centre-left door (the one with a window) to reach a ward with beds and a caged safe. Drag the camera onto the room view to take the first photo (1/3).
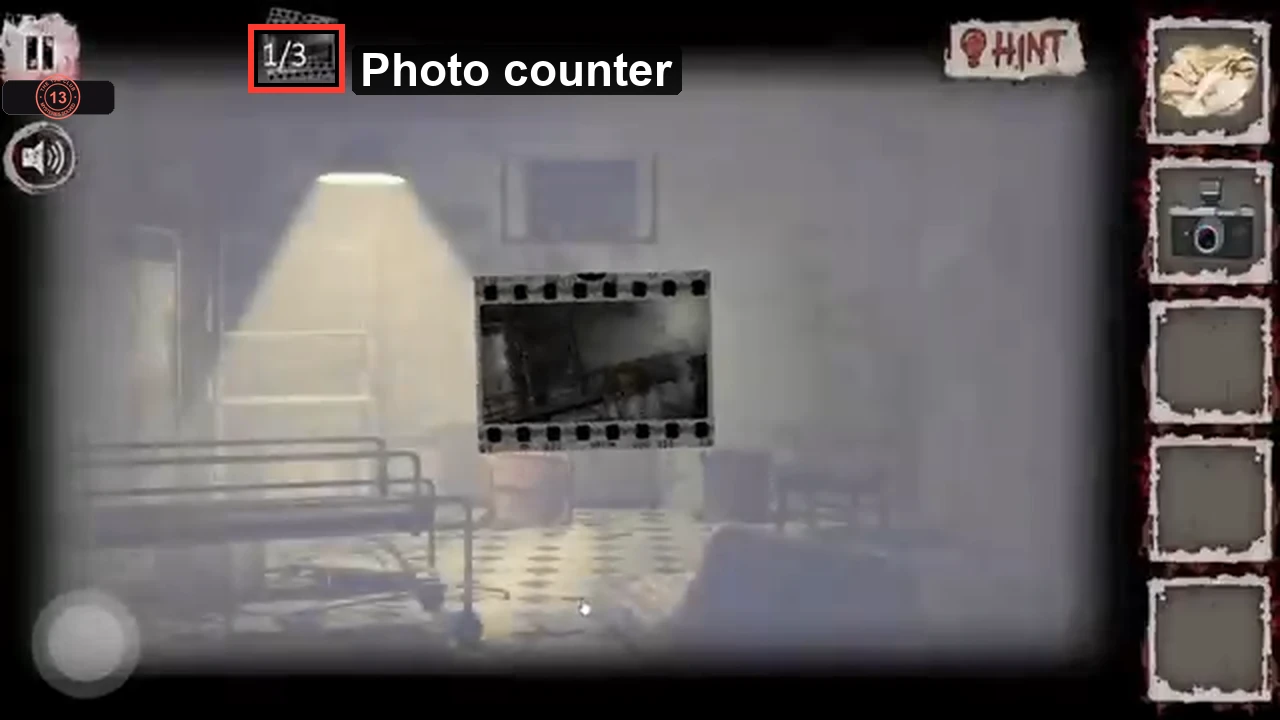
Each photo adds to the counter at the top of the screen.
The wall code and the knob grid
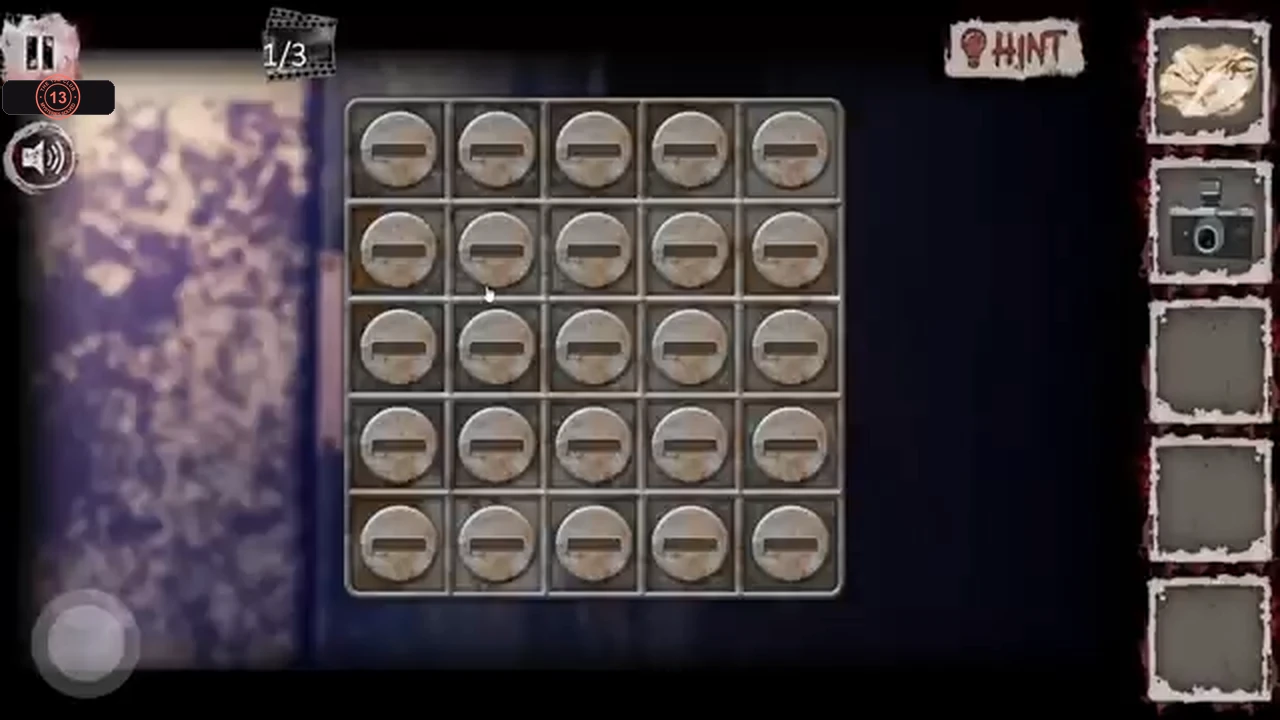
The right-hand door of the corridor is controlled by a small panel with a 5 x 5 grid of slotted knobs. A barely visible number on the corridor wall tells you which knobs to turn.
- In the corridor, turn to the other side and tap the wall above the boxes on the right ("It's barely visible"). Faint digits read 41513.CODE41513
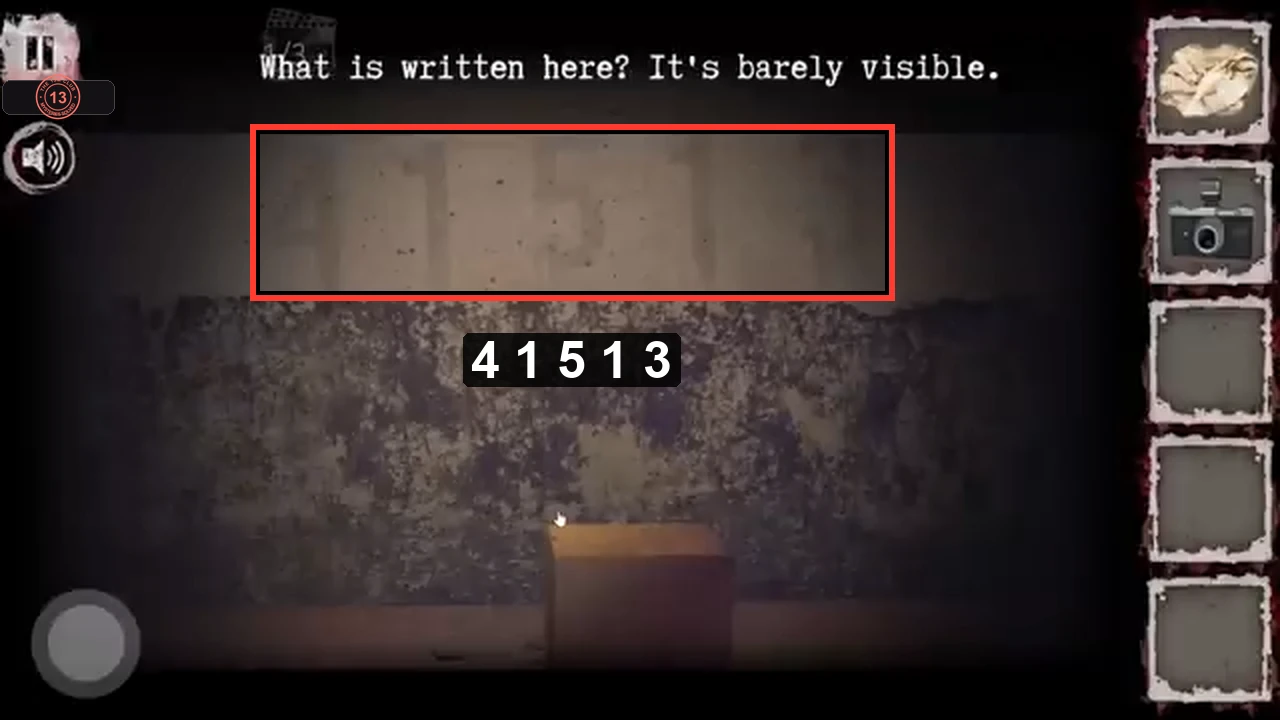
The faint digits on the wall read 41513. - Turn back and tap the small panel on the wall just left of the right-hand door's frame. Each digit tells you which row to turn in that column, counting from the top: turn exactly one knob per column so its slot stands vertical - column 1 row 4, column 2 row 1, column 3 row 5, column 4 row 1, column 5 row 3. The panel closes when the pattern is complete.CODE41513
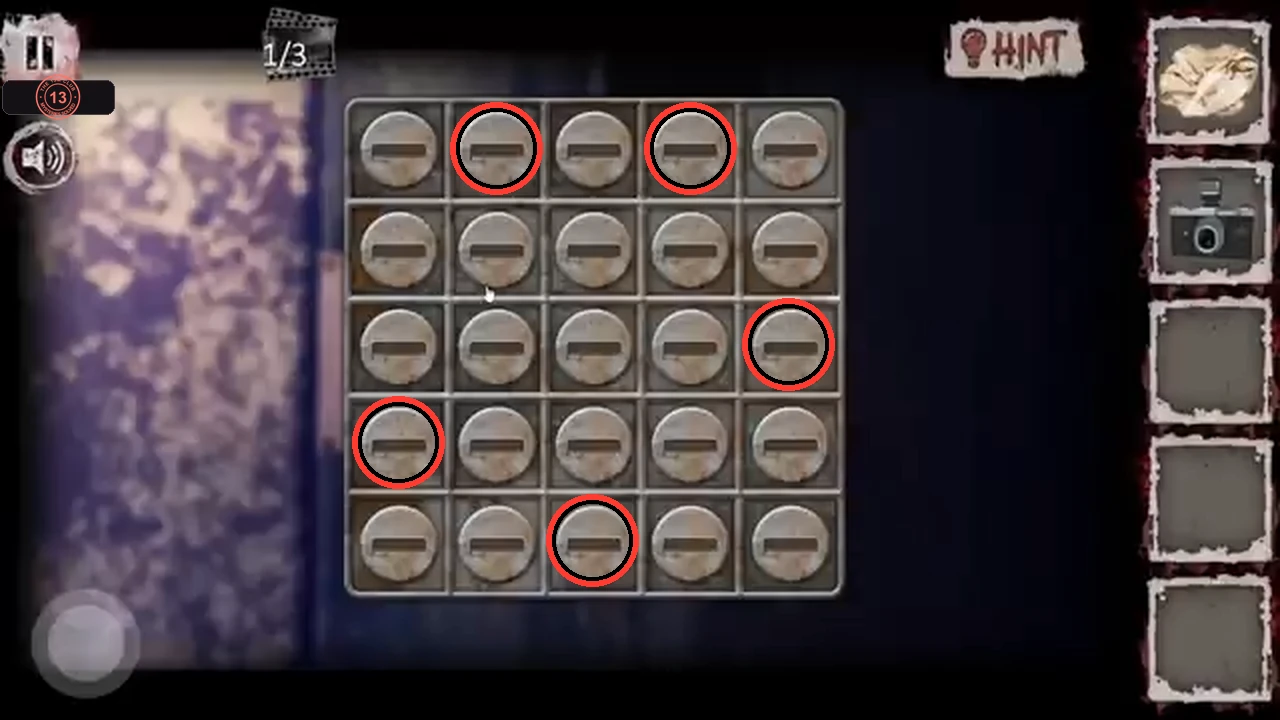
Turn the circled knob in each column (rows 4, 1, 5, 1, 3 from the top).
The operating table
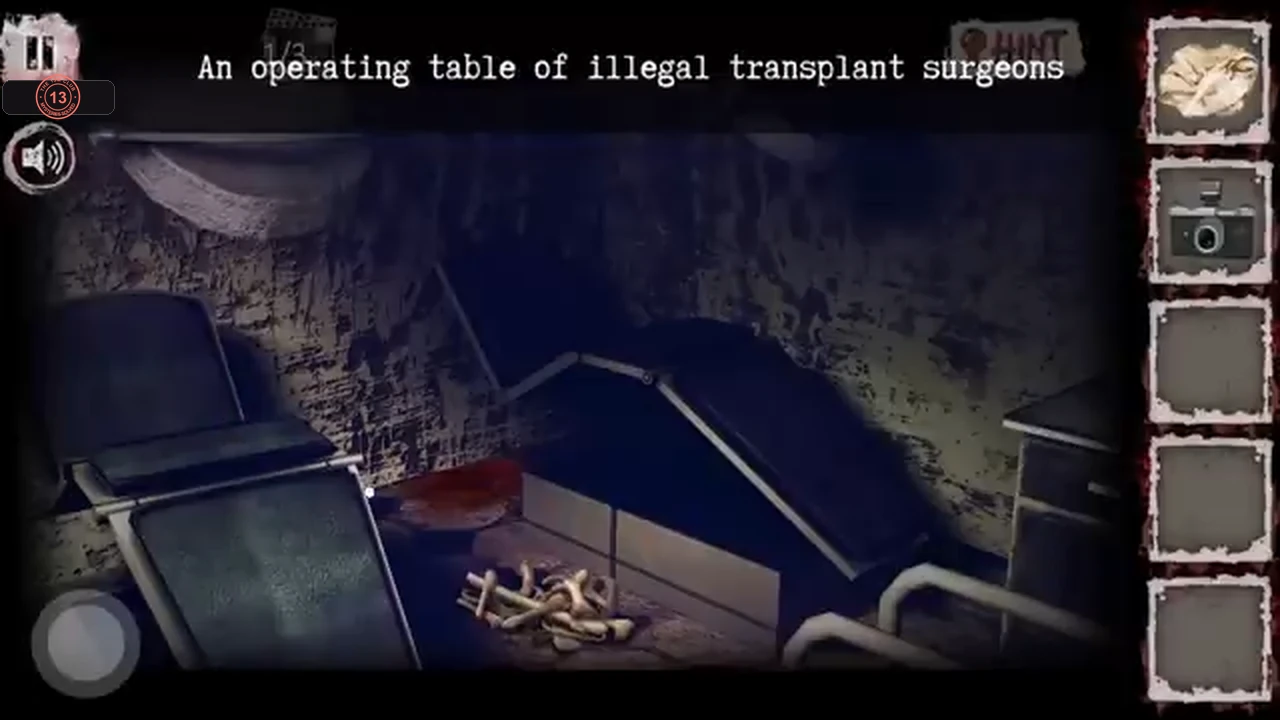
The right-hand door opens into the operating room of the illegal transplant surgeons. A key is buried under a pile of bones on the operating table.
- Tap the operating table. Keep tapping the bones on the tray; each tap throws one aside. When the pile is cleared, a T-handle key is uncovered. Take it. This takes many taps, so keep going until the tray is empty.
The instrument chest
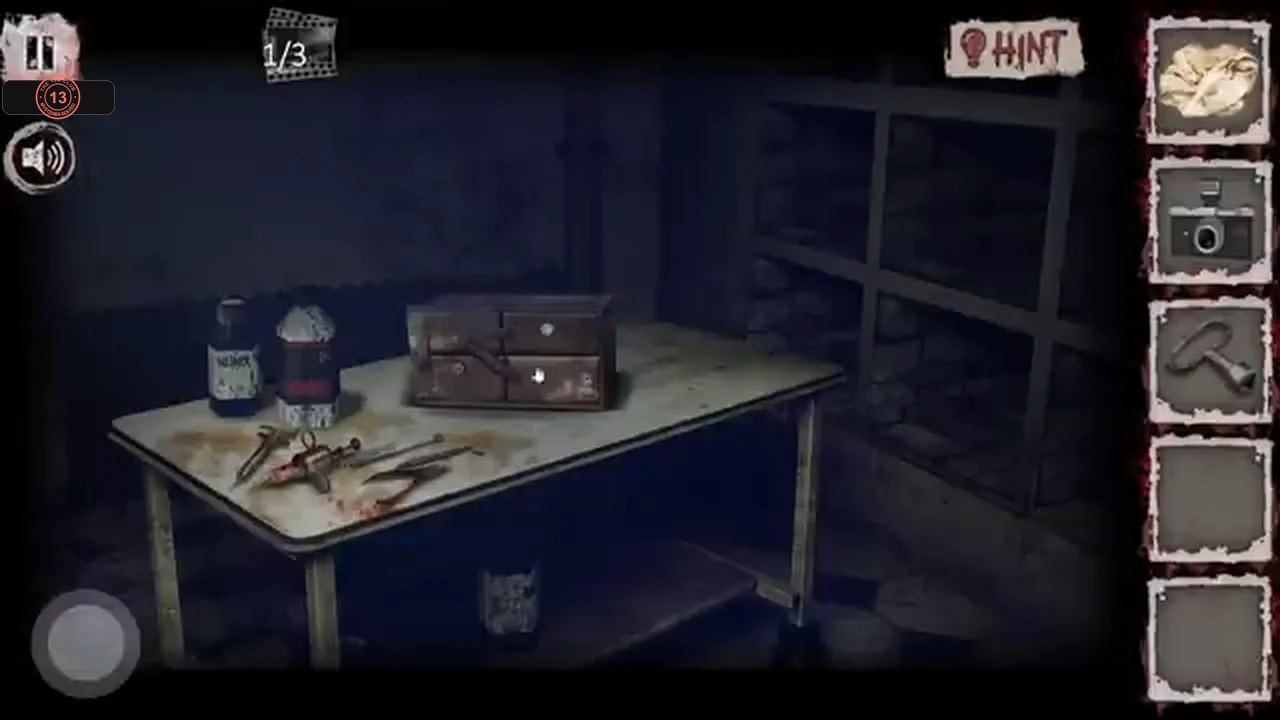
The small instrument table in the operating room holds a drawer chest full of the surgeons' documents. Its four drawers open in different ways; two can be opened now.
- Tap the small instrument table at the back right. Take the coin from the top of the left bottle, then tap among the instruments and take the long thin probe.
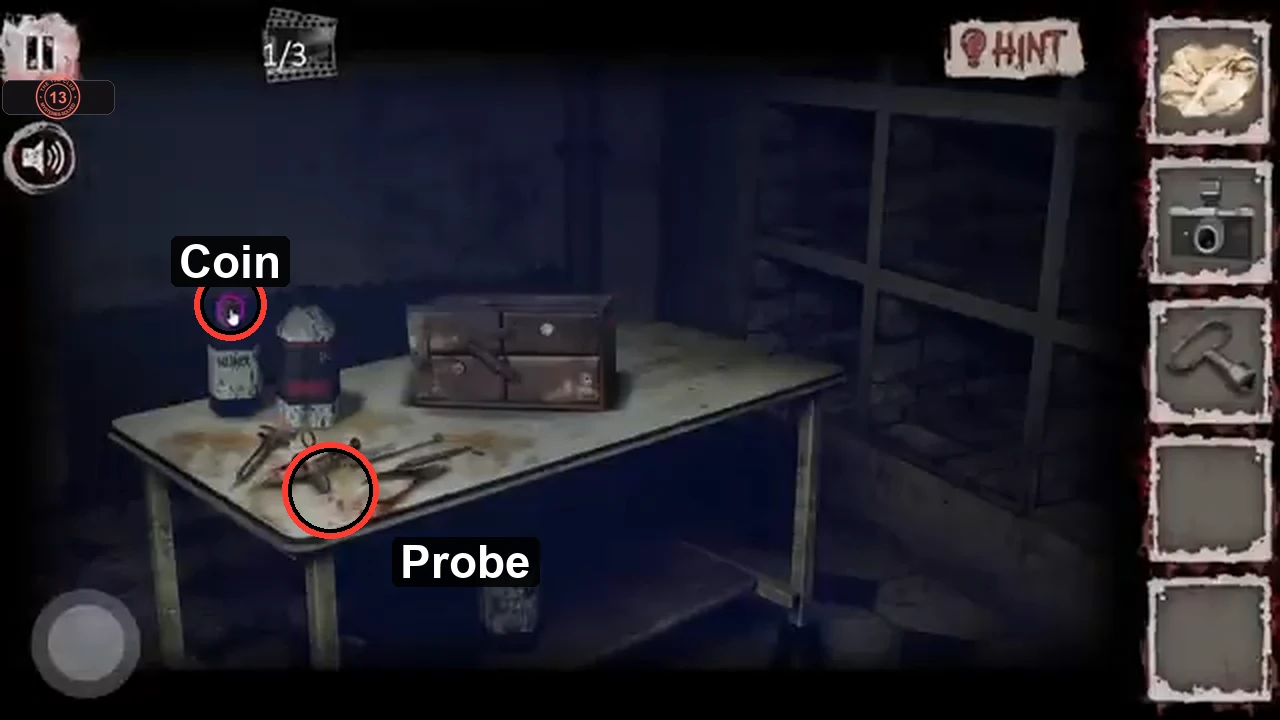
The coin sits on top of the left bottle; the probe lies among the instruments. - Tap the drawer chest. Drag the coin onto the slotted screw at the left of the lower-left drawer to turn it, then drag the T-handle key onto the round lock of the lower-right drawer.
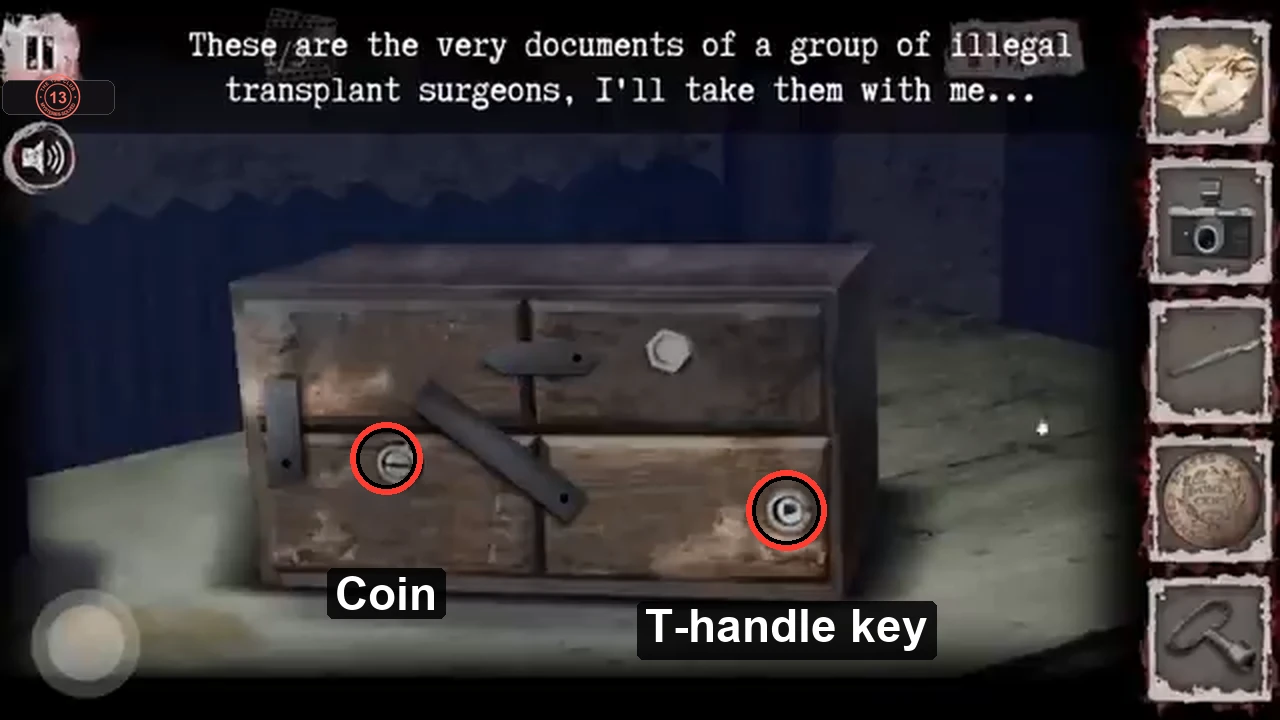
Use the coin on the slotted screw and the T-handle key on the round lock. - Take the red folder from the lower-right drawer (formulas for poisons and preservatives). Then tap the lower-left drawer to open it and take the tan folder (the lists of illegal buyers).
- Back out to the full operating room view and drag the camera onto it to take the second photo (2/3). Keep the probe for Chapter 26.
The coloured stripes
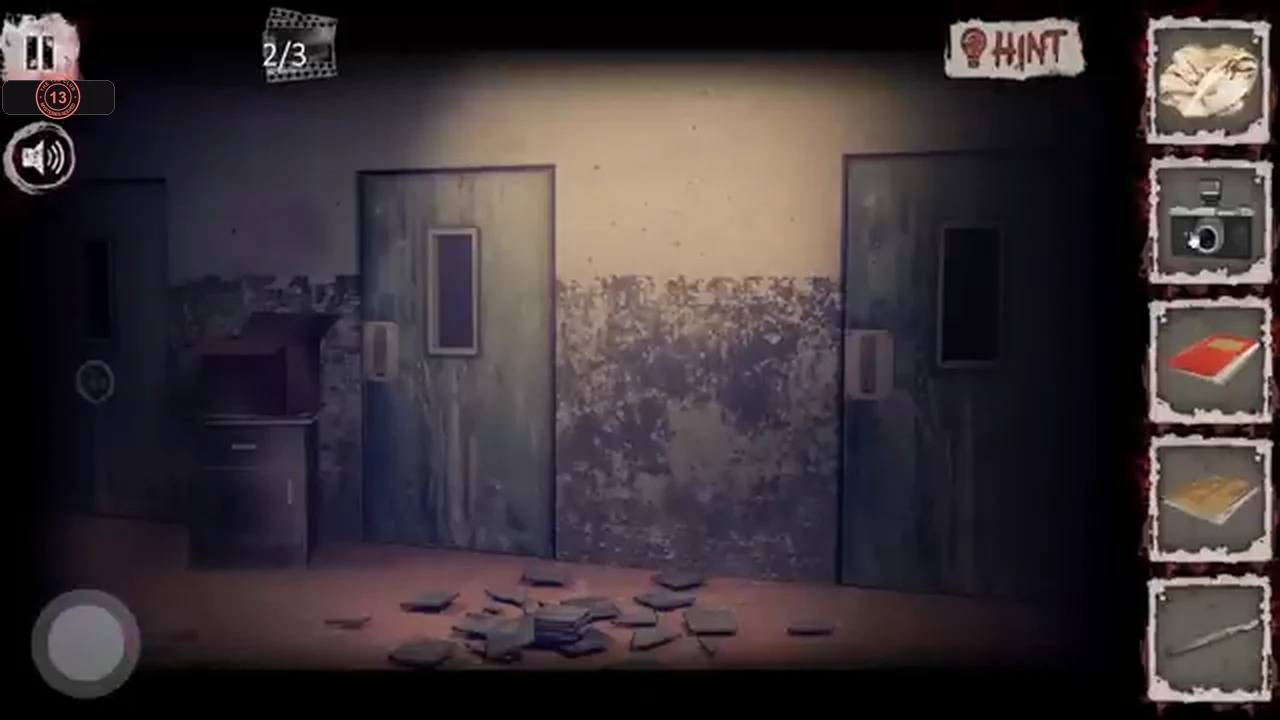
A round panel with five coloured buttons sits beside the dark doorway at the far left of the corridor. The order is hidden under dirt on the wall.
- In the corridor, drag the rag onto the dirty wall above the cabinet to the left of the centre-left door. Wiping it reveals coloured vertical stripes; from left to right: blue, yellow, red, green, orange.
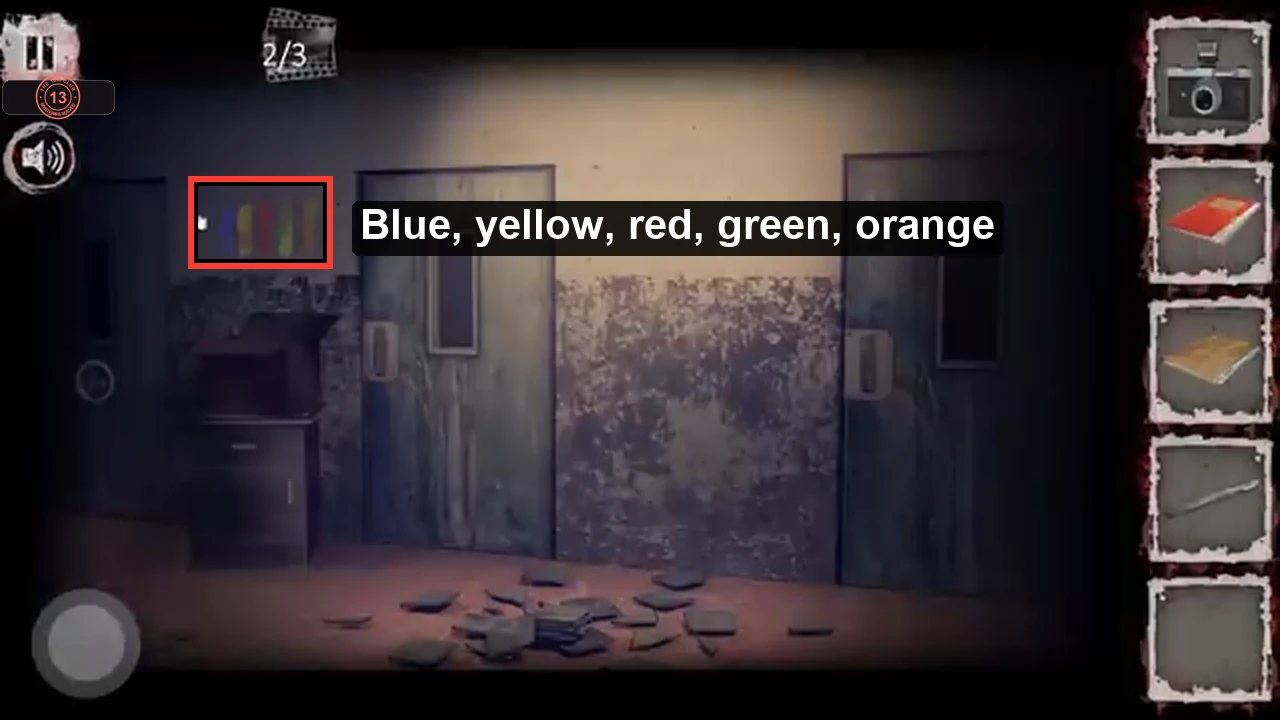
After wiping, the stripes read blue, yellow, red, green, orange. - Tap the small round panel on the wall at the far left. It has yellow at the top, blue on the left, orange in the centre, red on the right and green at the bottom. Press them in the stripe order: blue, yellow, red, green, orange (centre). The panel closes and the far-left doorway opens.CODEBLUE YELLOW RED GREEN ORANGE
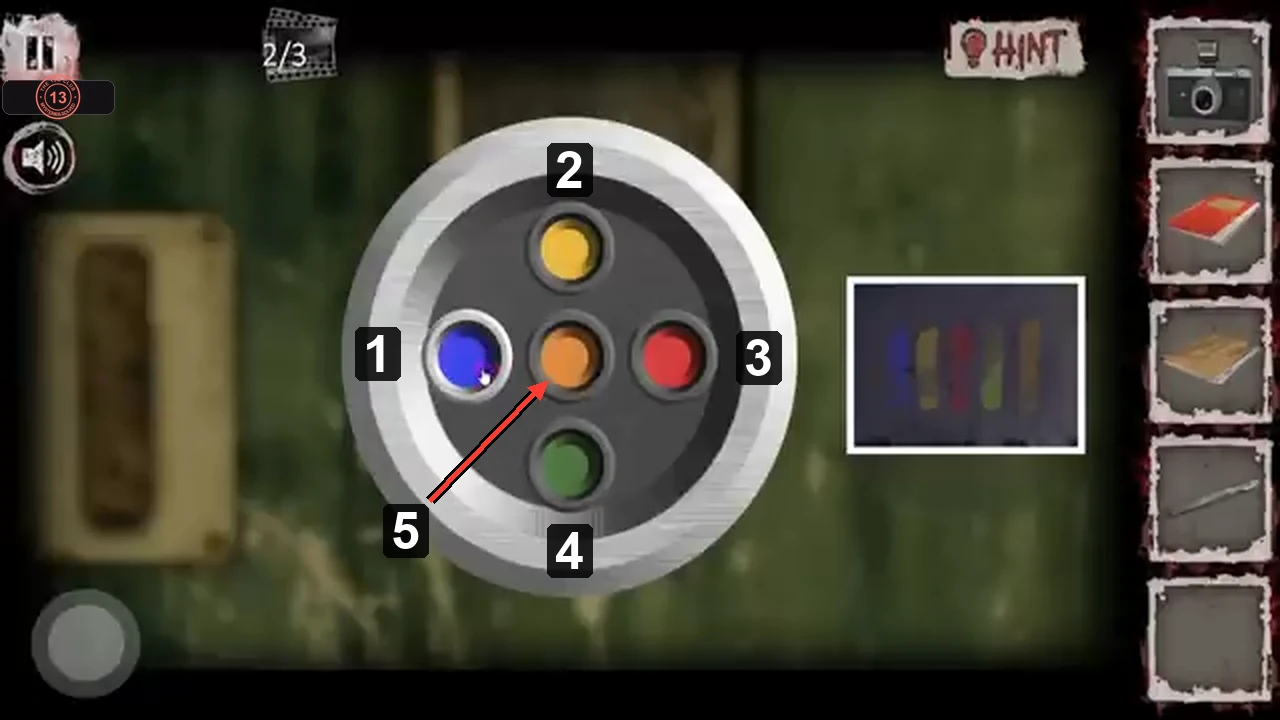
Press order: 1 blue, 2 yellow, 3 red, 4 green, 5 orange (centre).
The riddle and the safe
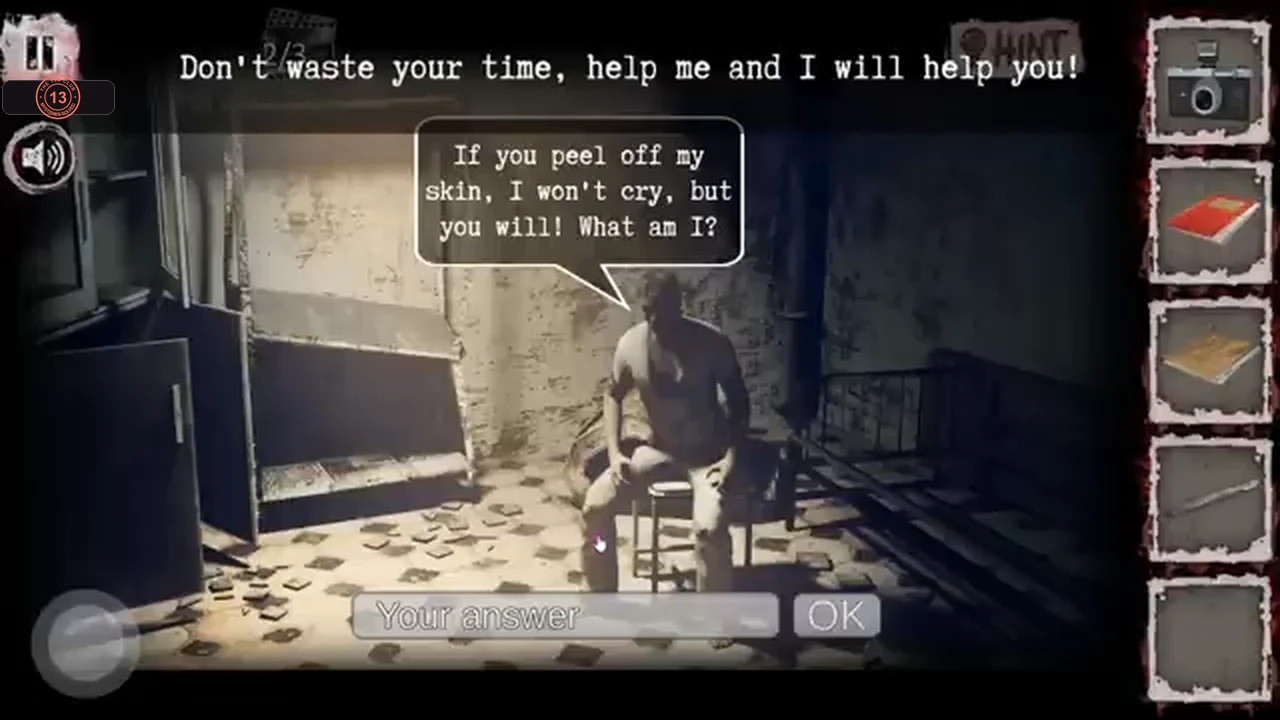
Behind the far-left doorway, another prisoner is tied to a chair. Answer his riddle and he gives you the code for the safe in the ward.
- Enter the far-left doorway and tap the man on the chair. He asks: "If you peel off my skin, I won't cry, but you will! What am I?" Type Onion in the text field and press OK. He tells you the safe code: 92745.CODEOnion
- Go to the ward (centre-left door) and tap the safe inside the cage. Enter 9, 2, 7, 4, 5 and press ENTER. Take the steering wheel from the safe.CODE92745
Keys, the last photo and the wrench
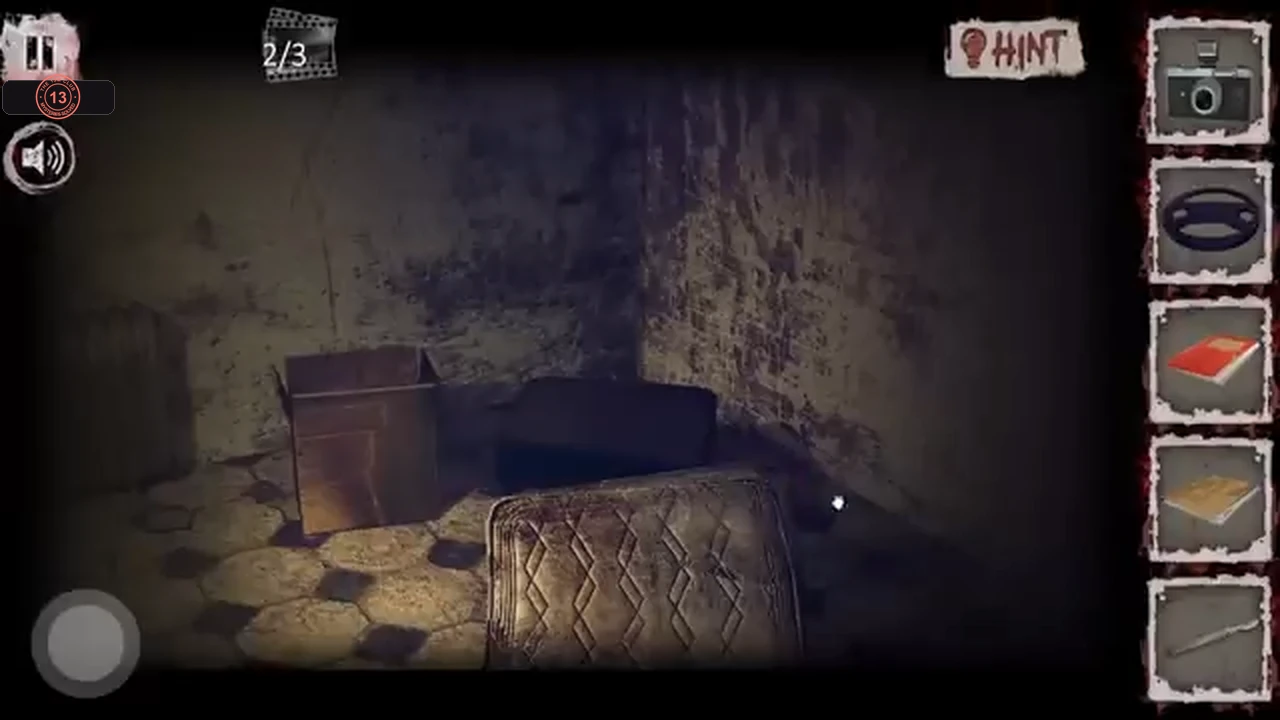
Three more things in the ward and the riddle room: the keys to the exit, the last photo and a wrench for the chest.
- In the ward, tap the corner with the mattress. Drag the probe onto the slit in the mattress; the probe slides in and pulls out a bunch of keys. Take them.
- Enter the riddle room (far-left doorway) and drag the camera onto the room view to take the third photo (3/3).
- In the riddle room, tap the broken bed and radiator area on the right ("It's broken") and take the wrench lying on top of the radiator.
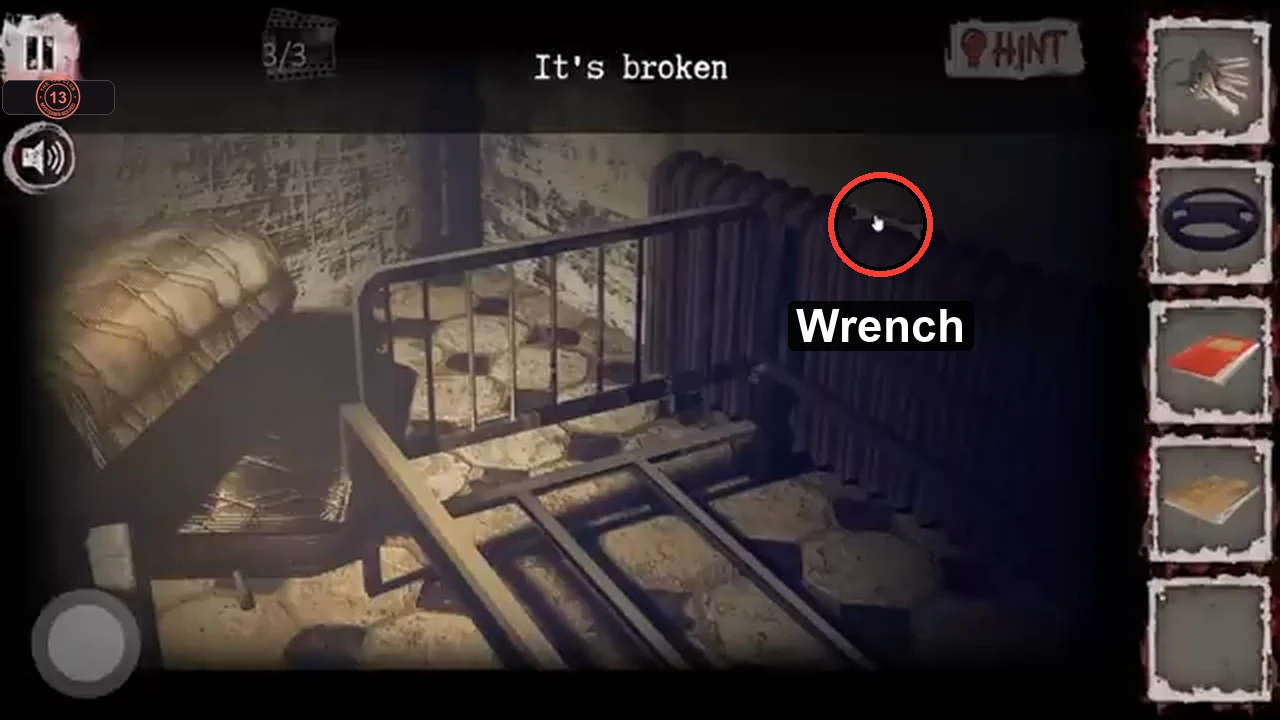
The wrench lies on top of the radiator in the riddle room.
The last documents
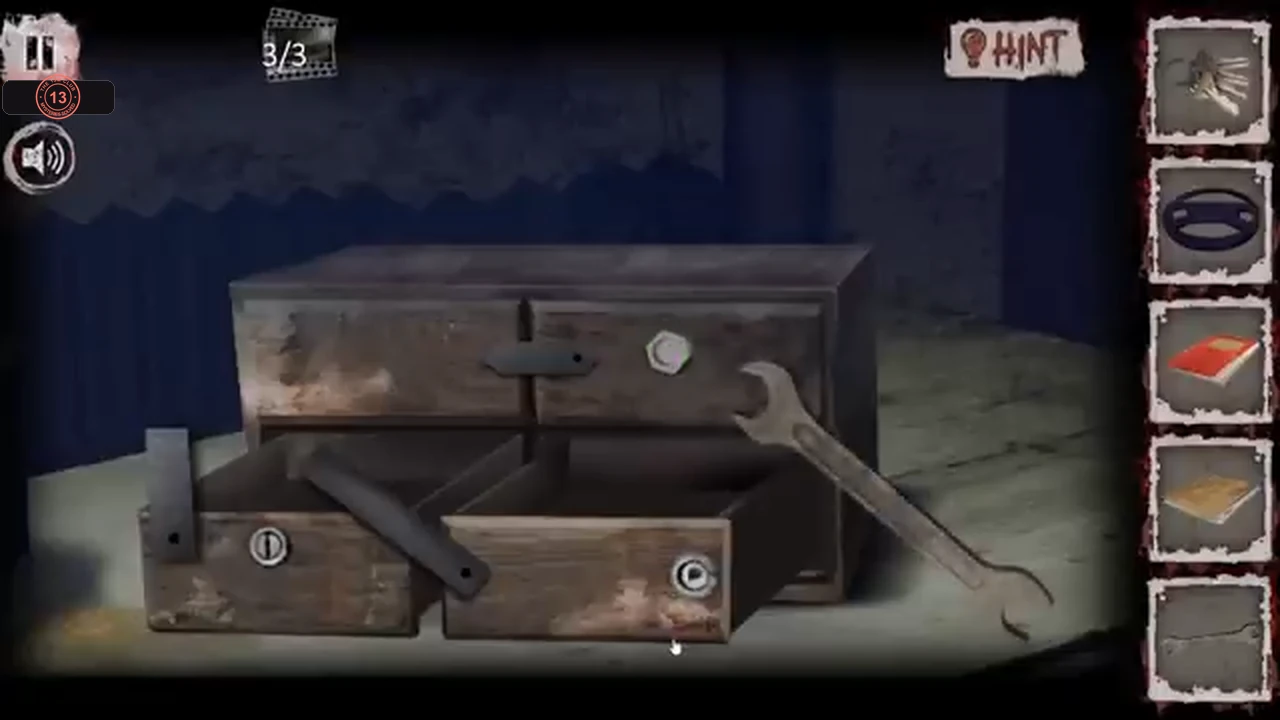
The wrench opens the top drawers of the chest, completing the set of documents.
- Return to the operating room, tap the instrument table and then the drawer chest. Drag the wrench onto the hex bolt at the top right of the chest to unscrew it.
- Take the white papers from the upper-right drawer (account numbers of the surgeons), then take the green folder from the upper-left drawer ("Now I have a complete set of documents!").
Escape from the hospital
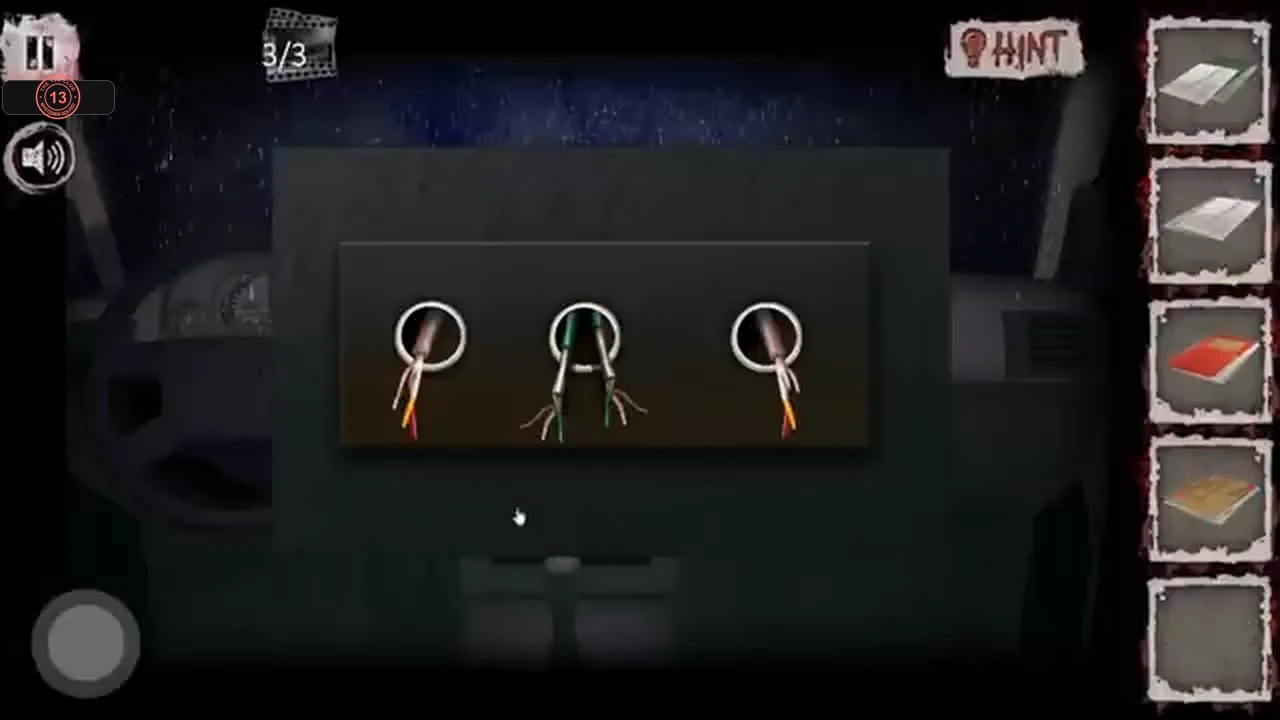
With all three photos and the complete documents, head for the exit. One last obstacle waits outside: the car has no steering wheel and has to be hot-wired.
- Go back up through the TGIF door to the end of the hall and drag the bunch of keys onto the green double doors. You step outside ("I got out, finally!") beside a red car.
- Tap the car to get in, then drag the steering wheel onto the steering column.
- Tap the panel under the dashboard to see three bundles of cut wires. Tap the left, the right and the middle (green) bundle to pull each one out, then drag the green wire ends onto the left wires and onto the right wires. The engine starts ("Bingo, I've started the car!") and the ending plays: you escape the hospital with the evidence.
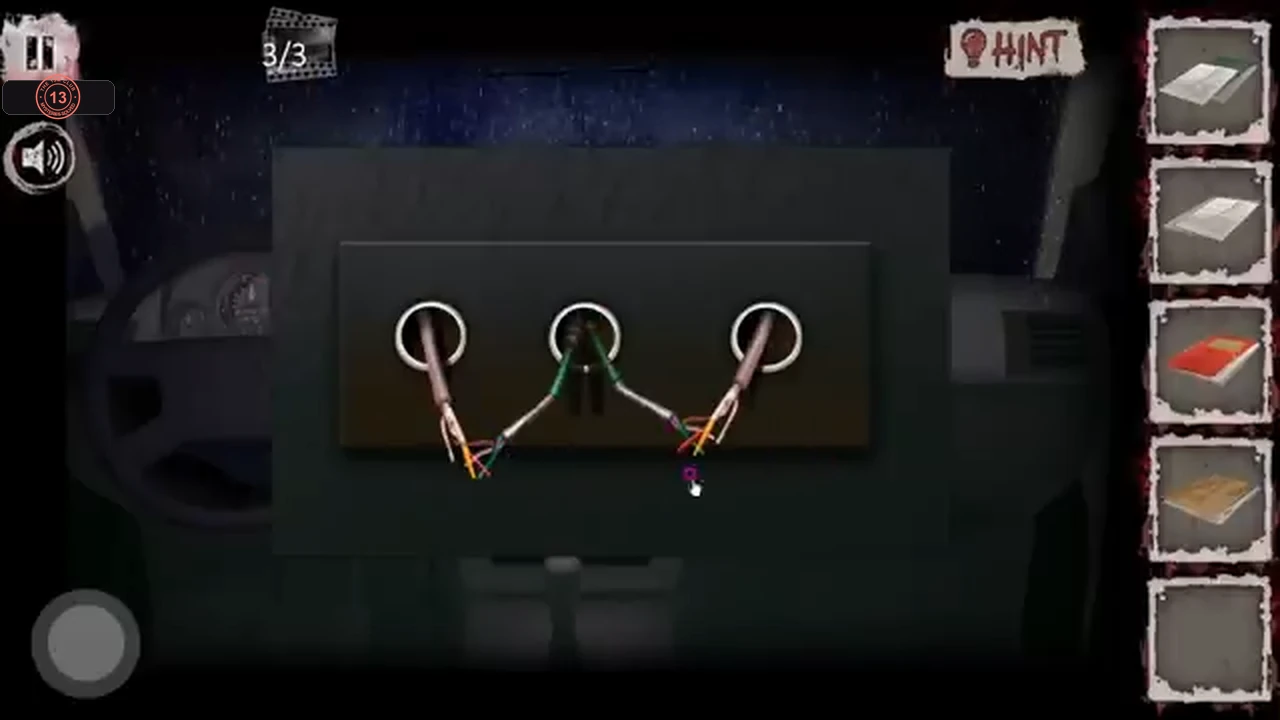
The joined wires that start the engine.