The cabin and the masked padlock
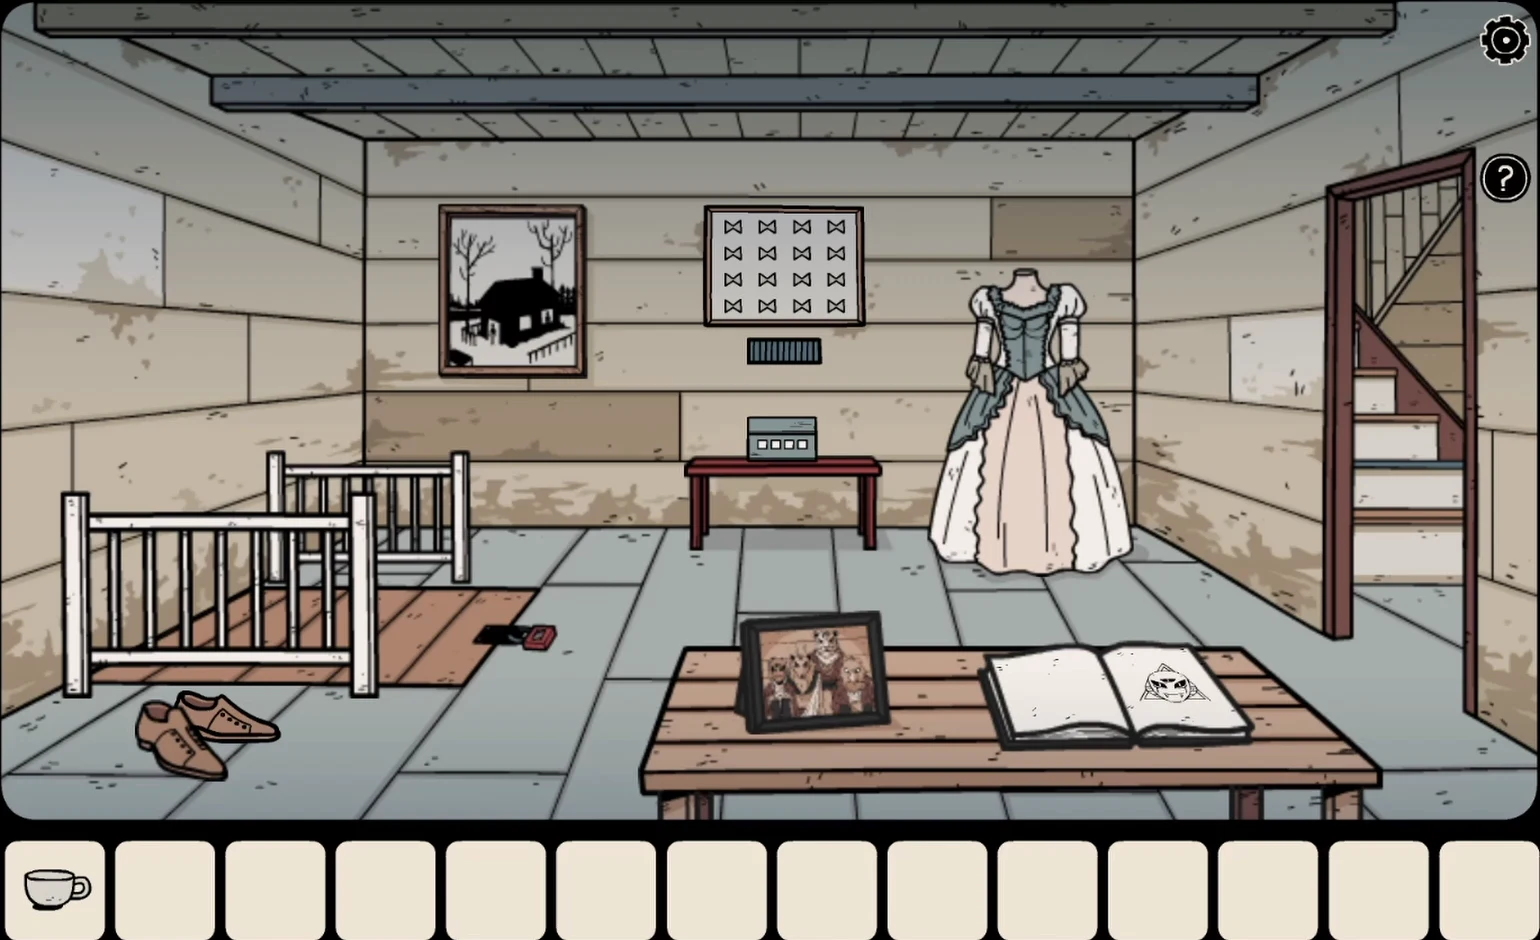
You now play young Bastian inside the cabin he found in the forest. The ground-floor main room has a stone fireplace, a small table on the right and a door on the left to the dress room (a mannequin in a dress, a cot and a padlocked trapdoor). Stairs lead up to a hallway; the trapdoor leads down to the basement. Randomized: the order of the masks in the photo changes between games.
- In the main room, take the cup from the small table on the right. Look into the fireplace: a frog sits inside, and looking up the chimney shows a skull caught in a web. You will come back for it.
- Optional, hidden shadow 5 of 9: go through the left door into the dress room and tap the bottom of the dress on the mannequin. Tap the shadow hiding underneath.
- On the dress room's table, look at the framed photo of four people in animal masks and read the book: each page shows one mask inside a shape (eagle in a square, tiger in a circle, horned wolf in a rhombus, three-eyed mask in a triangle). Tap the padlock on the trapdoor beside the cot and enter the shapes in the photo's left-to-right mask order. Example: triangle, rhombus, circle, square. The trapdoor opens to the basement.
The card board and the basement wardrobe
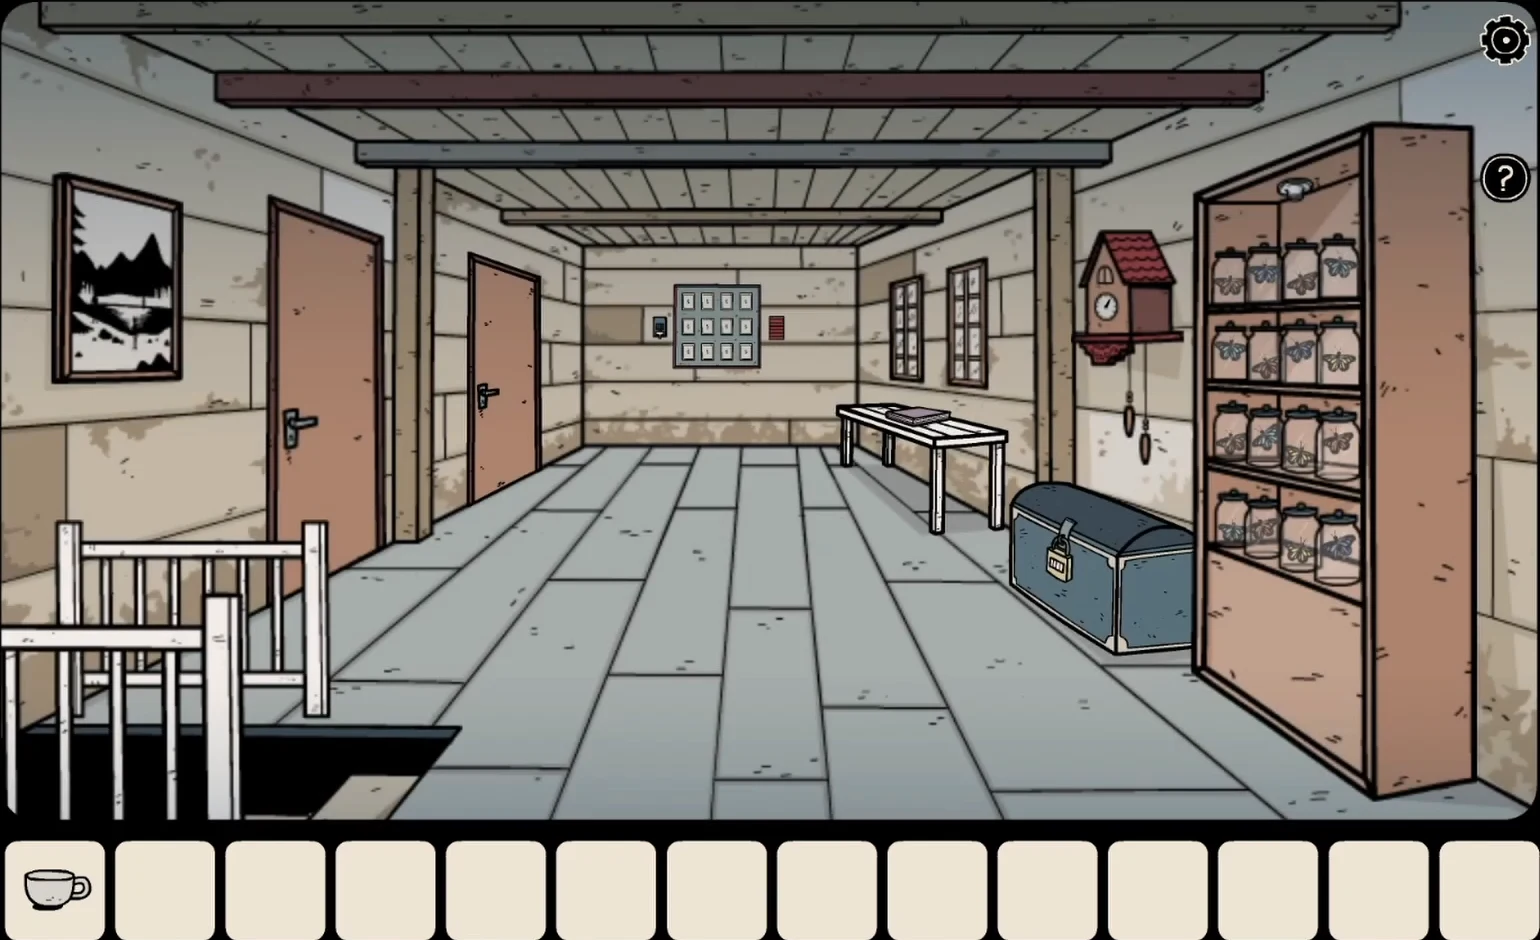
The upstairs hallway has two doors on the left, a bench, a chest with a yellow padlock, a cuckoo clock, a shelf of butterfly jars and a board of twelve cards at the far end. The card board is a memory test.
- Go upstairs and take the purple book from the bench. One page matches arm poses to colours; another lists the numbers 1 to 9, each with a symbol. You need both later.
- At the end of the hallway, pull the lever beside the card board. The twelve cards briefly show keys and skulls, then turn face down. Tap every card that showed a key. Example: first and third in the top row, first and second in the middle row, first and third in the bottom row. A small door opens: take the blue key.
- Go down through the trapdoor to the basement and open the wardrobe with the blue key. Take the pair of shoelaces and the note, a recipe for Divine wings: harpy's claw, blue feather and the eye of a possessed doll.
The shadow at the window
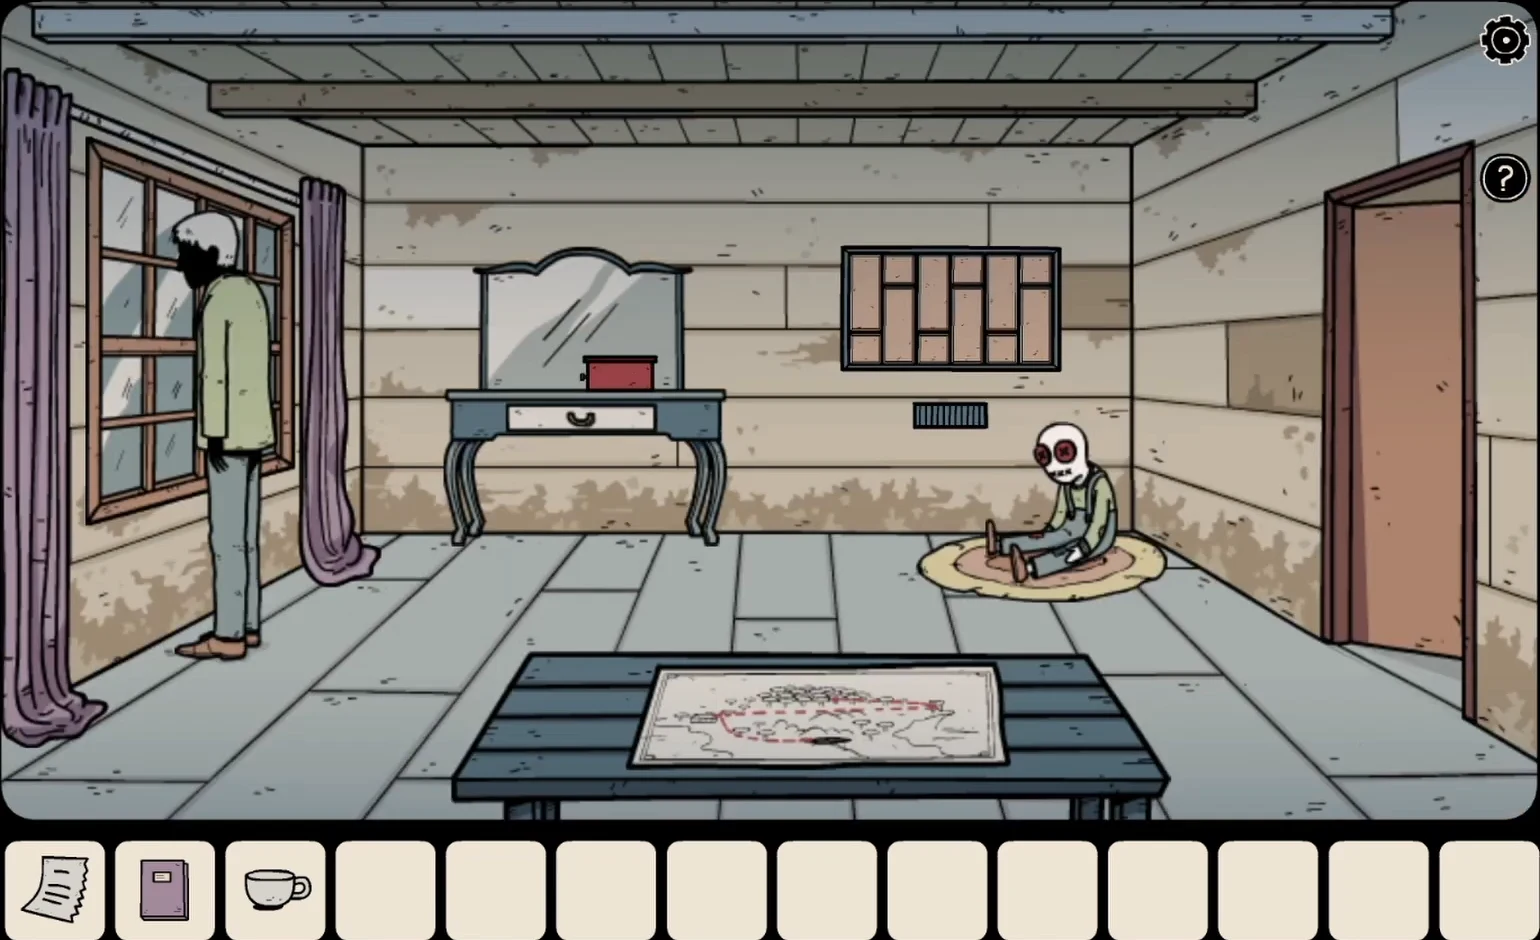
A pair of laceless shoes leads to a shadow in the first room on the left upstairs, which this guide calls the window room. Its four-digit code comes from counting. Randomized: the counts change between games.
- In the dress room, thread the shoelaces into the empty shoes by the cot. The shoes walk off on their own; follow them through the main room and upstairs to the first door on the left, where a figure in a green coat steps inside.
- Enter the window room and tap the figure at the window. It bangs its head against the glass in four groups separated by pauses. Count each group to get four digits. Example: 1, 4, 2, 3.
- Tap the red box on the dresser and set its four dice to your digits in order. The figure dissolves and the box opens; it is a music box with an empty stand for a dancer.
- Optional, hidden shadow 6 of 9: pull back the left-hand curtain and tap the shadow behind it.
- Take the red button eye from the doll sitting on the rug. Note the map on the table and the board of tall and short panels on the back wall for later.
Across the window: the tea room and the cuckoo clock
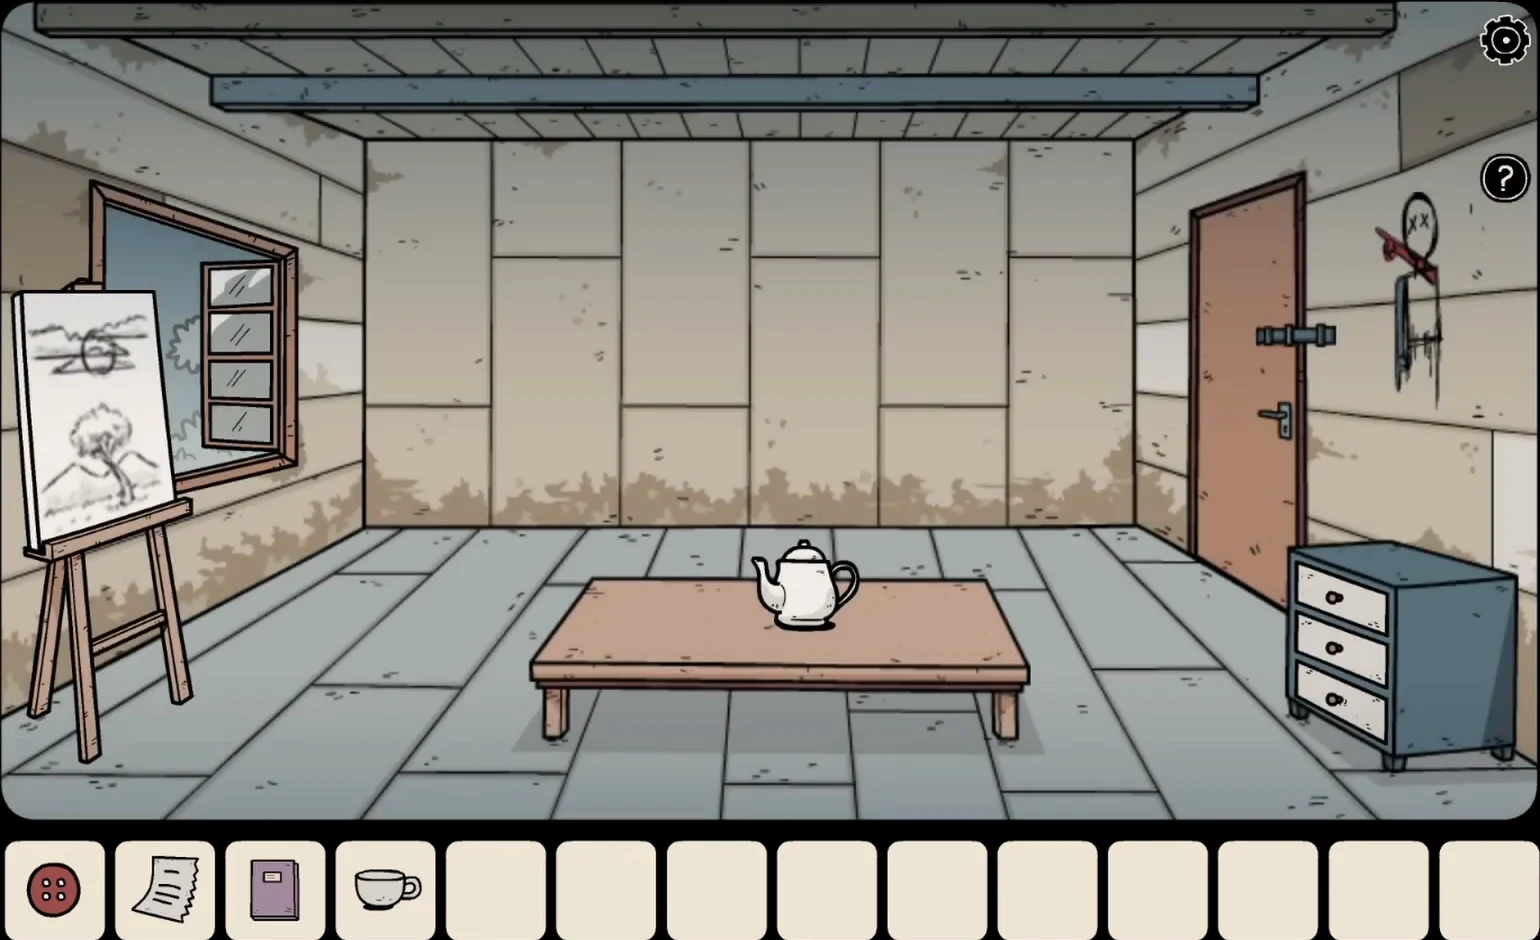
The second room on the left upstairs is barred from inside, so Bastian climbs in from the window room's window. This guide calls it the tea room: an easel by the window, a low table with a teapot, blue drawers and a stick-figure drawing beside the door. Randomized: the drawing's arm positions change between games.
- Open the window-room window and look out. Optional, hidden shadow 7 of 9: tap the shadow in the red tree below the window. Then climb across into the next window.
- In the tea room, put the cup on the table next to the teapot. Open the middle of the blue drawers and take the blue feather.
- Look at the stick figure drawn beside the door: its red arm and blue arm are the hour and minute hands of a clock. Example: red arm pointing up and left (10 o'clock), blue arm straight down (6 o'clock).
- Slide the bar on the door. A pale ghost appears behind Bastian, passes into the wall and leaves black handprints all over it, and the door opens to the hallway.
- In the hallway, set the cuckoo clock: the red short hand like the drawing's red arm and the blue long hand like its blue arm. A compartment opens: take the light bulb.
Butterfly jars and the symbol board
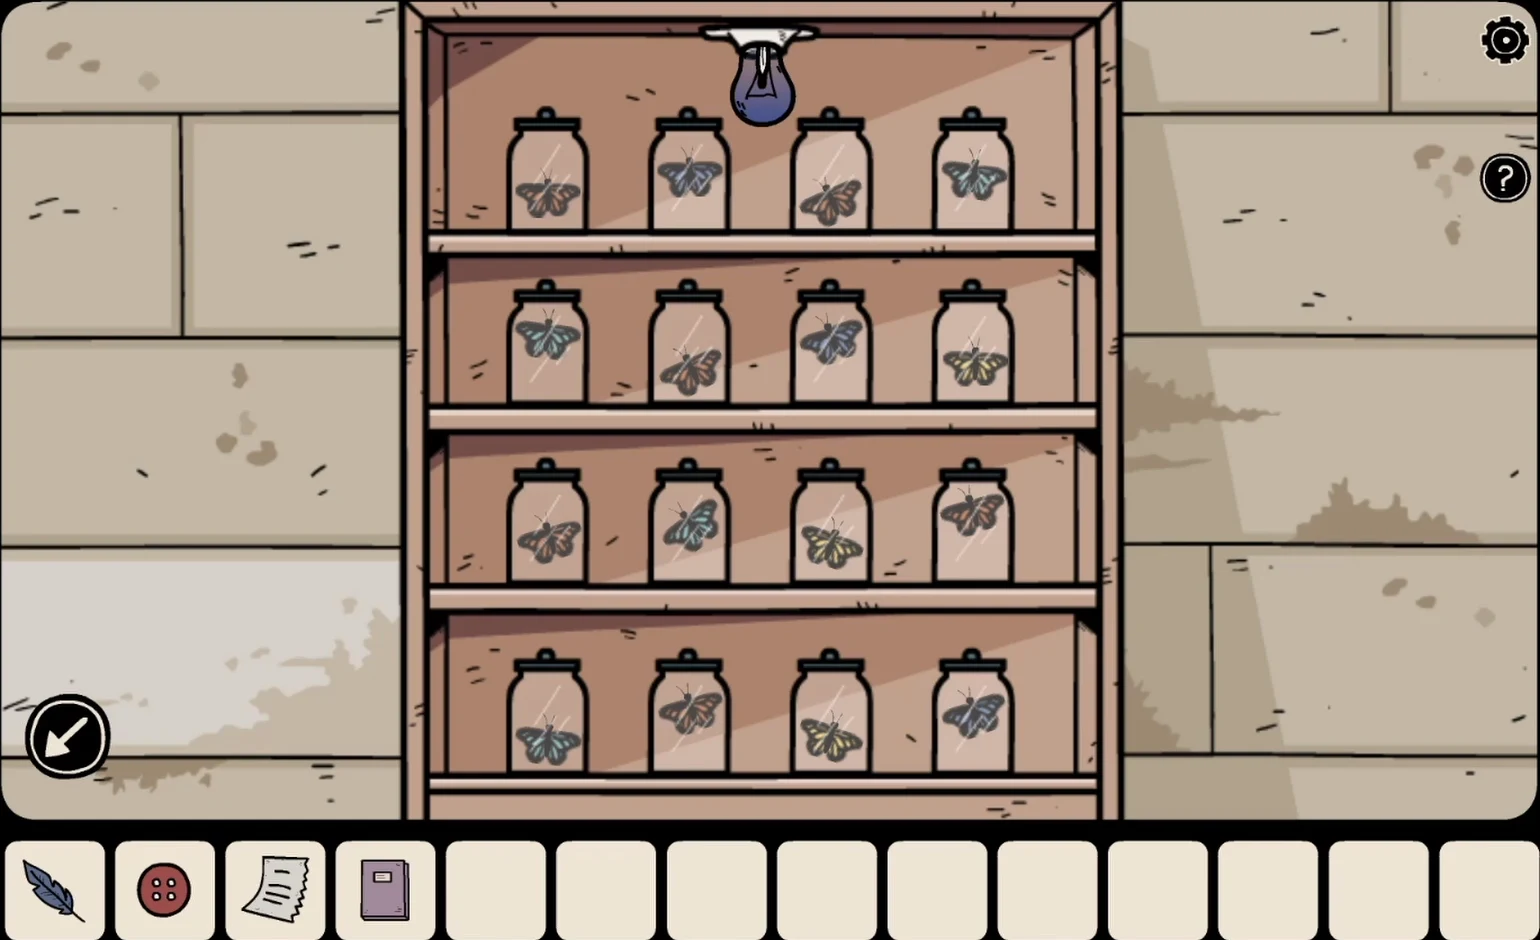
The shelf of sixteen butterfly jars and the four-by-four symbol board in the dress room share the same grid. Randomized: which butterflies move changes between games.
- Screw the light bulb into the empty socket at the top of the jar shelf. When the light comes on, some butterflies flap their wings. Note which of the sixteen jars they are in.
- Go to the dress room and tap the four-by-four symbol board on the back wall. Press the symbols in the same positions as the moving butterflies. A drawer opens below: take the eraser.
The four pictures, the map and the grey box
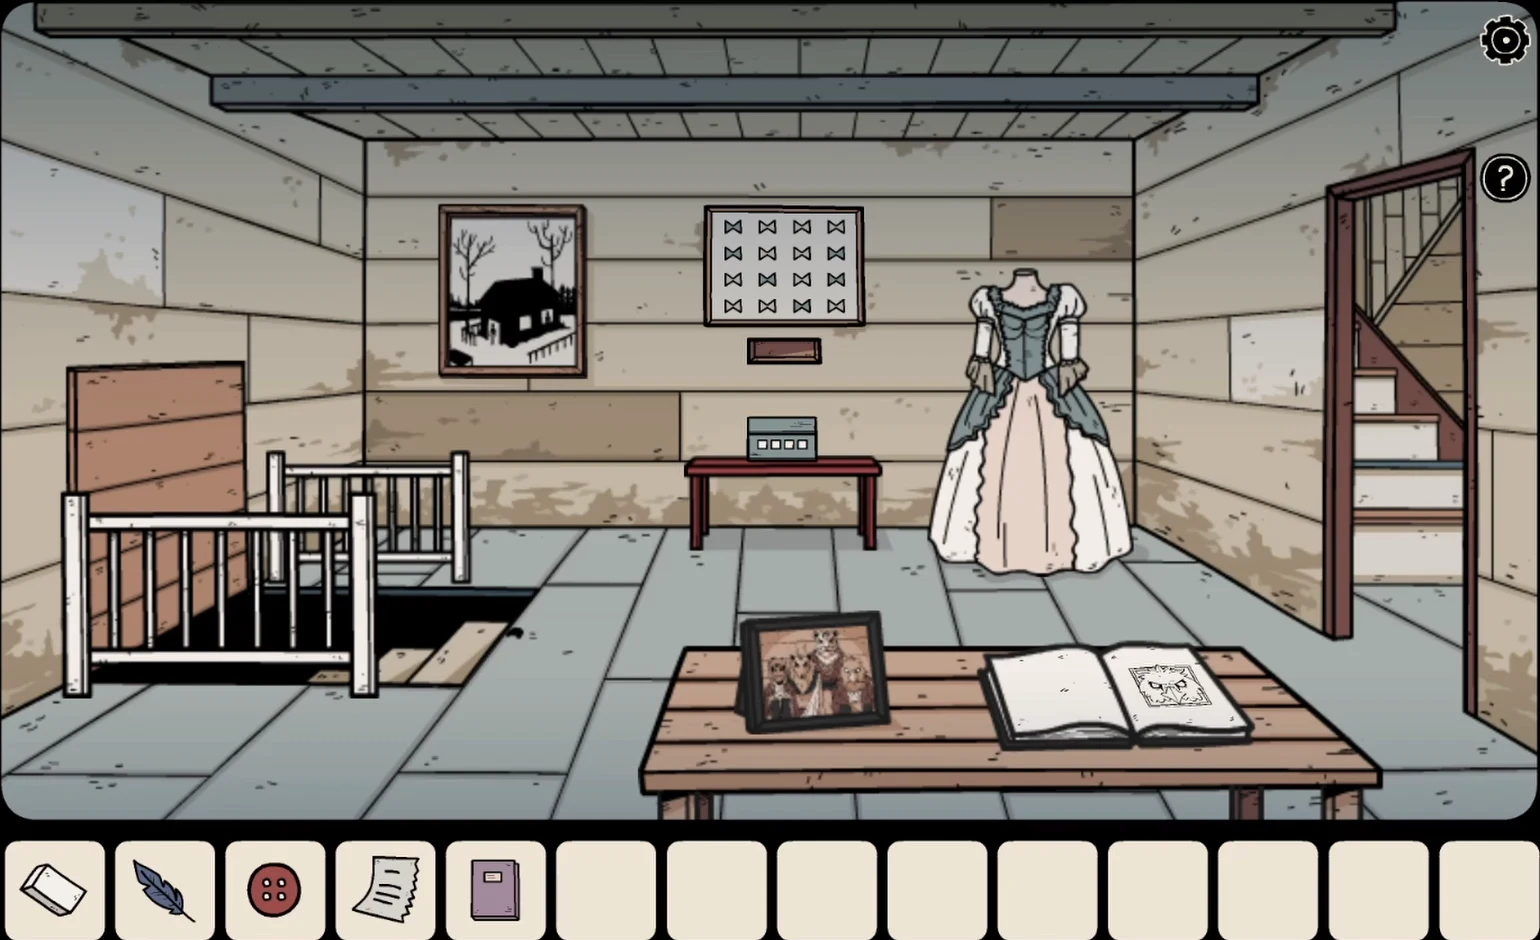
Four landscape pictures hang around the cabin, each showing a number of shadow figures. The map gives their order and the purple book turns the numbers into the four symbols for the grey box in the dress room. Randomized: the counts and the route on the map change between games.
- Count the shadow figures in the four landscape pictures: the forest above the main-room fireplace, the tower in the basement, the cabin in the dress room and the lake in the upstairs hallway. Example: forest 5, tower 8, cabin 2, lake 3.
- Read the map on the window-room table. The trail starts at a small circle; follow its arrows to put the four places in order.
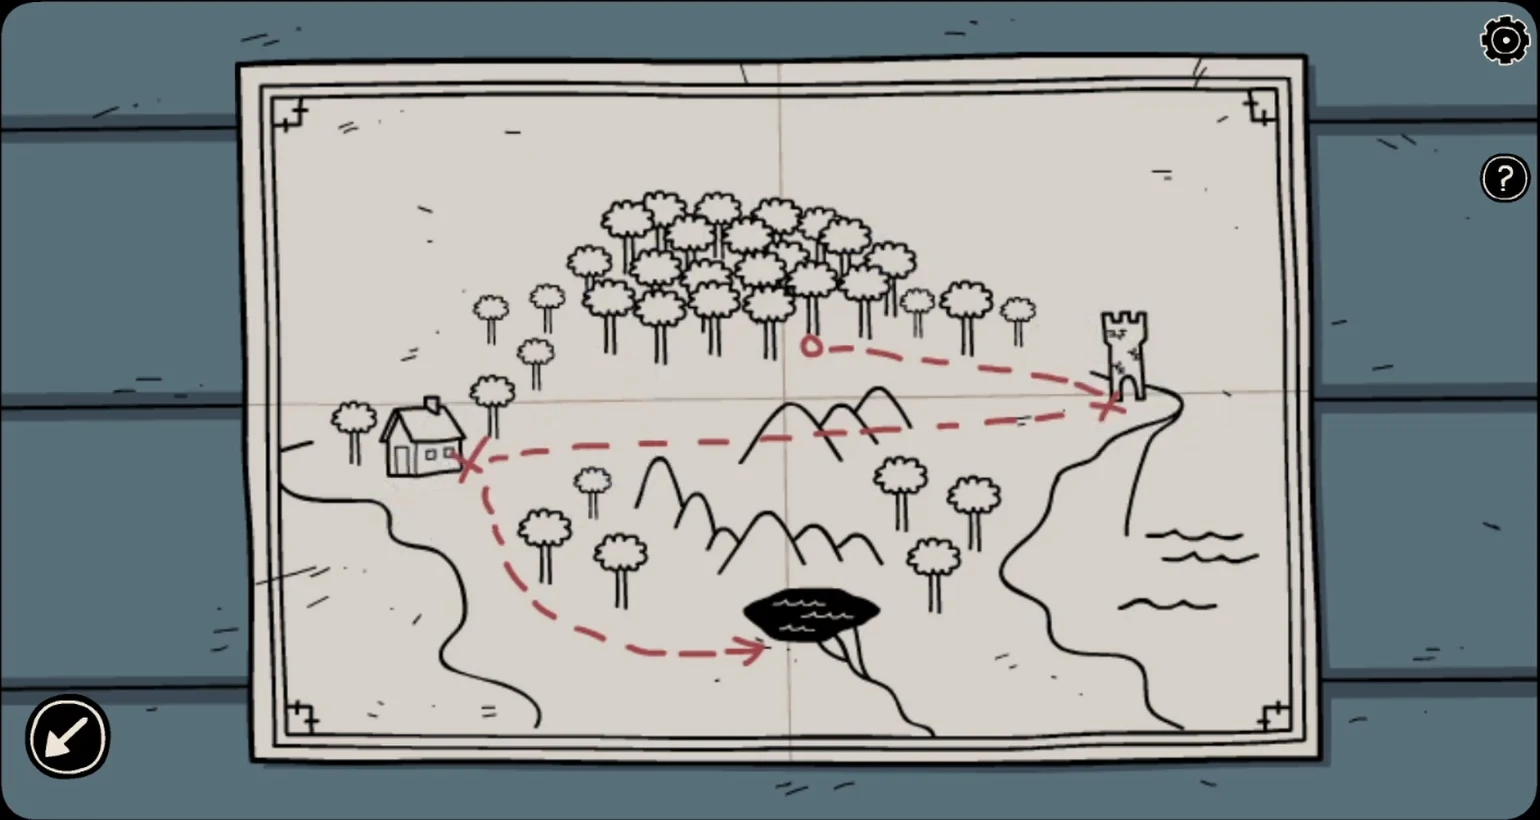
Example map: from the small circle the trail visits the forest, tower, cabin and lake in that order. - Open the purple book at the page of numbers 1 to 9 and find the symbol for each place's shadow count. Enter the four symbols in map order on the grey box in the dress room (example: the symbols for 5, 8, 2 and 3). Take the porcelain ballerina.
Music box, clouds and the handprint board
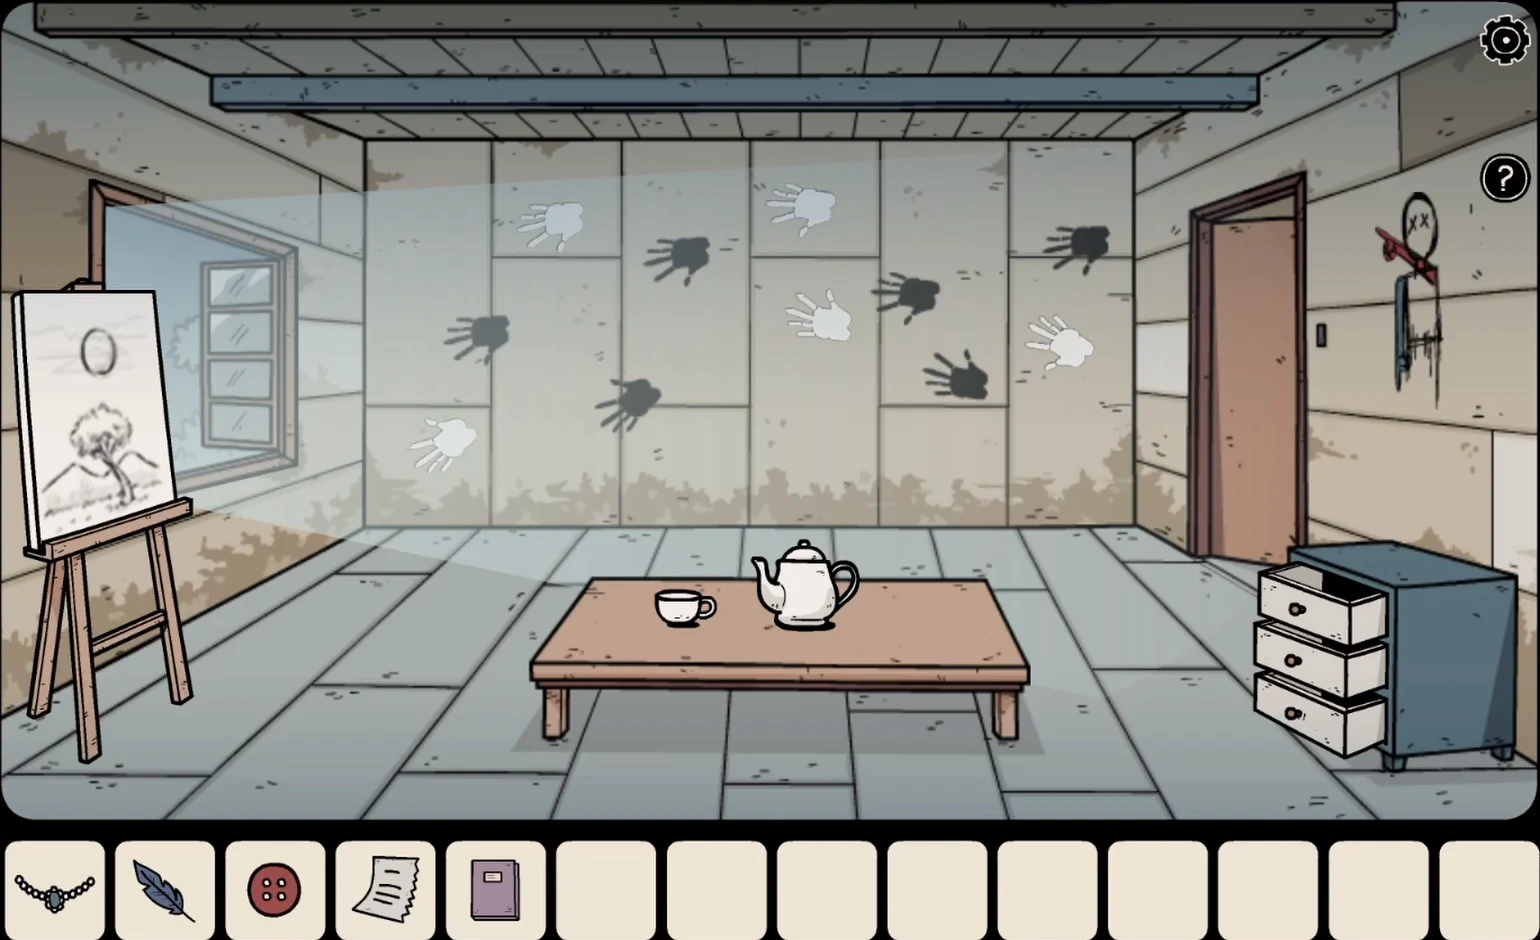
Clearing the sky lights up some of the ghost's handprints, and the board in the window room copies the tea-room wall. Randomized: which handprints turn white changes between games.
- In the window room, put the porcelain ballerina on the music box's stand and wind the key. A pale ghost girl rises behind Bastian while it plays, then sinks away and leaves her necklace: take it.
- In the tea room, use the eraser on each of the three clouds in the easel drawing. The real clouds outside disappear, light falls across the wall and some handprints turn white.
- The tea-room wall is divided into six columns of tall and short panels, and the board on the window-room wall has the same layout. Press the board panels that match the wall panels with white handprints. A drawer opens: take the tea leaves and the note with coloured symbols.
The skeleton's tea and the hallway chest
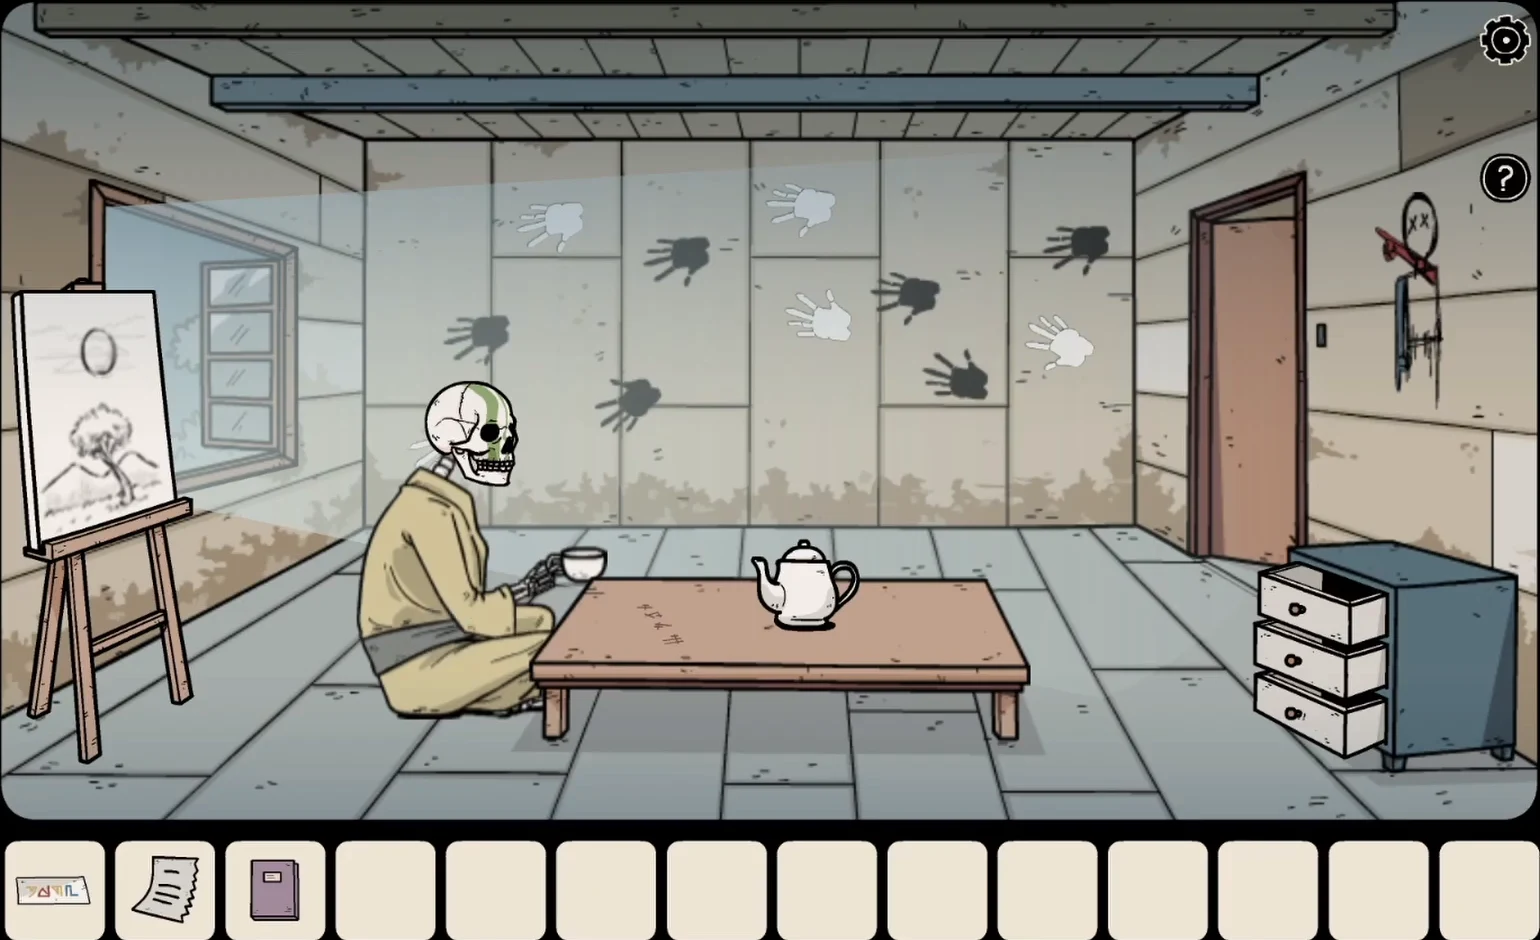
Tea brings a ghostly guest who writes the code for the blue chest in the hallway. Randomized: the written symbols change between games.
- In the dress room, put the necklace on the mannequin. A skull appears: take the skull with red markings.
- In the tea room, put the tea leaves in the teapot (the cup must already be on the table). A skeleton appears, pours itself tea and writes on the table with a wet finger. Take its skull with green markings.
- Read the four symbols written on the table, then enter them in the same order on the yellow padlock of the blue chest in the upstairs hallway. Take the wheel with colourful symbols.
The colour discs
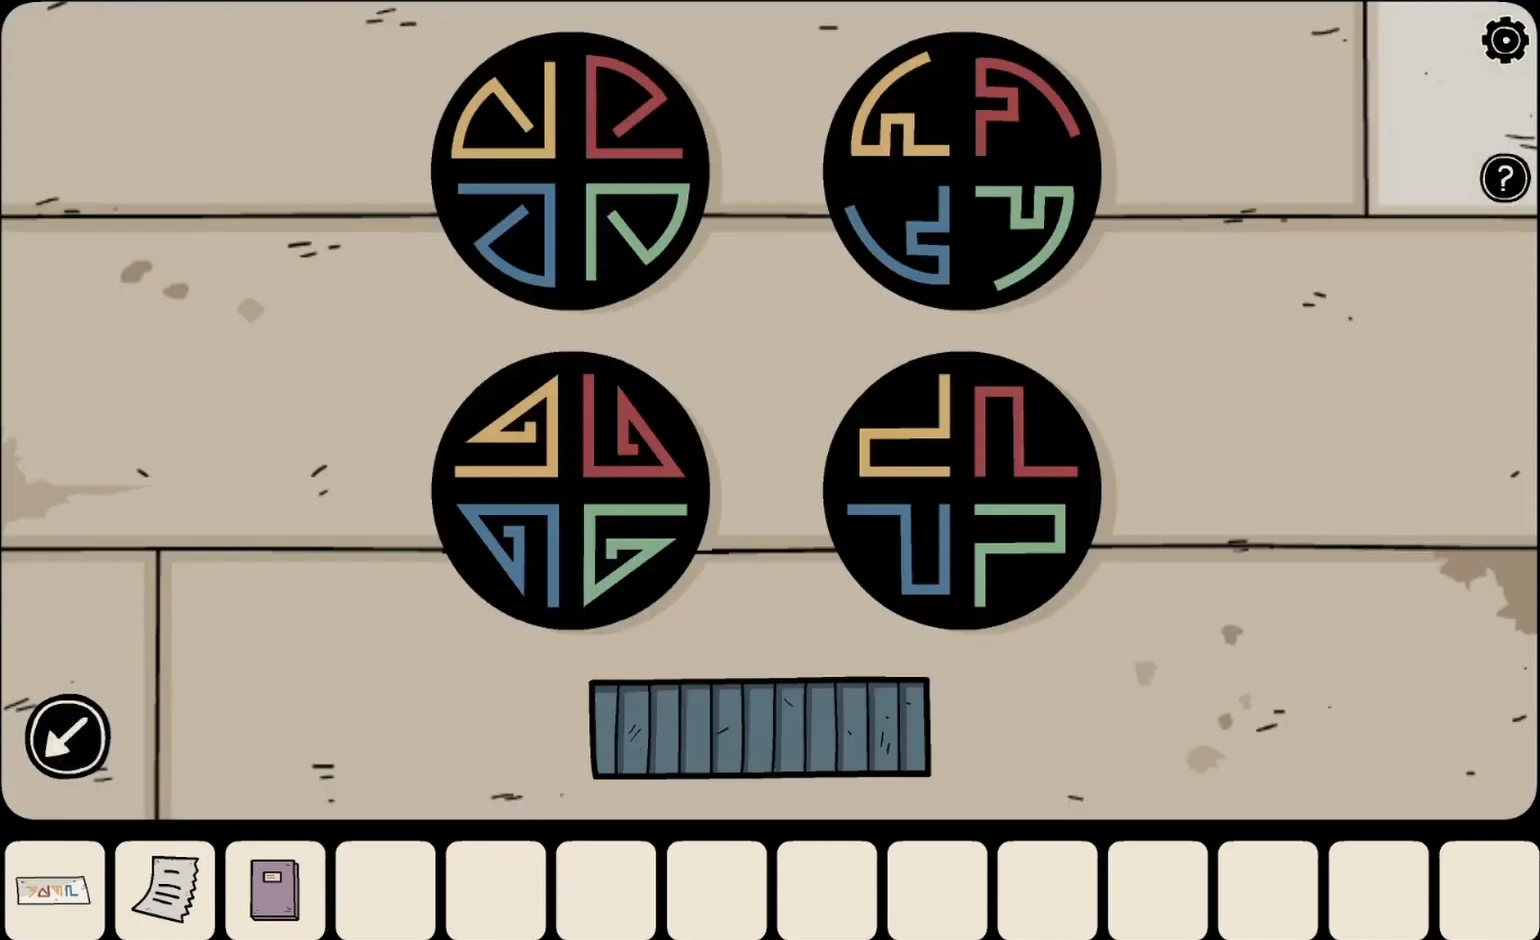
A panel on the basement wall holds four turning discs; each disc carries one shape repeated in four rotations and four colours. Randomized: the note's symbols and colours change between games.
- In the basement, fit the wheel with colourful symbols into the empty spot on the disc panel.
- Read the note with coloured symbols from the handprint drawer. Each of its four symbols appears, in exactly that shape and direction, as one quadrant on one of the discs. Tap the discs to rotate their colours until each of those quadrants shows the colour drawn on the note. The drawer opens: take the harpy's talon.
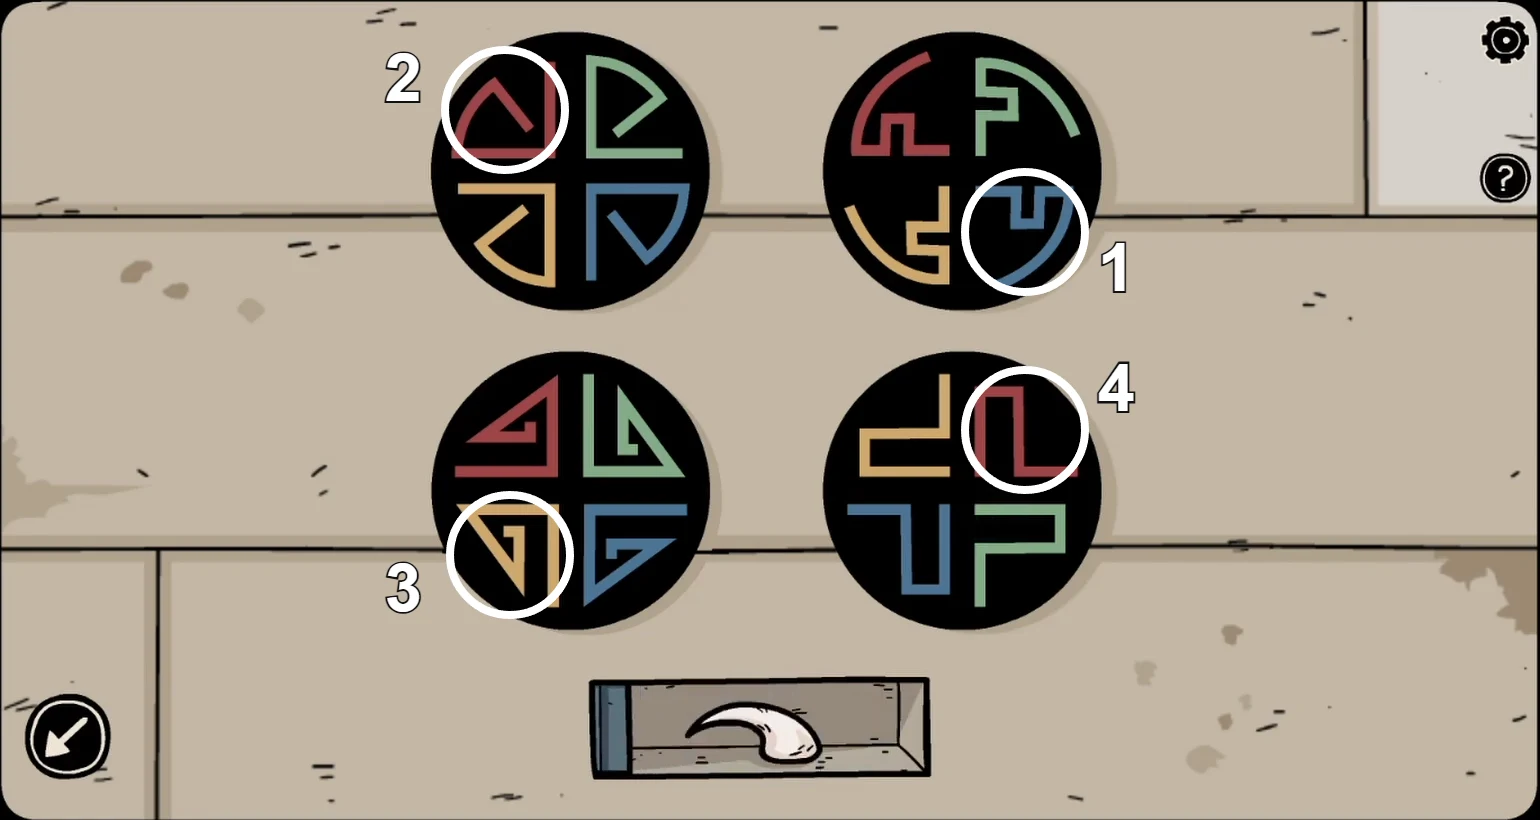
Example solution: each circled quadrant matches one note symbol in shape, direction and colour.
The winged frog and the skeleton wall
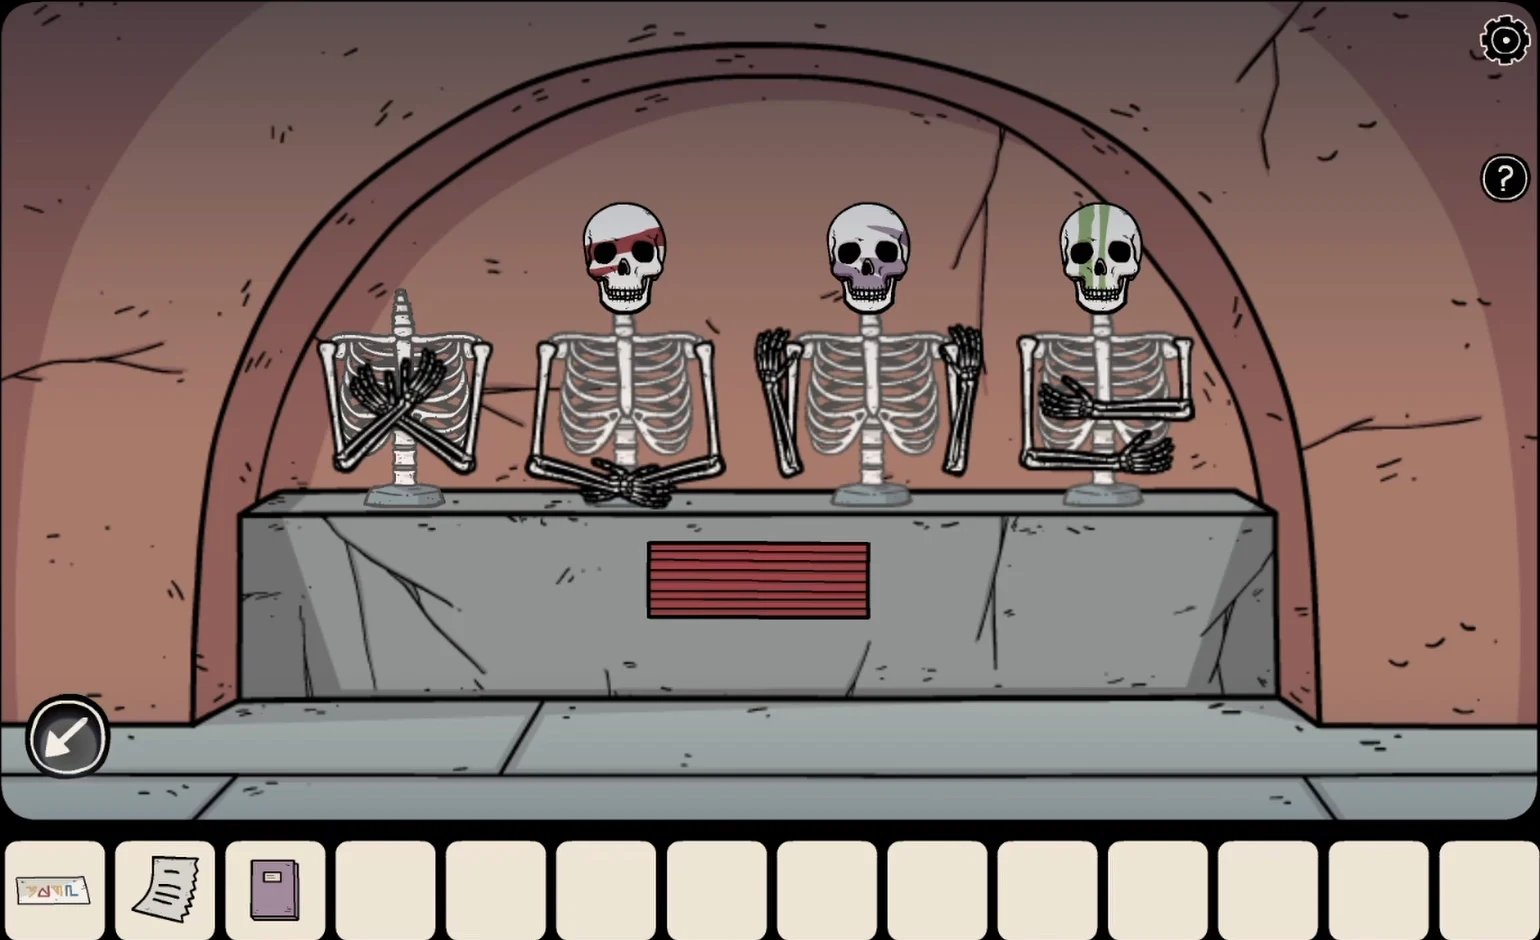
Four headless skeletons sit in an alcove in the basement, each in a different pose; one already wears a purple-marked skull. The purple book's arm-pose page decides which coloured skull goes where. Randomized: the tile directions at the end can change between games.
- At the cauldron on the basement table, add the blue feather, the red button eye and the harpy's talon, as the recipe says. Take the empty flask from the table and fill it from the cauldron to get a flask of magic potion.
- In the main room, pour the potion over the frog in the fireplace. It grows wings and flies up the chimney, knocking down the skull caught in the web: take the skull with blue markings.
- In the basement, give each skeleton the skull whose colour matches its pose on the purple book's arm page: arms crossed at the chest = blue, hands crossed low = red, both arms raised = purple, one arm across the chest and the other lower = green. Move the purple skull if it is on the wrong skeleton.
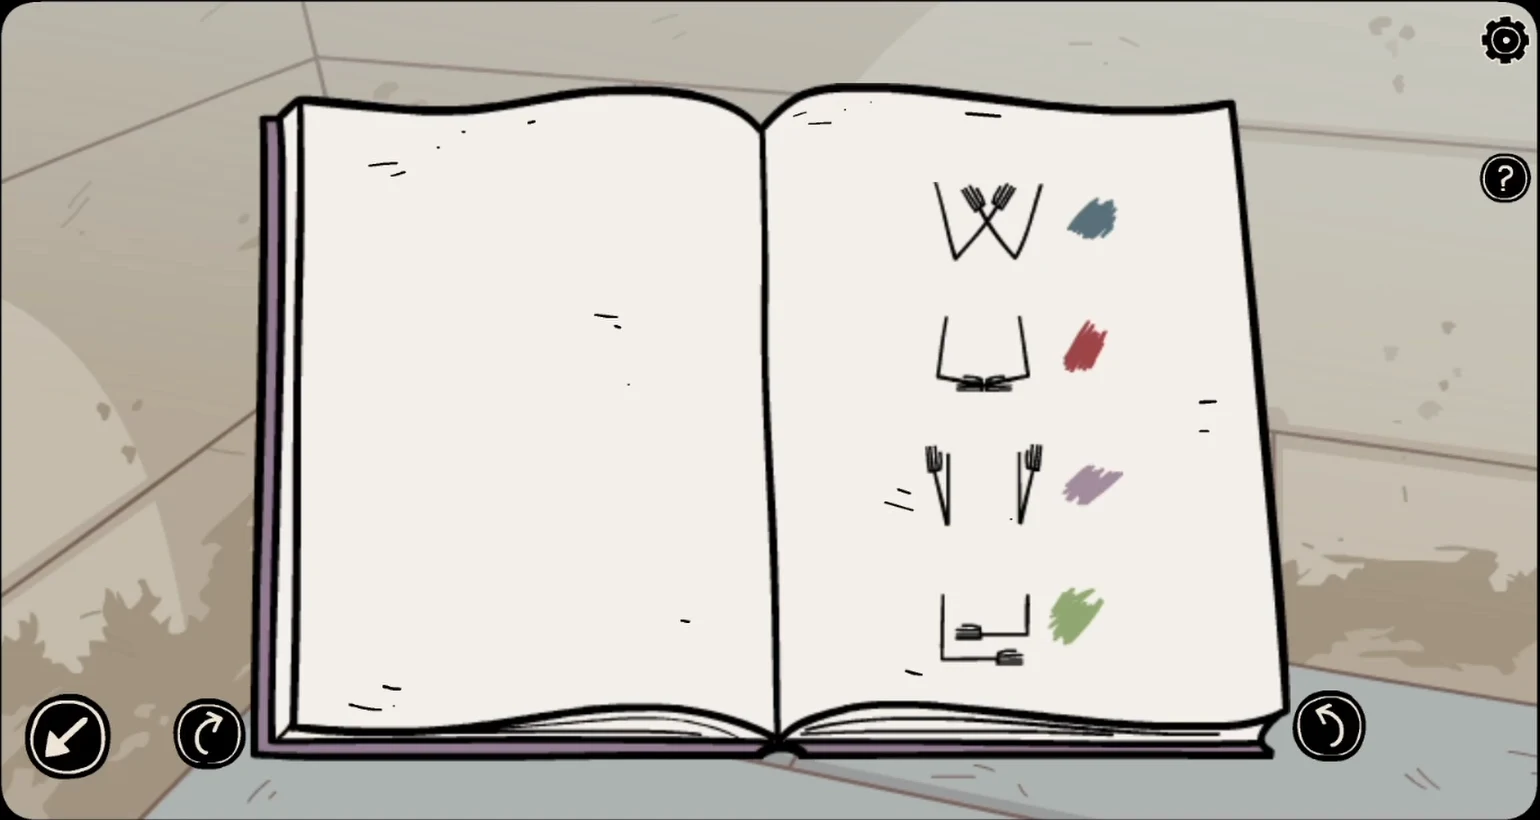
The purple book's arm-pose page: each pose's colour is the skull that skeleton needs. - The skeletons now point in different directions and a panel of four black-and-white tiles opens below them. Tap each tile until its black half points the same way as the skeleton above it. Example: up-right, left, down-right, up. The wall slides away, Bastian meets the masked demon and is cursed: when he turns 33, it will take him as its slave in Penumbra. Back in the present, Lou explains that the house hides two keys, one in each world, that can bring him back.