Bedroom: Bonsai Trimming
The bedroom has a bonsai, a dresser under a dark aquarium, a bedside table with a chessboard top, a bed, and a glass door to the balcony.
- Pick up the Wooden fish from the floor near the foot of the bed.
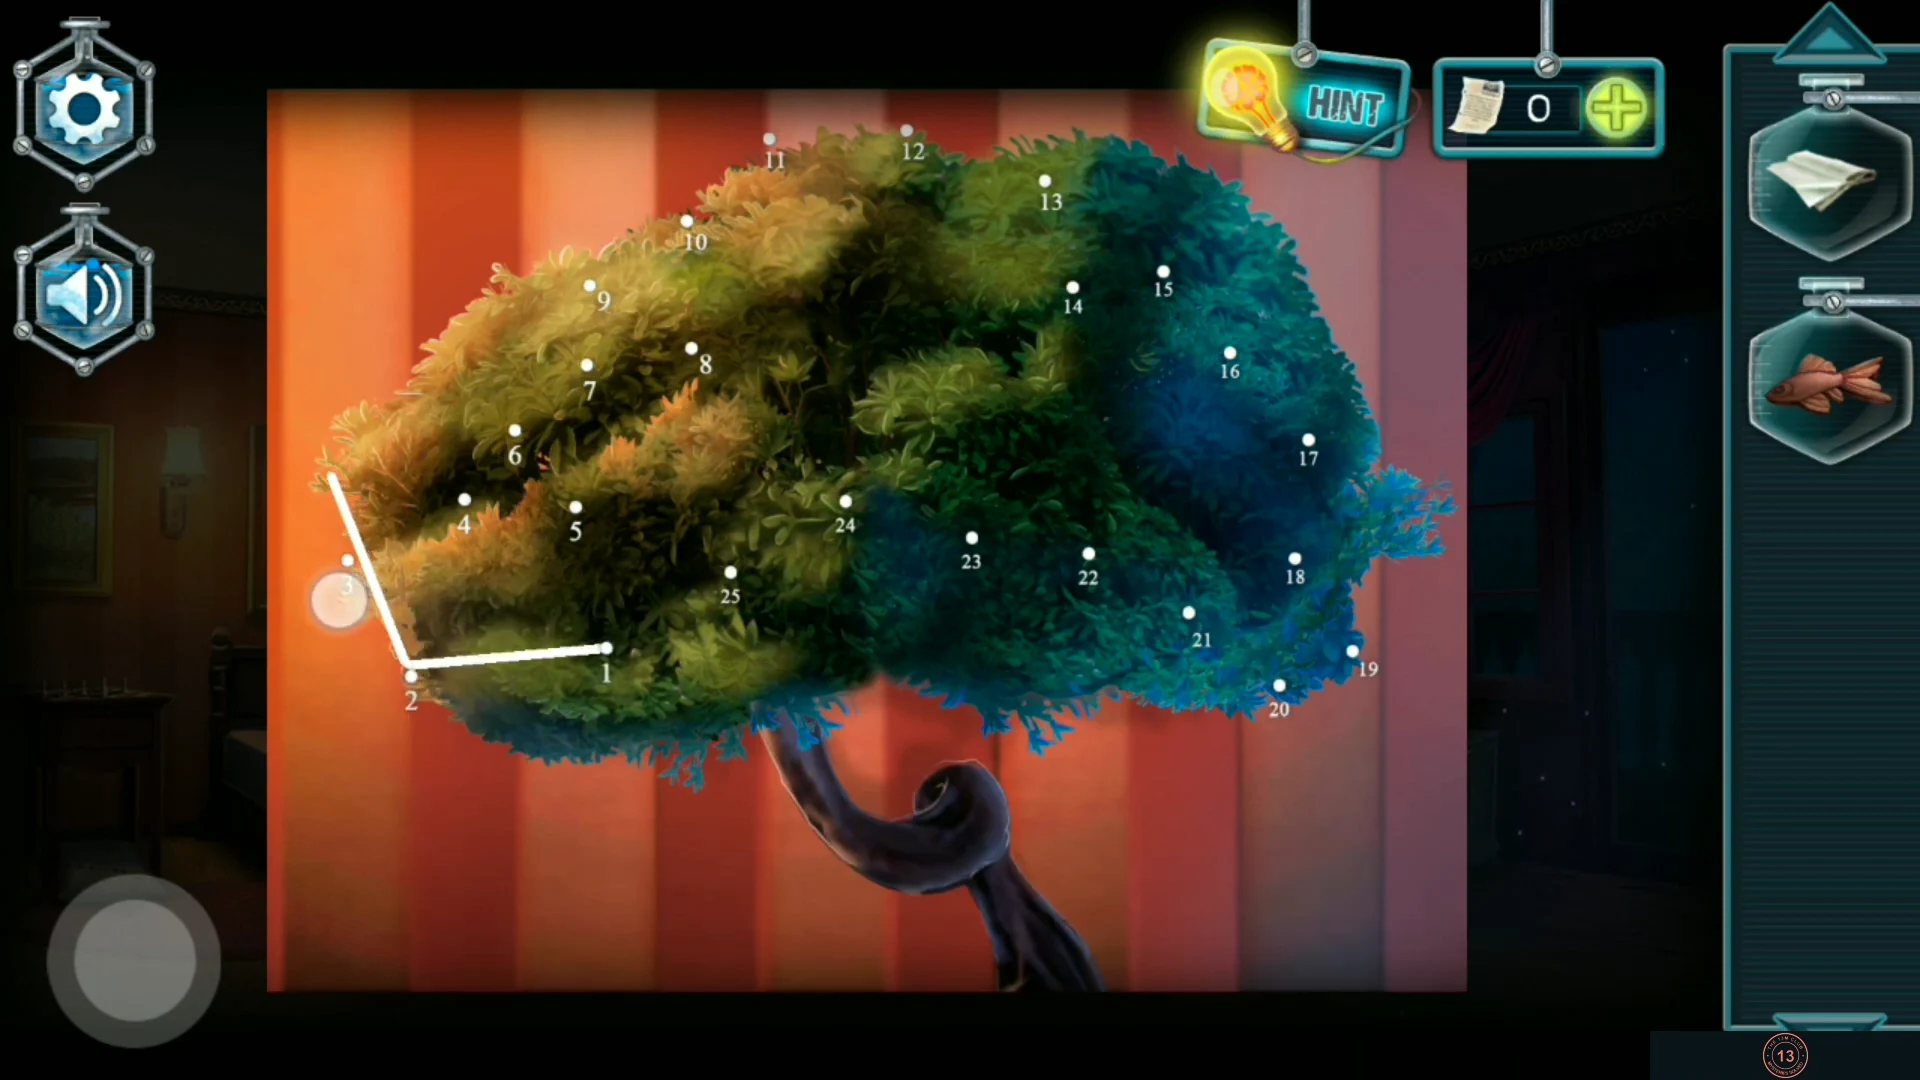
- Zoom in on the bonsai and use the trimming scheme from the back of the study photo ("Well, now I need scissors"), then use the Scissors on it. Only now do the numbered points appear on the tree. Draw one continuous line through them in order, 1, 2, 3 and so on up to 25, without lifting your finger ("Draw a continuous line through all points in the correct order without lifting your finger."). When the line is complete, the scissors trim the tree by themselves. Take the red Dresser button that is revealed among the branches.
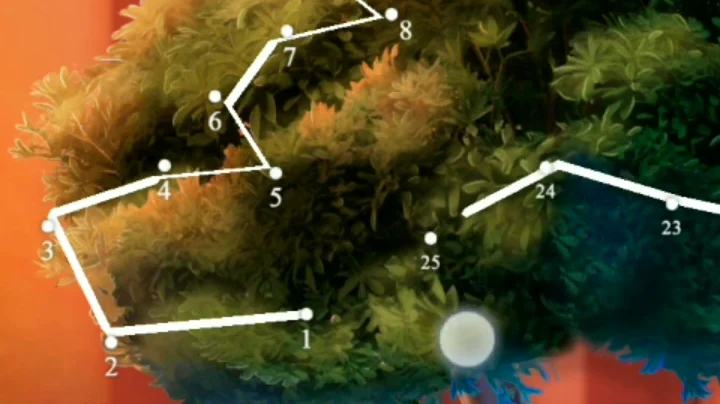
Detail: points 1 to 8 on the left, with 23 to 25 near the middle. 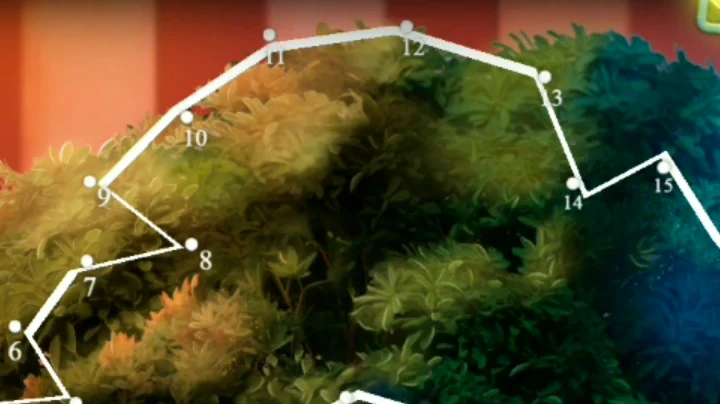
Detail: points 9 to 15 along the top. 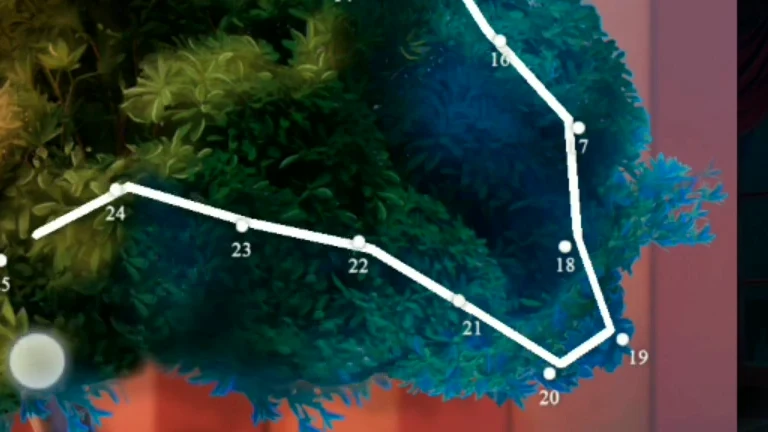
Detail: points 16 to 24 on the right, ending back near 25.
Bedroom: Dresser Button Grid
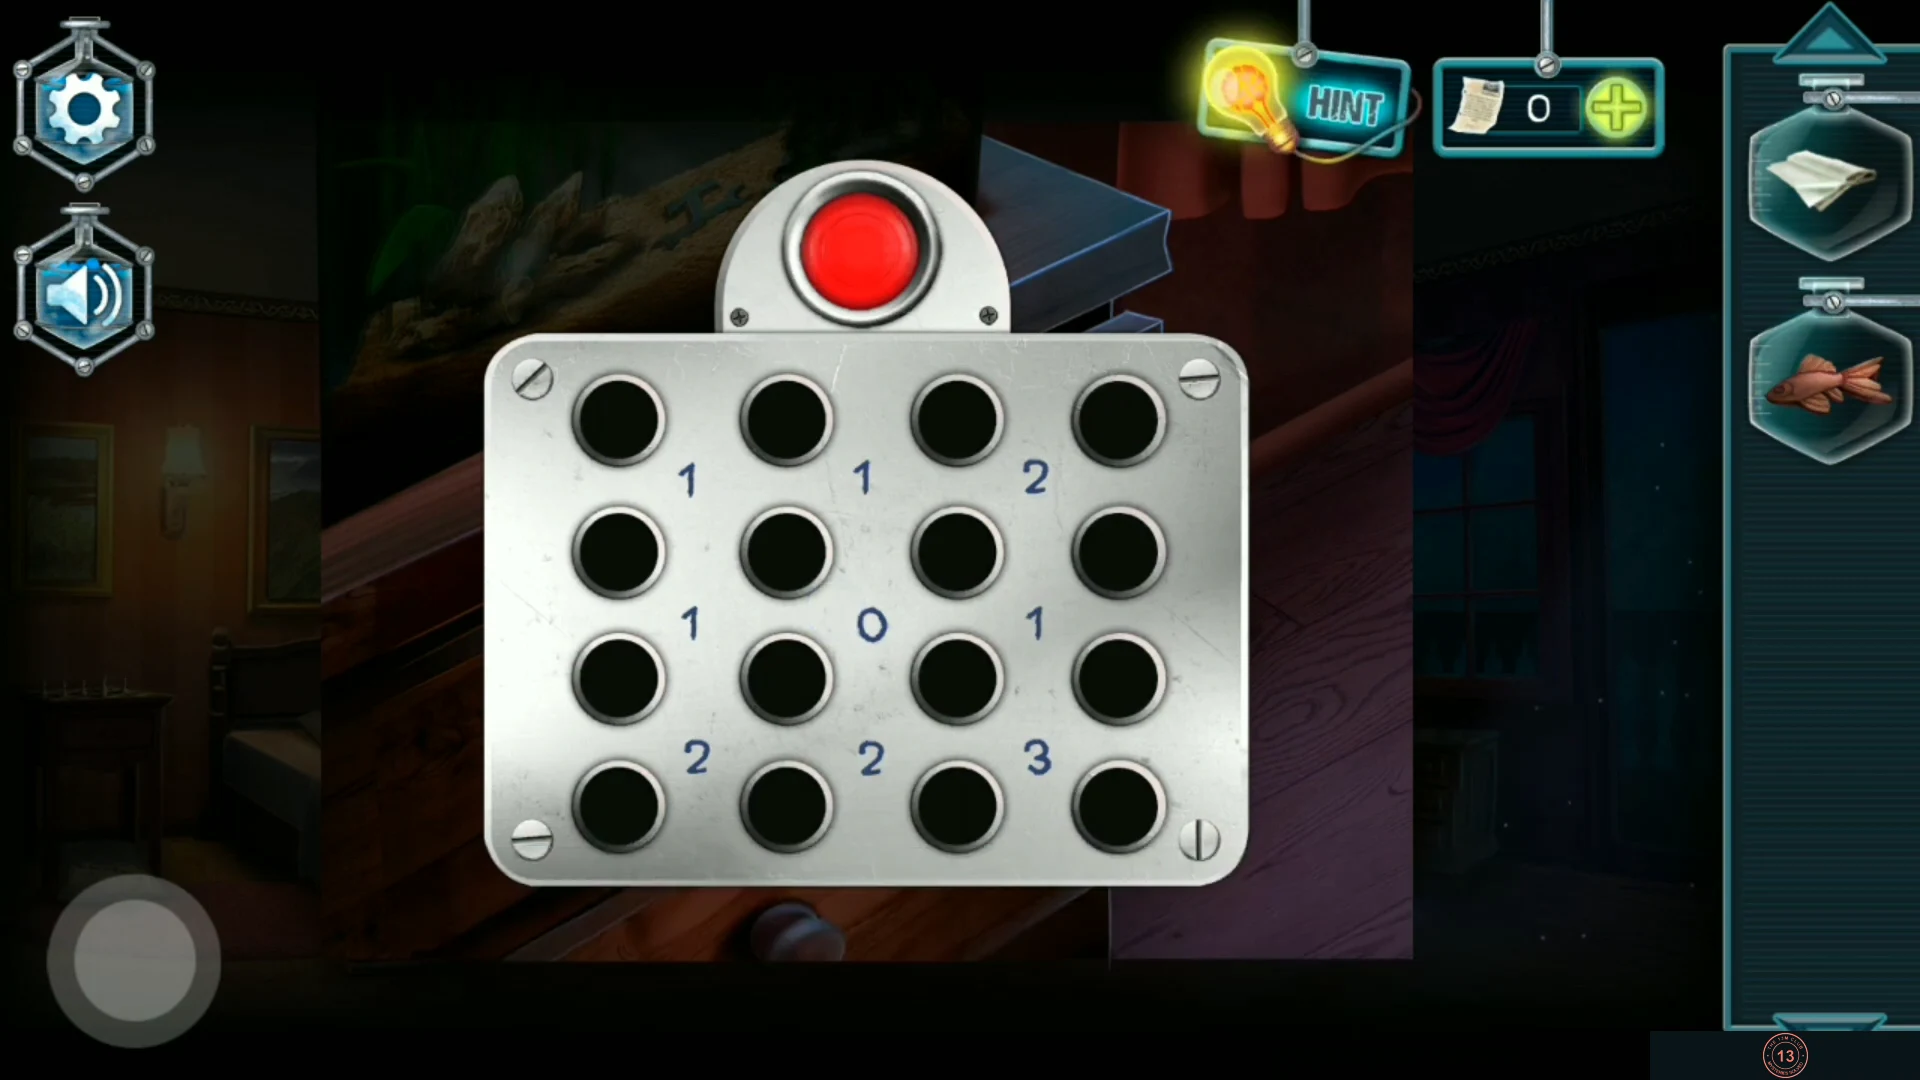
The dresser under the aquarium has a 4 x 4 grid of buttons with numbers between them ("The numbers show how many active buttons are next to them.").
- Put the Dresser button into the empty socket on the plate. Press buttons so that every number equals the count of active buttons touching it. Start with any 0 (none of its neighbours may be pressed) and the highest numbers (all or most of their neighbours must be pressed), then fill in the rest.
- The solved pattern, counting buttons from the left: top row 1, 3 and 4 pressed; second row none; third row 1 and 4; bottom row 2, 3 and 4. That is eight lit buttons. Then press the large red button above the grid to submit the pattern; the drawer opens only after this press. Inside, take the sakura Medallion and the Small rake. The drawer also holds a six-well mixer, which you will use later.
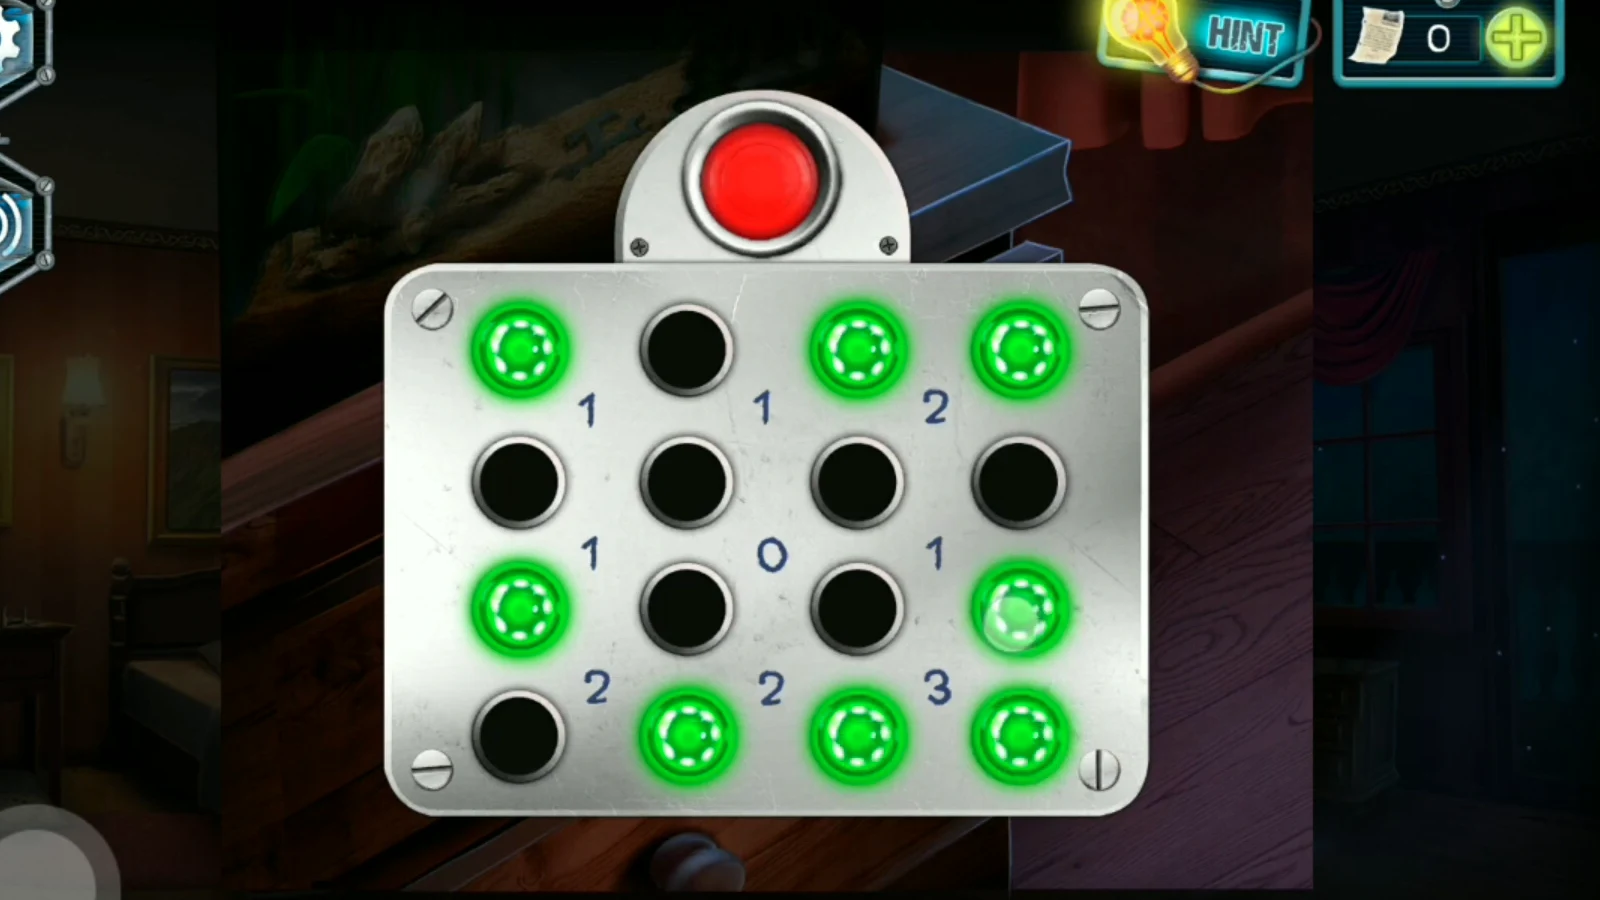
The solution pattern; press the red button to submit it.
Upstairs Corridor: Sakura Medallion Stand
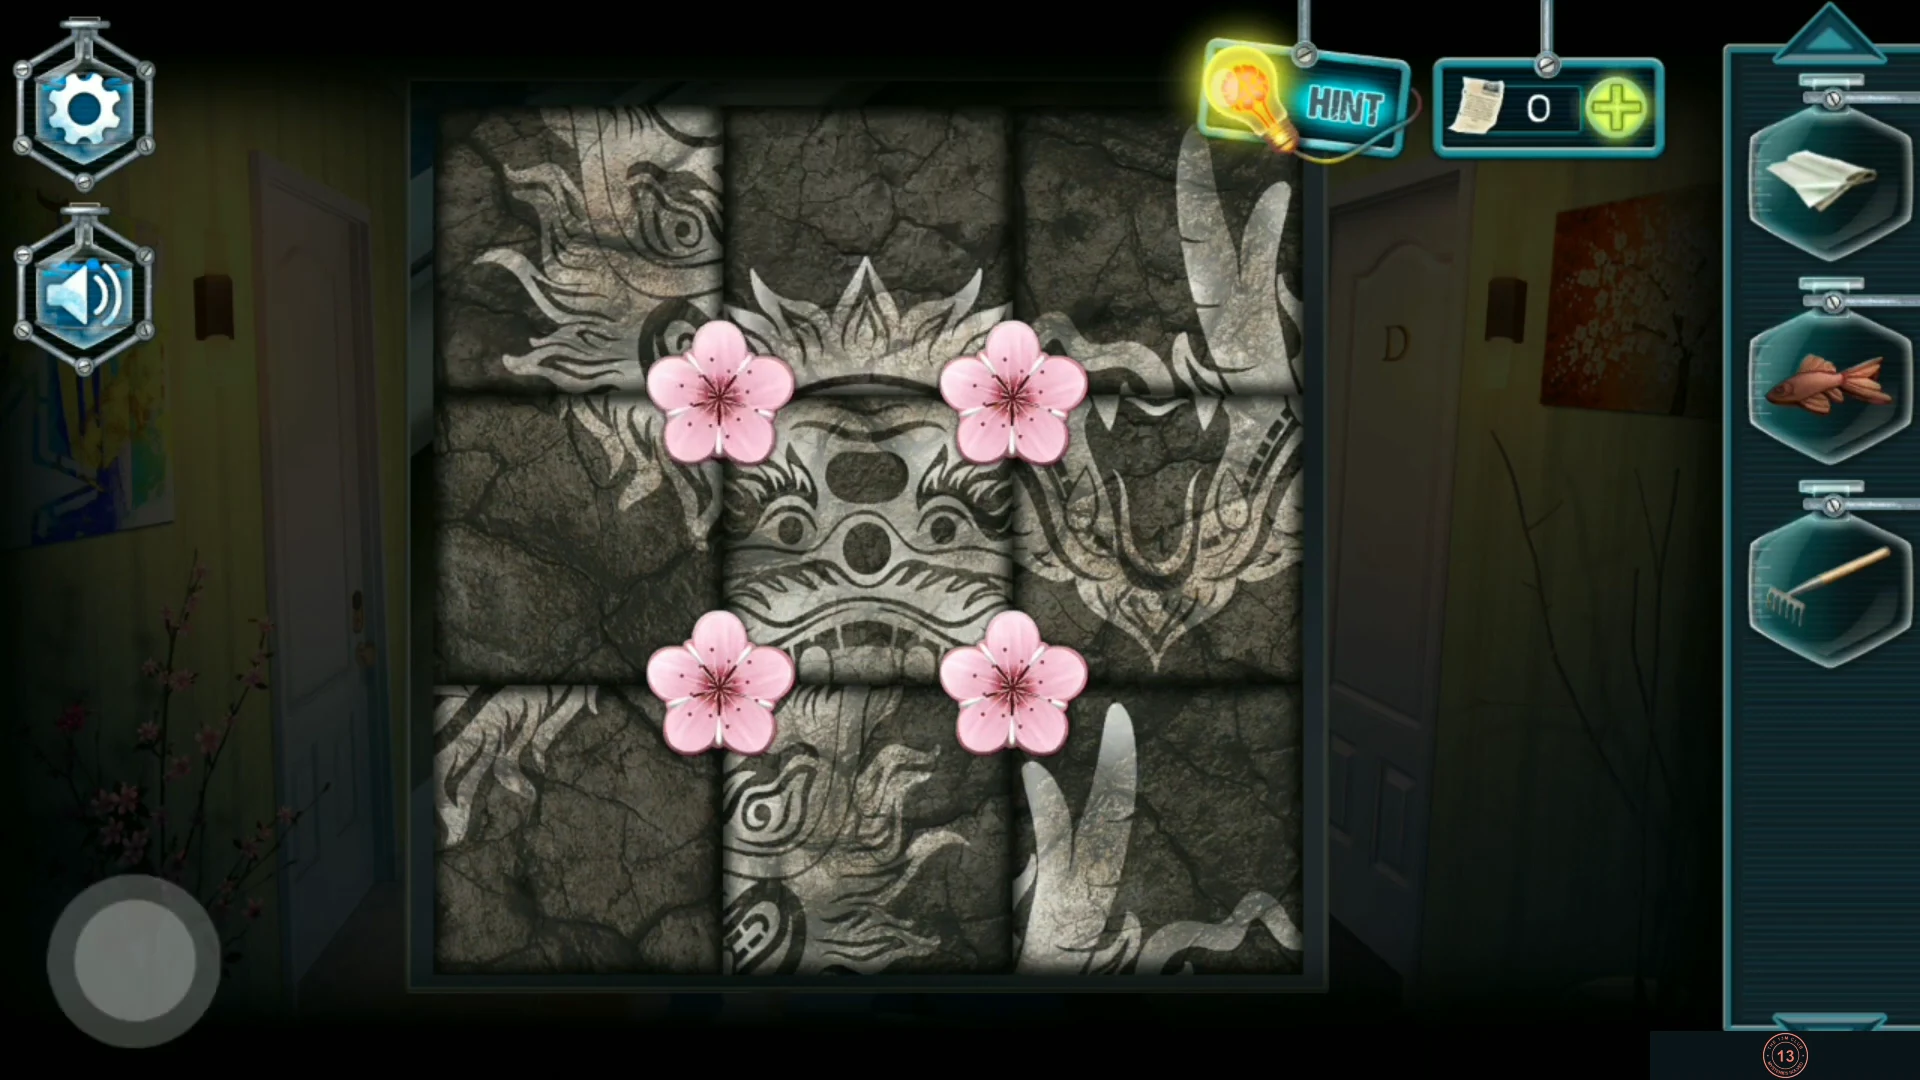
A katana stand in the corridor takes the sakura Medallion ("I am a pacifist, I don't know how to use a sword, but the katana might be of use.").
- Place the Medallion on the stand. Click the four medallions to rotate the quarters of the picture ("Click on the medallions to make the picture.") until the stone dragon face is whole. Take the Katana that appears.
Bedroom: Balcony Door and Leaves
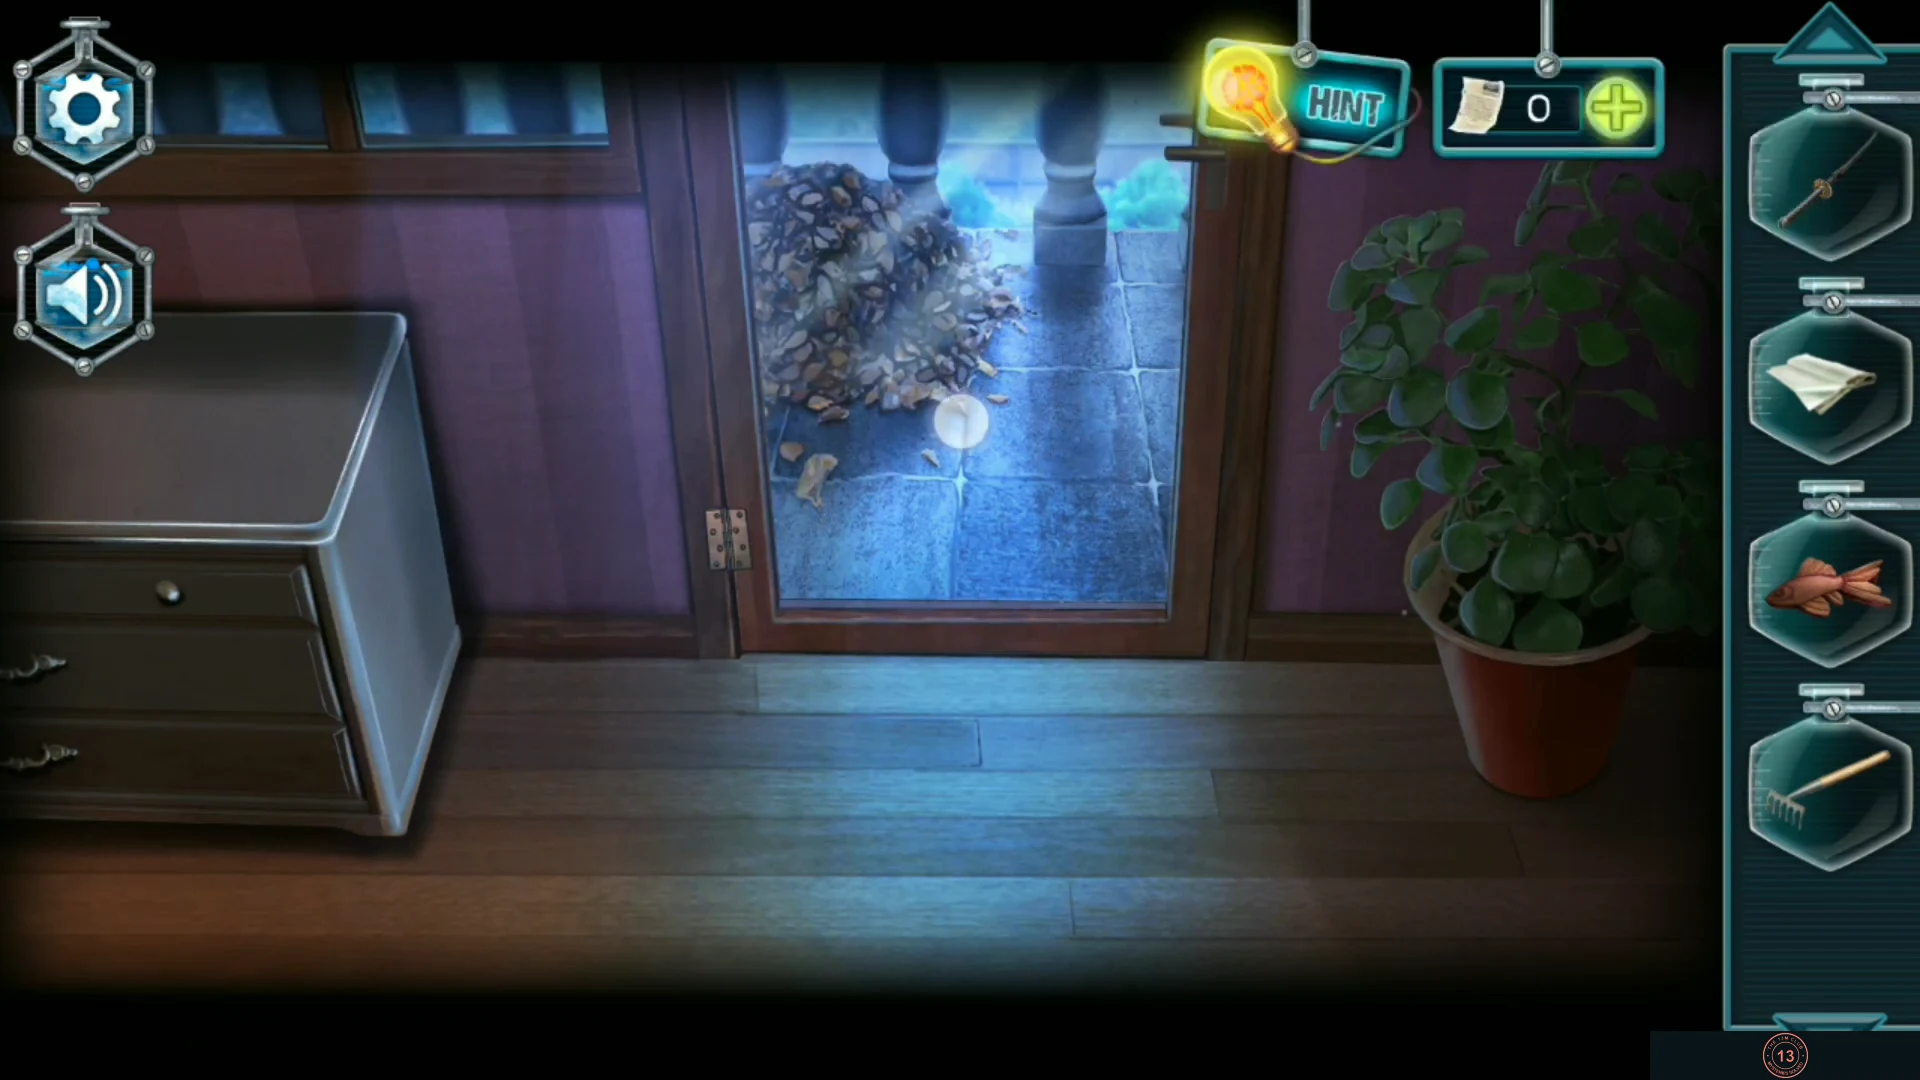
The balcony door is locked, but its lower pane is glass.
- In the bedroom, use the Katana on the lower glass of the balcony door. It shatters ("Ouch! I can cut my hands!").
- Use the Rag on the broken glass to pick up a Wrapped shard safely, then step out onto the balcony.
- Take the Pole (a long stick with a hooked end) leaning by the broken ladder. Look at the colour-mixing chart painted on top of the balcony cabinet ("I think I practiced mixing colors here."); it is the key to the mixing puzzle later.
- Use the Small rake on the pile of dry leaves at the far end of the balcony and take the Saw hidden underneath. The Pole stays in your inventory.
Balcony: Colour Block Drawer
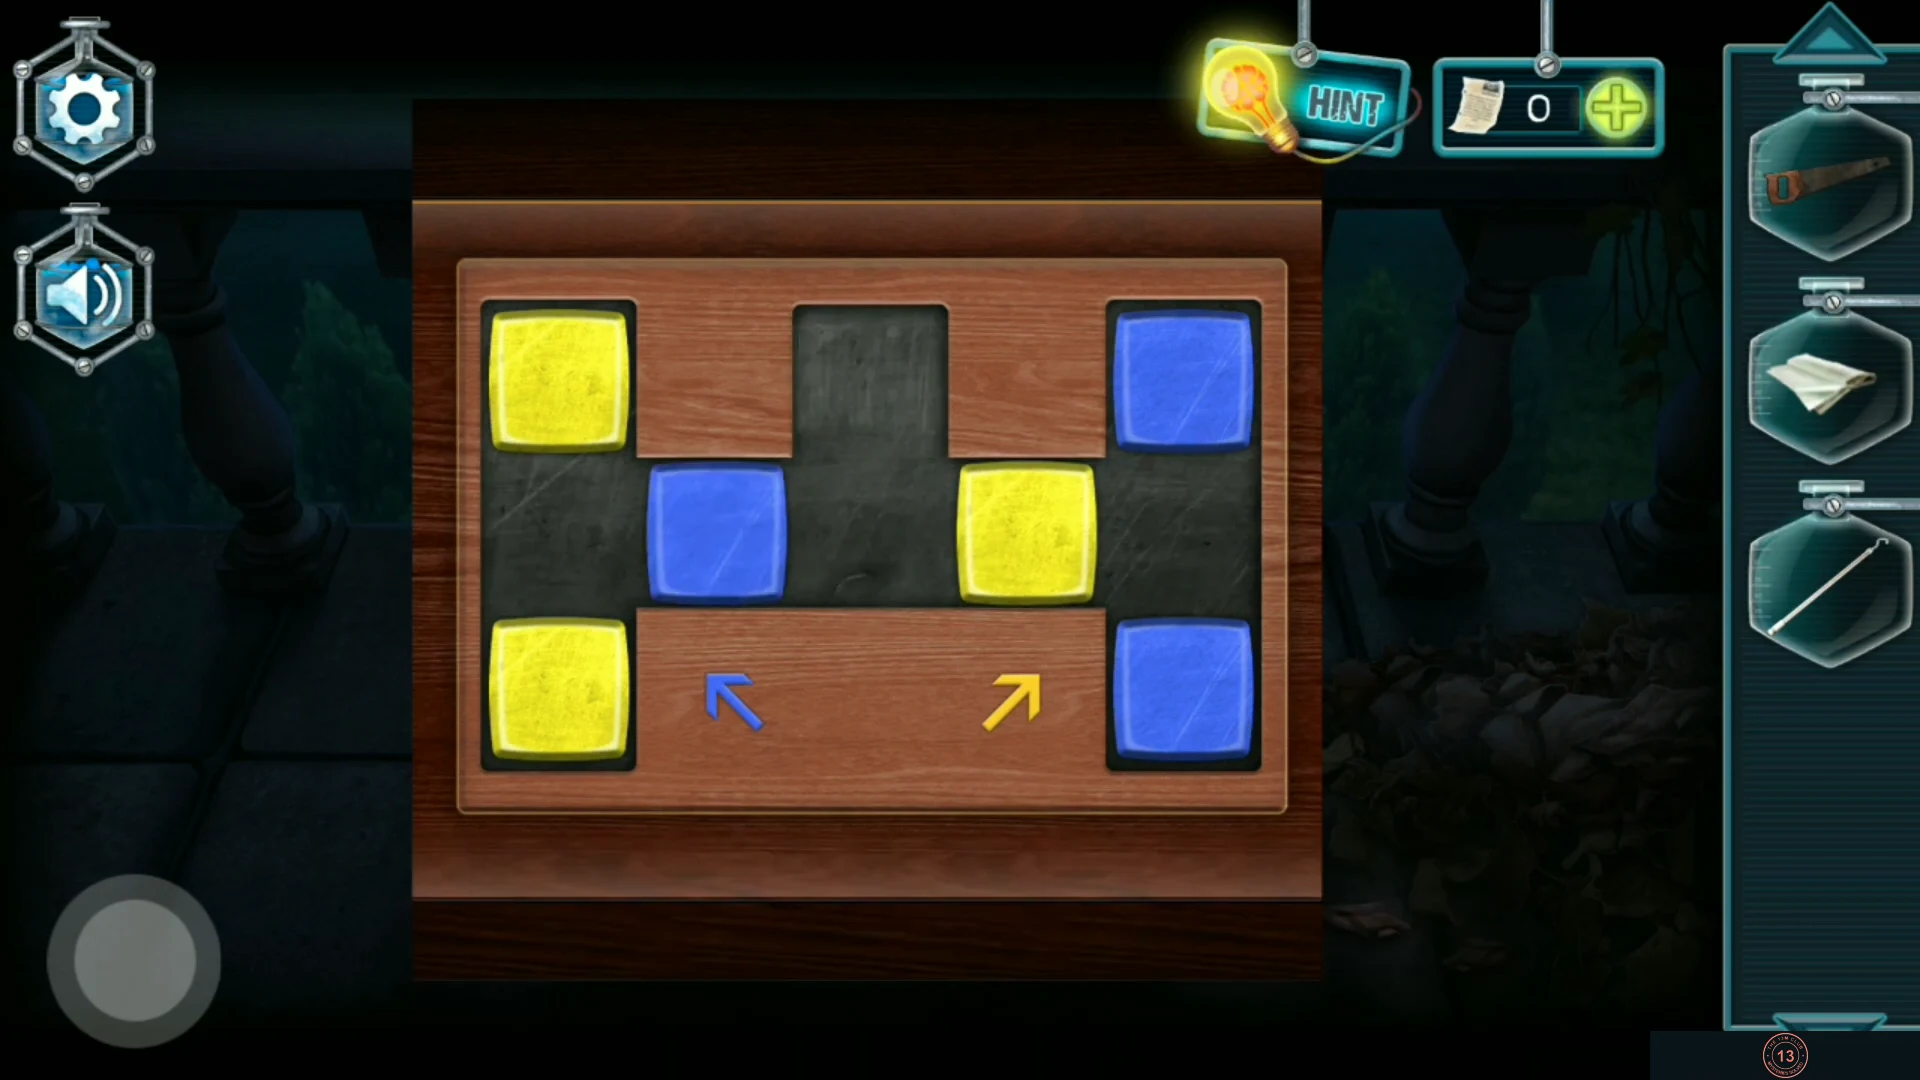
The balcony cabinet has a fish-shaped recess on its drawer and a small panel of coloured blocks.
- Place the Wooden fish in the recess. Slide the blocks ("Arrange blocks according to colors") so that all the blue blocks fill the left column and all the yellow blocks fill the right column. Use the empty space to cycle blocks past each other. Take the Fishing rod from the drawer.
Bedroom: Phosphor Mixing
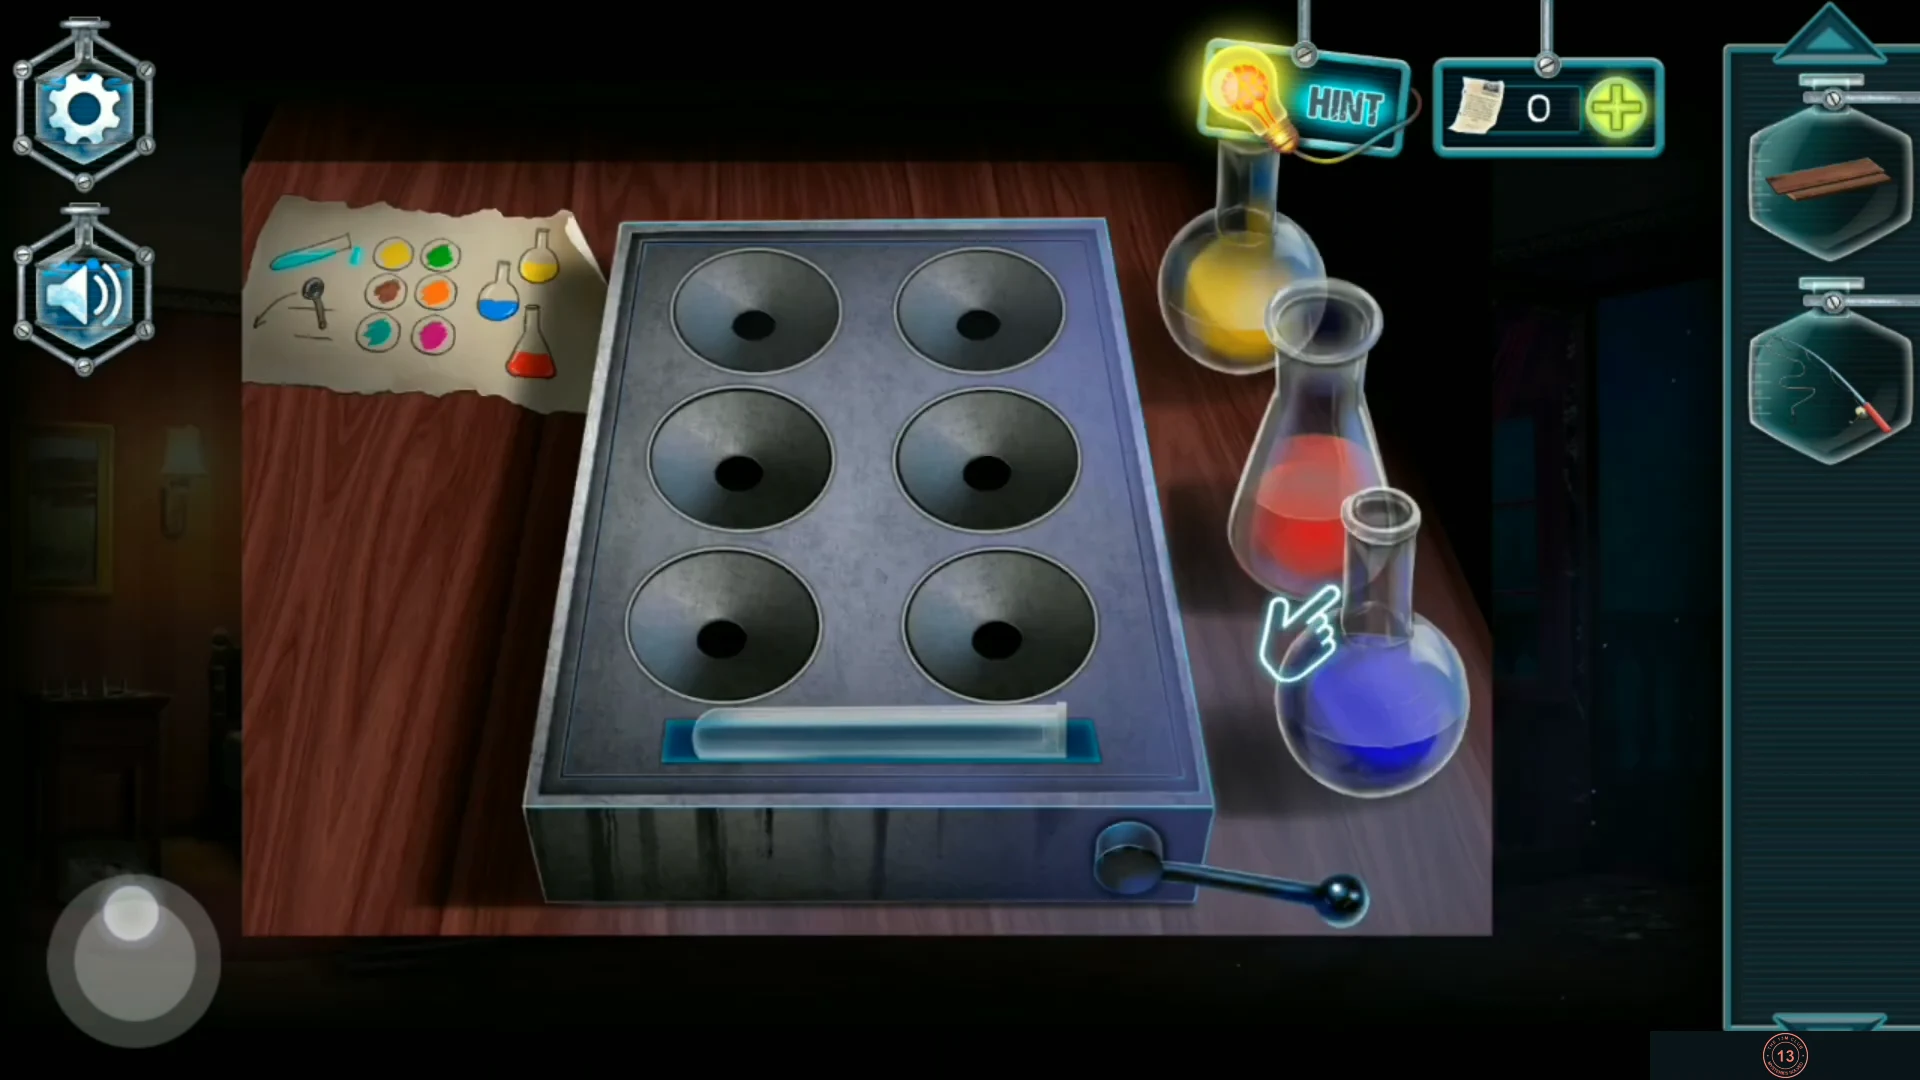
To light the aquarium you need phosphor. Find the recipe and the red ingredient, then mix colours in the dresser drawer.
- In the bedroom, tap under the bed. Move the boxes aside and use the Pole to drag out the flask of red liquid.
- Zoom in on the pillow with a stitched seam at the head of the bed, next to the chessboard table, and cut it open with the Wrapped shard. Take the recipe: six coloured circles plus a red flask.
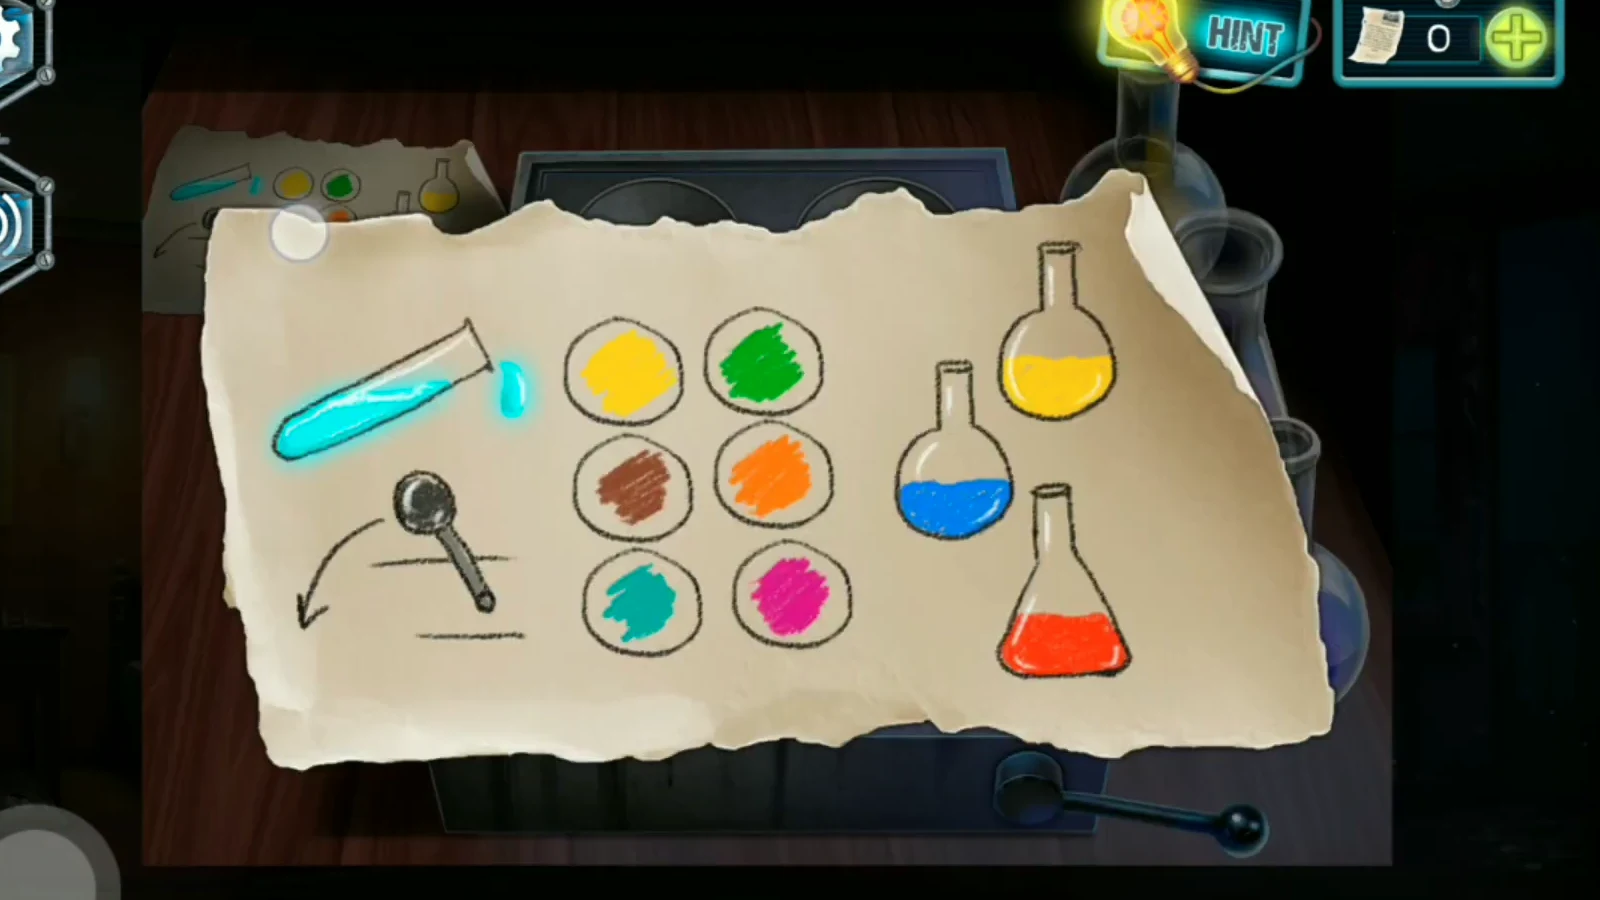
The recipe from the pillow: the six colours to mix. - Open the mixer in the dresser drawer and place the recipe and the red flask beside the yellow and blue flasks ("Mix the liquids to make the colors from the recipe. When they're ready, pull the handle."). Each tap of a flask pours one measure into the chosen well.
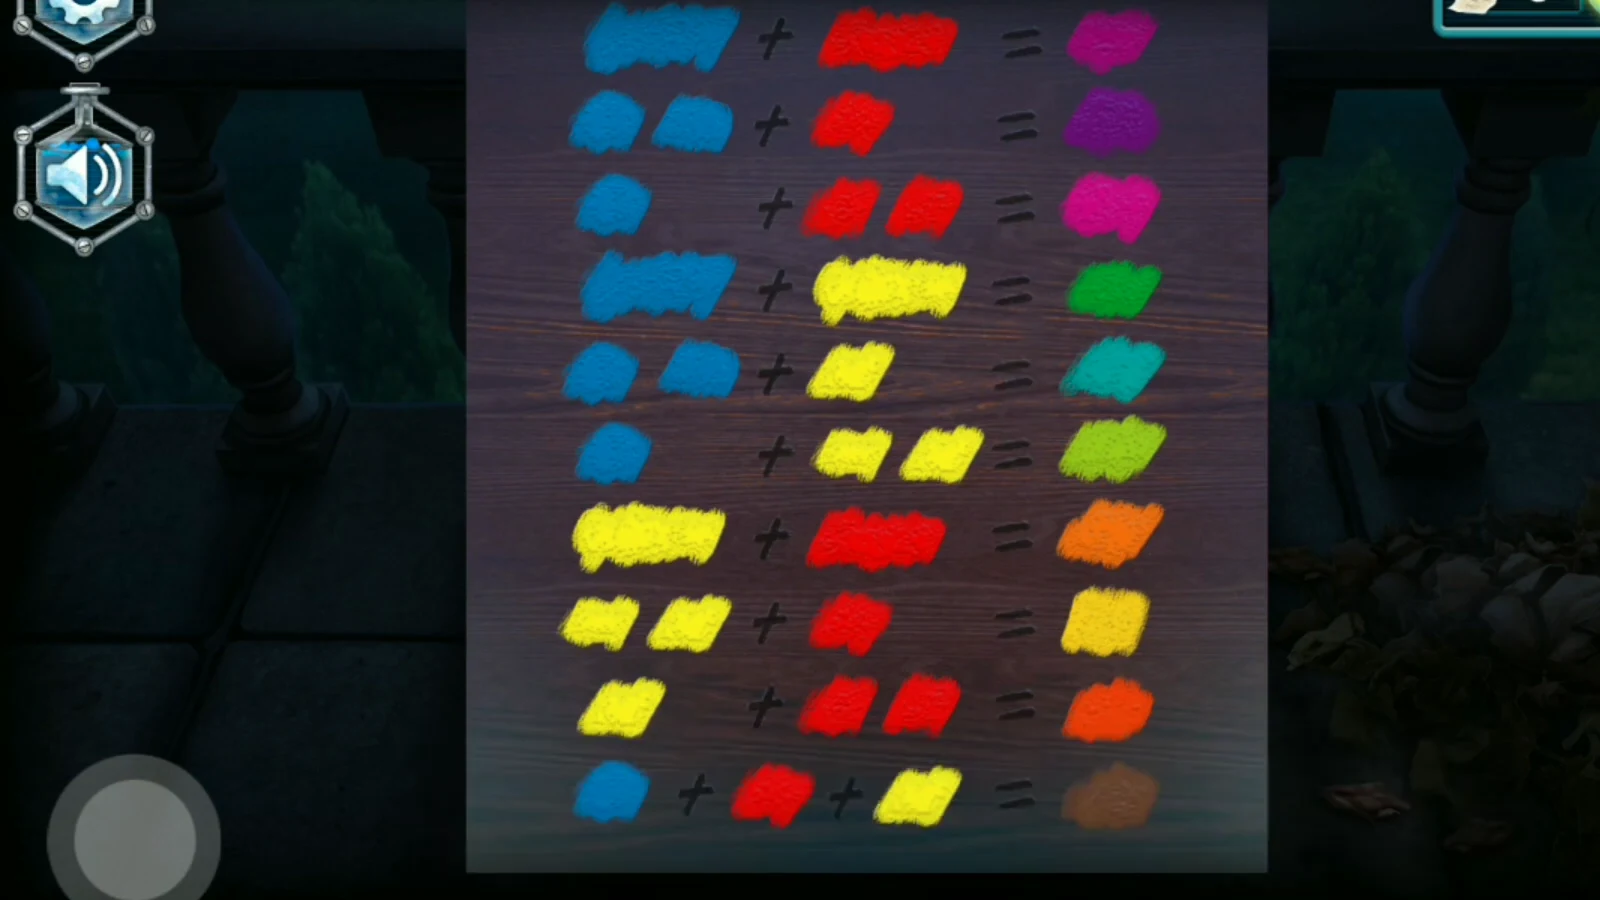
The balcony chart: a short smear is one pour, a long smear or a pair is two. - Use the balcony chart to work out each colour: on the chart a short smear is one measure, and a long smear or a pair of smears is two. Fill the wells to match the recipe: top left yellow (1 yellow); top right green (2 yellow + 2 blue); middle left brown (1 yellow + 1 red + 1 blue); middle right orange (2 red + 2 yellow); bottom left teal (2 blue + 1 yellow); bottom right magenta (2 red + 1 blue). Watch each well change colour as you pour so you can check it against the recipe. Pull the handle when all six match and take the Phosphor.
Bedroom: Aquarium
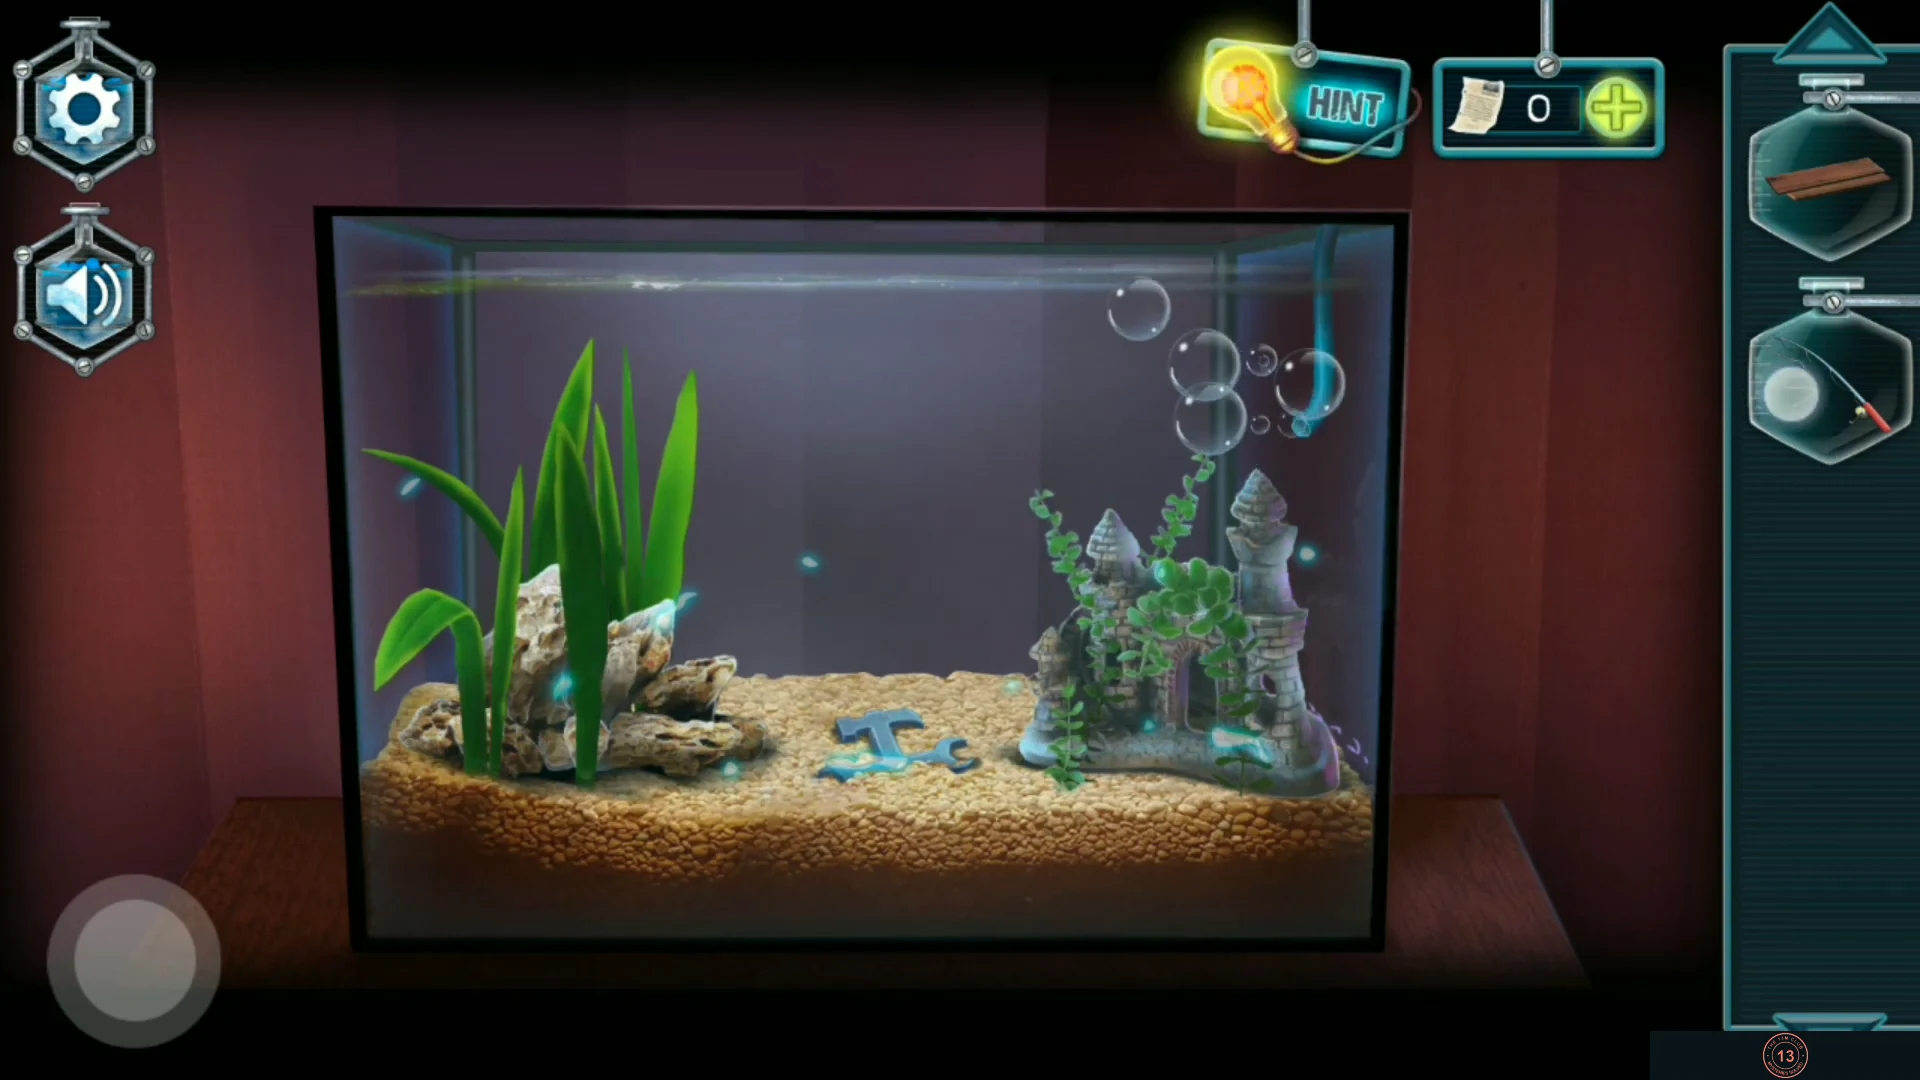
Something lies at the bottom of the dark aquarium above the dresser.
- Pour the Phosphor into the aquarium to light it up. Use the Fishing rod on the tank and twist the reel handle to lift the object from the bottom. It is the Piece from suitcase, a cross-shaped hammer-and-wrench piece.
Garden: Tool Compartment and Planks
The hammer-and-wrench piece fits the carved stone slab beside the roses in the garden.
- In the garden, zoom in on the stone slab by the rose bed and place the Piece from suitcase in the matching recess. The slab opens; take the Bungee cord, the Nails and the Hammer.
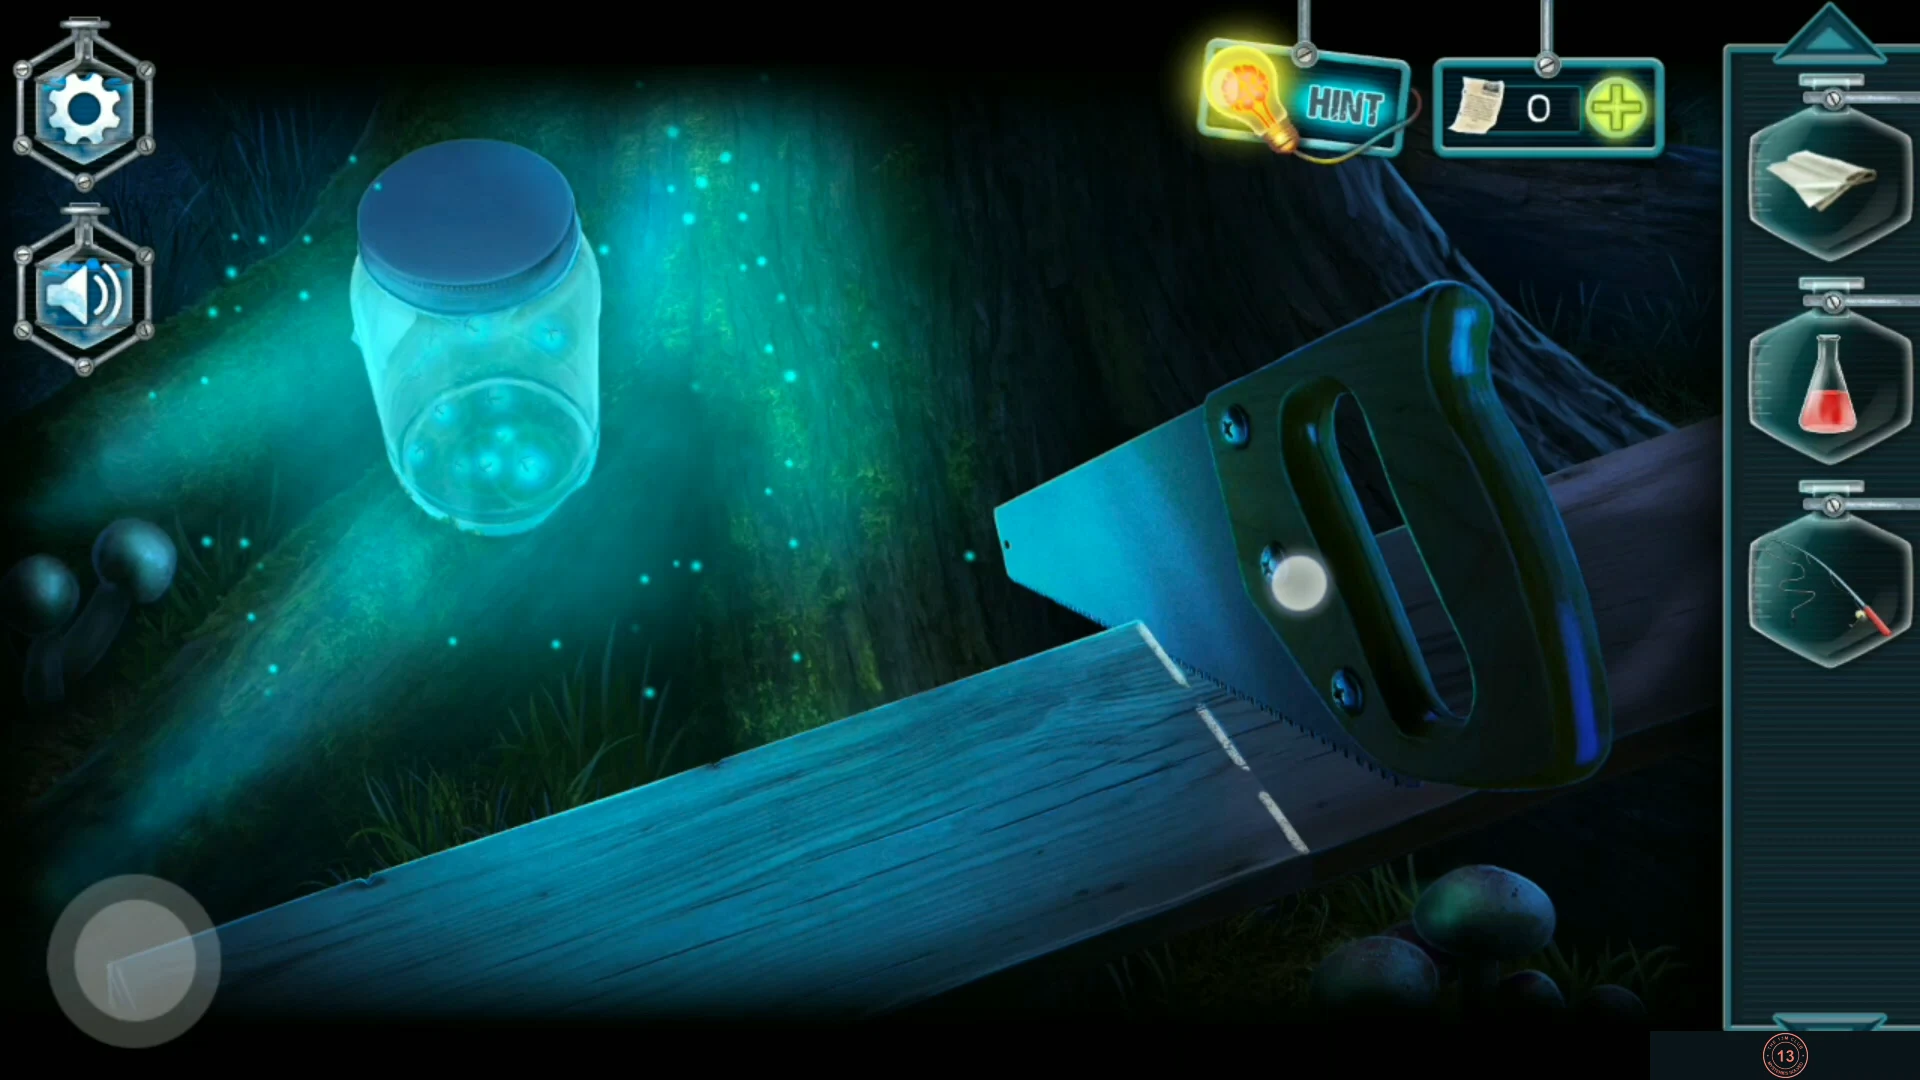
- Tap the plank beside the firefly jar under the big tree and use the Saw ("Tilt your phone to align the board with the notches. Hold the saw with your finger to start sawing."). Tilt the device until the board lines up with the notches, then hold the saw to cut along the line. Take the Planks.
Balcony: Ladder Repair
The ladder at the end of the balcony leads to the attic but is missing its rungs.
- Combine the Hammer with the Nails. On the balcony, put the Planks on the broken ladder and use the hammer with nails to fix each rung in place. Climb up into the attic.