Behind the Brick Wall: The Piano
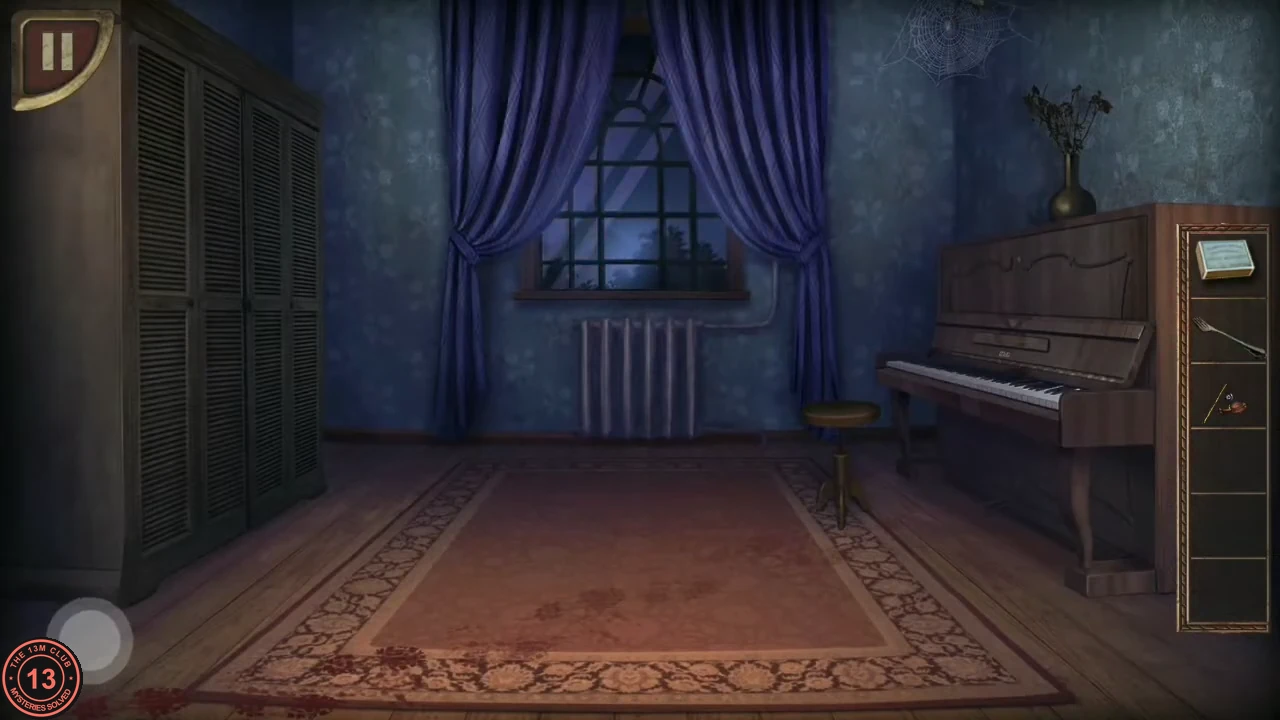
Go back upstairs to the child's bedroom and break through the wall behind the poster.
- Use the hammer on the flimsy brick patch beside the desk. Climb through the hole: "ANOTHER CRIME SCENE."
- Turn to the piano and zoom in on the keyboard. Fingerprints of different darkness mark white keys 1, 2, 4, 6 and 7 (counting from the left). Press the printed keys from the faintest print to the darkest: 7, 6, 2, 4, 1.CODE7-6-2-4-1
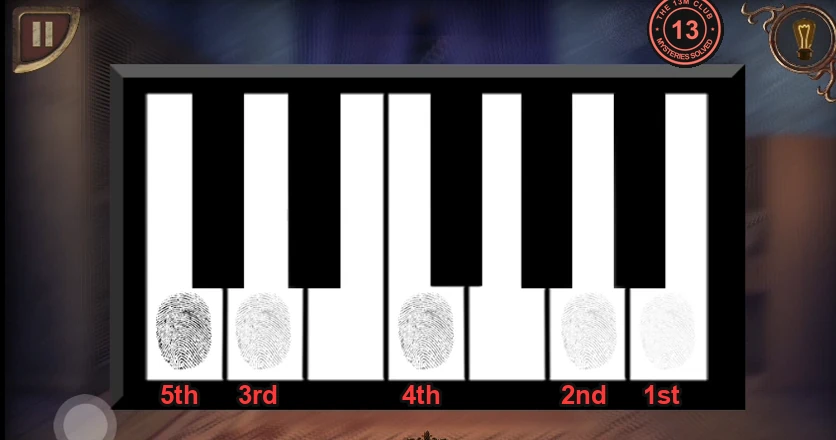
Press the printed keys from faintest (1st) to darkest (5th): keys 7, 6, 2, 4, 1. - A skeleton falls out of the wardrobe. Take the BRASS KEY beside its hand.
The Crime-Scene Bedroom: The Matchstick Equation
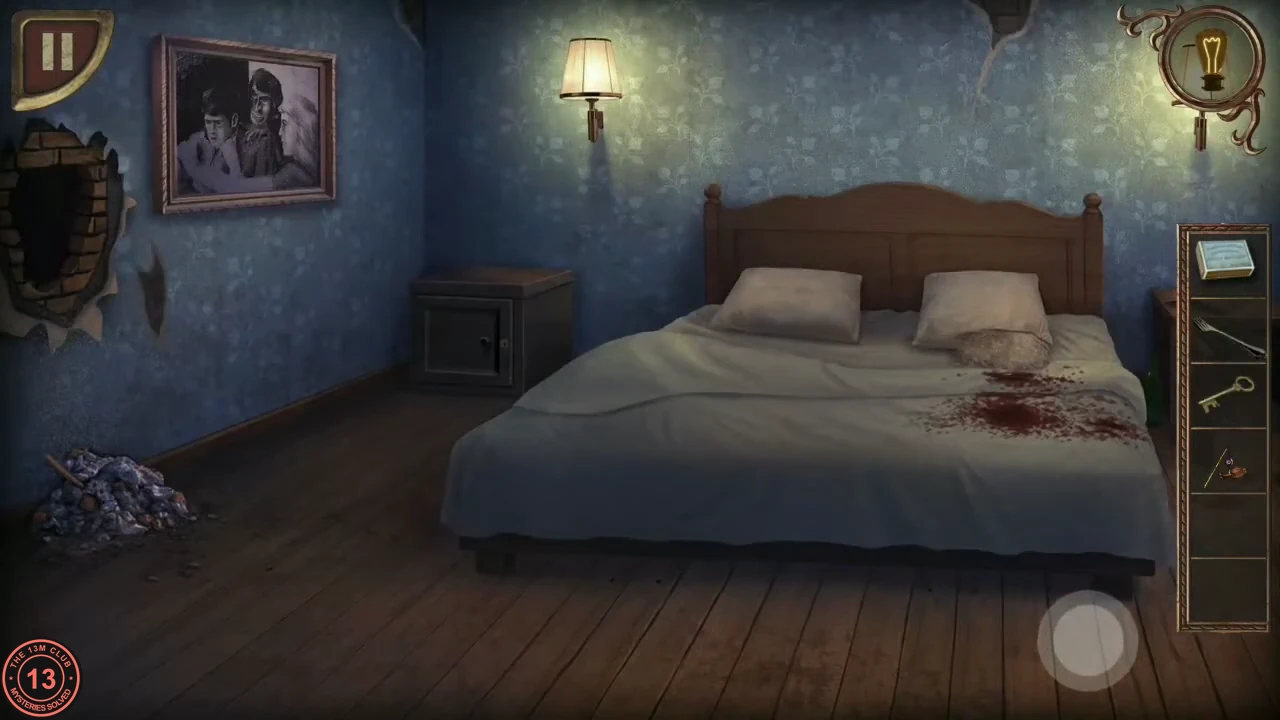
The nightstand by the blood-stained bed hides a matchstick puzzle.
- Use the brass key on the nightstand to the left of the bed and tap inside. A panel marked "=1 g Made in Yougoslavia" has five empty hollows.
- Use the MAGIC MATCHES on the panel. They form the false equation III - II = IV.
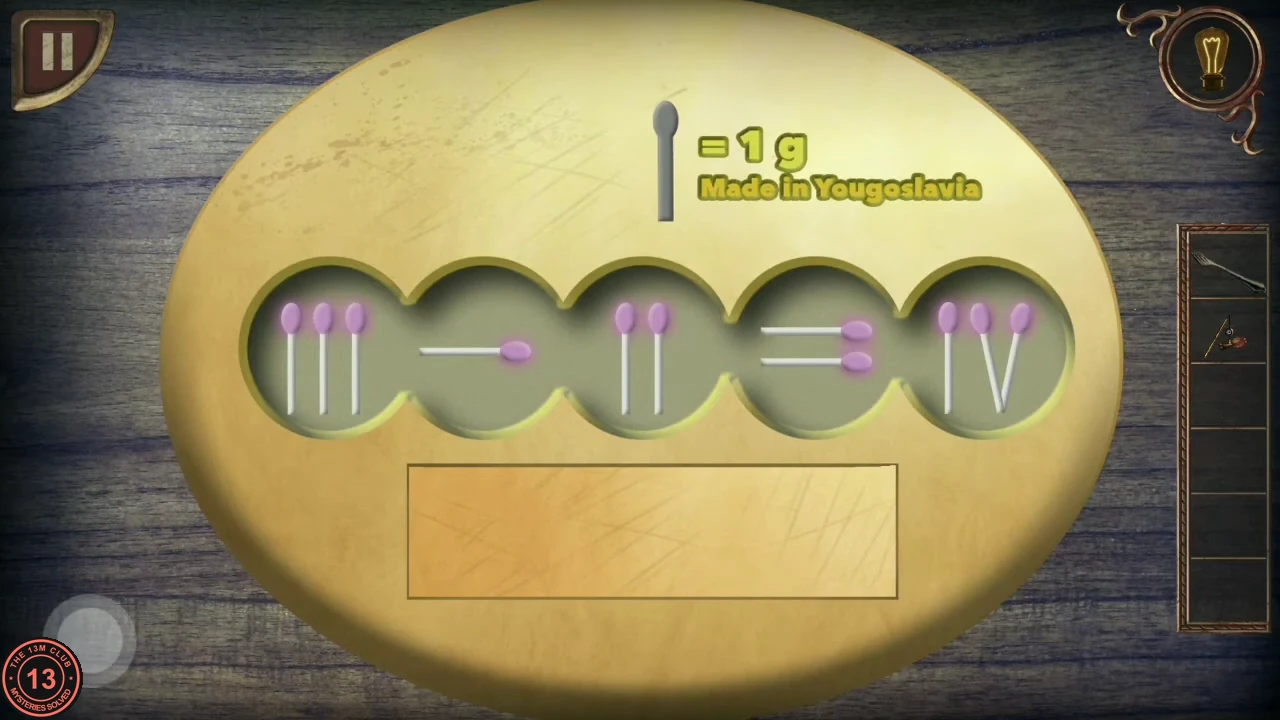
The starting equation III - II = IV. - Move one match: take the upright stick from IV and lay it vertically across the minus sign to turn it into a plus. The equation becomes III + II = V and the drawer opens; take the SMALL KEY.
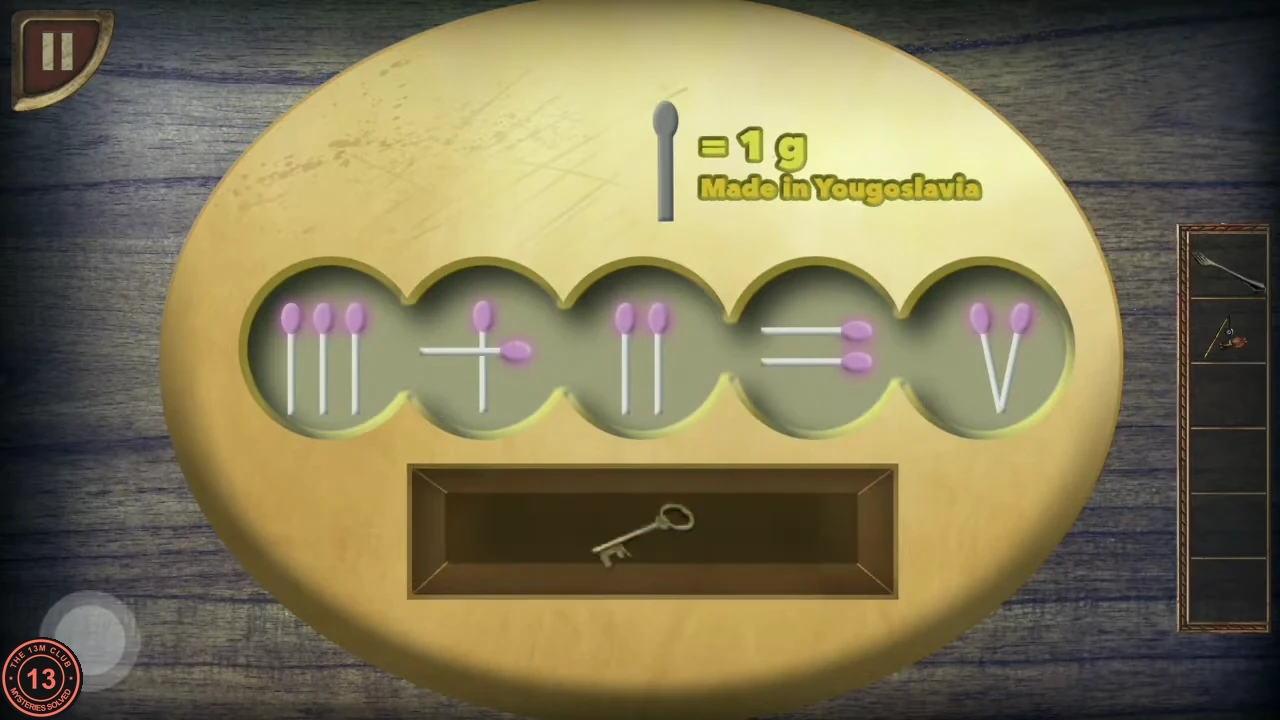
Solved: III + II = V, and the small key appears.
The Kitchen and Torture Room: Building a Long Hook
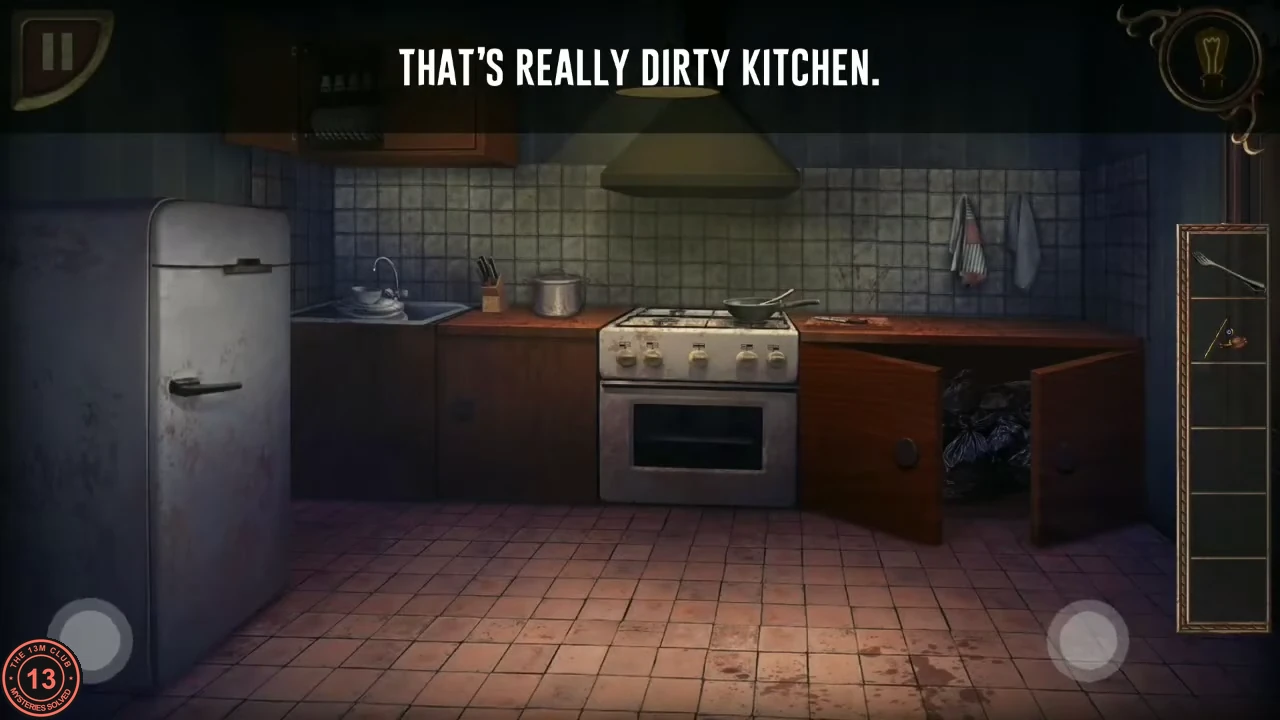
The small key opens the upstairs door that refused the gold key.
- Return to the upstairs hallway and use the small key on the near left door to enter the kitchen: "THAT'S REALLY DIRTY KITCHEN."
- Open the lower cabinet just left of the stove and take the GARDEN SCISSORS, then take the TAPE from the wall cabinet at the upper left. The fridge only holds an unpleasant surprise.
- Turn around with the turn control at the bottom left to face the torture room. Tap the pile of clothes on the floor repeatedly until you uncover a METAL STICK.
- In the inventory, combine the fork with the metal stick, then add the tape to make a long tool with the fork taped to the end.
The Hallway Curtain: The Hanging Man
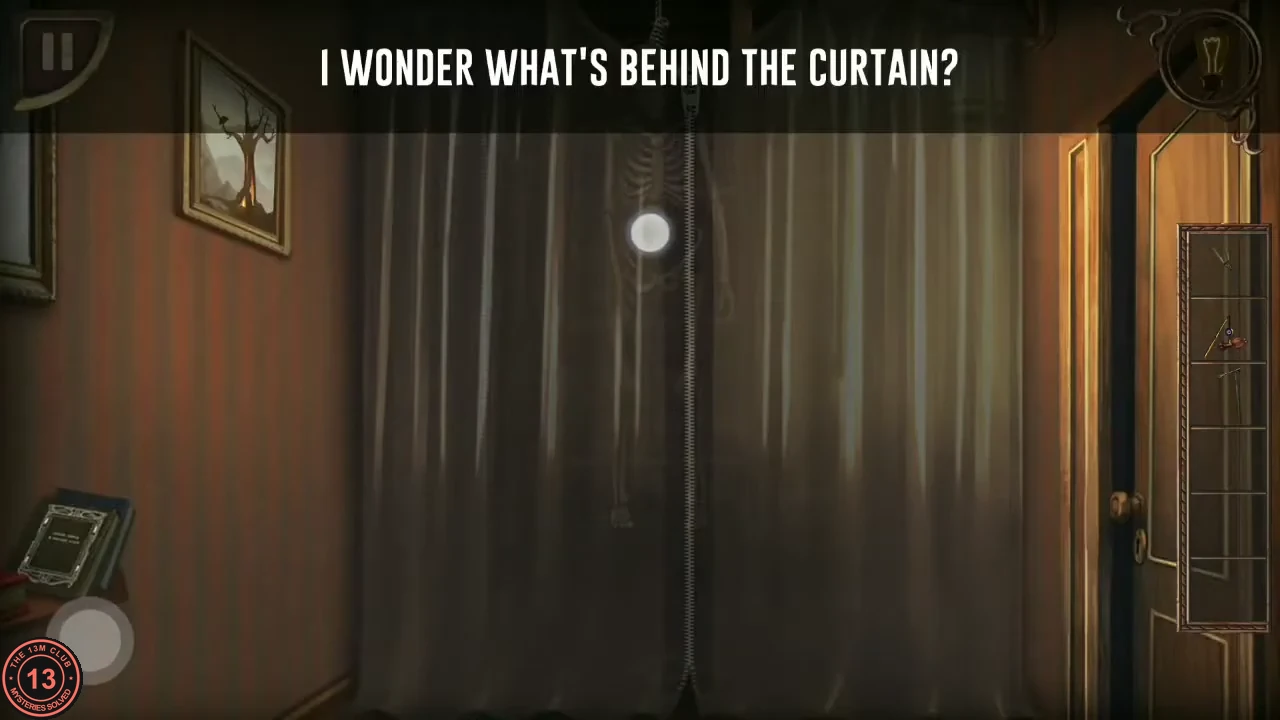
A curtain hangs across the far end of the upstairs hallway.
- Walk to the curtain ("I WONDER WHAT'S BEHIND THE CURTAIN?") and use the long tool on the zipper at its top. It opens on a hanging skeleton: "THIS GUY DISTURB ME."
- Use the garden scissors on the rope; the skeleton drops. Climb the ladder to the attic.
The Attic: The Doberman and the Gate Keypad
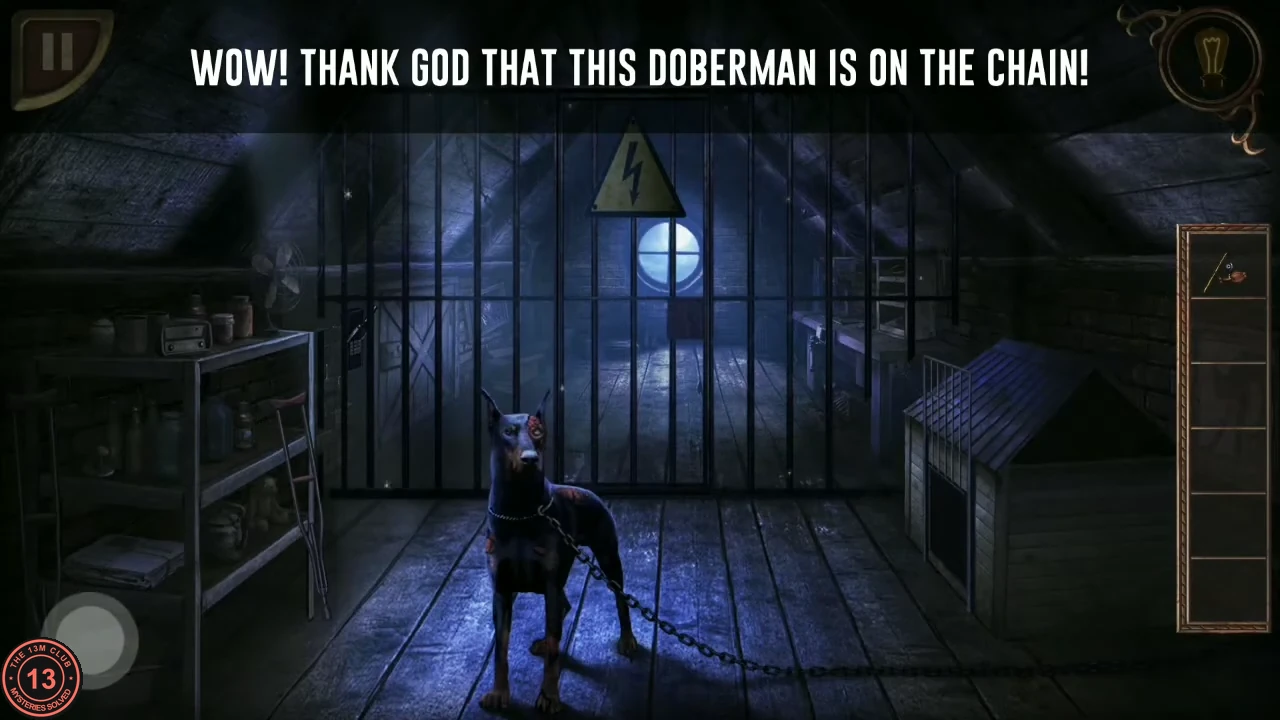
"WOW! THANK GOD THAT THIS DOBERMAN IS ON THE CHAIN!" A barred gate with an electrical warning sign blocks the rest of the attic. Its code keypad sits behind the bars, so you need something long to press the keys.
- Give the meat with the amulet to the Doberman. It retreats into its kennel.
- Tap the kennel to drop its barred door shut.
- Take the METAL CRUTCH leaning against the front right corner of the metal shelf unit on the left (the stick leaning on the kennel is scenery). Then zoom in on the tied bundle of newspapers on the same shelf unit: the top newspaper has the year 1972 printed in large digits on its left-hand page. That is the gate code.CODE1972
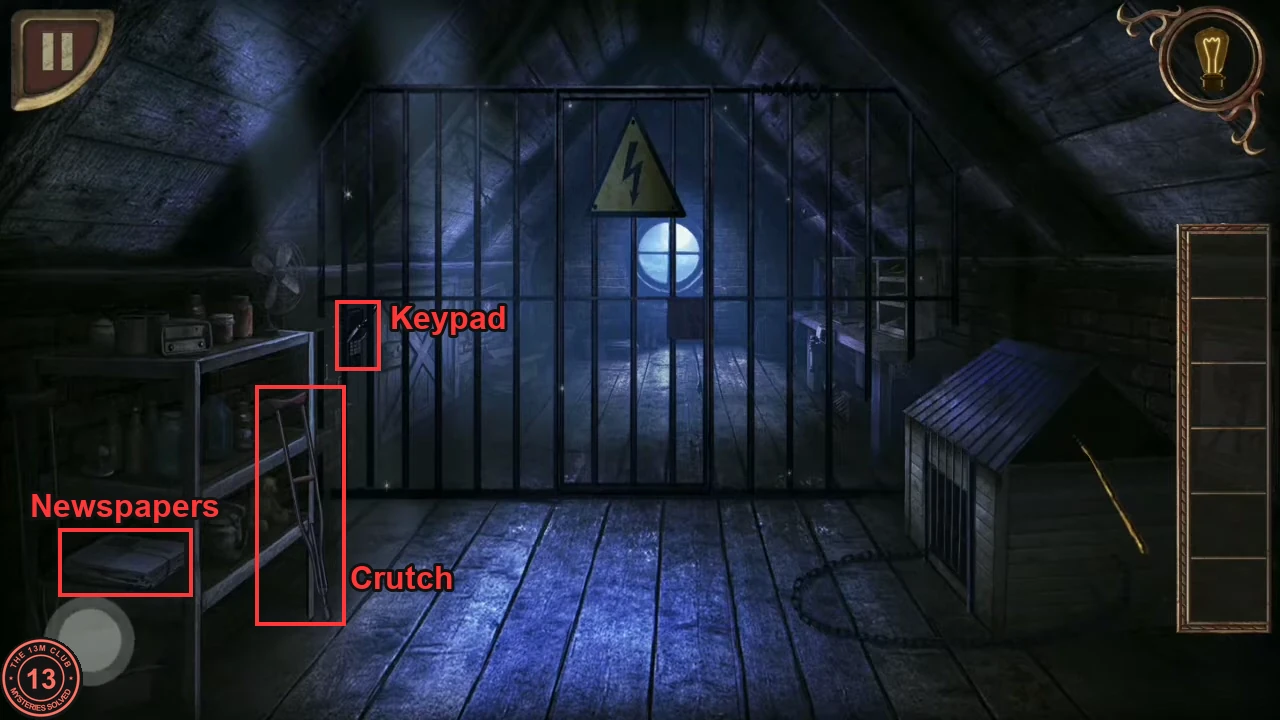
The newspapers and the crutch on the left shelf unit, and the keypad behind the gate bars that you press with the crutch. 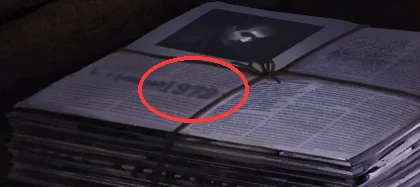
The year 1972 on the top newspaper is the gate code. - Go to the gate and drag the crutch from the inventory onto the keypad behind the bars. In the keypad close-up, tap 1, 9, 7, 2 and then the Enter key (the arrow at the bottom right); the crutch pokes each key through the bars. The lock releases and the gate opens into the workshop.CODE1972
The Workshop: The Electrical Lock
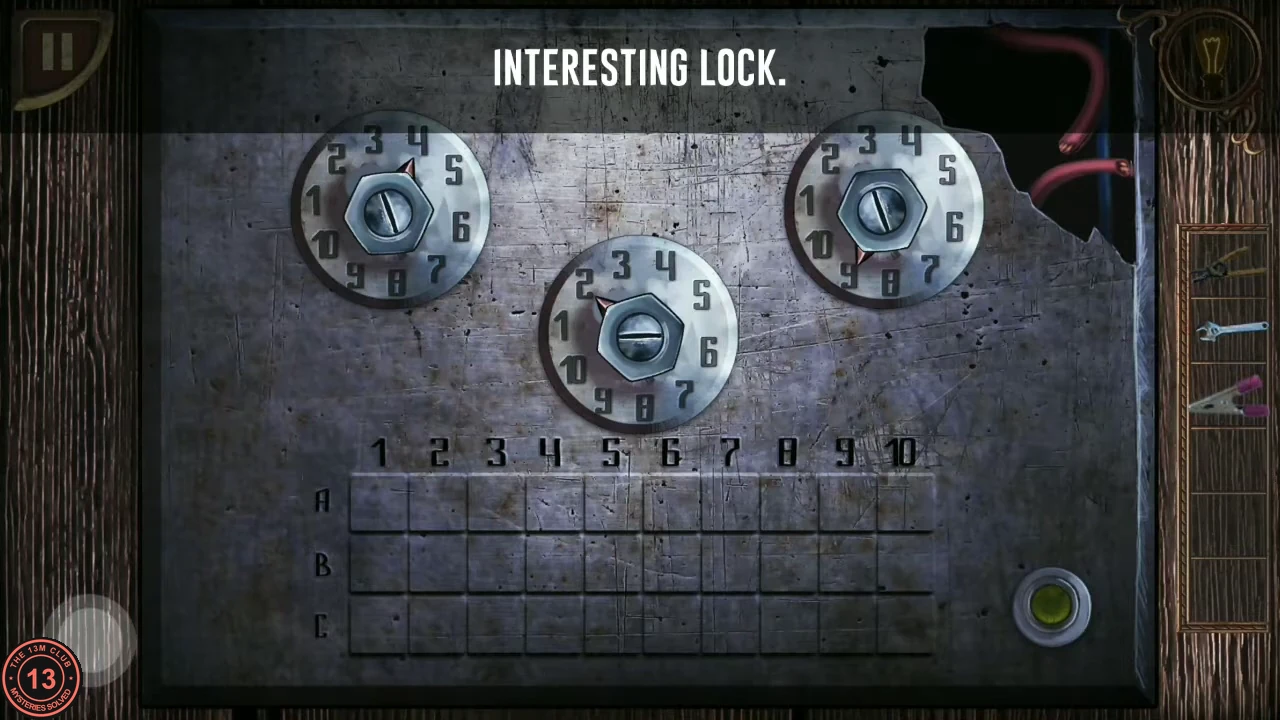
Behind the gate is a workbench and a metal panel with three dials: "INTERESTING LOCK."
- Take the WIRE STRIPPER, the WRENCH and the CLAMP from the workbench on the right.
- Zoom in on the panel. Use the wire stripper on the torn red wires at the top right, then attach the clamp to the stripped wires. The green light comes on.
- Each dial has fixed numbers 1-10 around a hex nut with a small red pointer. Use the wrench on the left nut and keep turning until the pointer points at 6. The opening values are fixed: 6 on the left, 3 in the middle and 9 on the right. No clue for them has been identified in the game, and the A/B/C grid stays empty, so simply set these values.CODE6-3-9
- Turn the middle nut with the wrench until its pointer points at 3, then the right nut until it points at 9. Once all three are set, the lock releases and a trapdoor drops you down a shaft.
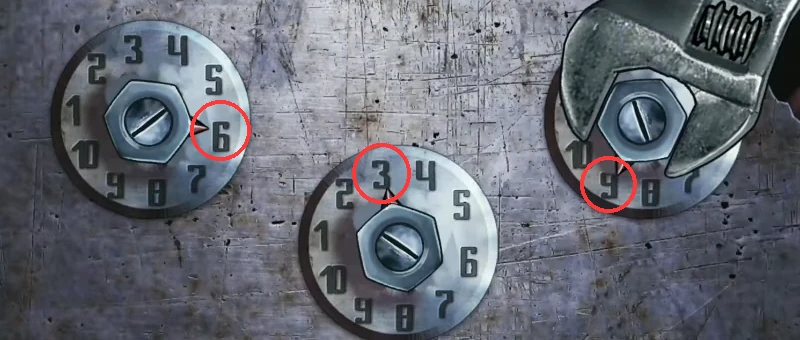
The opening setting: left 6, middle 3, right 9.
The Cell: Free Yourself and Call for Help
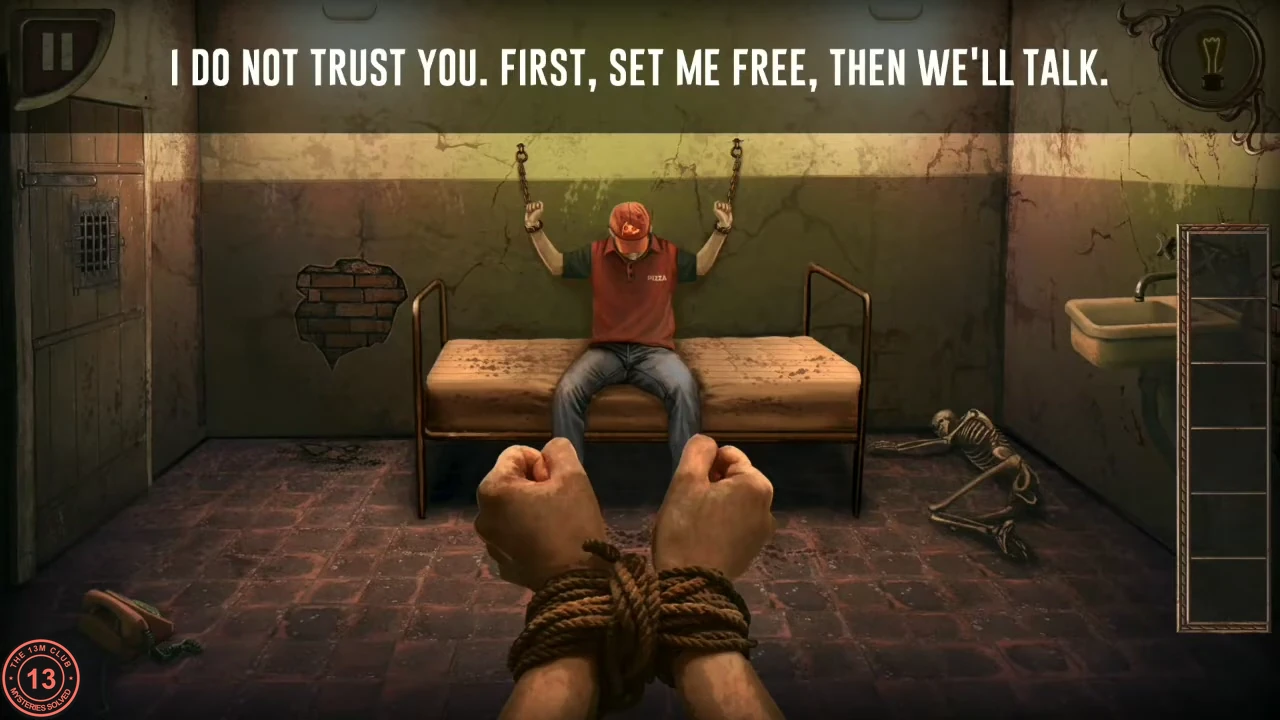
"DAMN, MY HEAD HURTS, SOMEONE TIED MY HANDS! AND WHO IS THIS?..." A prisoner in a red cap refuses to talk until you free him.
- Zoom in on the sink on the right wall and tap the iron rod sticking out of the bricks beside it. Follow the prompt "MOVE YOUR PHONE IN DIFFERENT DIRECTIONS" and tilt or move your device back and forth to rub the rope against the rod until your hands are free.
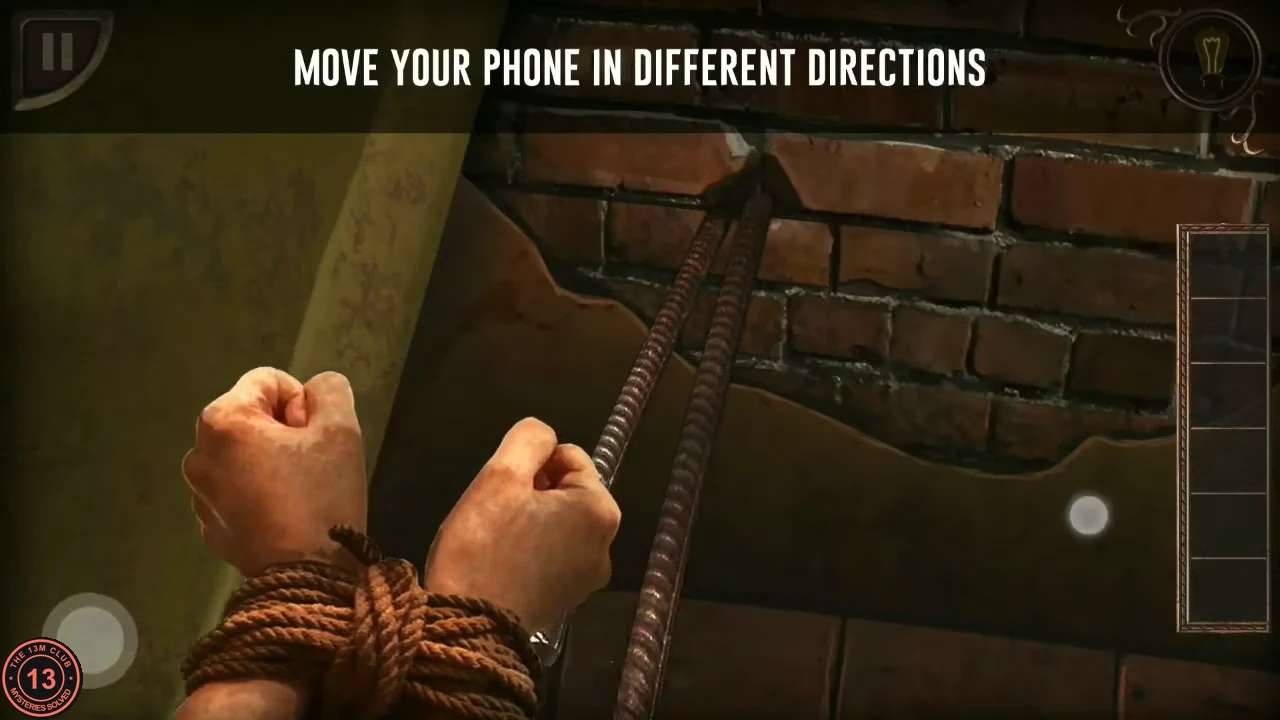
Tilt or move your device to saw the rope on the iron rod. - In the sink close-up, tap each of the two cross-shaped tap handles above it. A tapped handle turns and springs back. Turn both handles, in either order; a small KEY then drops into the basin. Tap it to take it.
- Use the key on the prisoner's shackles to unlock them. He thanks you and hands over a note he stole from the maniac.
- The note reads 16, 06, 68, 88, a squashed fly, 98. Read it upside down (turning your phone over also flips the view): it becomes 86, (fly), 88, 89, 90, 91. The fly hides the missing number in the sequence, 87.CODE87
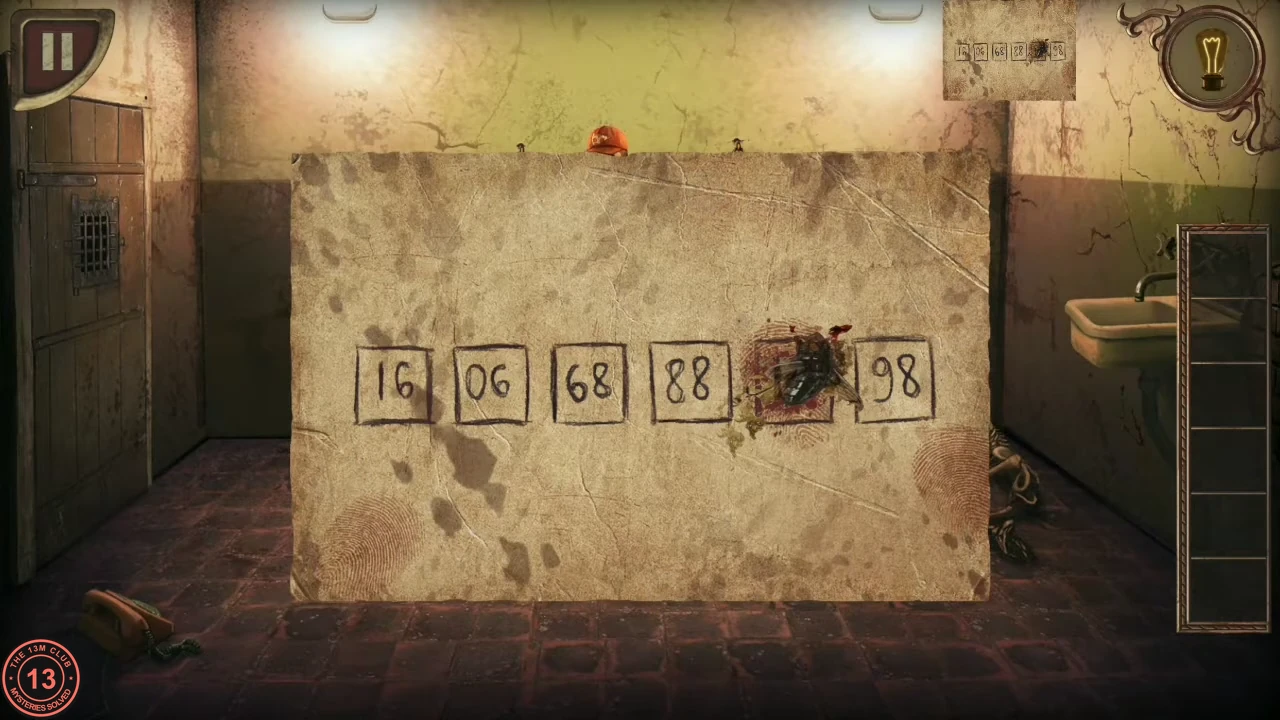
The note; read it upside down to get 86, ?, 88, 89, 90, 91. - Tap the rotary phone lying on the floor in the bottom-left corner of the cell. Dial 8, then 7: drag each number's finger hole clockwise round to the metal stop at the lower right and let go. The number appears at the top of the screen.CODE87
The Final Fight
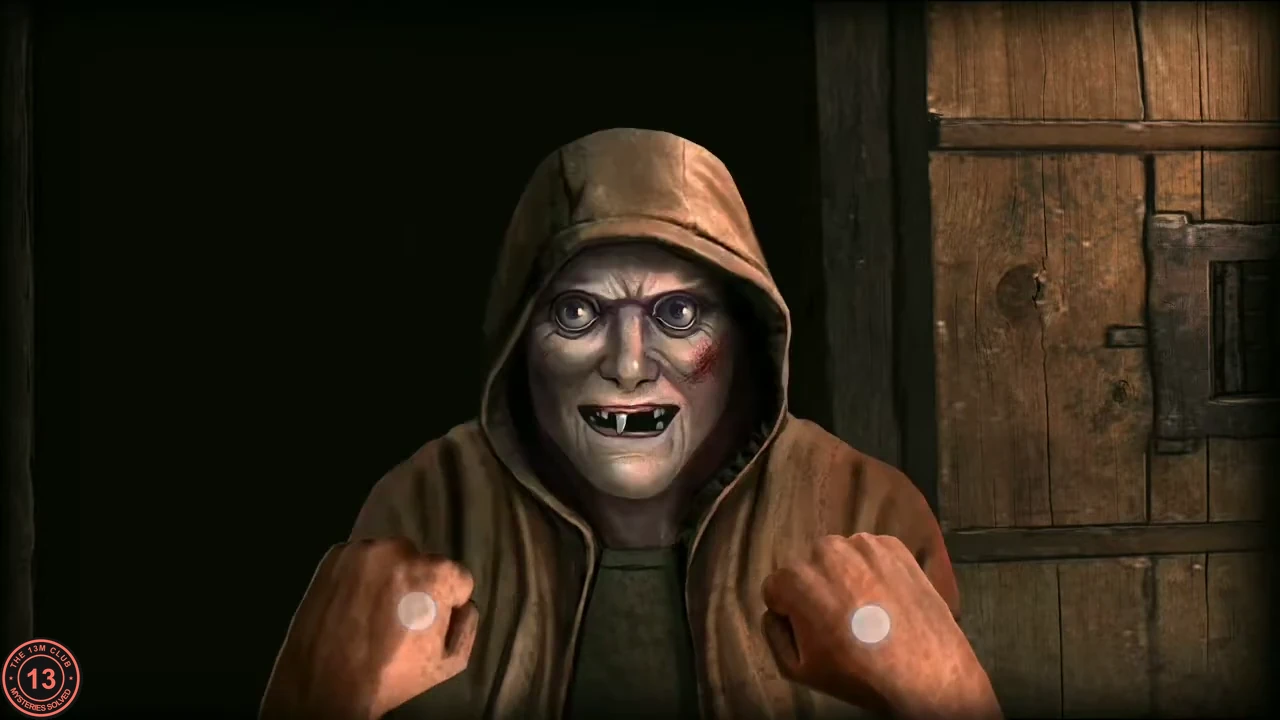
Right after your call, the maniac comes back to the cell.
- The hooded maniac bursts in armed, and a short scene shows the officer (you) kicking his weapon aside. In the first-person fight that follows, keep tapping the fist targets as they appear until he is beaten.
- The closing scenes end with "WE DID A GREAT JOB!" and the game returns to the main menu. This is the only ending; the menu offers just NEW GAME and EXIT besides promotional tiles.